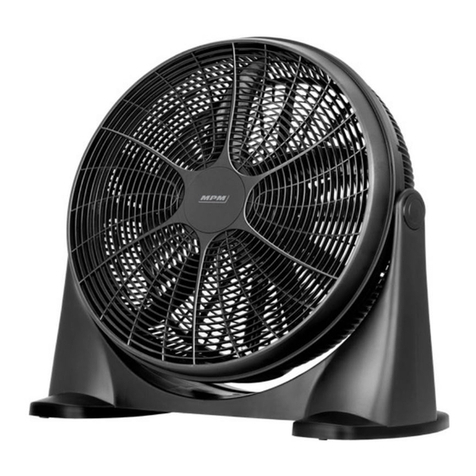
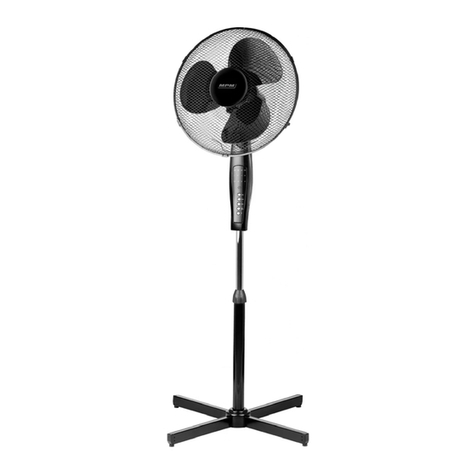
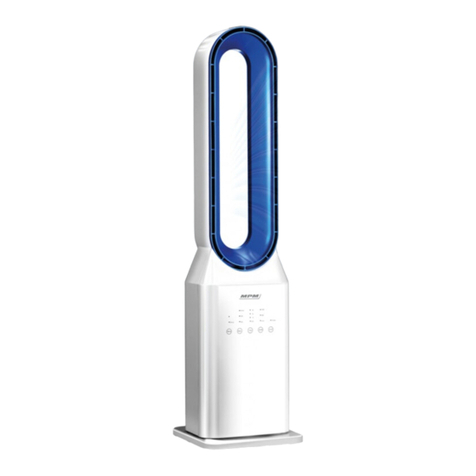
MPM MWP-17/C User manual

PRZED PIERWSZYM UŻYCIEM ZAPOZNAJ SIĘ ZINSTRUKCJĄ OBSŁUGI
INSTRUKCJA OBSŁUGI
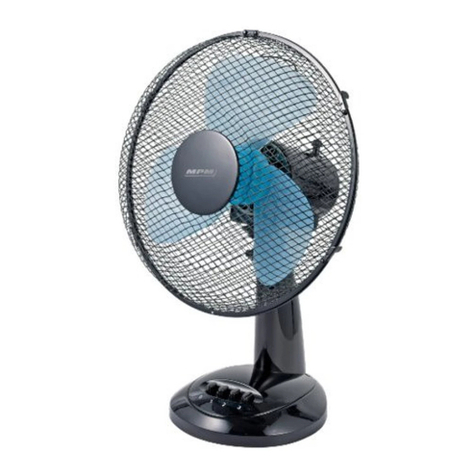
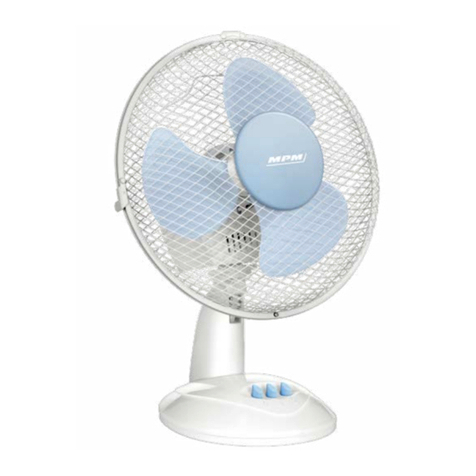
WENTYLATOR BIURKOWY: MWP-16
Stolní ventilátor/Table fan/Hacтольный вeнтлятор/
Tischventilator/Stolný ventilátor
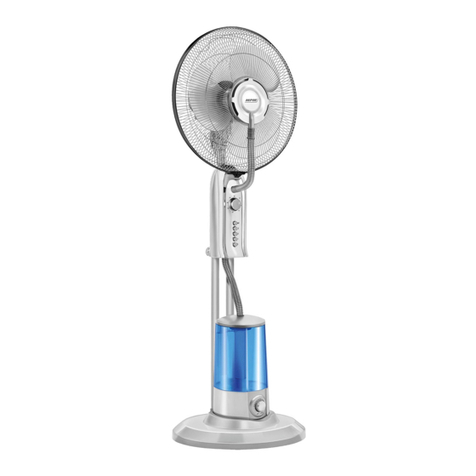
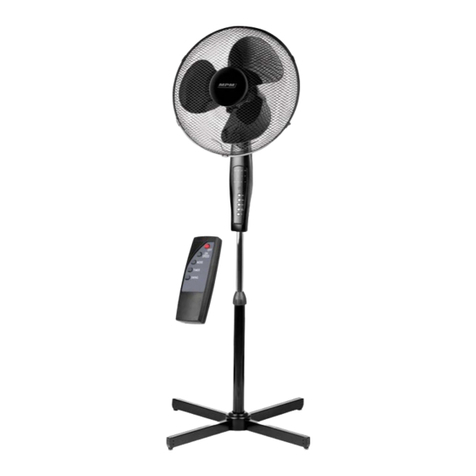
WENTYLATOR STOJĄCY: MWP-17
Stojanový ventilátor/Stand fan/Наполный
вeнтлятор/Standventilator/Stojanový ventilátor

NÁVOD K OBSLUZE.............................................................................. 3
BEDIENUNGSANLEITUNG..................................................................... 8
USER MANUAL ...................................................................................13
INSTRUKCJA OBSŁUGI........................................................................ 18
ИНСТРУКЦИЯ ПО ОБСЛУЖИВАНИЮ................................................ 24
POUŽÍVATEĽSKÁ PRÍRUČKA............................................................... 29
EN
RU
SK
DE
PL
CZ

3
CZ
BEZPEČNOSTNÍ POKYNY PŘI POUŽÍVÁNÍ
Před použitím si pozorně přečtěte následující návod k obsluze.
Obzvláště opatrně postupujte v případě, že se v blízkosti vyskytují děti.
Elektrický kabel nevěšejte přes ostré hrany a nedovolte, aby se dostal do kontaktu
s horkými povrchy.
Jestliže zařízení nepoužíváte nebo se chystáte jej čistit, vždy vyjměte zástrčku
z elektrické zásuvky.
Zařízení nepoužívejte ani v případě, kdy došlo k poškození napájecího kabelu
nebo zástrčky - v takovém případě předejte zařízení do autorizovaného servisu
k opravě.
Používání příslušenství, které nebylo doporučeno výrobcem, může způsobit
poškození zařízení nebo zranění.
Zařízení, napájecí kabel ani zástrčku neponořujte do vody či jiných kapalin -
napájecí kabel i zástrčka musí být vždy suché.
Zapnuté zařízení neponechávejte bez dozoru.
Pamatujte na to, že před odpojením zařízení z elektrické zásuvky je nutné zařízení
nejprve vypnout.
Neumisťujte ventilátor do blízkosti tepelných zdrojů.
Zařízení nepoužívejte k jiným účelům, než k jakým bylo určeno.
Ventilátor nepoužívejte venku (ve venkovním prostředí).
V žádném případě nestrkejte prsty ani žádné jiné předměty do krycí mřížky
ventilátoru, pokud je zapnutý.
Před přemístěním ventilátoru na jiné místo je nutné jej odpojit ze zásuvky.
Přední ani zadní část krycí mřížky nezakrývejte!
Ventilátor neumisťujte do blízkosti otevřeného okna - dešťové kapky mohou
způsobit elektrický zkrat a zasažení elektrickým proudem! Nedoporučujeme
umisťovat ventilátor do místnosti s vysokou vlhkostí, např. do koupelny.
Toto zařízení mohou používat děti ve věku od 8 let a osoby se sníženými fyzický-
mi či duševními schopnostmi i osoby bez zkušeností a znalosti zařízení, bude-li
nad nimi zajištěn dohled nebo budou poučeny v oblasti bezpečného používání
zařízení tak, aby riziko s tímto spojené bylo pro tyto osoby srozumitelné. Děti
bez dozoru nesmějí zařízení čistit ani provádět jeho údržbu.
Zařízení i jeho napájecí kabel uchovávejte na místě, které je pro děti do 8 let
nedostupné.
Dávejte pozor na to, aby si děti se zařízením nehrály.
Zařízení je určeno výhradně k domácímu použití.

4
CZ
Zástrčku nezapojujte do zásuvky mokrýma rukama.
Zástrčku nevytahujte z elektrické zásuvky taháním za kabel.
Zařízení nezapínejte bez nasazeného předního a zadního ochranného krytu.
Zařízení je možné spustit teprve po jeho kompletním smontování. Pouze čás-
tečně sestavený a spuštěný ventilátor negarantuje bezpečný a správný provoz.
VAROVÁNÍ! Nedovolte, aby si děti hrály s fólií. Nebezpečí udušení!
S ohledem na zajištění bezpečnosti dětí, prosíme, neponechávejte volně ležet
součásti balení výrobku (plastové sáčky, krabice, polystyren apod.).
POPIS ZAŘÍZENÍ:
Model MWP-16
1. Přední ochranná mřížka
2. Ochranná matice vrtule
3. Vrtule
4. Podstavec
5. Vypínač a přepínače rychlosti
6. Kryt přepínačů rychlosti
7. Protiskluzové nožky
8. Zadní ochranná mřížka
9. Ochranná matice
10. Tlačítko rotace
11. Upevňovací háčky.
12. Otvory pro upevňovací šroub
1
11
8
9
10
2
3
12
4
7
6
5

5
CZ
Model MWP-17
1. Přední ochranná mřížka
2. Ochranná matice vrtule
3. Vrtule
4. Kryt podstavce
5. Vypínač a přepínače rychlosti otáček
6. Kryt přepínačů rychlosti
7. Matice pro nastavování výšky ventilátoru
8. Zadní ochranná mřížka
9. Ochranná matice
10. Tlačítko rotace
11. Upevňovací háčky.
12. Otvory pro upevňovací šroub
13. Zajišťovací matice
14. Ramena podstavce
15. Tyč ventilátoru
PŘÍPRAVA ZAŘÍZENÍ K PROVOZU
POZOR! Ventilátory musí stát na stabilní, rovné a suché ploše!
1. Odstraňte z ventilátoru všechny ochranné folie.
2. Odšroubujte ochrannou matici ze zadní ochranné mřížky vrtule ⑨, která se nachází na hří-
deli motoru.
3. Zadní ochrannou mřížku vrtule ⑧nasaďte úchytem nasměrovaným nahoru na hřídel mo-
toru a zašroubujte ochrannou matici ⑨. Ujistěte se, že jsou tyto části správně namontovány.
4. Poté správně nasaďte vrtuli ③na hřídel motoru a zašroubujte ochrannou matici vrtule ②
proti směru hodinových ručiček.
5. Nasaďte přední ochrannou mřížku ventilátoru ①tím, že háček s drážkou vložíte do zadní
ochranné mřížky vrtule ⑧v jejím nejvyšším bodě. Věnujte pozornost tomu, aby se otvory
pro upevňovací šroub v předním i zadním krytu ventilátoru (mřížce) ⑫nacházely naproti
sobě.
6. Uzavřete upevňovací háčky ⑪.
7. Ochranné mřížky ventilátoru sešroubujte pomocí upevňovacího šroubu a matice.
MONTÁŽ PODSTAVCE MODELU MWP16
1. Kryt přepínačů ⑥rychlosti vložte do podstavce ④.
2. Obě části k sobě upevněte ze spodní strany čtyřmi šrouby, které jsou součástí balení.
MONTÁŽ PODSTAVCE MODELU MWP17
1. Nasaďte kolmá ramena podstavce ⑭.
2. Hlavní tyč ⑮ umístěte do křížového podstavce tak, aby montážní otvory lícovaly s otvory v
podstavci.
3. Důkladně spojte pomocí 4 upevňovacích šroubů.
1
12
4
14
15
5
6
7
2
3
11
13

6
CZ
4. Povolte matici pro nastavení výšky hlavy ventilátoru ⑦a na tyč ⑮nasaďte kryt podstavce
④s výřezy nasměrovanými dolů.
5. Vnitřní část tyče ⑮vysuňte do krajní polohy a důkladně utáhněte regulační matici ⑦.
6. Hlavu ventilátoru nasaďte na vnitřní část tyče ⑮.
7. Důkladně utáhněte šroub ⑬, který se nachází v krytu přepínačů ⑥.
POUŽITÍ VENTILÁTORŮ
POZOR! Před zapnutím se ujistěte, že je ventilátor umístěn na rovném, stabilním a suchém povrchu!
1. Přístroj připojte do elektrické zásuvky.
2. Nastavte požadovanou rychlost otáček, které regulují přepínače:
„0“ - vypnuto, „1“ - rychlost 1, „2“ - rychlost 2, „3“ - rychlost 3
3. Pro spuštění otáčivého provozu ventilátoru stiskněte tlačítko rotace ⑩, která se nachází na
krytu motoru.
4. Pro změnu nastavení sklonu vrtule a tím také úhlu proudění vzduchu, postačí naklonit hlavu
ventilátoru, přičemž druhou rukou držte kryt vypínačů, aby se ventilátor nepřevrátil.
5. U modelu MWP-17 je možné výšku hlavy ventilátoru nastavit uvolněním matice pro regulaci
výšky hlavy ⑦, nastavením požadované výšky a opětovným dotažením matice.
ČIŠTĚNÍ A ÚDRŽBA
1. Před čištěním je nutné nejprve odpojit zařízení od elektrického napájení!
2. Kryt motoru, kryty přepínačů, stojan a křížový podstavec stojanového ventilátoru, podsta-
vec stolního ventilátoru můžete čistit vlhkým hadříkem s příměsí malého množství mycího
prostředku.
3. Ochranné mřížky můžete občas očistit štětečkem, čímž z nich odstraníte prach usazený v
otvorech.
4. Po odšroubování vrtule jí můžete rovněž očistit vlhkým hadříkem s příměsí mycího prostřed-
ku.

7
CZ
Produktový list
MPM AGD S.A.
MODEL: MWP-16 (MWP-17)
Popis Symbol Hodnota Jednotka
Maximální intenzita průtoku vzduchu F 30,35 (47,95) m3/min
Výkon ventilátoru P31,20 (39,10) W
Provozní hodnota SV 0,97 (1,23) (m3/min)/W
Příkon v pohotovostním stavu PSB 0 W
Hladina hluku ventilátoru LWA 50,5 (50,9) dB(A)
Maximální rychlost vzduchu c 2,351 (2,738) m/s
Sezónní spotřeba elektrické energie Q9,984 (12,512) kWh/a
Norma pro měření provozní hodnoty EN 50564:2011,
EN 60704-1:2010 + A.11: 2012,
EN 60704-2-7:1998
IEC60879:2019
Doplňující informace získáte u MPM AGD S.A.
ul. Brzozowa 3
Milanówek 05-822, Polsko
tel.: +48 (22) 380-52-00
BDO: 000027599
TECHNICKÉ PARAMETRY
Technické parametry jsou uvedeny na nominálním štítku výrobku:
Emise hluku:
• Model MWP-16: LWA= 50,5 dB
• Model MWP-17: LWA= 50,9dB
Délka napájecího kabelu:
• Model MWP-16: 1,50m
• Model MWP-17: 1,60 m
POZOR! Firma MPM agd S.A. si vyhrazuje právo na provádění technických změn.
SPRÁVNÁ LIKVIDACE VÝROBKU použité elektrické nebo elektronické zařízení.
Polsko Označení, které je umisťováno na výrobku, znamená, že po uplynutí doby životnosti výrobku nesmí být vý-
robek vyhozen do běžného komunálního odpadu. Použitý spotřebič může mít negativní vliv na životní pro-
středí a lidské zdraví z důvodu potencionálního obsahu nebezpečných látek, směsí a součástí. Smísení
elektrického odpadu s jinými odpady nebo jejich neprofesionální demontáž mohou způsobit uvolňování
látek škodlivých pro lidské zdraví i životní prostředí. Použité spotřebiče je nutné předat na určeném sběrném
místě zajišťujícím sběr elektroodpadu. Pro podrobné informace týkající se místa sběru starých elektronických a elektric-
kých spotřebičů je uživatel povinen kontaktovat obecní sběrné místo nebo závod na zpracovávání použitých spotřebičů.

8
DE
SICHERHEITSHINWEISE
Vor Anwendung lesen Sie bitte die Bedienungsanleitung genau durch.
In der Nähe von Kindern ist mit dem Gerät besonders vorsichtig umzugehen.
Das Versorgungskabel nicht von scharfen Rändern überhängen und mit keinen
heißen Oberflächen in Berührung kommen lassen.
Wenn das Gerät nicht mehr benutzt wird oder gereinigt werden soll, ist der
Stecker aus der Steckdose zu ziehen.
Wenn das Gerät beschädigt ist, auch bei Kabelbruch oder Beeinträchtigung des
Netzsteckers, darf es nicht mehr benutzt werden. In diesem Fall ist das Gerät
bei einer autorisierten Fachwerkstatt zu reparieren.
Anwendung von Zubehör, das von dem Gerätehersteller nicht empfohlenen
wurde, kann Geräteschäden, Brand oder Körperverletzungen verursachen.
Tauchen Sie weder das Gerät, das Kabel noch den Stecker in Wasser oder an-
deren Flüssigkeiten ein – das Versorgungskabel und der Stecker müssen immer
trocken sein.
Das Gerät niemals ohne Aufsicht eingeschaltet lassen.
Vor dem Ausschalten des Gerätes stets den Stecker von der Steckdose trennen.
Gerät fern von Wärmequellen aufstellen.
Nur bestimmungsgemäß benutzen.
Nicht im Freien verwenden.
Während des Betriebs weder Finger noch andere Geräte ins Gitter am Propel-
lergehäuse stecken.
Bevor das Gerät an einen anderen Platz umgestellt wird, stets von der Versor-
gung trennen.
Die vordere und hintere Netzgitterabdeckung am Propeller nicht abdecken.
Lüfter fern von offenen Fenster aufstellen – Regentropfen könnten einen Kurz-
schluss und Stromschlag verursachen! Die Lüfter sollten in keinen Räumen mit
hoher Feuchtigkeit, z.B. in Badezimmern aufgestellt werden.
Dieses Gerät darf von Kindern, die mindestens 8 Jahre alt sind sowie von Personen
mit verminderter körperlicher oder geistiger Leistungsfähigkeit und die keine
Erfahrung und Kenntnisse des Geräts aufweisen, verwendet werden, sofern
diese Personen in seine sichere Bedienung eingewiesen oder bei der Bedienung
beaufsichtigt werden, sodass alle mit der Bedienung zusammenhängenden
Gefahren für diese Personen verständlich sind. Das Gerät darf von Kindern ohne
Aufsicht weder gereinigt noch gewartet werden.

9
DE
Das Gerät und das Versorgungskabel fern von Kindern unterhalb von 8 Jahren
aufbewahren.
Darauf achten, dass keine Kinder mit dem Gerät spielen.
Dieses Gerät ist ausschließlich für den Hausgebrauch bestimmt.
Gerät nur mit trockenen Händen an die Steckdose anschließen.
Netzstecker vorsichtig aus der Steckdose ziehen, nicht am Kabel reißen.
Ohne vordere und hintere Abdeckung darf das Gerät nicht in Betrieb gesetzt
werden.
Das Gerät darf erst nach kompletter Montage eingeschaltet werden. Ein teilweise
zusammengebautes und in Betrieb gesetztes Gerät gewährleistet keine sichere
und zuverlässige Funktion.
WARNUNG! Kinder nicht mit Folie spielen lassen. Erstickungsgefahr!
Aus Sicherheitsgründen sind lose Verpackungsteile (Kunststoffbeutel, Kartons,
Styropor etc.) von Kindern fern zu halten.
GERÄTEBESCHREIBUNG
MODELL MWP-16
1. Vordere Netzgitterabdeckung des Propellers
2. Schutzmutter des Propellers
3. Propeller
4. Gestell
5. O/I-Schalter und Geschwindigkeitsschalter
6. Abdeckung der Geschwindigkeitsschalter
7. Rutschfeste Füße
8. Hinteres Schutzgitter
9. Befestigungsring für hinteres Schutzgitter
10. Einstellknopf für Oszillation
11. Befestigungshaken
12. Löcher für die Befestigungsschraube
1
11
8
9
10
2
3
12
4
7
6
5

10
DE
MODELL MWP-17
1. Vordere Netzgitterabdeckung des Propellers
2. Schutzmutter des Propellers
3. Propeller
4. Gestellabdeckung
5. O/I-Schalter und Drehzahlregler
6. Abdeckung der Geschwindigkeitsschalter
7. Kopf-Höhenverstellmutter
8. Hinteres Schutzgitter
9. Befestigungsring für hinteres Schutzgitter
10. Einstellknopf für Oszillation
11. Befestigungshaken
12. Löcher für die Befestigungsschraube
13. Knopf Schlossgehäuse
14. Standfuß
15. Stützenelement
INBETRIEBNAHME DES GERÄTES.
ACHTUNG! Der Lüfter muss auf stabilen, ebenen und trockenen
Untergründen aufgestellt werden!
1. Schutzfolie von allen Lüfterteilen entfernen.
2. Schutzkappe an der hinteren Netzgitterabdeckung des Propellers, die am Motorbolzen an-
gebracht ist, lösen.
3. Hintere Netzgitterabdeckung ⑧mit dem Griff nach oben auf den Motorbolzen aufsetzen
und die Schutzkappe festdrehen ⑨, beachten dass die Elemente sorgfältig montiert sind.
4. Propeller ③am Motorbolzen sorgfältig installieren und Schutzkappe ②des Propellers ent-
gegen dem Uhrzeigersinn festschrauben.
5. Vordere Netzgitterabdeckung des Propellers ①aufsetzen, Haken mit Falz in die hintere
Netzgitterabdeckung des Propellers befestigen. Beachten, dass die Öffnungen ⑫für die
Befestigungsschraube an vorderer und hinterer Netzgitterabdeckung des Propellers gegen-
über von einander liegen.
6. Befestigungshaken ⑪schließen.
7. Die beiden Netzgitterabdeckungen des Propellers mit der Befestigungsschraube und Mut-
ter zusammenschrauben.
GESTELLMONTAGE MODELL MWP16
1. Gehäuse der Geschwindigkeitsschalter ⑥im Fuß platzieren ④.
2. Beide Teile von unten mit vier mitgelieferten Schrauben befestigen.
1
12
4
14
15
5
6
7
2
3
11
13

11
DE
GESTELLMONTAGE MODELL MWP17
1. Legen Sie die Teile des Standfußes ⑭zu einem Kreuz zusammen.
2. Stützenelement ⑮am Kreuzgestell platzieren.
3. Die vier Schrauben drehen.
4. Kopf-Höhenverstellmutter ⑦lösen und die Gestellabdeckung ④mit den Ausschnitten
nach unten auf der Stütze aufsetzen.
5. Das innere Stützenelement ⑮maximal hinausschieben und Verstellmutter ⑦festdrehen.
6. Lüfterkopf auf dem inneren Stützenelement ⑮anbringen.
7. Die am Schaltergehäuse angebrachte Schraube ⑬festdrehen.
ANWENDUNG
ACHTUNG! Vor dem Einschalten sicherstellen, dass der Lüfter auf einem ebenem, stabilen und trockenen Un-
tergrund aufgestellt ist!
1. Gerät an der Versorgung anschließen.
2. Mit den Schaltern die gewünschte Drehzahl einstellen:
„0” - ausgeschaltet, „1” - Geschwindigkeit I, „2” - Geschwindigkeit II, „3” – Geschwindigkeit III.
3. Zur Betätigung des Lüfter-Umluftbetriebs ist die Umluftbetrieb-Taste ⑩am Motorgehäuse
zu drücken.
4. Zur Verstellung der Propellerneigung und somit auch des Luftstromwinkels reicht es den
Lüfterkopf nach hinten abzubiegen, dabei ist das Schaltergehäuse gleichzeitig mit einer
Hand fest zu halten, sodass das Gerät nicht umkippt.
5. Im Modell MWP-17 kann die Höheneinstellung des Lüfterkopfes durchs Lösen der Kopf-Hö-
henverstellmutter, entsprechende Einstellung des Kopfes und Festschrauben der Mutter
erfolgen.
REINIGUNG UND WARTUNG
1. Vor Reinigung des Gerätes ist es stets zuerst von der Versorgung zu trennen.
2. Motorgehäuse, Schaltergehäuse, Gestell und Kreuzfuß des Standlüfters, Gestell des Schreib-
tischlüfters mit einem feuchten Tuch mit Waschmittelzusatz reinigen.
3. Die Netzgitterabdeckungen ab und zu mit einer weichen Bürste reinigen, um Staub aus den
Öffnungen zu entfernen.
4. Nachdem der Propeller gelöst wurde, kann er mit einem feuchten Tuch mit Waschmittelzu-
satz gereinigt werden.

12
DE
Datenblatt
MPM AGD S.A.
MODELL: MWP-16 (MWP-17)
Beschreibung Symbol Wert Einheit
Max. Lüfter-Volumenstrom F 30,35 (47,95) m3/min
Lüfterleistung P31,20 (39,10) W
Betriebswert SV 0,97 (1,23) (m3/min)/W
Leistungsaufnahme im Stand-by-
Modus
PSB 0 W
Schallleistungspegel LWA 50,5 (50,9) dB(A)
Max. Luftgeschwindigkeit c 2,351 (2,738) m/s
Saisonaler Energieverbrauch Q9,984 (12,512) kWh/a
Norm zur Betriebswertmessung EN 50564:2011,
EN 60704-1:2010 + A11: 2012,
EN 60704-2-7:1998
IEC60879:2019
Für zusätzliche Informationen
kontaktieren Sie MPM AGD S.A.
ul. Brzozowa 3
Milanówek 05-822, Polska
tel. (22) 380-52-00
BDO: 000027599
TECHNISCHE DATEN
Technische Parameter des Gerätes sind vom Typenschild
zu entnehmen.
Lärmpegel:
• Modell MWP-16: LWA = 50,5dB
• Modell MWP-17: LWA = 50,9dB
Länge des Netzkabels:
• Modell MWP-16: 1,50m
• Modell MWP-17: 1,60m
ACHTUNG! Firma MPM agd S.A. behält sich das Recht auf technische Änderungen vor.
ORDNUNGSGEMÄSSE ENTSORGUNG ELEKTRO UND ELEKTRONIKALTGERÄTE
Polen Die Bezeichnung am Gerät bedeutet: Elektro- und Elektronik-Altgeräte gehören nicht in den Hausmüll.
Schonen Sie unsere Umwelt und menschliche Gesundheit und nutzen Sie die für die Entsorgung von
Elektrogeräten vorgesehenen Sammelstellen und geben dort Ihre Elektrogeräte ab oder melden Sie ihre
Entsorgung von zu Hause. Informationen, wo und wie die Geräte zu entsorgen sind, erhalten Sie über Ihre
Verkaufsstelle oder über die lokale Umweltschutzbehörde. Dieses Produkt gehört nicht in den Hausmüll.

13
EN
SAFETY INSTRUCTIONS
Read carefully this manual before using the appliance.
Close supervision is necessary when using the appliance near children.
Do not hang the power cord over sharp edges and do not allow the power
cord to touch hot surfaces.
Always unplug the appliance when it is not in use or before cleaning.
Do not use the appliance if it is damaged, also if the power cord or plug is dam-
aged - return the appliance for repair to an authorized service centre.
To avoid the risk of damage or injury, always use the attachments recommended
by the manufacturer.
Do not immerse the appliance, its cord and plug in water or any other liquids,
keep it dry at all times.
Do not leave the appliance switched on when unattended.
Always switch off the appliance before unplugging it.
Do not place the appliance in vicinity of heat sources.
Do not use the appliance for the purposes different than it was designed for.
Do not use the appliance outdoors.
Never insert your fingers nor any other items through the guard when the
appliance is running.
Before moving the appliance to another location disconnect it from the power
source.
Do not cover the front and rear guard!
Do not place the fan near open windows - raindrops may cause a short circuit
and electrical shock! It is advisable not to place fans in rooms with high humidity,
such as bathrooms.
This appliance is not intended for use by children under 8 years of age and
individuals with reduced physical, sensory or mental capabilities, or lack of ex-
perience and knowledge, unless they have been given supervision or instruction
concerning use of the appliance in a safe way and if they understand the hazards
involved. Cleaning and user maintenance shall not be carried out by children
without supervision.
Store the appliance and its cord out of reach of children under 8 years of age.
Children should be supervised to ensure that they do not play with the appliance.
Do not switch on the appliance without front and rear guard mounted.
The appliance may be switched on only after complete assembly. Partially
assembled unit does not provide safe and proper operation.

14
EN
Do not plug the power cord with wet hands.
This appliance is intended for household use only.
Do not remove the plug from the mains by pulling by the cord.
In order to ensure your children‘s safety, please keep all packaging (plastic bags,
boxes, polystyrene etc.) out of their reach.
WARNING! Do not allow small children to play with the foil as there
is a danger of suffocation!
DESCRIPTION OF THE APPLIANCE
MODEL MWP-16
1. Front mesh guard of the propeller
2. Propeller protective nut
3. Propeller
4. Base
5. Off switch and speed controls
6. Speed controls cover
7. Non-slip feet
8. Rear mesh guard of the propeller
9. Ring for rear guard of the propeller
10. Button for oscillation
11. Attachment hooks
12. Holes for the attachment screw
1
11
8
9
10
2
3
12
4
7
6
5

15
EN
MODEL MWP-17
1. Front mesh guard of the propeller
2. Propeller protective nut
3. Propeller
4. Base cover
5. Off switch and speed controls
6. Speed controls cover
7. Head height adjustment nut
8. Rear mesh guard of the propeller
9. Ring for rear guard of the propeller
10. Button for oscillation
11. Attachment hooks
12. Holes for the attachment screw
13. Lock screw
14. Shoulders of the base
15. Tube
PREPARING THE APPLIANCE FOR OPERATION
ATTENTION! The fan must be placed on a stable, flat and dry sur-
face!
1. Remove the protective films from the fan.
2. Unscrew the protective nut of the rear mesh guard ⑨which is located on a motor pin.
3. Mount the rear mesh guard ⑧with the handle facing upwards onto the motor pin and tight-
en the protective nut ⑨, making sure all elements are properly installed.
4. Carefully install the propeller ③onto the motor pin and tighten the propeller protective
nut ②counter-clockwise.
5. Mount the front mesh casing of the propeller ①by attaching the hook with the groove to
the back mesh casing of the propeller. Make sure that the openings ⑫for the fixing bolt in
the front and back mesh casings of the propeller are positioned opposite each other.
6. Lock the fixing hooks ⑪.
7. Tighten the mesh casings of the propeller together by use of the fixing nut and bolt.
ASSEMBLY OF THE BASE FOR MODELS MWP16
1. Place the speed controls cover ⑥onto the base ④.
2. Secure both parts from the bottom using a four screws provided.
ASSEMBLY OF THE BASE FOR MODEL MWP17
1. Mount the arms of the base ⑭perpendicularly.
2. Place the head tube ⑮on the cross shaped base so that the mounting holes line up with the
mounting screws.
3. Tighten 4 mounting screws.
4. Unscrew the head adjustment nut ⑦and place the base cover ④onto the tube ⑮with
notches facing downwards.
5. Pull out the inner tube ⑮element and tighten the adjustment nut ⑦.
1
12
4
14
15
5
6
7
2
3
11
13

16
EN
6. Mount the fan head on the inner tube ⑮element.
7. Tighten the screw located ⑬on the controls cover ⑥.
USING THE FAN:
ATTENTION! Before switching on make sure the fan is placed on a flat, stable and dry surface!
1. Plug in the appliance.
2. Set the desired rotation speed using controls:
„0” - switched on, „1” - speed I, „2” – speed II, „3” – speed III.
3. To activate the rotating mechanism, press the rotating operation button ⑩located on the
motor cover.
4. To change the angle of the propeller, and thus the angle of the air stream, simply tilt the fan
head by holding the controls cover with the second hand to prevent the fan from overturn-
ing.
5. In model MWP-17 the head height can also be adjusted by loosening the head height adjust-
ment nut ⑦, proper positioning of the head and tightening the nut.
CLEANING AND MAINTENANCE
1. Before cleaning the appliance, unplug it from the power outlet.
2. The motor cover, controls cover, stand and cross of the standing fan, base of the desktop fan,
may be cleaned with a damp cloth and a mild detergent.
3. The mesh guards may be occasionally wiped with a brush to remove dust from the holes.
4. After the propeller is unmounted, wipe it with a damp cloth with a detergent.
Technical data sheet
MPM AGD S.A.
MODEL: MWP-16 (MWP-17)
Description Symbol Value Unit
Maximum flow rate of the fan F 30,35 (47,95) m3/min
Fan power P 31,20 (39,10) W
Operating value SV 0,97 (1,23) (m3/min)/W
Power consumption in standby mode PSB 0 W
Fan’s sound power level LWA 50,5 (50,9) dB(A)
Maximum air speed c 2,351 (2,738) m/s
Seasonal electricity consumption Q9,984 (12,512) kWh/a
Standards used for measuring the
operational values
EN 50564:2011,
EN 60704-1:2010 + A11: 2012,
EN 60704-2-7:1998
IEC60879:2019
To get additional information, contact MPM AGD S.A.
ul. Brzozowa 3
Milanówek 05-822, Polska
tel. (22) 380-52-00
BDO: 000027599

17
EN
TECHNICAL DATA
Technical parameters are indicated on the product nameplate.
Noise level:
• model MWP-16: LWA = 50,5dB
• model MWP-17: LWA = 50,9dB
Length of power cord:
• model MWP-16: 1,50m
• model MWP-17: 1,60m
ATTENTION! MPM agd S.A. reserves its right to modify the technical data!
PROPER DISPOSAL OF THE PRODUCT (waste electrical and electronic equipment)
This symbol on the product indicates that the product, after its lifetime, should not be disposed with other
household wastes. To avoid harmful influence on the environment and human health due to uncontrolled
waste disposal, dispose the waste device to the service point of waste household appliances or report
collecting it from home. In order to obtain detailed information about the location and how to dispose
the waste electrical and electronic equipment in a safe way, contact your retailer or local Department
of Environmental Protection. Do not dispose the device with other municipal waste.
Poland

18
PL
WSKAZÓWKI DOTYCZĄCE BEZPIECZEŃSTWA UŻYTKOWANIA
Przed użyciem przeczytaj dokładnie instrukcję obsługi.
Zachowaj szczególną ostrożność, gdy w pobliżu urządzenia znajdują się dzieci.
Nie wieszaj przewodu na ostrych krawędziach i nie pozwól, aby stykał się z go-
rącymi powierzchniami.
Zawsze wyjmuj wtyczkę z gniazda sieciowego, gdy nie używasz urządzenia lub
przed rozpoczęciem czyszczenia.
Nie używaj uszkodzonego urządzenia, również wtedy gdy uszkodzony jest prze-
wód sieciowy lub wtyczka – w takim wypadku oddaj urządzenie do naprawy
w autoryzowanym punkcie serwisowym.
Użycie akcesoriów nie polecanych przez producenta może spowodować uszko-
dzenie urządzenia lub obrażenia ciała.
Nie zanurzaj urządzenia, przewodu i wtyczki w wodzie lub w innych płynach
przewód sieciowy i wtyczka muszą być zawsze suche.
Nie zostawiaj urządzenia bez nadzoru podczas pracy.
Pamiętaj, aby zawsze przed wyjęcie wtyczki z gniazdka sieciowego wyłączyć
najpierw urządzenie.
Nie stawiaj urządzenia w pobliżu źródeł ciepła.
Nie wykorzystuj urządzenia do innych celów niż zostało przeznaczone.
Nie używaj wentylatorów na wolnym powietrzu.
W żadnym wypadku nie wkładaj palców i jakichkolwiek przedmiotów przez
kratkę obudowy śmigła podczas pracy urządzenia.
Przed przestawieniem urządzenia w inne miejsce należy odłączyć je od źródła
prądu.
Nie zakrywaj przedniej i tylnej obudowy siatkowej śmigła!
Nie stawiaj wentylatorów w pobliżu otwartych okien – krople deszczu mogą
spowodować spięcie instalacji elektrycznej i porażenie prądem! Wskazane jest
nie ustawiać wentylatorów w pomieszczeniach o wysokim stopniu wilgotności,
np. w łazienkach.
Niniejszy sprzęt może być użytkowany przez dzieci w wieku co najmniej 8 lat
i przez osoby o obniżonych możliwościach fizycznych, umysłowych i osoby
o braku doświadczenia i znajomości sprzętu, jeżeli zapewniony zostanie nadzór
lub instruktaż odnośnie do użytkowania sprzętu w bezpieczny sposób, tak aby
związane z tym zagrożenie były zrozumiałe. Dzieci bez nadzoru nie powinny
wykonywać czyszczenia i konserwacji sprzętu.

19
PL
Przechowuj urządzenie i jego przewód w miejscu niedostępnym dla dzieci
poniżej 8 lat.
Należy zwracać uwagę na dzieci aby nie bawiły się sprzętem.
Urządzenie przeznaczone jest tylko do użytku domowego.
Nie podłączaj wtyczki do gniazdka sieci mokrymi rękami.
Nie wyciągaj wtyczki z gniazdka sieci pociągając za przewód.
Nie włączać urządzenia bez założonych osłon przedniej i tylnej.
Urządzenie można włączyć dopiero po całkowitym jego montażu. Częściowo
zmontowane i uruchomione urządzenie nie zapewnia bezpiecznego i prawi-
dłowego działania.
OSTRZEŻENIE! Nie pozwalaj dzieciom bawić się folią. Niebezpieczeń-
stwo uduszenia!
Dla bezpieczeństwa dzieci proszę nie zostawiać swobodnie dostępnych części
opakowania (torby plastikowe, kartony, styropian itp.).

20
PL
OPIS URZĄDZENIA
MODEL MWP-16
1. Przednia obudowa siatkowa śmigła
2. Nakrętka ochronna śmigła
3. Śmigło
4. Podstawa
5. Wyłącznik oraz przełączniki prędkości
6. Obudowa przełączników prędkości
7. Antypoślizgowe nóżki
8. Tylna obudowa siatkowa śmigła
9. Nakrętka ochronna
10. Przycisk pracy obrotowej
11. Haczyki mocujące
12. Otwory do śruby mocującej
MODEL MWP-17
1. Przednia obudowa siatkowa śmigła
2. Nakrętka ochronna śmigła
3. Śmigło
4. Osłona podstawy
5. Wyłącznik oraz przełączniki prędkości obrotów
6. Obudowa przełączników prędkości
7. Nakrętka regulacji wysokości głowicy
8. Tylna obudowa siatkowa śmigła
9. Nakrętka ochronna
10. Przycisk pracy obrotowej
11. Haczyki mocujące
12. Otwory do śruby mocującej
13. Pokrętło blokady
14. Ramiona podstawy
15. Sztyca wentylatora
PRZYGOTOWANIE URZĄDZENIA DO PRACY
UWAGA! Wentylatory muszą stać na stabilnych, płaskich i suchych
powierzchniach!
1. Usuń wszystkie folie ochronne z elementów wenty-
latora.
2. Odkręć nakrętkę ochronną tylnej obudowy siatkowej
śmigła ⑨, znajdującą się na bolcu silnika.
3. Załóż tylną obudowę siatkową śmigła ⑧uchwytem
do góry na bolec silnika i zakręć nakrętkę ochron-
ną ⑨, upewniając się czy elementy te są dokładnie
zainstalowane.
1
11
8
9
10
2
3
12
4
7
6
5
1
12
4
14
15
5
6
7
2
3
11
13
This manual suits for next models
2
Table of contents
Languages:
Other MPM Fan manuals