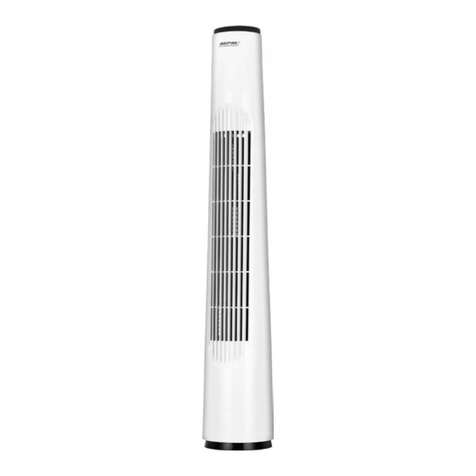
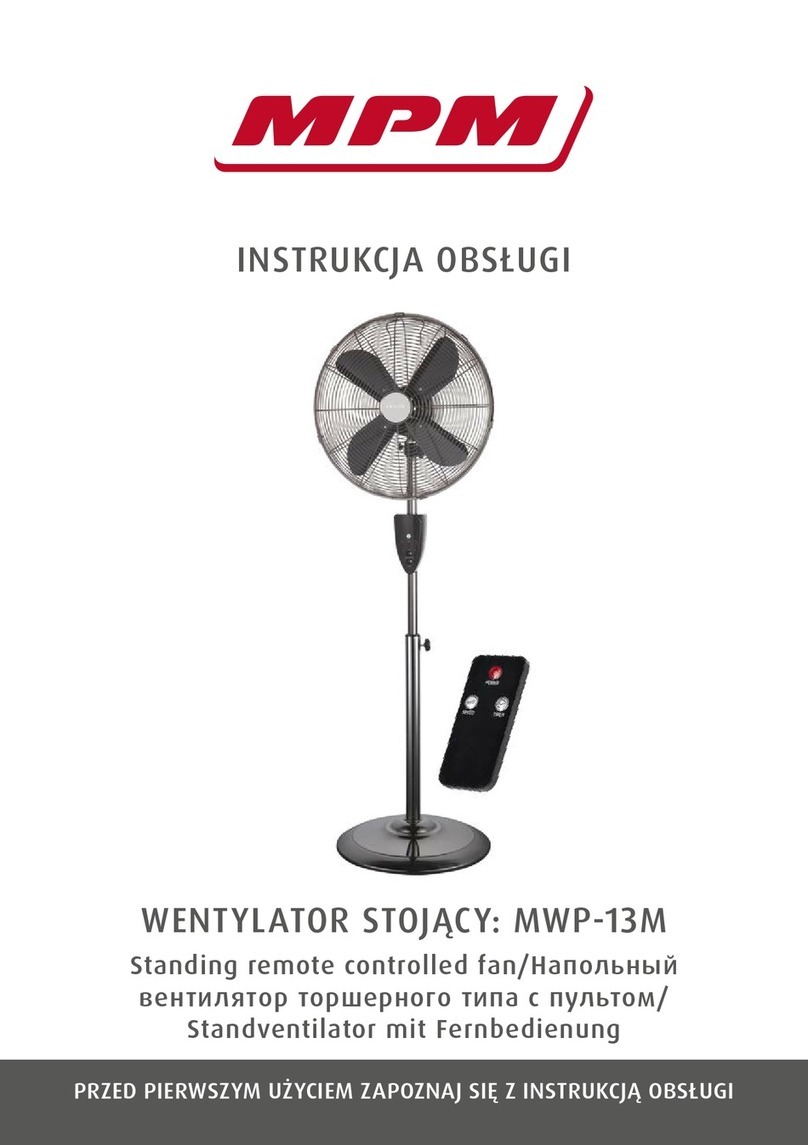
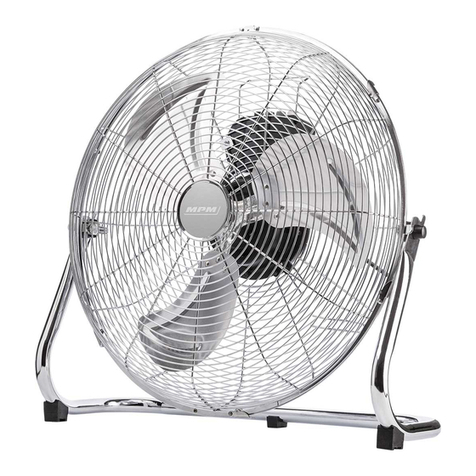
MPM MWP-31 User manual

PRZED PIERWSZYM UŻYCIEM ZAPOZNAJ SIĘ ZINSTRUKCJĄ OBSŁUGI
INSTRUKCJA OBSŁUGI
WENTYLATOR BEZŚMIGŁOWY ZPILOTEM
MWP-31
Bezlopatkový ventilátor s dálkovým ovladačem/
Blattloser ventilator mit fernbedienung/
Bladeless fan with remote/Вентилятор без
пропеллера c дистанционным управлением/
Bezvrtuľový ventilátor s diaľkovým ovládaním

NÁVOD K OBSLUZE.............................................................................. 3
BEDIENUNGSANLEITUNG..................................................................... 8
USER MANUAL ...................................................................................13
INSTRUKCJA OBSŁUGI........................................................................ 18
ИНСТРУКЦИЯ ПО ОБСЛУЖИВАНИЮ................................................ 23
POUŽÍVATEĽSKÁ PRÍRUČKA............................................................... 28
EN
RU
SK
DE
PL
CZ

3
CZ
BEZPEČNOSTNÍ POKYNY PŘI POUŽÍVÁNÍ
Před použitím si pozorně přečtěte následující návod k obsluze.
Obzvláště opatrně postupujte v případě, že se v blízkosti vyskytují děti.
Elektrický kabel nevěšejte přes ostré hrany a nedovolte, aby se dostal do kontaktu
s horkými povrchy.
Jestliže zařízení nepoužíváte nebo se chystáte jej čistit, vždy vyjměte zástrčku
z elektrické zásuvky.
Zařízení nepoužívejte ani v případě, kdy došlo k poškození napájecího kabelu
nebo zástrčky - v takovém případě předejte zařízení do autorizovaného servisu
k opravě.
Používání příslušenství, které nebylo doporučeno výrobcem, může způsobit
poškození zařízení nebo zranění.
Zařízení, napájecí kabel ani zástrčku neponořujte do vody či jiných kapalin -
napájecí kabel i zástrčka musí být vždy suché.
Zapnuté zařízení neponechávejte bez dozoru.
Pamatujte na to, že před odpojením zařízení z elektrické zásuvky je nutné zařízení
nejprve vypnout.
Neumisťujte ventilátor do blízkosti tepelných zdrojů.
Zařízení nepoužívejte k jiným účelům, než k jakým bylo určeno.
Ventilátor nepoužívejte venku (ve venkovním prostředí).
V žádném případě nestrkejte prsty ani žádné jiné předměty do krycí mřížky
ventilátoru, pokud je zapnutý.
Před přemístěním ventilátoru na jiné místo je nutné jej odpojit ze zásuvky.
Ventilátor neumisťujte do blízkosti otevřeného okna - dešťové kapky mohou
způsobit elektrický zkrat a zasažení elektrickým proudem! Nedoporučujeme
umisťovat ventilátor do místnosti s vysokou vlhkostí, např. do koupelny.
Toto zařízení mohou používat děti ve věku od 8 let a osoby se sníženými fyzický-
mi či duševními schopnostmi i osoby bez zkušeností a znalosti zařízení, bude-li
nad nimi zajištěn dohled nebo budou poučeny v oblasti bezpečného používání
zařízení tak, aby riziko s tímto spojené bylo pro tyto osoby srozumitelné. Děti
bez dozoru nesmějí zařízení čistit ani provádět jeho údržbu.
Zařízení i jeho napájecí kabel uchovávejte na místě, které je pro děti do 8 let
nedostupné.
Dávejte pozor na to, aby si děti se zařízením nehrály.
Zařízení je určeno výhradně k domácímu použití.
Zástrčku nezapojujte do zásuvky mokrýma rukama.
Zástrčku nevytahujte z elektrické zásuvky taháním za kabel.

4
CZ
Ventilátor nezakrývejte ani jiným způsobem neblokujte průtok vzduchu.
VAROVÁNÍ! Nedovolte, aby si děti hrály s fólií. Nebezpečí udušení!
S ohledem na zajištění bezpečnosti dětí, prosíme, neponechávejte volně ležet
součásti balení výrobku (plastové sáčky, krabice, polystyren apod.).
Toto zařízení nepoužívejte v prostředí s výskytem výbušných nebo hořlavých
plynů.
POPIS ZAŘÍZENÍ
6
3
f ji h g
b e d c a
5
4
2
1
2
1. Otočný podstavec ventilátoru
2. Ovládací panel
a. dotykový vypínač
b. dotykové tlačítko funkce „Swing“
(otáčení ventilátoru)
c. dotykové tlačítko funkce
„Speed“ (rychlost proudění)
d. dotykové tlačítko funkce „Timer“
(odložené vypnutí)
e. dotykové tlačítko funkce „Mode“
f. kontrolka funkce „Swing“
g. kontrolka funkce „Speed“
h. kontrolka funkce „Timer“
i. kontrolka funkce „Mode“
j. kontrolka „POWER“ signalizující
spuštění zařízení
3. Vstup vzduchu
4. Výstup vzduchu
5. Plášť zařízení
6. Dálkový ovladač

5
CZ
PŘED PRVNÍM POUŽITÍM
1. Ventilátor vyjměte z krabice, odstraňte z něj všechny nálepky, přepravní pojistky, sáčky a vý-
plně.
2. Ventilátor zkontrolujte z hlediska poškození, k nimž mohlo dojít během přepravy. Jestliže
budete mít podezření, že došlo k jeho poškození, kontaktujte prodejce.
3. Ventilátor umístěte na pevný, suchý, stabilní a rovný povrch.
4. Baterii CR2025 vložte do dálkového ovladače (viz kapitola: „ČIŠTĚNÍ A ÚDRŽBA).
5. Ujistěte se, že jsou parametry Vaší elektrické sítě shodné s parametry uvedenými na nomi-
nálním štítku ventilátoru.
POZOR! Pro dosažení nejlepšího výkonu ventilátoru jej umístěte do vzdálenosti minimálně 50 cm od nejbližší
stěny, nábytku apod.
POZOR! Ventilátor neumisťujte do blízkosti záclon, závěsů apod.
POZOR! Baterie není součástí balení výrobku MWP-31
POUŽITÍ VENTILÁTORU
1. Ventilátor připojte do elektrické sítě a pomocí tlačítka ON/OFF (2a) jej zapněte.
POZOR! Při prvním spuštění se může z ventilátoru uvolňovat slabý zápach ze zahřívajícího se motoru. Zápach
zmizí v průběhu dalšího provozu. Zapnutí ventilátoru bude signalizováno kontrolkou „Power“ (2j).
2. Tlačítkem „Swing“ (2b) můžete spustit otáčení ventilátoru kolem svislé osy. Otáčení bude
signalizovat kontrolka (2f). Další stisknutí tlačítka „Swing“ (2b) funkci „Swing“ vypne.
3. Tlačítkem „Speed“ (2c) nastavte požadovanou rychlost proudění vzduchu:
- „Low“ - nízká rychlost
- „Mid“ - střední rychlost
- „Hi“ - vysoká rychlost
Aktuálně nastavená rychlost proudění je signalizována příslušnou kontrolkou (2g).
4. Tlačítkem „Timer“ (2d) můžete nastavit dobu, po níž se ventilátor automaticky vypne. Další
stisknutí tlačítka (2d) povede k rozsvěcování kontrolek (2h) a doby uvedené na kontrolkách
se budou sčítat. Maximální doba, kterou je možné na ventilátoru nastavit, činí 7,5 hodiny.
Zhasnutí všech kontrolek (2h) znamená, že byla funkce automatického vypnutí ventilátoru
po nastavené době vypnuta.
5. Tlačítkem „Mode“ (2e) můžete zapnout provozní režim:
- Nature - v tomto režimu ventilátor simuluje přirozené proudění vzduchu (proměnlivá
rychlost a přestávkami).
- Sleep - ventilátor snižuje rychlost proudění, tichý provoz
- Normal - normální provoz ventilátoru
- Zvolený provozní režim je signalizován příslušnou kontrolkou (2i).
6. Po ukončení používání ventilátoru jej vypněte na vypínači ON/OFF (2a) a odpojte jej ze zá-
suvky.
7. Všechny výše uvedené funkce můžete zapnout a vypnout také pomocí dálkového ovladače
(6).

6
CZ
ČIŠTĚNÍ A ÚDRŽBA
POZOR! Zařízení odpojte z elektrické sítě, teprve potom jej můžete čistit. Ventilátor neponořujte do vody ani
jiných kapalin.
POZOR! K čištění nepoužívejte agresivní čistící prostředky ani rozpouštědla, benzín apod.
1. Kryt zařízení čistěte vlhkým hadříkem a následně je vytřete do sucha. V případě silného zne-
čištění použijte jemný detergent.
2. Vstupní a výstupní mřížky můžete očistit měkkým kartáčovým nástavcem vysavače nastave-
ného na nízký sací výkon. Tuto činnost provádějte velice opatrně a s citem.
3. Dálkový ovladač je napájen baterií CR2025 s napětím 3V. Přístup k baterii je možný po stisk-
nutí pojistky (šipka A) a následném vysunutí zásuvky (šipka B). Při vkládání baterie věnujte
pozornost správnému umístění pólů. Po výměně baterie vložte zásuvku s baterií zpět do
ovladače.
POZOR! Použité baterie nevyhazujte do běžného odpadu. Odevzdejte je na příslušném sběrném místě nebo v
prodejnách. Baterie nevhazujte do ohně.
Produktový list
MPM AGD S.A.
Model MWP-31:
Popis Symbol Hodnota Jednotka
Maximální intenzita průtoku vzduchu F17,11 m3/min
Výkon ventilátoru P36,3 W
Provozní hodnota SV 0,47 (m3/min)/W
Příkon v pohotovostním stavu PSB 0,43 W
Hladina hluku ventilátoru LWA 60,97 dB(A)
Maximální rychlost vzduchu c1,74 m/s
Sezónní spotřeba elektrické energie Q12,10 kWh/a
Norma pro měření provozní hodnoty EN IEC 60879:2019
Doplňující informace získáte u MPM AGD S.A.
ul. Brzozowa 3
Milanówek 05-822, Polsko
tel.: +48 (22) 380-52-00
BDO: 000027599

7
CZ
TECHNICKÉ PARAMETRY
Technické parametry jsou uvedeny na nominálním štítku výrobku:
Délka napájecího kabelu: 1,7 m
POZOR! Firma MPM agd S.A. si vyhrazuje právo na provádění technických změn.
SPRÁVNÁ LIKVIDACE VÝROBKU použité elektrické nebo elektronické zařízení.
Polsko Označení, které je umisťováno na výrobku, znamená, že po uplynutí doby životnosti výrobku nesmí být vý-
robek vyhozen do běžného komunálního odpadu. Použitý spotřebič může mít negativní vliv na životní pro-
středí a lidské zdraví z důvodu potencionálního obsahu nebezpečných látek, směsí a součástí. Smísení
elektrického odpadu s jinými odpady nebo jejich neprofesionální demontáž mohou způsobit uvolňování
látek škodlivých pro lidské zdraví i životní prostředí. Použité spotřebiče je nutné předat na určeném sběrném
místě zajišťujícím sběr elektroodpadu. Pro podrobné informace týkající se místa sběru starých elektronických a elektric-
kých spotřebičů je uživatel povinen kontaktovat obecní sběrné místo nebo závod na zpracovávání použitých spotřebičů.

8
DE
SICHERHEITSHINWEISE
Vor Anwendung lesen Sie bitte die Bedienungsanleitung genau durch.
In der Nähe von Kindern ist mit dem Gerät besonders vorsichtig umzugehen.
Das Versorgungskabel nicht von scharfen Rändern überhängen und mit keinen
heißen Oberflächen in Berührung kommen lassen.
Wenn das Gerät nicht mehr benutzt wird oder gereinigt werden soll, ist der
Stecker aus der Steckdose zu ziehen.
Wenn das Gerät beschädigt ist, auch bei Kabelbruch oder Beeinträchtigung des
Netzsteckers, darf es nicht mehr benutzt werden. In diesem Fall ist das Gerät
bei einer autorisierten Fachwerkstatt zu reparieren.
Anwendung von Zubehör, das von dem Gerätehersteller nicht empfohlenen
wurde, kann Geräteschäden, Brand oder Körperverletzungen verursachen.
Tauchen Sie weder das Gerät, das Kabel noch den Stecker in Wasser oder an-
deren Flüssigkeiten ein – das Versorgungskabel und der Stecker müssen immer
trocken sein.
Das Gerät niemals ohne Aufsicht eingeschaltet lassen.
Vor dem Ausschalten des Gerätes stets den Stecker von der Steckdose trennen.
Gerät fern von Wärmequellen aufstellen.
Nur bestimmungsgemäß benutzen.
Nicht im Freien verwenden.
Während des Betriebs weder Finger noch andere Geräte ins Gitter am Propeller-
gehäuse stecken.
Bevor das Gerät an einen anderen Platz umgestellt wird, stets von der Versor-
gung trennen.
Die vordere und hintere Netzgitterabdeckung am Propeller nicht abdecken.
Lüfter fern von offenen Fenster aufstellen – Regentropfen könnten einen Kurz-
schluss und Stromschlag verursachen! Die Lüfter sollten in keinen Räumen mit
hoher Feuchtigkeit, z.B. in Badezimmern aufgestellt werden.
Dieses Gerät darf von Kindern, die mindestens 8 Jahre alt sind sowie von
Personen mit verminderter körperlicher oder geistiger Leistungsfähigkeit und
die keine Erfahrung und Kenntnisse des Geräts aufweisen, verwendet werden,
sofern diese Personen in seine sichere Bedienung eingewiesen oder bei der
Bedienung beaufsichtigt werden, sodass alle mit der Bedienung zusammen-
hängenden Gefahren für diese Personen verständlich sind. Das Gerät darf von
Kindern ohne Aufsicht weder gereinigt noch gewartet werden.
Das Gerät und das Versorgungskabel fern von Kindern unterhalb von 8 Jahren
aufbewahren.
Darauf achten, dass keine Kinder mit dem Gerät spielen.

9
DE
Dieses Gerät ist ausschließlich für den Hausgebrauch bestimmt.
Gerät nur mit trockenen Händen an die Steckdose anschließen.
Netzstecker vorsichtig aus der Steckdose ziehen, nicht am Kabel reißen.
Ohne vordere und hintere Abdeckung darf das Gerät nicht in Betrieb gesetzt
werden.
WARNUNG! Kinder nicht mit Folie spielen lassen. Erstickungsgefahr!
Aus Sicherheitsgründen sind lose Verpackungsteile (Kunststoffbeutel, Kartons,
Styropor etc.) von Kindern fern zu halten.
Verwenden Sie dieses Gerät nicht in Umgebungen mit brennbaren und ex-
plosiven Gasen.
GERÄTEBESCHREIBUNG
6
3
f ji h g
b e d c a
5
4
2
1
2
1. Rotierender Untersatz des Ventilators
2. Bedienfeld
a. Touch-Schalter (ON/OFF)
b. „Swing“-Touchfeld (Schwingung
des Ventilators)
c. „Speed“-Touchfeld (Blasge-
schwindigkeit)
d. „Timer“-Touchfeld (verzögertes
Abschalten)
e. „Mode“-Touchfeld

10
DE
f. Kontrolllämpchen der „Swing“-
Funktion
g. Kontrolllämpchen der „Speed“-
Funktion
h. Kontrolllämpchen der „Timer“-
Funktion
i. Kontrolllämpchen der „Mode“
j. Kontrollleuchte „POWER“ signali-
siert, dass das Gerät gestartet ist
3. Lufteintritt
4. Luftauslass
5. Gehäuse
6. Fernbedienung
VOR DEM ERSTEN GEBRAUCH
1. Den Ventilator aus der Schachtel nehmen und sämtliche Aufkleber, Transportblockaden, Tü-
ten und Füllstoffe entfernen.
2. Den Ventilator auf mögliche Transportschäden überprüfen. Falls Schäden befürchtet wer-
den, bitte an den Verkäufer wenden.
3. Den Ventilator auf einem flachen, trockenen, ebenen und waagerechten Untergrund auf-
stellen.
4. Eine CR2025-Batterie in die Fernbedienung einlegen (siehe Kapitel: „REINIGUNG UND WAR-
TUNG“)
5. Sicherstellen, dass die Parameter des Stromnetzes mit den Angaben auf dem Typenschild
des Ventilators übereinstimmen.
WICHTIG! Um die maximale Leistung des Geräts zu gewährleisten, den Ventilator in einem Abstand von min-
destens 50 cm zu Wänden, Möbelstücken etc. aufstellen.
WICHTIG! Den Ventilator nicht in der Nähe von Vorhängen, Gardinen etc. aufstellen.
WICHTIG! Die Batterie ist nicht Teil des Produkts MWP-31.
BETRIEB DES VENTILATORS
1. Den Ventilator an das Stromnetz anschließen und mit der ON/OFF-Taste (2a) einschalten.
WICHTIG! Während der ersten Inbetriebnahme des Ventilators kann durch das Heißlaufen des Antriebs ein
leichter Geruch entstehen. Dieser verschwindet im Laufe der weiteren Nutzung des Geräts. Die Ventiltorakti-
vierung wird durch die Kontrollleuchte „Power“ (2j) signalisiert.
2. Bei Betätigung der „Swing“-Taste (2b) führt der Ventilator schwingende Bewegungen zur
vertikalen Achse aus. Die Schwingungen werden durch das Kontrolllämpchen (2f) signali-
siert. Durch die erneute Betätigung der „Swing“-Taste (2b) wird die „Swing“-Funktion wieder
deaktiviert.
3. Mit der „Speed“-Taste (2c) kann die gewünschte Blasgeschwindigkeit des Ventilators einge-
stellt werden:
- „Low“ – geringe Blasgeschwindigkeit
- „Mid“ – mittlere Blasgeschwindigkeit
- „Hi“ – hohe Blasgeschwindigkeit
Die aktuelle Blasgeschwindigkeit wird durch das entsprechende Kontrolllämpchen ange-
zeigt (2g).
4. Mit der „Timer“-Taste (2d) können Sie eine Zeitdauer wählen, nach der sich der Ventilator
ausschaltet. Bei mehrfacher Betätigung der Taste (2d) leuchten die Kontrolllämpchen (2h)

11
DE
auf und die neben den Lämpchen angegebenen Minutenangaben werden summiert. Ein-
stellbare Höchstlaufzeit – 7,5 Stunden. Das Erlöschen aller Lämpchen (2h) bedeutet, dass die
automatische zeitbedingte Abschaltfunktion deaktiviert wurde.
5. Mit der Taste „Mode“ (2e) können Sie in den Betriebsmodus wechseln:
- Nature - der Ventilator simuliert natürliche Luftstöße wie an der frischen Luft (zeitlich und
mit Pausen variabel)
- Sleep - der Ventilator reduziert die Luftstromgeschwindigkeit, diskreter Betrieb
- Normal - normaler Betrieb des Ventilators
Die gewählte Betriebsart wird durch die entsprechende Kontrollleuchte (2i) angezeigt.
6. Wenn der Ventilator nicht weiter benötigt wird, schalten Sie ihn bitte mit der ON/OFF-Taste
(2a) aus und ziehen sie den Stecker aus der Steckdose.
7. Alle oben beschriebenen Funktionen können auch über die Fernbedienung aktiviert und
deaktiviert werden (6).
REINIGUNG UND WARTUNG
WICHTIG! Vor der Reinigung des Geräts bitte immer den Stecker ziehen. Das Gerät nie in Wasser oder andere
Flüssigkeiten tauchen.
WICHTIG! Zur Reinigung dürfen keine aggressiven Reinigungsmittel, Lösungsmittel, Benzine etc. verwendet
werden.
1. Wischen Sie das Gehäuse des Ventilators mit einem feuchten Tuch sauber und trocknen sie
es dann ab. Bei starken Verunreinigungen ein sanftes Reinigungsmittel verwenden.
2. Das Luftauslassgitter kann mit dem Staubsauger auf niedrigster Stufe und mit dem weichen
Bürstenaufsatz abgestaubt werden. Gehen Sie dabei sehr vorsichtig und bedacht vor.
3. Die Fernbedienung funktioniert mit einer Batterie des Typs CR2025 (3V). Zum Einlegen der
Batterie den Fortsatz der Blockade (Pfeil A) nach unten drücken und das Batteriefach heraus-
ziehen (Pfeil B). Beim Einlegen der Batterie auf die Polierung achten. Nach dem Einlegen der
Batterie das Batteriefach wieder in die Fernbedienung schieben.
WICHTIG!LeereBatterienniemitdemHausmüllentsorgen.GebenSieBatterienimmeranhierfürvorgesehenen
Stellen oder in Geschäften ab. Batterien nicht ins Feuer werfen!“

12
DE
Datenblatt
MPM AGD S.A.
MODELL: MWP-31
Beschreibung Symbol Wert Einheit
Max. Lüfter-Volumenstrom F17,11 m3/min
Lüfterleistung P36,3 W
Betriebswert SV 0,47 (m3/min)/W
Leistungsaufnahme im Stand-by –
Modus
PSB 0,43 W
Schallleistungspegel LWA 60,97 dB(A)
Max. Luftgeschwindigkeit c1,74 m/s
Saisonaler Energieverbrauch Q12,10 kWh/a
Norm zur Betriebswertmessung EN IEC 60879:2019
Für zusätzliche Informationen
kontaktieren Sie MPM AGD S.A.
ul. Brzozowa 3
Milanówek 05-822, Polska
tel. (22) 380-52-00
BDO: 000027599
TECHNISCHE DATEN
Technische Parameter des Gerätes sind vom Typenschild
zu entnehmen.
Länge des Netzkabels: 1,7 m
ACHTUNG! Firma MPM agd S.A. behält sich das Recht auf technische Änderungen vor.
ORDNUNGSGEMÄSSE ENTSORGUNG DES PRODUKTS Elektro – und Elektronikmüll
Polen Die Kennzeichnung auf dem Produkt weist darauf hin, dass das Produkt nach Ablauf seiner Lebensdauer
nicht zusammen mit anderen Haushaltsabfällen entsorgt werden darf. Gebrauchte Geräte können sich we-
gen des potentiellen Gehalts gefährlicher Stoffe, Gemische und Bauteile nachteilig auf die Umwelt und
menschliche Gesundheit auswirken. Das Vermischen von Elektromüll mit anderen Abfällen bzw. sein nicht
sachgerechter Ausbaukannzur Freisetzung umwelt– undgesundheitsschädlicher Stoffeführen.Das gebrauchte Gerätist
bei einer Sammelstelle für Elektro – und Elektronikschrott zu entsorgen. Für detaillierte Informationen zu Sammelstellen
für Elektro – und Elektronikschrott wenden Sie sich bitte an Ihre örtliche Wertstoffsammelstelle oder Schrottbehand-
lungsanlage.

13
EN
SAFETY INSTRUCTIONS
Read carefully this manual before using the appliance.
Close supervision is necessary when using the appliance near children.
Do not hang the power cord over sharp edges and do not allow the power
cord to touch hot surfaces.
Always unplug the appliance when it is not in use or before cleaning.
Do not use the appliance if it is damaged, also if the power cord or plug is dam-
aged – return the appliance for repair to an authorized service centre.
To avoid the risk of damage or injury, always use the attachments recommended
by the manufacturer.
Do not immerse the appliance, its cord and plug in water or any other liquids,
keep it dry at all times.
Do not leave the appliance switched on when unattended.
Always switch off the appliance before unplugging it.
Do not place the appliance in vicinity of heat sources.
Do not use the appliance for the purposes different than it was designed for.
Do not use the appliance outdoors.
Never insert your fingers nor any other items through the guard when the
appliance is running.
Before moving the appliance to another location disconnect it from the power
source.
Do not place the fan near open windows – raindrops may cause ashort circuit
and electrical shock! It is advisable not to place fans in rooms with high humidity,
such as bathrooms.
This appliance is not intended for use by children under 8 years of age and
individuals with reduced physical, sensory or mental capabilities, or lack of ex-
perience and knowledge, unless they have been given supervision or instruction
concerning use of the appliance in asafe way and if they understand the hazards
involved. Cleaning and user maintenance shall not be carried out by children
without supervision.
Store the appliance and its cord out of reach of children under 8 years of age.
Children should be supervised to ensure that they do not play with the appliance.
Do not switch on the appliance without front and rear guard mounted.
The appliance may be switched on only after complete assembly. Partially
assembled unit does not provide safe and proper operation.
Do not plug the power cord with wet hands.
This appliance is intended for household use only.

14
EN
Do not remove the plug from the mains by pulling by the cord.
In order to ensure your children‘s safety, please keep all packaging (plastic bags,
boxes, polystyrene etc.) out of their reach.
WARNING! Do not allow small children to play with the foil as there
is adanger of suffocation!
Do not use this unit in environments with flammable and explosive gases.
OVERVIEW
6
3
f ji h g
b e d c a
5
4
2
1
2
1. Fan’s rotating base
2. Control panel
a. on/off touch switch
b. “Swing” touch button (fan’s
oscillating movement)
c. “Speed” touch button (airflow
speed)
d. “Timer” touch button (delayed
start)
e. “Mode” touch button
f. “Swing” indicator
g. “Speed” indicators
h. “Timer” indicators
i. “Mode” indicator
j. ”POWER” device activation signal
lamp
3. Air intake
4. Air exhaust
5. Housing
6. Remote

15
EN
BEFORE FIRST USE
1. Remove the fan from the box; remove all stickers, transport protectors, bags and fillers.
2. Check the fan for any damages that might have occurred during transport. If you have any
doubts, contact the seller.
3. Place the fan on a horizontal, flat, even and dry surface.
4. Install a CR2025 battery in the remote (see chapter: “CLEANING AND MAINTENANCE”)
5. Make sure the electrical mains parameters match the data on the fan’s name plate.
CAUTION! Toensure thebest performance of thefan, do notplaceitcloser than 50cm from any walls, furniture,
etc.
CAUTION! Do not place the fan near curtains, shades, etc.
CAUTION! The battery is not included with MWP-31.
USE OF AFAN
1. Connect the fan to the mains and start it by pressing the ON/OFF button (2a).
CAUTION! A mild odour might be detectable when the fan is started for the first time, indicating that the motor
iswarming up.Theodour willdisappearaftersometime.Uruchomieniewentylatorazostanie zasygnalizowane
lampką kontrolną “Power” (2j)
2. Use the “Swing” (2b) button to activate the fan’s vertical, oscillating movement. The oscillat-
ing movement is signalled by an indicator (2f). Press the “Swing” (2b) button a second time
to deactivate the function.
3. Use the “Speed” (2c) button to set the desired air flow.
- “Low” – low air flow
- “Mid” – medium air flow
- “Hi” – high air flow
The current air flow speed is indicated by a relevant indicator (2g).
4. Use the “Timer” (2d) button to set the time after which the fan shuts down automatically.
Pressing the button (2d) again activates the indicators (2h), with the time shown by the in-
dicators adding up. The maximal time that can be set is 7.5 hours. The deactivation of all
indicators (2h) means that the fan shuts down after the set time.
5. Use the ”Mode” button to activate an operating mode:
- Nature – fan simulates natural outdoor blows (changing in time and with intervals)
- Sleep – fan reduces air injection speed, working discreetly
- Normal – standard fan operation
Selected operating mode is signaled by a respective signal lamp (2i)
6. Once the operating time of the fan is over, use the ON/OFF (2a) to shut it down and discon-
nect it from the mains.
7. All functions described above may be activated or deactivated with the remote (6).
CLEANING AND MAINTENANCE
CAUTION! Disconnect the device from the main before cleaning it. Do not submerge it in water or other liquids.

16
EN
CAUTION! Do not use any aggressive cleaning agents, gasoline, solvents etc. to clean the device.
1. Use a damp cloth to wipe the fan’s housing and wipe it dry afterwards. Use a mild cleaning
agent for stubborn dirt.
2. The grates in the intake and exhaust openings can be vacuum-cleaned at low speed. Perform
this cleaning very gently and carefully.
3. The remote is powered by a CR2025 3V battery. To access the battery, press the interlock’s
embossing (arrow A) and then slide away the battery compartment (arrow B). When inserting
a new battery, make sure the polarity is correct. Once the battery is replaced, slide back the
battery compartment in the device.
CAUTION! Do not discard used batteries with your municipal waste. Only discard them in proper pick-up points
or at the store. Do not place the battery in fire.
Technical data sheet
MPM AGD S.A.
MODEL: MWP-31
Description Symbol Value Unit
Maximum flow rate of the fan F 17,11 m3/min
Fan power P 36,3 W
Operating value SV 0,47 (m3/min)/W
Power consumption in standby mode PSB 0,43 W
Fan’s sound power level LWA 60,97 dB(A)
Maximum air speed c1,74 m/s
Seasonal electricity consumption Q12,10 kWh/a
Standards used for measuring the
operational values
EN IEC 60879:2019
To get additional information, contact MPM AGD S.A.
ul. Brzozowa 3
Milanówek 05-822, Polska
tel. (22) 380-52-00
BDO: 000027599

17
EN
TECHNICAL DATA
Technical parameters are indicated on the product nameplate.
Length of power cord: 1,7 m
ATTENTION! MPM agd S.A. reserves its right to modify the technical data!
PROPER DISPOSAL OF THE PRODUCT (waste electrical and electronic equipment)
Poland Marking on the product indicates that after the service-life of the product expires, it should not be disposed
with other type of municipal waste. Used equipment may have a negative impact on the environment
and health of people due to potentially containing hazardous substances, mixtures and components. Mixing
electric waste with other types of waste or disassembling those in an unprofessional manner may cause
a release of substances that are hazardous to the environment and health. Used equipment should be hand-
ed-over to a point for collection of electric waste. In order to obtain detailed information regarding the electric waste col-
lection points, the user should contact the municipal point of electric waste collection or used equipment processing de-
partment.

18
PL
WSKAZÓWKI DOTYCZĄCE BEZPIECZEŃSTWA UŻYTKOWANIA
Przed użyciem przeczytaj dokładnie instrukcję obsługi.
Zachowaj szczególną ostrożność, gdy w pobliżu urządzenia znajdują się dzieci.
Nie wieszaj przewodu na ostrych krawędziach i nie pozwól, aby stykał się z go-
rącymi powierzchniami.
Zawsze wyjmuj wtyczkę z gniazda sieciowego, gdy nie używasz urządzenia lub
przed rozpoczęciem czyszczenia.
Nie używaj uszkodzonego urządzenia, również wtedy gdy uszkodzony jest prze-
wód sieciowy lub wtyczka – w takim wypadku oddaj urządzenie do naprawy
w autoryzowanym punkcie serwisowym.
Użycie akcesoriów nie polecanych przez producenta może spowodować uszko-
dzenie urządzenia lub obrażenia ciała.
Nie zanurzaj urządzenia, przewodu i wtyczki w wodzie lub w innych płynach
przewód sieciowy i wtyczka muszą być zawsze suche.
Nie zostawiaj urządzenia bez nadzoru podczas pracy.
Pamiętaj, aby zawsze przed wyjęcie wtyczki z gniazdka sieciowego wyłączyć
najpierw urządzenie.
Nie stawiaj urządzenia w pobliżu źródeł ciepła.
Nie wykorzystuj urządzenia do innych celów niż zostało przeznaczone.
Nie używaj wentylatorów na wolnym powietrzu.
W żadnym wypadku nie wkładaj palców i jakichkolwiek przedmiotów przez
kratkę obudowy śmigła podczas pracy urządzenia.
Przed przestawieniem urządzenia w inne miejsce należy odłączyć je od źródła
prądu.
Nie stawiaj wentylatorów w pobliżu otwartych okien – krople deszczu mogą
spowodować spięcie instalacji elektrycznej i porażenie prądem! Wskazane jest
nie ustawiać wentylatorów w pomieszczeniach o wysokim stopniu wilgotności,
np. w łazienkach.
Niniejszy sprzęt może być użytkowany przez dzieci w wieku co najmniej 8 lat
i przez osoby o obniżonych możliwościach fizycznych, umysłowych i osoby
o braku doświadczenia i znajomości sprzętu, jeżeli zapewniony zostanie nadzór
lub instruktaż odnośnie do użytkowania sprzętu w bezpieczny sposób, tak aby
związane z tym zagrożenie były zrozumiałe. Dzieci bez nadzoru nie powinny
wykonywać czyszczenia i konserwacji sprzętu.
Przechowuj urządzenie i jego przewód w miejscu niedostępnym dla dzieci
poniżej 8 lat.

19
PL
Należy zwracać uwagę na dzieci aby nie bawiły się sprzętem.
Urządzenie przeznaczone jest tylko do użytku domowego.
Nie podłączaj wtyczki do gniazdka sieci mokrymi rękami.
Nie wyciągaj wtyczki zgniazdka sieci pociągając za przewód.
Nie przykrywaj ani nie zasłaniaj wentylatora .
OSTRZEŻENIE! Nie pozwalaj dzieciom bawić się folią. Niebezpieczeń-
stwo uduszenia!
Dla bezpieczeństwa dzieci proszę nie zostawiać swobodnie dostępnych części
opakowania (torby plastikowe, kartony, styropian itp.).
Nie używaj tego urządzenia wśrodowisku zgazami palnymi iwybuchowymi.
OPIS URZĄDZENIA
6
3
f ji h g
b e d c a
5
4
2
1
2
1. Obrotowa podstawa wentylatora
2. Panel sterowania
a. dotykowy włącznik/wyłącznik
b. dotykowy przycisk funkcji
„Swing” (oscylacja wentylatora)
c. dotykowy przycisk funkcji „Spe-
ed” (prędkość nadmuchu)
d. dotykowy przycisk funkcji „Ti-
mer” (opóźniane wyłączanie)

20
PL
e. dotykowy przycisk funkcji
„Mode”
f. lampka kontrolna funkcji
„Swing”
g. lampki kontrolne funkcji „Speed”
h. lampki kontrolne funkcji „Timer”
i. lampki kontrolne funkcji „Mode”
j. lampka kontrolna „POWER”
sygnalizująca uruchomienie
urządzenia
3. Wlot powietrza
4. Wylot powietrza
5. Obudowa urządzenia
6. Pilot zdalnego sterowania
PRZED PIERWSZYM UŻYCIEM
1. Wyjmij wentylator z kartonu, usuń wszystkie naklejki, blokady transportowe, torebki
i wypełniacze.
2. Sprawdź wentylator pod kątem uszkodzeń mogących powstać podczas transportu.
W przypadku podejrzeń uszkodzeń skontaktuj się ze sprzedawcą.
3. Ustaw wentylator na płaskiej, suchej, równej i poziomej powierzchni.
4. Zainstaluj baterię CR2025 w pilocie zdalnego sterowania (patrz rozdział: „CZYSZCZENIE
I KONSERWACJA)
5. Upewnij się, że parametry Twojej sieci zasilającej odpowiadają danym na tabliczce
znamionowej wentylatora.
UWAGA! Dla uzyskania najlepszej wydajności wentylatora ustaw go w odległości nie mniejszej niż 50cm od
najbliżej ściany, mebla itp.
UWAGA! Nie ustawiaj wentylatora w pobliżu zasłon, firan itp.
UWAGA! Bateria nie stanowi wyposażenia produktu MWP-31.
UŻYCIE WENTYLATORA
1. Podłącz wentylator do sieci zasilającej i uruchom go używając przycisku ON/OFF (2a).
UWAGA! Podczas pierwszego uruchomienia wentylatora może wydobywać się lekki zapach wygrzewania
silnika. Zaniknie on w dalszym okresie eksploatacji. Uruchomienie wentylatora zostanie zasygnalizowane
lampką kontrolną „Power” (2j)
2. Przyciskiem „Swing” (2b) możesz uruchomić ruchy oscylacyjne wentylatora względem pio-
nowej osi. Oscylacje będzie sygnalizowana lampką kontrolną (2f). Ponowne użycie przycisku
„Swing” (2b) wyłącza funkcję „Swing”.
3. Przyciskiem „Speed” (2c) ustaw pożądaną prędkość nadmuchu powietrza:
- „Low” – mała prędkość nadmuchu
- „Mid” – średnia prędkość nadmuchu
- „Hi” – duża prędkość nadmuchu
Aktualna prędkość nadmuchu sygnalizowana jest stosowną lampką kontrolną (2g).
4. Przyciskiem „Timer” (2d) możesz zadeklarować czas po jakim wentylator wyłączy się. Kolejne
przyciśnięcia przycisku (2d) powodują zaświecanie się lampek kontrolnych (2h) a czasy poda-
ne przy lampkach sumują się. Maksymalny czas jaki możesz ustawić to 7,5 godziny. Zgaśnię-
cie wszystkich lampek (2h) oznacza wyłączoną funkcję wyłączenia wentylatora po zadanym
czasie.
Table of contents
Languages:
Other MPM Fan manuals