manuals.online logo
Brands
  1. Home
  2. •
  3. Brands
  4. •
  5. MRC
  6. •
  7. Media Converter
  8. •
  9. MRC 0001822 User manual

MRC 0001822 User manual

S Gauge DC/DCC
Diesel Sound Decoder with
Four Prime Mover sounds
Item #0001822
Thank you for purchasing our most advanced DC/DCC
locomotive sound decoder. Combined with any DCC
System or MRC Blackbox, our true live capture digital
sound decoder will make your model railroad come to life.
•Four types of synchronized diesel prime mover sounds:
Alco /SD60/SD70/F
•3 amp capacity
•34 different types of horns and 8 types of bells
•Programmable individual sound volumes
•Programmable either 2-digit or 4-digit addresses
•Programmable start voltage and top voltage
•Programmable acceleration and decelaration rates
•Programmable 14, 28, 128 speed steps
•Back EMF load control
•Supports read back address and CV value
•Selectable factory default speed curve
•Advanced speed table control CV67-CV94
•Kick start voltage control CV65
•Easy function mapping
•3 headlight effects: Directional / rule 17 /off-dim-
bright cycle.
•7 accessory light effects: ditch lights, mars light,
gyra light, strobe light, prime strobe light and on/off
•28 accessory functions (F1-F28)
•Supports advanced consisting (CV19)
•Supports programming on the main (OPS mode)
•Compatible with NMRA DCC standards
•Complies with Part 15 of FCC Rules
•28 mm speaker included
•Dimensions: 60.0mm x 17.8mm x 5.0mm
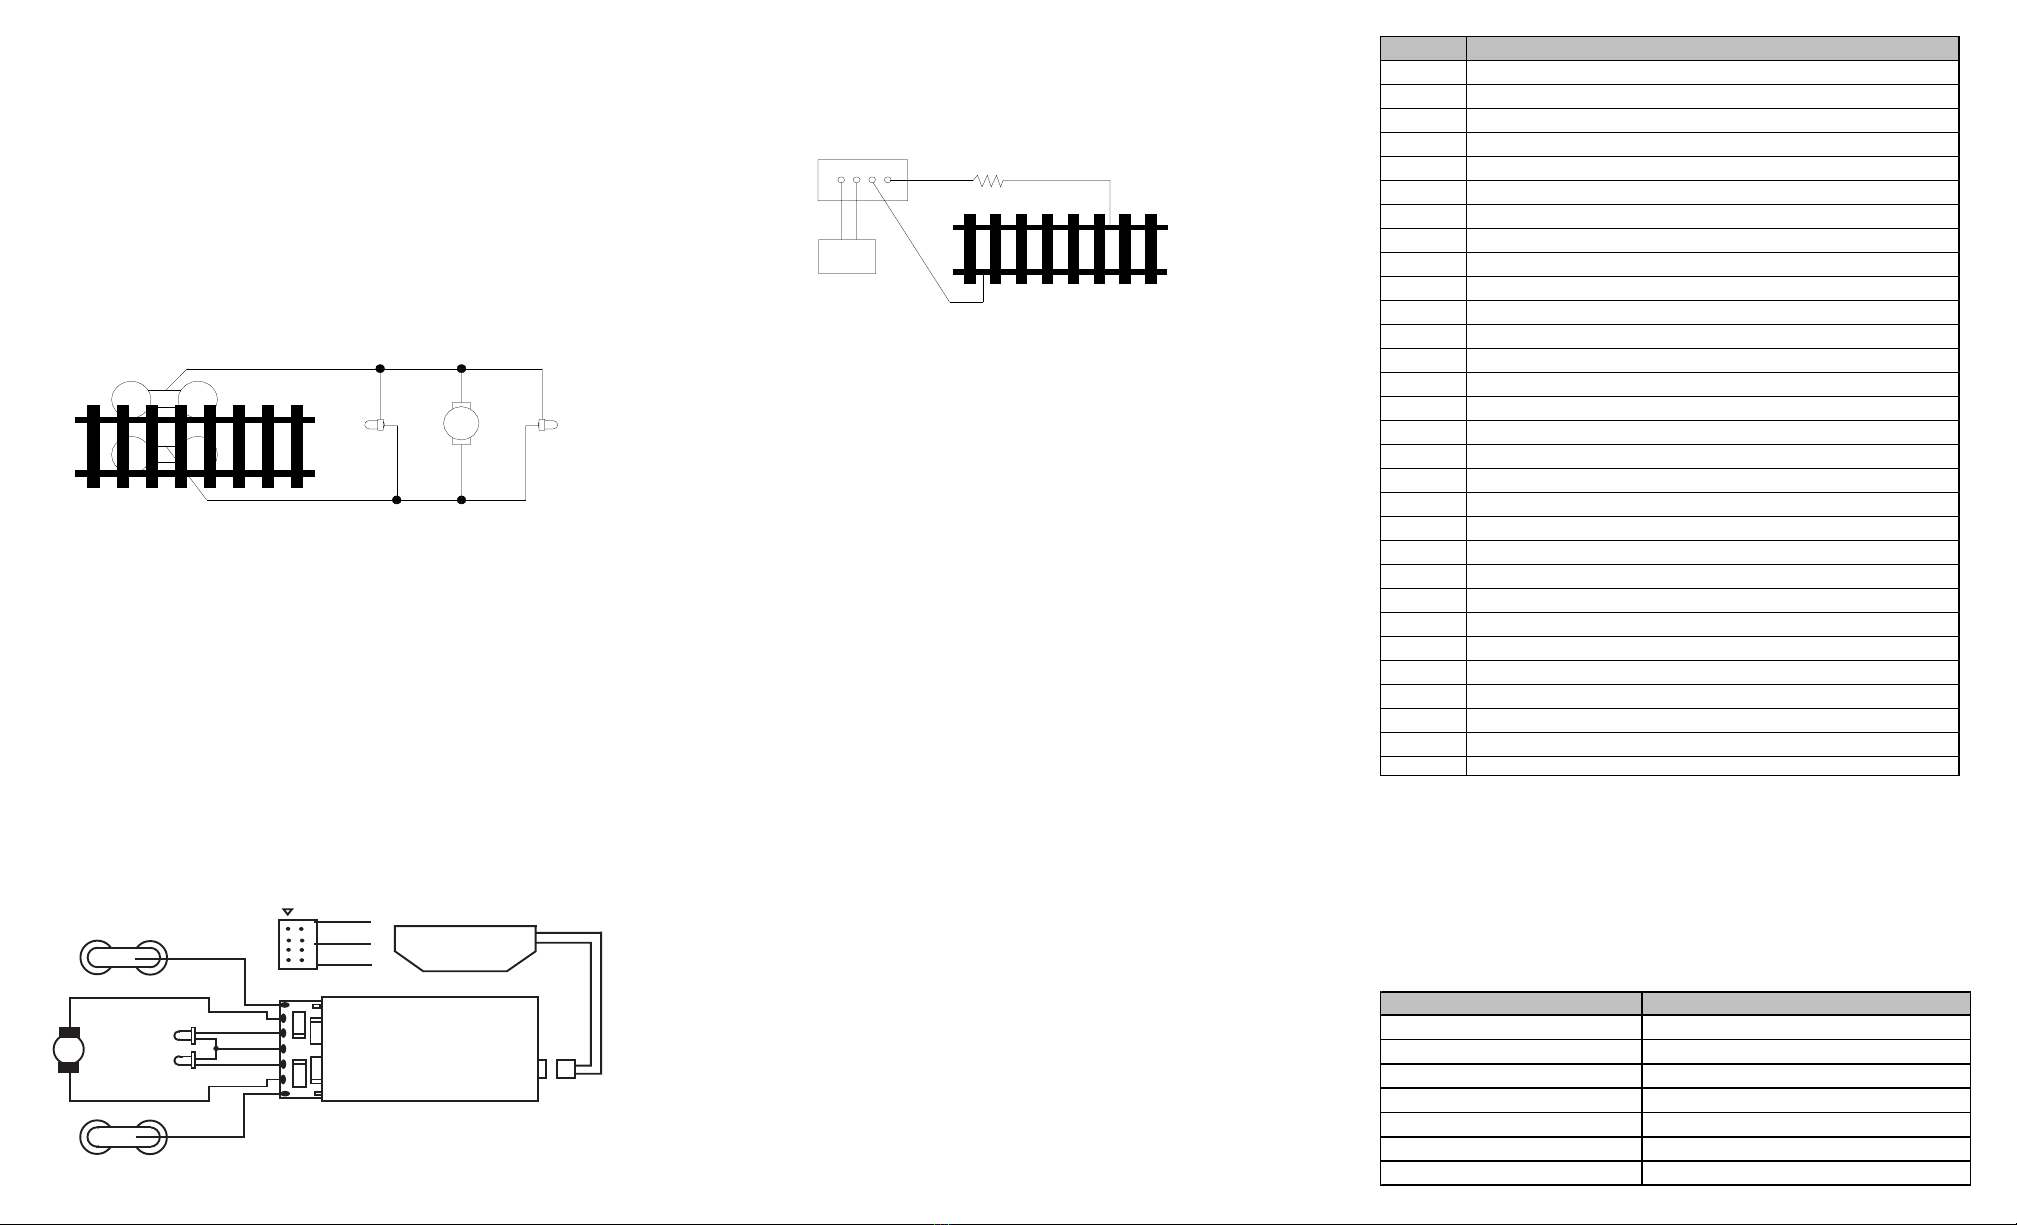
PROGRAMMING
This decoder supports all program modes and read back features. With MRC
Prodigy Advance DCC you can read its address and CV value.
Printed in USA
SPEED TABLE CV67-CV94 FOR 28 SPEED STEPS
When CV29’s bit 4 is set to “1” it will use the speed table formed by CV67-CV94
to control speed (motor voltage). It allows you to setup each speed for all 28
speed steps. First, program CV29 to 18 for short addresses (1-127) or program
CV29 to 50 for long addresses (128-9999) to enable speed table control. Then
select throttle to 28 speed steps and run your loco at speed step 1. Use program
CV on the main to change CV67’s value (1-255) to adjust step 1’s speed. The
kick voltage, CV65 is only applied when the speed step changes from 0 to 1. You
should switch between 0 to 1 many times to check step 1’s speed. When done
with CV67, select speed step 2 and program CV68. CV68’s value must be
greater then CV67’s. When done with CV67-CV94, use read back CV to make
sure their values are in increasing order.
Note: When using MRC Prodigy DCC to program addresses it will automatically
disable the speed table (set CV29’s bit 4 to “0”). Programming CV125 to 1 will
also disable the speed table and re-program CV67-CV94 to a default linear
speed setting.
TROUBLE SHOOTING
Whenever the decoder doesn’t work please use the program track to
program CV# 125 with value 1 to restore the decoder to factory settings.
This should bring the decoder to life with address #3. This decoder should
perform well with all DCC systems. The maximum DCC output should be less than
21 V. If the locomotive does not respond to commands, it may have lost its
address. Please re-program the address and program CV19 to 0 (disable
consist). If it responds to slowly, you should clear its momentum by reprogram-
ming CV3 and CV4 to zero. If step 1’s speed is too high, you should program
start voltage, CV2 to zero. If its top speed is too slow, program top voltage CV5
to 31. You should also clean the track to improve electrical pickup. Read your
DCC system manual to learn how to program and operate the decoder. For more
information about registers/CVs and their functions, please refer to the NMRA
DCC Standard & Recommended Practices, RP-9.2.2. This is available directly
from the NMRA or their website at www.nmra.org.
FCC COMPLIANCE
This device complies with part 15 of the FCC Rules. Operation is subject to the
following two conditions. (1) This device may not cause harmful interference,
and (2) This device must accept any interference received, including interfer-
ence that may cause undesired operation.
RETURN PROCEDURE
This decoder carries a 6 month warranty against factory defects. This warranty
does not include abuse, misuse, neglect, improper installation, or any modifications
made to this decoder, including but not limited to the removal of the NMRA plug if
applicable. If it should become necessary to return the decoder for warranty repair/
replacement, please include a copy of the original sales receipt. Please
include a letter (printed clearly) with your name, address, daytime phone number,
and a detailed description of the problem you are experiencing. Please also include
a check or a money order for $8.00 to cover return shipping and handling. If the
decoder is no longer considered under warranty, then please include a check or a
money order for $29.00 to cover the cost of repair or replacement and return
shipping and handling. Be certain to return the decoder only.
Any questions regarding Warranty Policy can be directed to our Customer
Service Department by calling 732-225-6360 between the hours of 8:30am
and 6:00pm EST, or by emailing: rrtech@modelrectifier.com
Send the decoder to:
Model Rectifier Corporation
Attn: Parts & Service
80 Newfield Avenue
Edison, NJ 08837-3817 U.S.A
CV Register Description Range Default
CV1 R1 Short address 1-127 3
CV2 R2 Start voltage 0-32 12
CV3 R3 Acceleration 0-32 0
CV4 R4 Deceleration 0-32 0
CV5 --- Top voltage 0-32 32
CV 6 Speed curve select (0=linear, 1=slow increase,
2=fast increase at slow speed 0-2 0
--- R6 Page number --- ---
CV29 R5 Basic configuration --- 2
CV7 R7 Manufacturer version number 22 22
CV8 R8 Manufacturer ID --- 143
CV17 --- Long address upper byte 192-231 192
CV18 --- Long address low er byte 0-255 3
CV19 --- Advanced consist address 0-127 0
CV37 0=normal, 1=F3 and F4 exchange 0-1 0
CV39 0=normal, 1=F5 and F6 exchange 0-1 0
CV42 0=normal, 1=F8 and F12 exchange 0-1 0
CV49 All sounds on/off except horn that is alw ays on 0-1 1
CV50 --- Horn type (34 types) 0-33 17
CV51 --- Horn volume 0-3 3
CV52 --- Bell type (8 types) 0-7 2
CV53 --- Bell volume 0-3 3
CV54 --- Bell ring rate 0-50 3
CV55 --- Diesel rumble volume 0-3 3
CV56 --- Brake squeal volume 0-3 3
CV57 --- Dynamic brake volume 0-3 3
CV58 --- Air release volume 0-3 3
CV59 --- Air pump volume 0-3 3
CV60 --- Safety pop valve volume 0-3 3
CV61 --- Engine cooling fan volume 0-3 3
CV62 --- Coupling volume 0-3 3
CV63 --- Auto ditch lights f lash w ith horn enable 0-1 1(enable)
CV64 --- Rail w heel clack 0-3 3
CV65 Kick start voltage 0-63 63
CV67-94 28 speed steps table w hile CV29.4=1 1-255 linear
CV113 --- Coupling fire volume 0-3 3
CV114 --- Brake release volume 0-3 0
CV115 --- Auto brake squeal enable/disable 0-1 1(enable)
Light mode, 0=normal headlight
1=off, dim, bright cycle, 2=rule 17
CV120 Ultra slow enable 0 0
CV121 Ditch lights flash (=1) or stay on (=0),
C118=CV119=0 0-1 0
CV122 --- Notch mode, 0=auto, 3=manual 0-3 0
CV123 Prime mover: 0=SD60, 1=F, 2=Alco, 3=SD70, 4=off ,
w ith traction air compressor cycling randomly 0-4 (4=off) 3(SD70)
CV124 Back emf load control on/off 0-1 0(of f)
CV125 --- Programming to "1" w ill restore some CV's to factory
settings --- 0
0CV117 0-2
0CV21 --- When CV21=0, functions follow its ow n address.
CV21=1, functions f ollow the consist address ---
INSTALLATION
It is quite a challenge to install the decoder in your loco. You should have some
basic electrical knowledge. If you do not have, please ask the dealer for help in
installation.
Figure 1 shows the electrical circuit of most standard locos. The terminals of the
motor and lights are directly connected to the wheel pickup. Each type of loco
has its own method of electrical pickup and distribution. There is no standard
rule for installing decoders. It is always better to consult the loco manufacturer
on how to install a decoder in your particular loco. First, figure out your loco’s
electrical wiring and how to disconnect (isolate) the motor and light(s). Label all
wires before you disconnect them.
Figure 1. Connection of standard locomotive. Note: The ‘X’ marks indicate
where to disconnect (isolate).
Figure 2. How to wire the decoder.
The decoder will be inserted between the wheel pickup and the motor. After
disconnecting the motor terminals from the pickup, connect the right side pickup
wires to the red decoder wire, and connect the left side pickup wires to the
black decoder wire. Connect the right motor terminal to the orange decoder wire,
and connect the left motor terminal to the grey decoder wire. The white decoder
wire is for the front headlight, the yellow decoder wire is for the rear headlight,
and the blue decoder wire is the headlight common. If you wish to add acces-
sory lights to your locomotive, there are 4 solder tabs on the bottom of the
decoder, ( flat side), marked; acy 1, com, com, and acy 2. Solder wire to these
tabs and make sure that there are no stray wires bridging the tabs. Refer to the
CV and Function charts as to programming and operating the accessory lights. If
you have enough room inside the locomotive a speaker enclosure can be built
around the speaker to improve overall sound quality.
If you have a 1.5V bulb or LED, you should connect a 2k ohm resistor in series to
one of the leads to limit current.
MAKING A TEST TRACK
We strongly recommend building a test track with a 27 ohm resistor to limit
current. Only test your installed decoder on the test track. The test track will
reduce the chance of damaging your decoder due to an incorrectly installed
decoder.
TESTING
The decoder has been programmed to address #3, 28/128 speed steps. To test,
place the loco on the test track. Select address #3 and 28 speed step. Move up
the throttle and the loco should move. Push the light button [F0] and headlight
should come on. Change the direction of the loco and the loco should change
direction. The loco cannot reach full speed, due to the resistor. If all the above
occurs, you passed the test. Congratulations! Do not run the loco for an
extended period of time on the test track or the resistor will overheat. If your
installed decoder does not pass the test, find the problem, correct it and test it again.
As long as you test the decoder on the test track there is little chance of damaging
the decoder. This is why the test track is so important.
OPERATION
The decoder has start up and shut down features. If the loco was previously
shut down you have to start up the engine. Press any function key to start up
the engine before operating the loco. To shut down the engine you must bring the
loco to idle and then press F8 three times.
Double click F0 will turn on/off sound (CV49). You can’t turn off horn which is
always on. The decoder has four types of diesel prime movers. You can use F12
or CV 123 to select the desired prime mover sound or turn them off. If you want
the decoder to be used in an Electric Type Traction Loco such as Trolley or GG-1
set CV 123=4 to turn off the diesel sound. With the prime mover sounds shut off,
CV 123=4, the traction air compressor will cycle on and off randomly, of course
you can still use F11 to activate the compressor whenever you want while in the
random mode. You can use F19 to select 34 different horn sounds and use F18
to select 8 different bell sounds. With MRC Prodigy Advance2DCC which has 28
functions, you can easily setup and access all the decoder’s functions. If not,
you may not be able to access all the features of the decoder. And you have to
use the CV program to setup the decoder.
This decoder allows certain functions to be re-mapped easily, ( CV numbers- 37,
39 and 42). If the values of these CV’s are set to “0” (default), normal DCC
keypad/functions are applicable. Inseting the values shown in the CV chart
allows certain function swapping for example: F3 becomes F4 and vice versa.
The decoder default is set to automatic notch. You can program CV122 to 3 for
manual notch for realistic operation. And then use F9 to notch up and use F8 to
notch down.
The decoder can also be operated by a regular DC power pack. This will give
you synchronized engine sounds only. If you wish to enjoy the full array of
sound functions using your DC power pack, the unique MRC Blackbox (item
#0001050) for DC operation will allow you to control all of the sounds in your
sound equipped locomotives. And, the MRC Blackbox is easy to setup and use.
Note: Bell, Dynamic Brake, and Rail Wheel Clack cannot play at the same time.
LIGHT EFFECT PROGRAMMING CHART FOR CV#118/119
Program CV117 to choose 3 different modes of headlight effects (0=normal
directional, 1=off/dim/bright cycle, 2=rule 17). Both ACC1 and ACC2 has 7
different accessory lights effects. Program CV #118/119 to choose the desired
light effect. CV118 for ACC1 and CV119 for ACC2. For ditch light both CV118 and
CV119 must be 0. In ditch light mode, use F3 to turn on/off and use F28 to enable/
disable flash. When you blow the horn the ditch lights will flash. The ditch lights
will remain flashing for several seconds after horn is off.
Right side pickup
Front
light Motor Rear
light
Left side pickup
X X
X X X
X
CV118/119 value ACC#1/ACC#2 Light effect
0 Ditch light
1 Gyra light
2 Marslight
3 Prime strato light
4 Single strobe light
5 Double strobe light
6on/off
Function Idle/Moving
F0 Headlight on/off or rule 17 or cycle of dim, bright, off
Double F0 Double click F0 within 1 second will turn on/off sound (CV49) with Horn on
F1 Bell on/off
F2 Horn
F3 Ditch lights on/off or Acc1 light on/off with air release
F4 Coupling 1
F5 Brake release (idle) / brake squeal (moving)
F6 Dynamic brake on/off
F7 Air hose firing/uncoupling lever
F8 Click 3 times during idle will shut down / notch down while CV122=3
F9 Engine cooling fan / notch up while CV122=3
F10 Rail wheel clack (only moving)
F11 Traction air compressor on/off
F12 Change prime mover type and prime mover off
F13 Acc2 light on/off with air release
F14 Coupler lift bar
F15 Air pump
F16 Associated loco sound
F17 Flange noise 1
F18 Change bell type (use F1 to turn off bell after adjustment)
F19 Horn type select (total 34 different horns)
F20 Associated loco sound
F21 Change bell volum e (use F1 to turn off bell after adjustment)
F22 Change horn volume
F23 Change diesel rumble volume
F24 Air release
F25 Flange noise 2
F26 Flange noise 3
F27 Sand drop
F28 Ditch lights steady on/off (CV121) with Air release, use F3 to turn on/off
1
orange
black
red
orange
gray
yellow
white
right
blue
headlight
rear light
black
left
black
28mm speaker
with cap
DCC base unit
Power supply Test track
27 ohm resistor
Figure 3. Diagram of test track

Other MRC Media Converter manuals

MRC 0001922 User manual

MRC

MRC 0001922 User manual

MRC 0001817 User manual

MRC

MRC 0001817 User manual

MRC 0001658 User manual

MRC

MRC 0001658 User manual

MRC 0001916 User manual

MRC

MRC 0001916 User manual

MRC 0001956 User manual

MRC

MRC 0001956 User manual

MRC 0001808 User manual

MRC

MRC 0001808 User manual

MRC Sheer Brilliance 0001643 User manual

MRC

MRC Sheer Brilliance 0001643 User manual

MRC SOUNDER 0001662 User manual

MRC

MRC SOUNDER 0001662 User manual

MRC 0001750 User manual

MRC

MRC 0001750 User manual

MRC 0001811 User manual

MRC

MRC 0001811 User manual

MRC 0001628 User manual

MRC

MRC 0001628 User manual

MRC 1651 User manual

MRC

MRC 1651 User manual

MRC 0001806 User manual

MRC

MRC 0001806 User manual

MRC 0001663 User manual

MRC

MRC 0001663 User manual

MRC 0001958 User manual

MRC

MRC 0001958 User manual

MRC 0001911 User manual

MRC

MRC 0001911 User manual

MRC 0001959 User manual

MRC

MRC 0001959 User manual

MRC 0001626 User manual

MRC

MRC 0001626 User manual

MRC AD370 User manual

MRC

MRC AD370 User manual

MRC 0001611 User manual

MRC

MRC 0001611 User manual

MRC Sheer Brilliance 0001637 User manual

MRC

MRC Sheer Brilliance 0001637 User manual

MRC AD332 User manual

MRC

MRC AD332 User manual

MRC 0001910 2 User manual

MRC

MRC 0001910 2 User manual

MRC 1651 User manual

MRC

MRC 1651 User manual

Popular Media Converter manuals by other brands

Stereoping synth programmer Operation manual

Stereoping

Stereoping synth programmer Operation manual

Lika Rotacod XAC81 PL Series Mounting instructions

Lika

Lika Rotacod XAC81 PL Series Mounting instructions

TFT 3320 instructions

TFT

TFT 3320 instructions

LH Technologies LH 500 Operator's manual

LH Technologies

LH Technologies LH 500 Operator's manual

Dometic SMP 301 installation manual

Dometic

Dometic SMP 301 installation manual

Blankom IRD-6100 user manual

Blankom

Blankom IRD-6100 user manual

Actox ABE10KXHM user manual

Actox

Actox ABE10KXHM user manual

Korenix JetCon 1100 Series user manual

Korenix

Korenix JetCon 1100 Series user manual

Siemens SINAMICS S150 operating instructions

Siemens

Siemens SINAMICS S150 operating instructions

Avenview SPLIT-HDM2-T4K-2 manual

Avenview

Avenview SPLIT-HDM2-T4K-2 manual

Dagan HDSP04V15 user manual

Dagan

Dagan HDSP04V15 user manual

ADF Web HD67B18-B2 user manual

ADF Web

ADF Web HD67B18-B2 user manual

ADF Web HD67867-A1-2A user manual

ADF Web

ADF Web HD67867-A1-2A user manual

Gilson SP-245 operating manual

Gilson

Gilson SP-245 operating manual

Moxa Technologies VPort 254 Series Quick installation guide

Moxa Technologies

Moxa Technologies VPort 254 Series Quick installation guide

Leviton NPC DHV user guide

Leviton

Leviton NPC DHV user guide

Gefen GTB-UHD600-18S-RT user manual

Gefen

Gefen GTB-UHD600-18S-RT user manual

DOTECH AX7241 manual

DOTECH

DOTECH AX7241 manual

manuals.online logo
manuals.online logoBrands
  • About & Mission
  • Contact us
  • Privacy Policy
  • Terms and Conditions

Copyright 2025 Manuals.Online. All Rights Reserved.