manuals.online logo
Brands
  1. Home
  2. •
  3. Brands
  4. •
  5. MRC
  6. •
  7. Media Converter
  8. •
  9. MRC 0001905 User manual

MRC 0001905 User manual

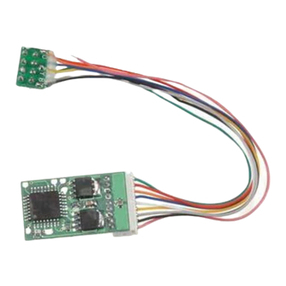
HO Gauge DC/DCC Diesel Sound Decoder
Fits Many Atlas/Kato/Athearn/Intermountain Locomotives
Item #0001905
Thankyouforpurchasingourmostadvanced16bitDC/
DCClocomotivesounddecoder.CombinedwithanyDCC
System, MRC Blackbox or Tech 6, our true live capture
digital sound decoder will make your model railroad come
to life.
•Three types of synchronized prime mover sounds:
Alco 539T /SD70/Electric Loco
•1.5 amp capacity
•22 different types of horns and 8 types of bells
•Adjustable individual sound volumes (16 levels)
•Programmable either 2-digit or 4-digit addresses
•Programmable start voltage and top voltage
•Programmable acceleration and decelaration rates
•Programmable 14, 28, 128 speed steps
•Back EMF load control
•Supports read back address and CV value
•Selectable factory default speed curve
•Advanced speed table control CV67-CV94
•Kick start voltage control CV65
•Easy function mapping
•7 accessory light effects: ditch lights, mars light,
gyra light, strobe light, prime strobe light and on/off
•28 accessory functions (F1-F28)
•Supports advanced consisting (CV19)
•Supports programming on the main (OPS mode)
•Compatible with NMRA DCC standards
•Complies with Part 15 of FCC Rules
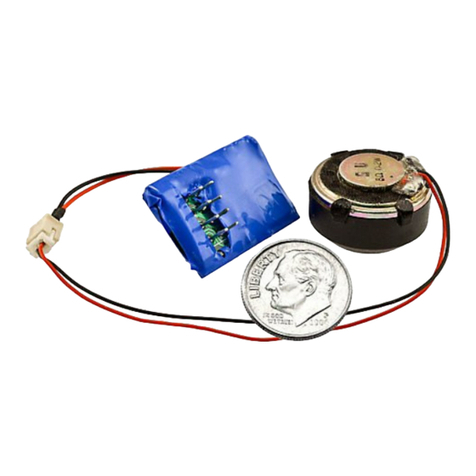
•18 mm speaker included
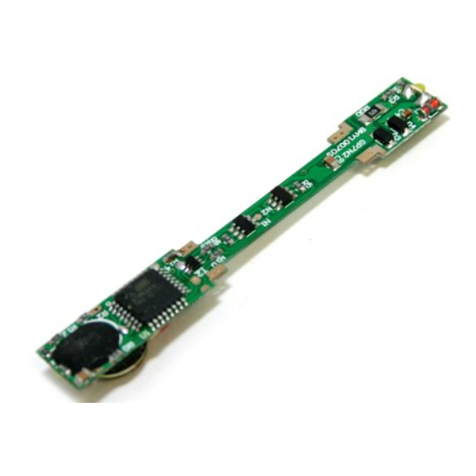
•Dimensions: 73.0mm x 17.8mm x 7.7mm
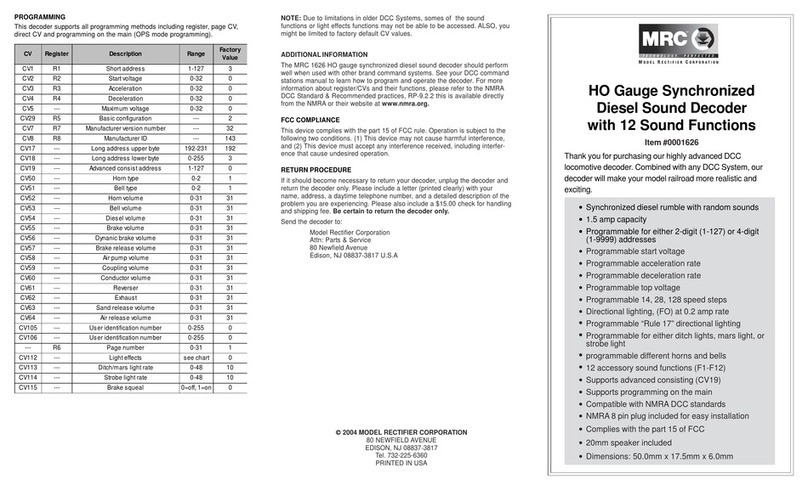
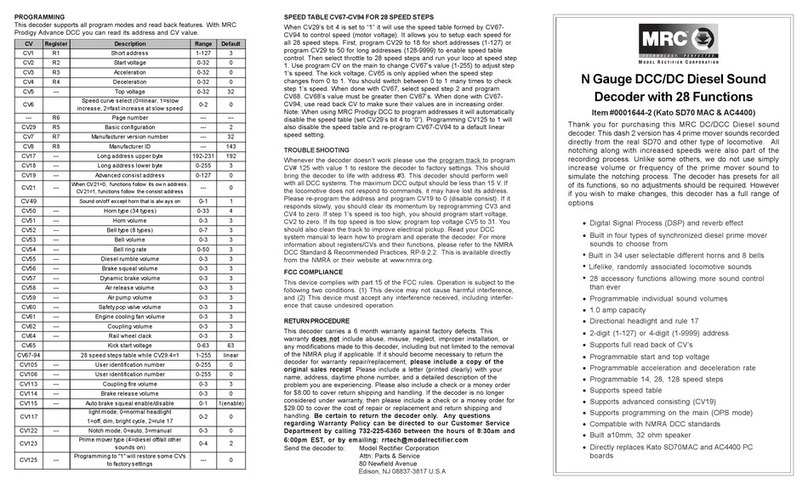
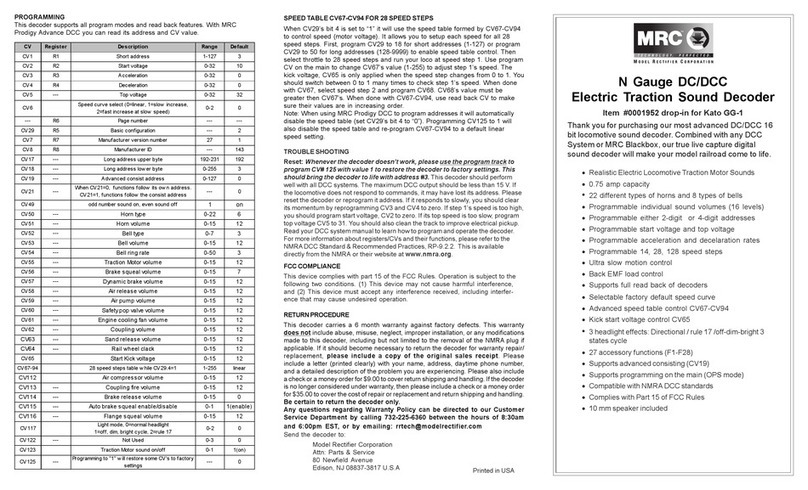
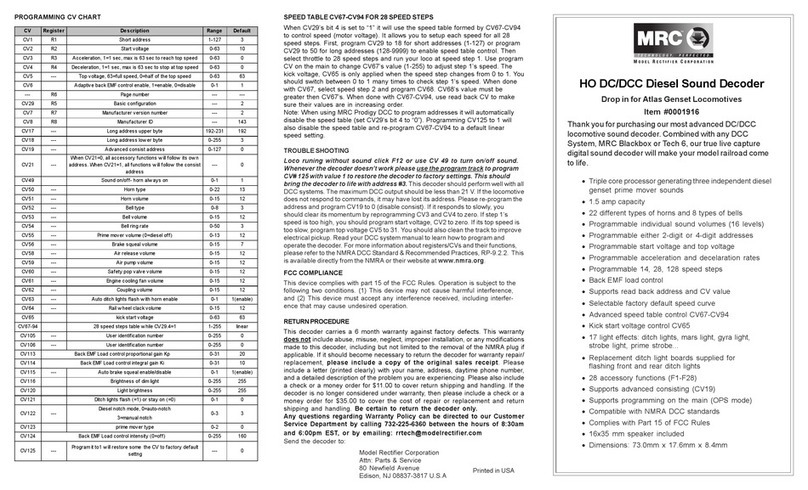
PROGRAMMING
This decoder supports all program modes and read back features. With MRC
Prodigy Advance DCC you can read its address and CV value.
Printed in USA
SPEED TABLE CV67-CV94 FOR 28 SPEED STEPS
When CV29’s bit 4 is set to “1” it will use the speed table formed by CV67-CV94
to control speed (motor voltage). It allows you to setup each speed for all 28
speed steps. First, program CV29 to 18 for short addresses (1-127) or program
CV29 to 50 for long addresses (128-9999) to enable speed table control. Then
select throttle to 28 speed steps and run your loco at speed step 1. Use program
CV on the main to change CV67’s value (1-255) to adjust step 1’s speed. The
kick voltage, CV65 is only applied when the speed step changes from 0 to 1. You
should switch between 0 to 1 many times to check step 1’s speed. When done
with CV67, select speed step 2 and program CV68. CV68’s value must be
greater then CV67’s. When done with CV67-CV94, use read back CV to make
sure their values are in increasing order.
Note: When using MRC Prodigy DCC to program addresses it will automatically
disable the speed table (set CV29’s bit 4 to “0”). Programming CV125 to 1 will
also disable the speed table and re-program CV67-CV94 to a default linear
speed setting.
TROUBLESHOOTING
Loco runing without sound click F12 turn on prime mover sound. Whenever
the decoder doesn’t work please use the program track to program CV# 125
with value 1 to restore the decoder to factory settings. This should bring the
decoder to life with address #3. This decoder should perform well with all DCC
systems. The maximum DCC output should be less than 21 V. If the locomotive
does not respond to commands, it may have lost its address. Please re-program the
address and program CV19 to 0 (disable consist). If it responds to slowly, you
should clear its momentum by reprogramming CV3 and CV4 to zero. If step 1’s
speed is too high, you should program start voltage, CV2 to zero. If its top speed is
too slow, program top voltage CV5 to 31. You should also clean the track to improve
electrical pickup. Read your DCC system manual to learn how to program and
operate the decoder. For more information about registers/CVs and their functions,
please refer to the NMRADCC Standard & Recommended Practices, RP-9.2.2. This
is available directly from the NMRA or their website at www.nmra.org.
FCC COMPLIANCE
This device complies with part 15 of the FCC Rules. Operation is subject to the
following two conditions. (1) This device may not cause harmful interference,
and (2) This device must accept any interference received, including interfer-
ence that may cause undesired operation.
RETURNPROCEDURE
This decoder carries a 6 month warranty against factory defects. This warranty
does not include abuse, misuse, neglect, improper installation, or any modifications
made to this decoder, including but not limited to the removal of the NMRA plug if
applicable. If it should become necessary to return the decoder for warranty repair/
replacement, please include a copy of the original sales receipt. Please
include a letter (printed clearly) with your name, address, daytime phone number,
and a detailed description of the problem you are experiencing. Please also include
acheckor a money orderfor$9.00tocoverreturnshipping and handling. If thedecoder
is no longer considered under warranty, then please include a check or a money order
for $35.00 to cover the cost of repair or replacement and return shipping and handling.
Be certain to return the decoder only.
Any questions regarding Warranty Policy can be directed to our Customer
Service Department by calling 732-225-6360 between the hours of 8:30am
and 6:00pm EST, or by emailing: rrtech@modelrectifier.com
Send the decoder to: Model Rectifier Corporation
Attn: Parts & Service
80 Newfield Avenue
Edison, NJ 08837-3817 U.S.A
CV Register Description Range Default
CV1 R1 Short address 1-127 3
CV2R2Startvoltage0-320
CV3 R3 Acceleration 0-32 0
CV4 R4 Deceleration 0-32 0
CV5 --- Top voltage 0-32 32
CV6 Speed curve select (0=linear, 1=slow increase,
2=fast increase at slow speed 0-2 0
--- R6 Page number --- ---
CV29 R5 Basic configuration --- 2
CV7 R7 Manufacturer version number --- 2
CV8 R8 Manufacturer ID --- 143
CV17 --- Long address upper byte 192-231 192
CV18 --- Long address lower byte 0-255 3
CV19 --- Advanced consist address 0-127 0
CV37 0=normal, 1=F3 and F4 exchange 0-1 0
CV39 0=normal, 1=F5 and F6 exchange 0-1 0
CV42 0=normal, 1=F8 and F12 exchange 0-1 0
CV49 All sounds on/off 0-1 1
CV50 --- Horn type 0-22 13
CV51 --- Horn volume 0-15 12
CV52 --- Bell type 0-6 3
CV53 --- Bell volume 0-15 12
CV54 --- Bell ring rate 0-50 3
CV55 --- Prime mover volume 0-15 12
CV56 --- Brake squeal volume 0-15 7
CV57 --- Dynamic brake volume 0-15 12
CV58 --- Air release volume 0-15 12
CV59 --- Air pump volume 0-15 12
CV60 --- Safety pop valve volume 0-15 12
CV61 --- Engine cooling fan volume 0-15 12
CV62 --- Coupling volume 0-15 12
CV63 --- Auto ditch lights flash with horn enable 0-1 1(enable)
CV64 --- Rail w heel clack 0-15 12
CV65 Kick start voltage 0-63 63
CV67-94 28 speed steps table w hile CV29.4=1 1-255 linear
CV113 --- Back EMF Load control proportional gain Kp 0-31 20
CV114 --- Back EMF Load control integral gain Ki 0-31 10
CV115 --- Auto brake squeal enable/disable 0-1 1(enable)
CV118-119 Accessory light mode 0-6 0
CV118 ACC1 light mode 0-6 0
CV119 ACC2 light mode 0-6 0
CV121 --- Mars lights flashing on/off(F28) 0-1 0
CV122 --- Diesel Notch mode, 0=auto, 3=manual 0-3 0
CV123 --- Prime mover type 0-3 0
CV124 0-255 160
CV125 ---
Programming to "1" will restore some CV's to factory
settings --- 0
Back EMF Load control intensity (0=off)
0CV21 --- When CV21=0, functions follow its ow n address.
CV21=1, functions follow the consist address ---
INSTALLATION
For newer locomotives with circuit board and wires, simply remove the old circuit
board and follow the diagram to install the decoder. Hook up the front headlight to
the tabs marked as FL and COM. Hook up the rear headlight to the tabs marked as
RL and COM. For accessory light, hook up toACC and COM.
For older model locomotives such as Atlas/Kato RS-1, RS-3 and RSD-4,
follow the installation tips.
There are no bulbs furnished with this decoder, as modification to the internal light
bars and internal weights may be needed to complete installation. New lenses and
bulb retainers are to be fabricated by the decoder installer. Use of DCC rated bulbs
is reccomended. The speaker is attached to the decoder with a plug. If you have
enough room inside the locomotive, a larger speaker from MRC can be used in place
of the 18mm round one included.
Remove the body shell of the locomotive by following the directions that came with
it. There is a centrally mounted board mounted on the chassis with one light bulb
mounted to it. Disconnect the four black pick up wires that are attached to the
corners of the board and label them right side and left side. Gently slide the motor
brush pick up tabs from under the brass pick up strips running lengthwise across the
circuit board. Pop the board off the retention clips and discard. Cut the motor brush
pick up tabs slightly short, leaving enough room to solder a short piece of wire to
each tab. These two wires then get soldered to the decoder’s motor terminals, [see
diagram]. Solder the four pick up wires from the trucks to the four corner terminals of
the decoder, keeping left side pick up wires to one side of the board and right side
pick up wires to the other side of the board, [see diagram]. Before attaching the
decoder to the retention clips on top of the motor, place a piece of insulating tape on
top of the motor to isolate the bottom of the decoder to the top of the motor, motor
brush tabs and wires. Decoder orientation does not matter as some locos ran long
hood forward and some ran short hood forward. If the locos direction does not match
your particular road name, you can reverse the decoder orientation, or reverse the
two wires on the motor brush terminals, or program CV # 29 to reverse direction.
There are two light bars running lengthwise inside the body shell. These must be
shortened or removed to accomodate the decoder. Choice of headlight/number
board lighting is left up to the decoder installer. The speaker can be mounted on
the decoder in the space provided if there is enough internal body shell clear-
ance. If not it can be mounted to the underside of one of the hoods. Some of
these locos have weights that sit over the gear towers, these must be trimmed
down to gain clearance when mounting the speaker to the undersides of the
hoods. Remove the paper backing from the face of the speaker to expose the
glue ring and press speaker into the desired location.
If your loco has more space for a large speaker we recommend to order 20mm
or even 28mm speaker for a better sound quality.
If you use 1.5V bulbs or LED’s, you should connect a 2k ohm resistor in series to
one of the leads to limit current.
MAKING A TEST TRACK
We strongly recommend building a test track with a 27 ohm resistor to limit
current. Only test your installed decoder on the test track. The test track will
reduce the chance of damaging your decoder due to an incorrectly installed
decoder.
TESTING
The decoder has been programmed to address #3, 28/128 speed steps. To test,
place the loco on the test track. Select address #3 and 28 speed step. Move up
the throttle and the loco should move. Push the light button [F0] and headlight
should come on. Change the direction of the loco and the loco should change
direction. The loco cannot reach full speed, due to the resistor. If all the above
occurs, you passed the test. Congratulations! Do not run the loco for an extended
period of time on the test track or the resistor will overheat. If your installed
decoder does not pass the test, find the problem, correct it and test it again. As long
as you test the decoder on the test track there is little chance of damaging the
decoder. This is why the test track is so important.
OPERATION
The decoder has start up and shut down features. If the loco was previously
shut down you have to start up the engine. Press any function key to start up the
engine before operating the loco. To shut down the engine you must bring the
loco to idle and then press F8 three times.
The decoder has three types of prime mover sound effects. You can use F12 or
CV 123 to select the desired prime mover sound or turn them off. Set CV123 to 0
for Alco, to 1 for SD70 or SD60, to 2 for electric loco, and to 3 for prime mover
sound off. You can use F19 to select 22 different horn sounds and use F18 to
select 8 different bell sounds. With MRC Prodigy Advance2DCC which has 28
functions, you can easily setup and access all the decoder’s functions. If not,
you may not be able to access all the features of the decoder. And you have to
use the CV program to setup the decoder.
This decoder allows certain functions to be re-mapped easily, ( CV numbers- 37,
39 and 42). If the values of these CV’s are set to “0” (default), normal DCC
keypad/functions are applicable. Inseting the values shown in the CV chart
allows certain function swapping for example: F3 becomes F4 and vice versa.
BACK EMF LOAD CONTROL (PID CONTROLLER)
This decoder is equipped with adjustable back EMF load control feature. It is a
closed loop speed control. With back EMF load control the locomotive will maintain its
speed regardless of pulling up hill or driving down hill. You may program the back EMF
load control intensity, CV124, to a lower value to get less back EMF load control. This
will enable the locomotive to slow down during uphill travel like real locomotive.
The PID controller contains three components: proportional gain (CV113); the
integral gain (CV114); and derivative gain (fixed). Designing (tuning) a PID
controller is a kind of “rocket science”. So optimized these gains at the factory
but still give the customer final adjustments. We recommend that you do not
change these settings. Too much gain may cause the motor to oscilate (become
unstable). Too little gain may cause slow response. Additional knowledge of PID
feedback control is required before attempting to adjust CV113 and CV114. If
CV113 and CV114 are programmed incorrectly, the locomotive will not run smothly.
Program CV125 to “1” will automatically restore the default PID controller settings.
The decoder default is set to automatic notch. You can program CV122 to 3
for manual notch for realistic operation. And then use F9 to notch up and use
F8 to notch down.
LIGHT EFFECT PROGRAMMING CHART FOR CV#118/119
Both ACC1 and ACC2 has 7 different accessory lights effects. Program CV
#118/119 to choose the desired light effect. CV118 for ACC1 and CV119 for
ACC2. For ditch light both CV118 and CV119 must be 0. In ditch light mode, use F3
to turn on/off and use F28 to enable/disable flash. When you blow the horn the
ditch lights will flash. The ditch lights will remain flashing for several seconds
after horn is off.
CV118/119 value ACC#1/ACC#2 Light effect
0 Ditch light
1 Gyra light
2Marslight
3 Prime strato light
4 Single strobe light
5 Double strobe light
6 on/off
Function Idle/Moving
F0 Lights on/off
F1 Bell on/off
F2 Horn
F3 Mars light on/off with air release
F4 Coupling 1
F5 Brake release (idle) /brake squeal (moving)
F6 Dynamic brake on/off
F7 Air hose firing/uncoupling lever
F8 3 times will shut down when in idle / Manual notch down
F9 Engine cooling fan /Manual notch up
F10 Rail wheel clack(onlymoving)
F11 Traction air compressor
F12 Change prime mover type,(3 types and off)
F13 Short air release
F14 Coupler crash
F15 Air compressor
F16 Flange squeal
F17 Air release
F18 Change bell type (use F1 to turn off bell after adjustment)
F19 Horn type select(total 22 differenthorns)
F20 Associated loco sound
F21 Change bell volume (use F1 to turn off bell afteradjustment)
F22 Change horn volume
F23 Change prime movervolume
F24 Safetyvalve pop
F25 Air release
F26 Flange noise
F27 Sand drop
F28 Mars light flash enable/disable with Air release (CV121)
com
com
pick up pick up
pick up pick up
front light
motor
motor
ACC1
ACC2
rear light
speaker connector
Figure 2. Diagram of test track
DCC base unit
Power supply
Test track
27 ohm resistor

Other MRC Media Converter manuals

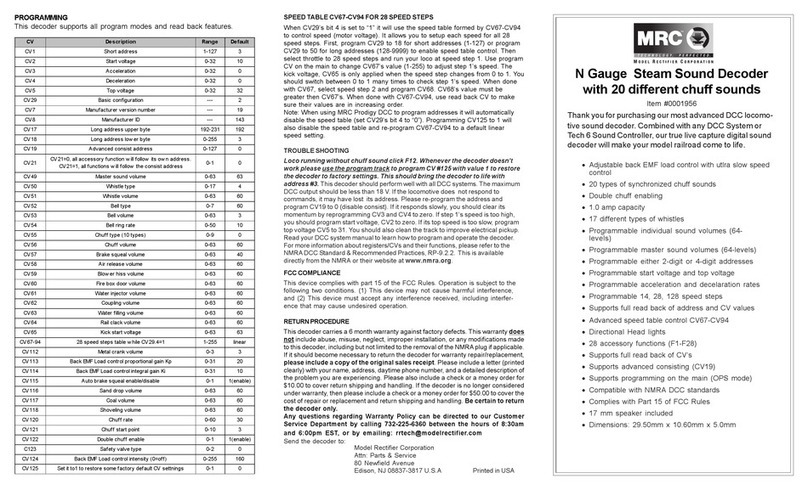
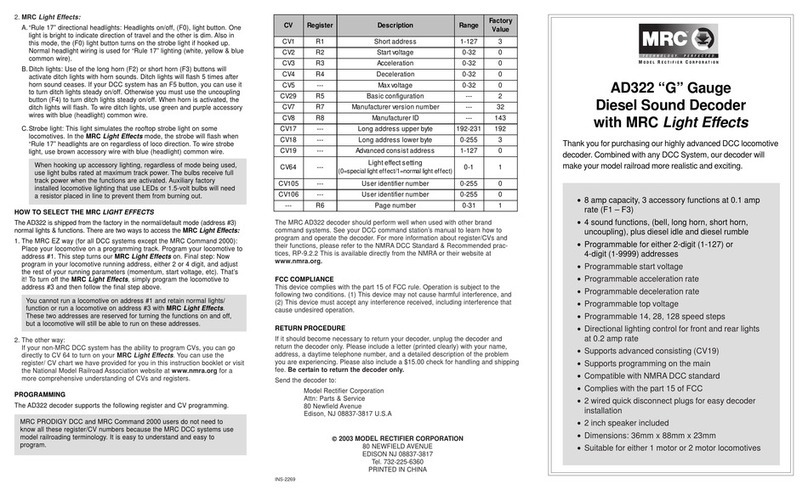
MRC AD322 User manual

MRC

MRC AD322 User manual

MRC 0001800 3 User manual

MRC

MRC 0001800 3 User manual

MRC SOUNDER 0001662 User manual

MRC

MRC SOUNDER 0001662 User manual

MRC 0001634 User manual

MRC

MRC 0001634 User manual

MRC 0001750 User manual

MRC

MRC 0001750 User manual

MRC 0001805 User manual

MRC

MRC 0001805 User manual

MRC 0001829 User manual

MRC

MRC 0001829 User manual

MRC AD370 User manual

MRC

MRC AD370 User manual

MRC Sheer Brilliance 0001637 User manual

MRC

MRC Sheer Brilliance 0001637 User manual

MRC 0001906 User manual

MRC

MRC 0001906 User manual

MRC 0001656 User manual

MRC

MRC 0001656 User manual

MRC 0001629 User manual

MRC

MRC 0001629 User manual

MRC 0001630 User manual

MRC

MRC 0001630 User manual

MRC 1650 User manual

MRC

MRC 1650 User manual

MRC 0001811 User manual

MRC

MRC 0001811 User manual

MRC Sheer Brilliance 0001638 User manual

MRC

MRC Sheer Brilliance 0001638 User manual

MRC 0001658 User manual

MRC

MRC 0001658 User manual

MRC 0001827 User manual

MRC

MRC 0001827 User manual

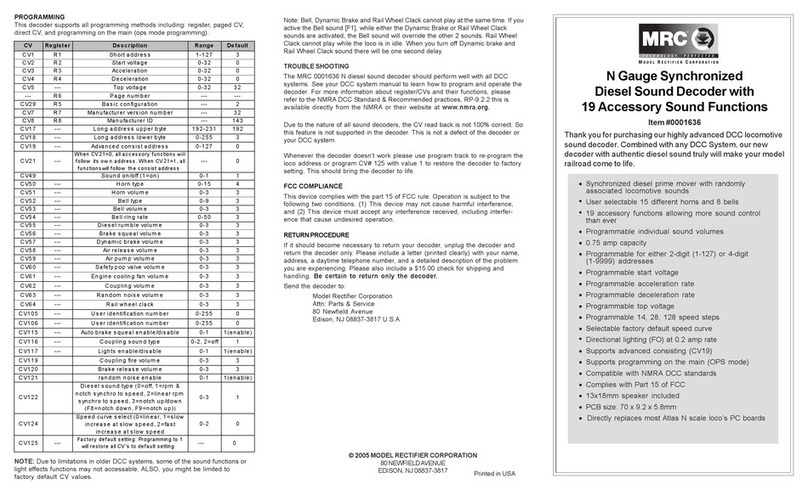
MRC 0001636 User manual

MRC

MRC 0001636 User manual

MRC 0001628 User manual

MRC

MRC 0001628 User manual

MRC 0001820 User manual

MRC

MRC 0001820 User manual

MRC 0001806 User manual

MRC

MRC 0001806 User manual

MRC 0001821 User manual

MRC

MRC 0001821 User manual

MRC 0001869 User manual

MRC

MRC 0001869 User manual

Popular Media Converter manuals by other brands

Transition Networks SI-IES-111D-LRT user guide

Transition Networks

Transition Networks SI-IES-111D-LRT user guide

golmar CD-PLUS/4+N instruction manual

golmar

golmar CD-PLUS/4+N instruction manual

Numerik Jena LIKselect Original user manual

Numerik Jena

Numerik Jena LIKselect Original user manual

Jensen ISO-MAX MEDIA-1 owner's manual

Jensen

Jensen ISO-MAX MEDIA-1 owner's manual

CYP CPLUS-V10E Operation manual

CYP

CYP CPLUS-V10E Operation manual

Vacon CX manual

Vacon

Vacon CX manual

Bluestream DA11USB Quick reference guide

Bluestream

Bluestream DA11USB Quick reference guide

Vigitron MaxiiFiber Vi5001 Installation

Vigitron

Vigitron MaxiiFiber Vi5001 Installation

Miditech Midiface 8x8 owner's manual

Miditech

Miditech Midiface 8x8 owner's manual

König Electronic KN-HDMICON25 manual

König Electronic

König Electronic KN-HDMICON25 manual

TR-Electronic CES582M-8192/4096 ETC DMS 12H7 KRF Assembly instructions

TR-Electronic

TR-Electronic CES582M-8192/4096 ETC DMS 12H7 KRF Assembly instructions

epiphan video SDI2USB 3.0 user guide

epiphan video

epiphan video SDI2USB 3.0 user guide

Conrad 98 92 70 operating instructions

Conrad

Conrad 98 92 70 operating instructions

Lynx C AD 5111 Reference manual

Lynx

Lynx C AD 5111 Reference manual

StarTech.com USB32DVCAPRO instruction manual

StarTech.com

StarTech.com USB32DVCAPRO instruction manual

Allied Telesis AT-PB300 Series Quick install guide

Allied Telesis

Allied Telesis AT-PB300 Series Quick install guide

Westell VirtualEdge VELGX-90 installation guide

Westell

Westell VirtualEdge VELGX-90 installation guide

Altronix NetWaySP2P installation guide

Altronix

Altronix NetWaySP2P installation guide

manuals.online logo
manuals.online logoBrands
  • About & Mission
  • Contact us
  • Privacy Policy
  • Terms and Conditions

Copyright 2025 Manuals.Online. All Rights Reserved.