MSI Saturn 900 User manual

Saturn900/945Series
G52-64661X1
Saturn900 /945 Series

ii
ThisdevicecomplieswithPart 15ofthe FCCRules.Operation issubject tothe
followingtwoconditions:
(1)thisdevicemaynotcauseharmful interference,and
(2)thisdevicemustacceptanyinterferencereceived,including interferencethat
maycauseundesiredoperation.
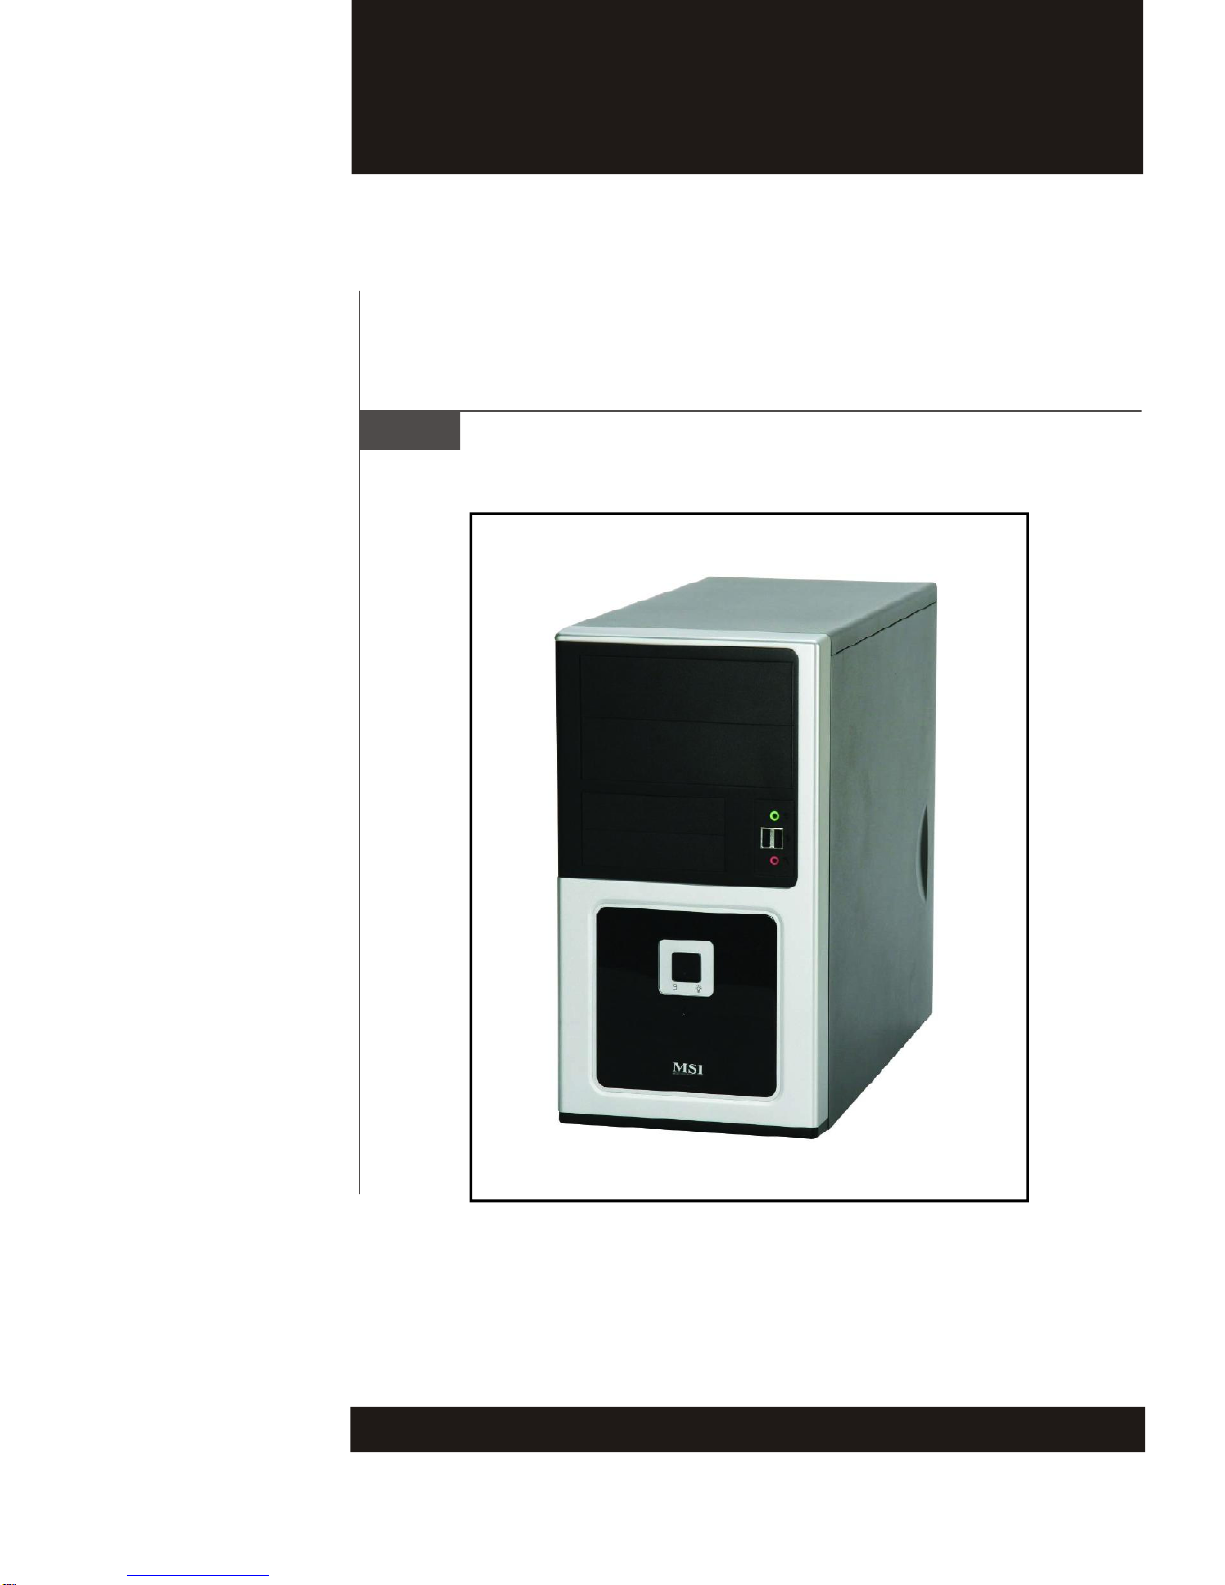
Saturn900/ 945Series
FCC-BRadio Frequency Interference Statement
Thisequipment hasbeen testedand
found tocomplywiththelimitsfora
class Bdigitaldevice,pursuantto
part15 of the FCCrules. Theselimits
aredesignedtoprovidereasonable
protectionagainstharmfulinterferencein aresidentialinstallation.Thisequipment
generates,usesand canradiateradiofrequencyenergyand,if notinstalled and
usedin accordancewiththeinstructionmanual,maycauseharmful interferenceto
radiocommunications.However,thereisno guaranteethatinterferencewill not
occurinaparticularinstallation.Ifthisequipmentdoescauseharmfulinterferenceto
radio ortelevisionreception,whichcanbedeterminedbyturning theequipmentoff
andon, theuserisencouraged totrytocorrect theinterferencebyone ormoreof the
measureslistedbelow.
=Reorientorrelocatethe receiving antenna.
=Increasetheseparationbetweentheequipmentandreceiver.
=Connectheequipmentintoanoutletonacircuitdifferentfromthattowhichthe
receiverisconnected.
=Consultthedealeroran experiencedradio/televisiontechnicianforhelp.
Notice1
Thechangesormodificationsnotexpresslyapprovedbythepartyresponsiblefor
compliancecould void theuser sauthoritytooperatetheequipment.
Notice2
Shielded interfacecablesandA.C.powercord,if any,mustbeusedin orderto
complywiththeemissionlimits.
VOIRLANOTICED INSTALLATIONAVANT DERACCORDERAURESEAU.

iii
Trademark
All trademarksarethepropertiesof theirrespectiveowners.
Intel®andPentium®areregistered trademarks ofIntel Corporation.
PS/2andOS®/2areregistered trademarksofInternationalBusiness Machines
Corporation.
Windows®95/98/2000/NT/XP areregistered trademarks ofMicrosoft Corporation.
Netware®isaregistered trademarkof Novell,Inc.
Award®isaregisteredtrademarkof PhoenixTechnologiesLtd.
AMI®isaregisteredtrademarkofAmericanMegatrendsInc.
U.S.PatentNumbers
4,631,603;4,819,098;4,907,093;5,315,448;and6,516,132.
ThisproductincorporatescopyrightprotectiontechnologythatisprotectedbyU.S.
patentsandotherintellectual propertyrights.Useofthiscopyrightprotection technol-
ogymustbeauthorized byMacrovision,and isintendedforhomeand otherlimited
viewing usesonlyunless otherwiseauthorizedbyMacrovision.Reverseengineering
ordisassemblyisprohibited.
RevisionHistory
Revision Revision History Date
V1.0 First Release April2007

iv
1. Alwaysread the safetyinstructions carefully.
2. KeepthisUser sManualfor futurereference.
3. Keepthisequipmentawayfromhumidity.
4. Laythisequipment onareliableflat surfacebeforesetting it up.
5. Theopeningsontheenclosurearefor air convectionhenceprotectsthe
equipmentfromoverheating.DONOTCOVERTHEOPENINGS.
6. Makesurethevoltage of thepowersourceand adjust properly110/220V
beforeconnecting theequipment tothepower inlet. Rating: 110-120V/ 220-
240V,8/4.5A, 60/50Hzor 220-240V,4A, 50Hz.
7. Placethe power cordsuchawaythat peoplecannot steponit. Donot
placeanythingover thepowercord.
8. AlwaysUnplug thePower Cordbeforeinserting any add-oncardor module.
9. All cautionsand warningsontheequipment shouldbenoted.
10. Never pourany liquidintotheopening that coulddamageorcauseelectrical
shock.
11. If any of thefollowing situationsarises, gettheequipment checkedbyservice
personnel:
- Thepower cordor plug isdamaged.
-Liquidhaspenetratedintotheequipment.
- Theequipment hasbeenexposedtomoisture.
- Theequipment doesnot workwell oryoucannot getit workaccording to
User sManual.
-The equipmenthasdroppedanddamaged.
- Theequipment hasobvioussign of breakage.
12. DONOTLEAVETHISEQUIPMENTINANENVIRONMENTUNCONDITIONED,
STORAGETEMPERATUREABOVE400 C(1020F),ITMAYDAMAGETHE
EQUIPMENT.
SafetyInstructions
CAUTION:Dangerofexplosionifbatteryisincorrectlyreplaced.
Replaceonlywiththesameorequivalenttyperecommendedbythe
manufacturer.

v
Warning:
1.For everychangesinpowercord susage, pleaseuse an approvedpower
cordwithconditiongreaterorequaltoH05VV-F,3G,0.75mm2.
2.Internalpart ishazardousmoving parts,pleasekeepfingersand other
bodypartsaway.
3.Forpluggableequipment,thesocket-outletshallbeinstallednearthe
equipmentand shall beeasilyaccessible.
4.Donot disabletheprotective earthpinfromthe plug,theequipment must
beconnectedtoanearthedmainssocket-outlet.

vi
WEEE Statement

vii

viii

ix
CONTENTS
FCC-B Radio Frequency InterferenceStatement................................ii
Trademark......................................................................................iii
U.S.Patent Numbers......................................................................iii
Revision History..............................................................................iii
SafetyInstructions..........................................................................iv
WEEEStatement...........................................................................vi
Chapter 1.Getting Started.........................................................1-1
SystemConfiguration..............................................................1-2
FrontView.......................................................................1-2
Back View.......................................................................1-3
InternalPlacement............................................................1-4
Chapter2. SystemAssembly......................................................2-1
Overview.................................................................................2-2
InstallationTools...............................................................2-2
Installation Screws............................................................2-2
Checking theItems...........................................................2-3
InstallationProcedures............................................................2-4
RemovingCovers..............................................................2-4
Installing OpticalDiskDrive(ODD).....................................2-7
InstallingCardReader(CR)orFloppyDiskDrive(FDD).........2-9
Installing IDEHardDisk Drive(HDD).................................2-10
InstallingSATAHardDiskDrive(HDD)...............................2-12
Installing PCICard............................................................2-14
Installing PCIExpress Card..............................................2-16
RestoringCovers...............................................................2-18
CompleteInstallation.........................................................2-21


Chapter1
Getting Started
Congratulationsforpurchasing MSI®Saturn900/ 945
Series(MS-6469 / MS-6466).MSI®Saturn900/ 945
SeriesisyourbestMini-TowerPCchoice.
Formore informationaboutthebuilt-in
mainboard'sspecification,pleaserefer
tothemainboardmanualinthepackage.
ONLYFORSERVICEPERSONEL

Saturn900 / 945Series
1-2
SystemConfiguration
FrontView
1.5.25”DriverBay(forODD) 5.Microphone(Pink)
2.3.5”DriverBay(forCR orFDD) 6.PowerButton /PowerLED
3.Headphone/Speaker(Green) 7.ResetButton
4.USB2.0Ports
*Thispictureisforyourreferenceonlyandmayvaryfromthe differentitemyou
installed.

1-3
Getting Started
BackView
1.VoltageSelector 7.ParallelPort
2.PowerJack 8.VGAPort(D-Sub15)
3.PowerSwitch 9.LAN Jack (RJ45)
4.PS/2Mouse(Green) 10.USB2.0Ports
5.PS/2Keyboard(Purple) 11.Audio Jacks
6. SerialPort 12.ExpansionSlots
*TheInput/Output(I/O)part inthispictureisforyourreferenceonlyandmayslightly
varyfromthedifferentmainboardyou purchased.

Saturn900 / 945Series
1-4
InternalPlacement
-Dimension:190mm(W)x350mm(H)x380mm(D)
-Minimized screwstructure
-Multipleventilationdesign
-Detachablebayhousing
MSI®Saturn900 Series (MS-6469)Mini-Tower PC
withbuilt-in (MS-7255)Micro-ATXMainboard
ATXPowerSupplySystemFanExpansionSlots
3.5”DriverBay
x2(ForHDD) 3.5”DriverBay
x2(ForCRorFDD)5.25”DriverBay
x2(ForODD)
Mainboard

1-5
Getting Started
MSI®Saturn945 Series (MS-6466)Mini-Tower PC
withbuilt-in (MS-7267)Micro-ATXMainboard
ATXPowerSupplySystemFanExpansionSlots
3.5”DriverBay
x2(ForHDD) 3.5”DriverBay
x2(ForCRorFDD)5.25”DriverBay
x2(ForODD)
Mainboard
InternalPlacement
-Dimension:190mm(W)x350mm(H)x380mm(D)
-Minimized screwstructure
-Multipleventilationdesign
-Detachablebayhousing


2-1
SystemAssembly
Chapter2
SystemAssembly
Thischapterprovidesyouwiththeinformationabout
systemassemblyprocedures. Whiledoing the installation,
becarefulinholdingthecomponentsandfollowthe
installationprocedures.
Useagrounded wriststrapbeforehandling computer
components.Staticelectricitymaydamage the
components.
Alwaysunplugthepower cordbefore
insertinganyadd-oncardormodule.
ONLYFORSERVICEPERSONEL

Saturn900 / 945Series
2-2
Overview
Installation Screws
Three typesofscrewsareusedin assemblingthebarebone:
Screwtype1:Round-headed screw(M3)
Screwtype2:Button-headedscrew(6#32)
Screwtype 3:Hexagonalscrewwithwasher(6#32)
InstallationTools
Thebuilt-inmainboardisdesignedforMSI®Saturn900 / 945Seriesonly.Except the
mainboard,thebuilt-in componentsof thebareboneincludeATXPowerSupplyand
SystemFan.Inthischapter, wewill showyouhowtoinstallOpticalDiskDrive(ODD),
CardReader(CR),FloppyDisk Drive(FDD),HardDiskDrive(HDD),PCICardandPCI-
ExpressCard.
Crosstypescrewdriver,canbeused todo mostofthe
installation.Chooseonewithamagneticheadwouldbebetter.
Pliers,canbeusedasanauxiliarytool toconnect somecon-
nectorsorcables.
Forceps,canbeusedtopick up tinyscrewsorsetup the
jumpers.
Rubbergloves,can preventyourselffrombeingincisedand
suffering thestaticcharge.
Screwtype1:Round-headed screw(M3)
Thisscrewisused tolocktheODD,CRorFDD (x16)
Screwtype2:Button-headedscrew(6#32)
ThisscrewisusedtolocktheHDD (x8)
Screwtype 3:Hexagonalscrewwithwasher(6#32)
Thisscrewisused tolockthesystemcoversandPCIexpansion
slots(x9)

2-3
SystemAssembly
Checking theItems
Beforeassembling thesystem,pleasecheck theitemslisted belowforbasicsystem
operation.Wehighlysuggest thattheusersshouldinstallretailboxCPUheat sinkor
standardCPUcooler.
OpticalDisk Drive(Optional) FloppyDisk Drive(Optional)
HardDisk Drive(Optional) CardReader(Optional)
MemoryModule(Optional)CPU(Optional)
PCIExpress x1 Card(Optional)
PCICard(Optional)
PCIExpress x16 Card(Optional)

Saturn900 / 945Series
2-4
InstallationProcedures
RemovingCovers
Pullthecover(rightside)forward.
Removethecoverfromsystem.
Unlockthetwoscrews (screwtype 3) on
the backpanel withascrewdriver.
This manual suits for next models
3
Table of contents
Other MSI Desktop manuals

MSI
MSI 005XEU User manual

MSI
MSI PRO AP242P 14M User manual

MSI
MSI Pro 24X 7M User manual

MSI
MSI Cubi N 021BEU User manual

MSI
MSI Wind Top AE220 User manual

MSI
MSI AE270 Series User manual

MSI
MSI MAG META Series User manual

MSI
MSI AE2040 User manual

MSI
MSI MPG GUNGNIR 110R User manual

MSI
MSI Hetis 945 User manual