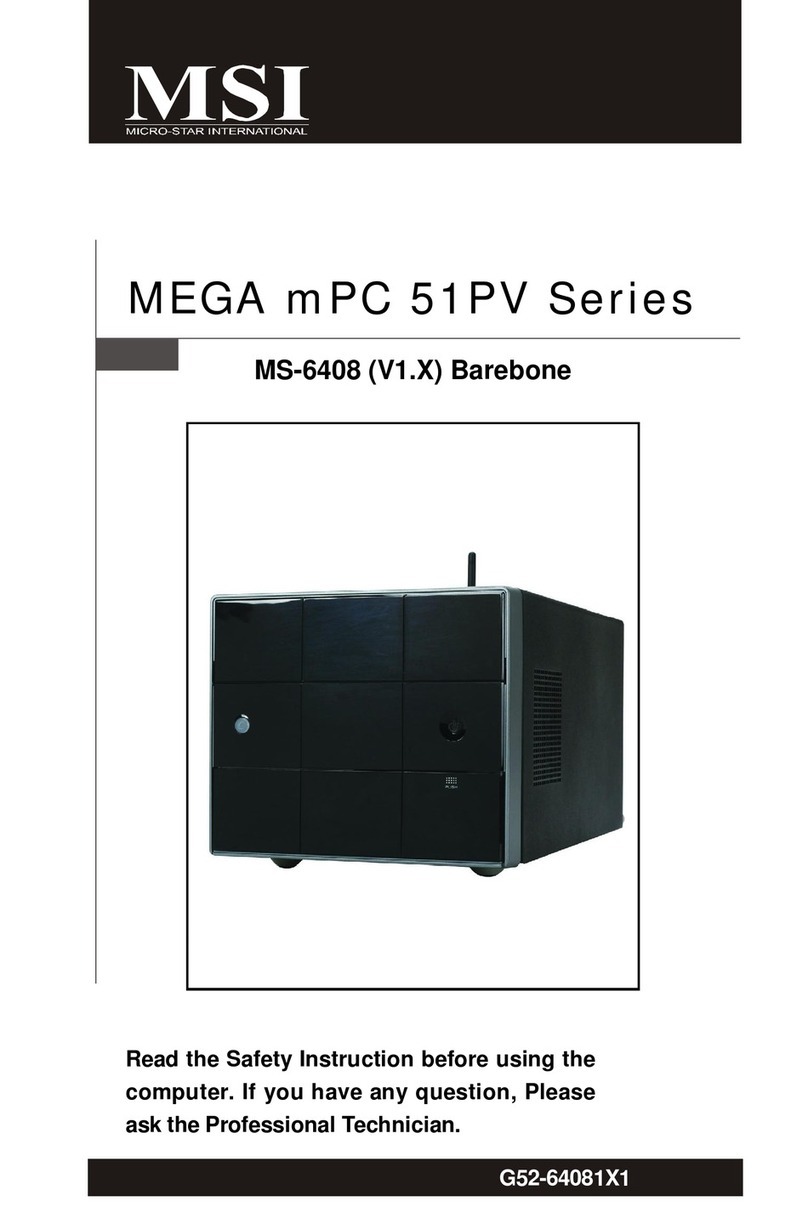
MSI MPC 651 User manual

Version 1.0
multi-lingual
G52-B6251XL
MPC651
maximizeyourDigitalWorld
Quick Installation Guide

2
Trademarks
All trademarksusedinthismanualarethepropertyoftheirrespective owners.
AboutthisManual
Thismanualisdesignedtoprovidetheuseraquick reference forbarebone
setup.AsMPC651 isshippedoutinabarebone,weassumeyou needthe
information regardinghowtoassemblythesystem,suchasCPU, RAM,FDD,
HDD..., etc.Basedon thisassumption,wemake thismanualofquick installa-
tion guide.Pleasefollowthedescription stepbysteptoassemblythecomponents.
If you have anyquestion inassemblingthesystem,you cancontactyourdealer
orourtechnicalsupport.
TechnicalSupport
If aproblemariseswithyoursystemand no solution canbeobtainedfromthe
user’smanual, pleasecontactyourplace ofpurchaseorlocaldistributor.
Revision History
Revision Revision HistoryDate
V1.0FirstReleaseforMPC651 SeriesJanuary2004

3
NOTE:Thismanualiswrittenjustforsystemassembly.Forcomplete
information aboutthesystem,pleaserefertotheuser’smanualinCD.
CONTENTS
English.......................................................................................................4
French(FRANÇAIS)..........................................................................................................14
German(DEUTSCH)..........................................................................................................24
Spanish(ESPAÑOL)...........................................................................................................34
Italian(ITALIANO)................................................................................................................44
Russian()...........................................................................54
Polish(POLSKI)...................................................................................................................64
Chinese(繁體中文)..............................................................................................................74
SimplifiedChinese(?蔨いゅ)..................................................................84
Japanese(、鬣ササy)....................................................................................94
???????

4
SafetyInstructions
1.Alwaysreadthesafetyinstructionsfirst.
2.KeepthisUser’sManualforfuturereference.
3.Keepthisequipmentaway fromhumidity.
4.Lay thisequipmenton areliableflatsurface beforesettingit up.
5.Theopeningson theenclosureareforairconvection hence protectsthe
equipmentfromoverheating.DONOTCOVERTHEOPENINGS.
6.Make surethevoltage ofthepowersource and adjustproperly110/230V
beforeconnectingtheequipmenttothepowerinlet.
7.Place thepowercordsuchaway thatpeoplecannotstepon it. Donot
place anythingoverthepowercord.
8.AlwaysUnplugthePowerCordbeforeinsertinganyadd-on cardormodule.
9.All cautionsand warningson theequipmentshouldbenoted.
10. Neverpouranyliquidintotheopeningthatcoulddamage orcauseelectri-
calshock.
11. If anyofthefollowingsituationsarises,gettheequipmentcheckedbya
service personnel:
lThepowercordorplugisdamaged.
lLiquidhaspenetratedintotheequipment.
lTheequipmenthasbeenexposedtomoisture.
lTheequipmenthasnotworkwell oryou cannotgetit workaccording
toUser’sManual.
lTheequipmenthasdroppedand damaged.
lTheequipmenthasobvioussignofbreakage.
12.DONOTLEAVETHISEQUIPMENTIN ANENVIRONMENT
UNCONDITIONED, STORAGETEMPERATUREABOVE600C(1400F), IT
MAYDAMAGETHEEQUIPMENT.
CAUTION: Dangerofexplosion if batteryisincorrectlyreplaced.
Replace onlywiththesameorequivalenttyperecommendedbythe
manufacturer.

5
overview
Thisproductisshippedoutasabarebone.Somecomponentsareequipped
whilesomeareoptional. See thefollowingforthestandardand optionalitems:
Thismanualprovidesyou withtheinformation ofsystemsetup.Before
assemblingyoursystem,pleasebepreparedfortheinstallation toolsand appro-
priateitems.If you arenotclearabouttheitems,contactyourdealerforthe
information.
Installation Tools
ScrewDriverGloves
Screws
Type1Type2
Fastening HDD
Fastening CD-ROM
StandardMainboard,PowerSupply,Case,Cables,Cooler,
CD, Manual

6
Checking theItems
Beforestartingtheassembling,check theitemsyou need.
HDDModuleCPU
CPUCooler
CD-ROMModule
DDRDIMM
Installation Flowchart
StartRemove Cover
Install HDD
Install CPU&
CoolerInstall Optical
Drives
Install RAM
Replace Cover
Attention!!!
Thechassisand devicesshownon theinstallation photos
areforyourreference only.Theactualproductsmay vary
inchassiscolor,frontbezeland othercomponent.

7
RemovingCover
Useyourhandtofree and remove thethumb
screwson theback panel.
Useyourtwohandstoremove thecover.
Followthedirection indicatedtoremove the
cover.

8
Installinghdd
Locatethebracket. Remove thescrewsto
take outthebracket.
InserttheHDD moduleintothebracket. Use
Type2screwstosecurethemoduleon both
sides.
Pushthebracketbackwardand thenlift it
up totake outthebracket.

9
InserttheHDD bracketintothecase.
UseType2screwstosecuretheHDD
bracket.
Connectthepowercord.
ConnecttheHDD cable.

10
InstallingCPU
PuttheCPUontothesocket. Make surethe
pinsarecompletelyembeddedintothe
socket. TheCPUcanonlyfit inthecorrect
direction.
Pull theleveraway fromthesocketand raise
it up toa90-degree angle.
Closethelevertocompletetheinstallation.
LocatetheCPUsocket.

11
InstallingCPUcooler
Insertthecoolerintothebareboneand put
it ontotheCPU.
Hookthelatchonbothsidestofixthecooler.
Firsthookthelatchon thesideneartheCPU
Fan,and thendo soon theotherside.
Note:To hookthelatcheasier,make sure
thatthefanhasbeentakenoutfromCPU
coolerbeforeyou hookthelatch.
Install CPUFanontothecooler.
Connectthepowercord.
Note:Readtheinstructionson thecooler
beforeyou starttheinstallation.

12
InstallingCD-ROM
InserttheCD-ROMmoduleintothechassis.
ConnecttheCD-ROMcable,audiocable
and powercord.
Use2Type1screwstosecuretheCD-ROM
moduleon therightside.
Use3Type1screwstosecuretheCD-ROM
moduleon theleft side.

13
InstallingDIMM
UseyourtwohandstoinserttheDDRDIMM
verticallyintotheslot.
Note:TheDIMM hasonlyonenotchon the
centerofmodule.It will onlyfitintheright
direction.
TheplasticclipateachsideoftheDIMM
slotwill automaticallyclose.
Replace thecoverand usethree thumb
screwstosecureit.
Note:Check theAC powervoltage switch
on theback panel. Selectthevoltage that
isappropriatetothecountryyou arein.

14
Instructionsdesécurité
1.Lisez toujourslesinstructionsdesécuritéenpremier.
2.Conservez leManueldel’utilisateurpourréférence.
3.Conservez cetappareil àl’abridel’humidit.
4.Posez cetappareil surunesurface planestableavantdel’installer.
5.Lesouverturesdu boîtierserventàlaconvection del’airetàprotéger
l’appareil contreunesurchauffe.NEBLOQUEZPASLES OUVERTURES.
6.Vérifiez latension del’alimentation électriquesecteuretréglez
correctemententre110 et230Vavantderelierl’appareil ausecteur.
7.Placez lecordon d’alimentation desortequepersonnenemarchedessus.
Neposez reinsurlecordon d’alimentation.
8. Débranchez toujourslecordon d’alimentation avantd’insérerunecarteou
un module.
9.Prenez notedetouteslesmisesengardeetavertissementsurl’appareil.
10. Neversez aucun liquidedanslesouvertures,celapourrait abîmer
l’appareil ou créerun risqued’électrocution.
11.Sil’unedessituationssuivantessurvient, faitesvérifierl’appareil parun
réparateur.
lLe cordon d’alimentation ou lapriseestabîmée.
lDuliquideestentrédansl’appareil.
lL’appareil àétéexposéàdel’humidité.
lL’appareil nefonctionnepascorrectementetvousn’arrivez pasàle
fairefonctionnerensuivantlesrecommandationsdu Manuelde
l’utilisateur.
lL’appareil esttombéou aétéabîmé.
lL’appareil estvisiblementcassé.
12.NELAISSEZPASCETAPPAREILDANSUN ENVIRONNEMENTSANSREGU-
LATIONTHERMIQUE.UNETEMPERATUREDESTOCKAGESUPERIEURE
A600C(1400F)RISQUED’ABIMERL’APPAREIL.
ATTENTION:Risqued’explosion silapileestremplacée de
manièreincorrecte.Remplacez uniquementavec unepile
identiqueou detypeéquivalentrecommandée parlefabricant.

15
Aperçu
Ceproduit estlivréavec un équipementminimal. Certainscomposants
sontinclustandisqued’autressontoptionnels.Consultez letableauci-dessous
pourunelistedescomposantsstandardsetoptionnels:
Cemanuelvousfournit lesinformationsnécessairesàl’installation du
système.Avantd’assemblervotresystème,préparez lesoutilsetinstruments
nécessairesàl’installation.Sivousavez desdoutesquantàcertainséléments,
contactez votredistributeurpourdesinformations.
Outils d’installation
Vis
Voustrouverez deuxtypesdevisdanslaboîte.
Tournevis Gants
Type1Type2
Fixation du disque dur
Fixation du CD-ROM
StandardCartemère,alimentation,boîtier,câbles,
radiateurdu processeur,CD, manuel

16
Organigramme de l’installation
DépartEnlevez le
couvercle
Installez le
disquedur
Installez le
processeuretle
radiateur
Installez les
disquesoptiques
Installez la
mémoire
Remettez le
couvercle
Vérifiezles composants
Avantdecommencerl’assemblage,vérifiez lescomposantsdansvous
aurez besoin.
ModuledisquedurProcesseur
Radiateurdu processeur
ModulelecteurdeCD-ROMModuleDIMMDDR
Attention!!!
Le boîtieretlespériphériquesmontrésdanslesphotos
d’installation sontuniquementpourvotreréférence.Les
produitsréelspeuventêtredifférentsence quiconcernela
couleurdu boîtier,lepanneauavantetlesautrescompsants.

17
Retirerlecouvercle
Dévissez àlamainlestroisvisàtête
moletée surlepanneauarrièreetretirez-
les.
Retirez lecouvercleavec vosdeux
mains.Suivez ladirection indiquée pour
retirerlecouvercle.

18
Installerledisquedur
Cherchez lesupport. Retirez lesvispour
enleverlesupport.
Suivez ladirection indiquée àsortentla
parenthèse.
Insérez ledisquedurdanslesupport.
UtilisezdesvisdeType2pourfixerledisque
dursurlesupport. N’oubliez pasdeserrer
lesvisdechaquecôté.

19
Branchez lecordon d’alimentation.
Reliez lecâblespécifiquedeHDD qui
est“maîtremarquédeHDD”.
Insérez lesupportdedisquedurdansle
boîtier.Utilisez desvisdetype2pour
fixerlesupportdedisquedursurlecôté
gauche.

20
Installerleprocesseur
Mettez leprocesseurdanslesupport.
Vérifiez quelesbrochessont
complètementenfoncéesdanslesupport.
Le processeurnepeutrentrerquedansla
bonnedirection.
Levez lelevierenl’éloignantdu support
etlevez-leàun anglede90 degrés.
Abaissez lelevierpourterminer
l’installation.
Cherchez lesupportdu processeur.
Other manuals for MPC 651
1
Table of contents
Languages:
Other MSI Desktop manuals

MSI
MSI Pro 22XT AM 021EU User manual

MSI
MSI AE2040 User manual

MSI
MSI AXIS 945GM - Axis - 945GM User manual

MSI
MSI Trident B935 User manual

MSI
MSI PRO 20EX Series User manual

MSI
MSI Infinite B915 User manual

MSI
MSI MS-9A07 User manual

MSI
MSI Wind Top AE2200 User manual

MSI
MSI AE2050 User manual

MSI
MSI MEGA 651 User manual

MSI
MSI Wind Top G52-AC911X1 User manual

MSI
MSI PRO DP130 User manual

MSI
MSI Axis 700 User manual

MSI
MSI 10SI-022EU User manual

MSI
MSI Midas 400 User manual

MSI
MSI Creator P100A 12th i5-12400F User manual

MSI
MSI MEGA 865 PRO MS-6287 User manual

MSI
MSI MAG META Series User manual

MSI
MSI AE200 User manual

MSI
MSI MS-6441 User manual