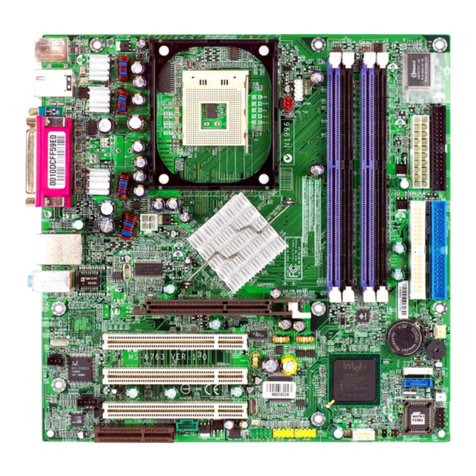
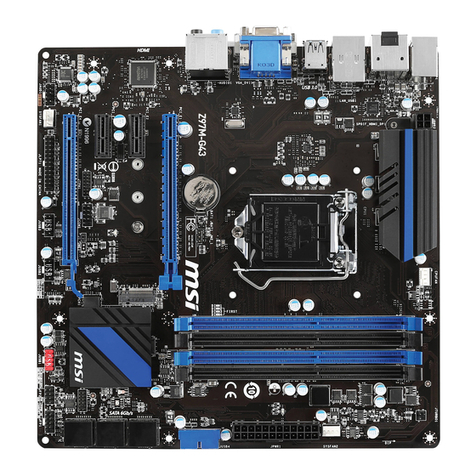
MSI MS-5187 User manual

CHAPTER 1 INTRODUCTION
1-1
The MICRO ATX VI16 mainboard is a high-performance all-in-one system
mainboard. This mainboard supports Intel® Pentium® processor/Pentium®
processorwithMMXTM technology,Cyrix®/IBM®6x86/6x86L/6x86MX/MII,
and AMD®K6/K6-2/K6-III processors.
The mainboard uses the highly integrated Apollo MVP4. The Apollo MVP4
is a PC Socket-7 system logic North Bridge with integrated 2D/3D Graphics
Accelerator. The core logic portion of the chip is based on the popular
100MHz VIA Apollo MVP3 chipset with enhanced features and graphics
accelerator based on the Cyber9398DVD from Trident Microsystems. The
VT82C686ASuperI/O PCI integrated Peripheral Controller (PSIPC) is ahigh
integration, high performance, power efficient and high compatibility device
that supports Intel and non-Intel based processors plus PCI bus bridge
functionality to make a complete Microsoft PC98-compliant PCI/ISA system.
The VT82C686A supports PCI-to-ISA bus controller, four USB ports, dual
bus-masterIDE with Ultra DMA33/66, AC97Basic Audio, System Hardware
Monitoring, and integrated “Super I/O functionality”.
This Mainboard with Apollo MVP4 coupled with VT82C686A is a ideal
performance energy efficient, and highly integrated computer systems.
Chapter 1
INTRODUCTION

CHAPTER 1 INTRODUCTION
1-2
1.1 Mainboard Features
CPU
lSocket 7 supports Intel®Pentium®processor with MMXTM technology.
lTheCyrix®6x86/6x86L/6x86MX/MIIandAMD®K6/K6-2/K6-III proces-
sors are also supported.
Chipset
lVIA®VT82C501(MVP4)chipset. (Northbridge)
-support66/100MHzFSB
- integrated AGP 2D/3D Graphics Accelerator
-supportPC66/PC100SDRAMmemorymodule
-493BGApackage
lVIA®VT82C686Achipset.(Southbridge)
- PCI Super I/O Integrated
- integrated SoundBlaster/Direct Sound AC97 Audio
-UltraDMA-33/66
-352BGApackage
FSB(FrontSideBus)
l66/75/83.3/95/100MHzclocksaresupported.
MainMemory
lSupportsamaximum memory size of 512MB.
lSupports four memory banks using two 168-pin DIMM sockets.
lSupports 3.3v SDRAM.
Slots
lOne AMR (Audio Modem riser) slot and one PTI (PanelLink TV-Out
Interface) slot.
lThree 32-bit Master PCI Bus slots and one 16-bit ISA bus slot. (wherein
one PCI/ISA is shared)
lSupports 3.3v/5v PCI bus Interface.

CHAPTER 1 INTRODUCTION
1-3
On-BoardIDE
lAn IDE controller provides IDE HDD/CD-ROM with PIO, Bus Master and
UltraDMA-33/66operation modes.
lCan connect up to four IDE devices.
On-BoardPeripherals
lOn-BoardPeripherals include:
-1 floppy port supports 2 FDD with 360K, 720K,1.2M, 1.44M and
2.88Mbytes.
- 1 serial ports (COMA)
- 1 parallel port supports SPP/EPP/ECP mode
- 2 USB ports
- 1 IrDA connector for SIR.
-1 AMR
-1 VGA Port
-1PTI
Video
lMVP4 chip integrated
lAGP2D/3D Graphics
Audio
lchip integrated
lDirectSound AC97 Audio
BIOS
lThe mainboard BIOS provides “Plug & Play” BIOS which detects the
peripheral devices and expansion cards of the board automatically.
lThe mainboard provides a Desktop Management Interface(DMI) function
which records your mainboard specifications.
Dimension
lMICROATX Form Factor: 24cm(L)x19.2cm(W)x 4layersPCB

CHAPTER 1 INTRODUCTION
1-4
Mounting
l6 mounting holes.
System Hardware Monitor (optional)
lCPU Fan Revolution Detect
lCPU Fan Control (the fan will automatically stop when the system enters
suspend mode)
lSystem Voltage Detect
lCPU Overheat Warning.
lDisplay Actual Current Voltage
Other Features
lLANWake-Up
lInternal/ExternalModemWake-Up

CHAPTER 1 INTRODUCTION
1-5
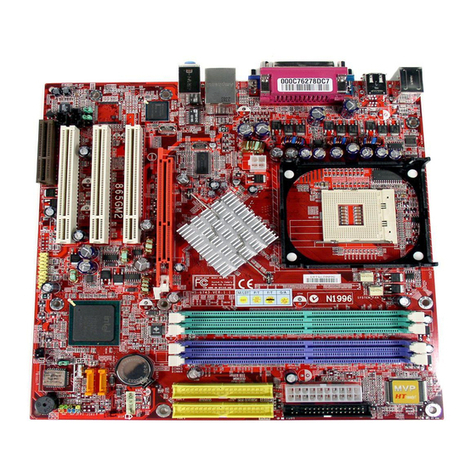
1.2 Mainboard Layout
PCI SLOT 3
PCI SLOT 2
PCI SLOT 1
ISA SLOT 1
ATX
Power Supply
VIA
Apollo
MVP4
Socket 7
DIMM 2
Top: mouse
Bottom:
keyboard
Top:Port 1
USB
DIMM 1
IDE2
Bottom:
Port2
IDE1 FDD
VT82C686A
JMDM1
IR1
SFAN1
JFP1
JGS1
BIOS
JWOL1
JCD1
JAUX1
CFAN1
BATT
+
Top: LPT
Bottom:
COMA
VGAPort
Top: Midi/
GamePort
Bottom:
Line-Out
Line-In
Mic
MS-5187 MICRO ATX VI16 Mainboard
MODEM1
JV1
AMR PTI
JBTCK1
JGL1
JSDIN1
JRMS1
SW1
JBAT1
1
5
JPL1+

CHAPTER 2 HARDWARE INSTALLATION
2-1
Chapter 2
Hardware Installation
2.1 Central Processing Unit: CPU
The MicroATX VI16 mainboardoperates with Intel®Pentium®processor/
Pentium® processorw/MMXTM technology, Cyrix®/IBM6x86/6x86L/
6x86MX/MII,andAMD®K6/K6-2/K6-III processors. Itcouldoperatewith
2.2V to 3.2V processors. The mainboard provides a 321-pin ZIF Socket 7 for
easy CPU installation. The CPU should always have a cooling fan attached
to prevent overheating.
CPU
CPU
OpenLever
Pin1
Sliding
Plate
White dot/
Cut edge
Close
Lever
1. Pull the lever sideways away
from the socket. Then raise
the lever up to a 90-degree
angle.
3. Press the lever down to
complete the installation.
2. Locate Pin 1 in the socket
and look for the white dot or
cut edge in the CPU. Match
Pin 1 with the white dot/cut
edge. Then, insert the CPU.
It should insert easily.
2.1-1 CPU Installation Procedures

CHAPTER 2 HARDWARE INSTALLATION
2-2
2.1-2 CPU Core Speed Derivation Procedure
1. The DIP Switch SW1 (1, 2, and 3) are used to set the Core/Bus
(Fraction) ratio of the CPU. The actual core speed of the CPU is
the Host Clock Frequency multiplied by the Core/Bus ratio. For
example:
If CPUClock = 66MHz
Core/Bus ratio = 3.5
then CPU core speed = Host Clock x Core/Busratio
= 66MHzx3.5
= 233MHz
1 2 3 Core/Bus Ratio
ON OFF OFF 2
ON ON OFF 2.5
OFF ON OFF 3
OFF OFF OFF 3.5
ON OFF ON 4
ON ON ON 4.5
OFF ON ON 5
OFF OFF ON 5.5
SW1 CPU
2. The DIP Switch SW1 (5, 6, 7, and 8) are used to adjust the CPU
clock frequency.
5 6 7 8 CPU
OFF OFF OFF ON 66
ON OFF OFF OFF 75
OFF ON OFF ON 83.3
OFF ON ON OFF 95
OFF ON ON ON 100
SW1 Clock

CHAPTER 2 HARDWARE INSTALLATION
2-3
2.1-3 Processor Voltage Setting
The jumper Switch JV1 (1-5) is used to set the processor Vcore
voltage setting.
1
5
3
2
4
1 2 3 4 5 Vcore
OPEN SHORT OPEN OPEN OPEN 2.2
SHORT SHORT OPEN OPEN OPEN 2.3
OPEN OPEN SHORT OPEN OPEN 2.4
OPEN OPEN OPEN SHORT OPEN 2.8
SHORT OPEN OPEN SHORT OPEN 2.9
OPEN OPEN SHORT SHORT OPEN 3.2
JV1
Note: Always consult vendor for proper CPU specification, before
setting the processor voltage (Vcore/Vio). Improper setting
may damage the processor and other components.

CHAPTER 2 HARDWARE INSTALLATION
2-4
2.1-4 Fan Power Connectors: CFAN1/SFAN1
These connectors support system cooling fan with + 12V. It supports three
pin head connector. When connecting the wire to the connector, always
take note that the red wire is the positive and should be connected to the
+12V, the black wire is Ground and should be connected to GND. If your
mainboard has System Hardware Monitor chipset on-board, you must use a
specially designed fan with speed sensor to take advantage of this function.
For fans with fan speed sensor, every rotation of the fan will send out 2
pulses. System Hardware Monitor will count and report the fan rotation
speed.
Note: 1. Always consult vendor for proper CPU cooling fan.
2. CPU FAN supports the FAN control. You can install PC Alert
utility. This will automatically control the CPU FAN Speed according
to the actual CPU temperature.
CFAN1
CFAN1: Processor Fan
SFAN1:SystemFan
+12V SENSOR
GND
SFAN1
+12V SENSOR
GND

CHAPTER 2 HARDWARE INSTALLATION
2-5
To adjust the speed and voltage of the CPU, you must know the
specifications of your CPU (always ask the vendor for CPU specifi-
cations). Then refer toTable 2.1 (Intel®processors),Table2.2
(Cyrix®processors)and Table 2.3 (AMD®processors) forproper
setting.
2.1-5 CPU Speed and Voltage Setting: SW1, JV1
SW1
ON
1 2 3 4 5 6 7 8
ECE
JV1
2
5
3
1
4

CHAPTER 2 HARDWARE INSTALLATION
2-6
Table 2.1 Intel®processors
Intel®Pentium®processorswithMMXTMtechnology
Note: If you encounter a CPU with different voltage, just go to Section 2.1-3 and look
for the proper voltage settings.
CPU
Type
CPU Speed & Voltage
SW1VI/O Vcore
200MHz 3.3 2.8
166MHz
JV1
233MHz
ON
1 2 3 4 5 6 7 8
ECE
ON
1 2 3 4 5 6 7 8
ECE
2
5
3
1
4
ON
1 2 3 4 5 6 7 8
ECE

CHAPTER 2 HARDWARE INSTALLATION
2-7
Table 2.2 Cyrix®processors
Cyrix®6x86 processor uses PR to rate the speed of their processors based
on Intel®Pentium®processor core speed. For example PR150 (120MHz) has
150MHz core speed of Intel®Pentium®processor but has 120MHz core
speed in Cyrix®. Cyrix®6x86 processor should always use a more powerful
fan (ask vendor for proper cooling fan).
CPU
Type
CPU Speed & Voltage
VI/O Vcore
6x86L
PR166 3.3 2.8
SW1
Cyrix®6x86/6x86L processors
JV1
6x86L
PR200
ON
1 2 3 4 5 6 7 8
ECE
ON
1 2 3 4 5 6 7 8
ECE
2
5
3
1
4

CHAPTER 2 HARDWARE INSTALLATION
2-8
CPU
Type
CPU Speed
CPU Voltage
VI/O Vcore
PR233
(75 x 2.5)
2.9
SW1
PR200
(66 x 2.5)
PR266
(75 x3)
Cyrix®6x86MXProcessor
(66 x 3)
(66 x 3.5)
JV1
(83 x 2.5)
(83 x 2) 3.3
CPU
Type
CPU Speed
CPU Voltage
VI/O Vcore
PR333
(83 x 3)
SW1
PR300
(66 x 3.5)
Cyrix®MIIProcessor
(75 x 3)
JV1
Note: If you encounter a CPU with different voltage, just go to Section 2.1-
3and look for the proper voltage settings.
2.9
3.3
2
5
3
1
4
2
5
3
1
4
ON
1 2 3 4 5 6 7 8
ECE
ON
1 2 3 4 5 6 7 8
ECE
ON
1 2 3 4 5 6 7 8
ECE
ON
1 2 3 4 5 6 7 8
ECE
ON
1 2 3 4 5 6 7 8
ECE
ON
1 2 3 4 5 6 7 8
ECE
ON
1 2 3 4 5 6 7 8
ECE
ON
1 2 3 4 5 6 7 8
ECE
ON
1 2 3 4 5 6 7 8
ECE
ON
1 2 3 4 5 6 7 8
ECE

CHAPTER 2 HARDWARE INSTALLATION
2-9
Table 2.3 AMD®Processor
CPU
Type
CPU SpeedCPU Voltage
VI/O Vcore SW1
AMD®K6/K6-2/K6-3Processor
JV1
200MHz
233MHz
166MHz 2.9
3.2
2.2
266MHz
300MHz
K6-2300MHz
3.3
3.3
3.3
K6-2333MHz
K6-2350MHz
K6-2380MHz
K6-2400MHz
K6-2450MHz
K6-III400MHz 2.4
3.3
5
1
5
1
5
1
5
1
K6-III450MHz
ON
1 2 3 4 5 6 7 8
ECE
ON
1 2 3 4 5 6 7 8
ECE
ON
1 2 3 4 5 6 7 8
ECE
ON
1 2 3 4 5 6 7 8
ECE
ON
1 2 3 4 5 6 7 8
ECE
ON
1 2 3 4 5 6 7 8
ECE
ON
1 2 3 4 5 6 7 8
ECE
ON
1 2 3 4 5 6 7 8
ECE
ON
1 2 3 4 5 6 7 8
ECE
ON
1 2 3 4 5 6 7 8
ECE
ON
1 2 3 4 5 6 7 8
ECE
ON
1 2 3 4 5 6 7 8
ECE
ON
1 2 3 4 5 6 7 8
ECE

CHAPTER 2 HARDWARE INSTALLATION
2-10
2.2 Clear CMOS Jumper: JBAT1
A battery must be used to retain the mainboard configuration in CMOS
RAM. Short 1-2 pins of JBAT1 to store the CMOS data.
Keep Data Clear Data
1133
Note: You can clear CMOS by shorting 2-3 pin, while the system is off.
Then, return to 1-2 pin position. Avoid clearing the CMOS while
the system is on, it will damage the mainboard. Always unplug
the power cord from the wall socket.
13
JBAT1

CHAPTER 2 HARDWARE INSTALLATION
2-11
2.3 Memory Installation
2.3-1 Memory Bank Configuration
Themainboard supports a maximum memory size of256MB(64-bit technol-
ogy) or 512MB(128-bit technology for SDRAM: It provides two 168-pin
unbuffered DIMMs (Double In-Line Memory Module) sockets. It supports
8 MB to 128 Mbytes DIMM memory module.
DIMM1(Bank0+Bank1)
DIMM2(Bank2+Bank3)

CHAPTER 2 HARDWARE INSTALLATION
2-12
A. HowtoinstallaDIMMModule
1. The DIMM slot has 2 Notch Keys “VOLT and DRAM”, so the
DIMM memory module can only fit in one direction.
2. Insert the DIMM memory module vertically into the DIMM slot.
Then push it in.
3. The plastic clip at the side of the DIMM slot will automatically
close.
Single Sided DIMM
Double Sided DIMM
VOLTDRAM
2.3-2 Memory Installation Procedures

CHAPTER 2 HARDWARE INSTALLATION
2-13
1. Supports only SDRAM DIMM.
2. To operate properly, at least one 168-pin DIMM module must be in-
stalled.
3. This mainboard supports Table Free memory, so memory can be installed
on DIMM1 or DIMM 2 in any order.
4. Supports 3.3 volt DIMM.
5. The DRAM addressing and the size supported by the mainboard is
shown below:
2.3-3 Memory Population Rules
Table 2.3-1 SDRAM Memory Addressing
16M 1Mx16 ASYM 11 8 8MBx4 16MBx8
2Mx8 ASYM 11 9 16MBx8 32MBx16
64M 2Mx32 ASYM 11 9 32MBx2 64MBx4
2Mx32 ASYM 12 8 16MBx2 32MBx4
4Mx16 ASYM 11 10 32MB 64MB
4Mx16 ASYM 13 8 32MB 64MB
8Mx8 ASYM 13 9 64MB 128MB
64M 2Mx32 ASYM 11 8 16MB 32MB
4Mx16 ASYM 12 8 --- ---
8Mx8 ASYM 12 9 --- ---
DRAM
Tech.
DRAM
Density &
Width
DRAM
Addressing Address Size MB/DIMM
Row Column Single
Side(S) Double
Side(D)
no.
pcs. no.
pcs.

CHAPTER 2 HARDWARE INSTALLATION
2-14
2.4 Case Connector: JFP1
ThePowerSwitch, Reset Switch, Power LED, Speaker,and HDD LED are all
connected to the JFP1 connector block.
JFP1
Power
Switch
Power
LED
+
Reset
Switch
HDD
LED
+
Speaker
Buzzer
(short
pin)
14
15

CHAPTER 2 HARDWARE INSTALLATION
2-15
2.4-1 Power Switch
Connect to a 2-pin push button switch. This switch has the same feature
withJRMS1.
2.4-2 Reset Switch
Reset switch is used to reboot the system rather than turning the power ON/
OFF. Avoid rebooting while the HDD LED is lit. You can connect the Reset
switch from the system case to this pin.
2.4-3 Power LED
The Power LED is lit while the system power is on. Connect the Power LED
from the system case to this pin. There are two types of LED that you can
use:3-pin single color LED or 2-pin dual color LED(ACPIrequest).
a. 3 pin single color LED connect to pin 4, 5, & 6. This LED will lit
when the system is on.
b. 2 pin dual color LED connect to pin 5 & 6.
GREENColor: Indicate the system is in full on mode.
ORANGEColor: Indicate the system is in suspend mode.
2.4-4 Speaker
Speaker from the system case is connected to this pin.
Ifon-board Buzzer is available:
Shortpin14-15: On-boardBuzzerEnabled.
Openpin14-15: On-board BuzzerDisabled.
2.4-5 HDD LED
HDD LED shows the activity of a hard disk drive. Avoid turning the power
off while the HDD led is lit. You can connect the HDD LED from the system
case to this pin.
Table of contents
Other MSI Motherboard manuals

MSI
MSI MPG Z690 EDGE WIFI DDR4 User manual

MSI
MSI C236M WORKSTATION User manual

MSI
MSI 661FM3-L User manual

MSI
MSI A320M PRO-VD/S V2 User manual

MSI
MSI Z68MA-ED55 (B3) User manual

MSI
MSI MS-S3361 User manual

MSI
MSI B350M GAMING PRO User manual

MSI
MSI MS-98H9 User manual

MSI
MSI MS-98L9 User manual

MSI
MSI PRO B650M-P User manual

MSI
MSI X299 RAIDER User manual

MSI
MSI 925X Neo Platinum User manual

MSI
MSI 7B84-017R User manual

MSI
MSI G31M4 Series User manual

MSI
MSI K9N6PGM-F - Motherboard - Micro ATX User manual

MSI
MSI MEG Z390 GODLIKE User manual

MSI
MSI X79A-GD45 (8D) series User manual

MSI
MSI P67A-GD65 Series User manual

MSI
MSI K7T266 Pro User manual

MSI
MSI H61M-E23 (G3) Series User manual