manuals.online logo
Brands
  1. Home
  2. •
  3. Brands
  4. •
  5. MSI
  6. •
  7. Video Card
  8. •
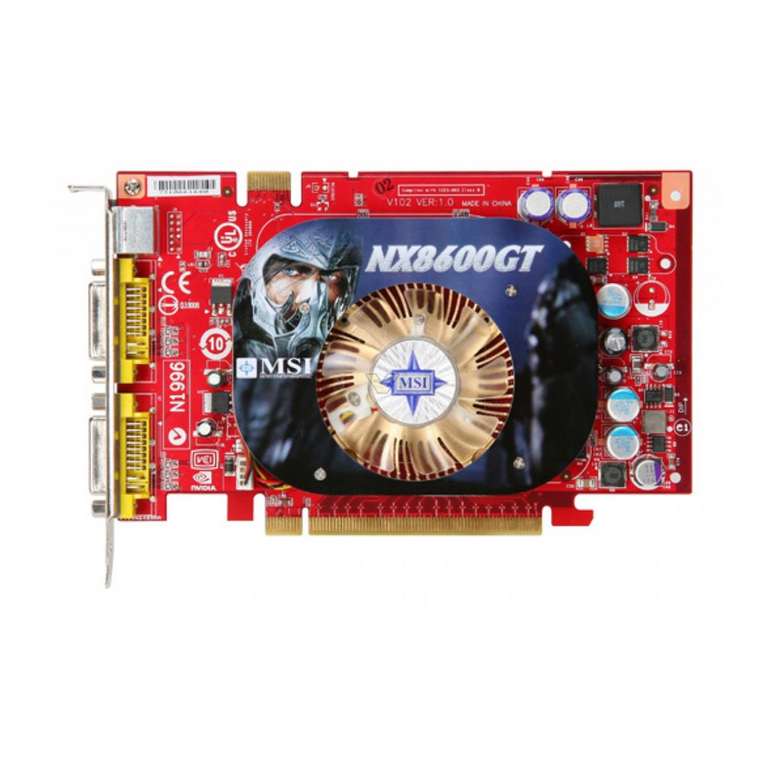
  9. MSI NX8600GT series Instruction manual

MSI NX8600GT series Instruction manual

Other manuals for NX8600GT series

1

This manual suits for next models

1

Other MSI Video Card manuals

MSI NX6200-TD128 User manual

MSI

MSI NX6200-TD128 User manual

MSI R7770 PoweR Edition User manual

MSI

MSI R7770 PoweR Edition User manual

MSI R4350 series Instruction manual

MSI

MSI R4350 series Instruction manual

MSI R7970 PoweR Edition User manual

MSI

MSI R7970 PoweR Edition User manual

MSI MX4000-T32 User manual

MSI

MSI MX4000-T32 User manual

MSI N220GT series User manual

MSI

MSI N220GT series User manual

MSI RX550-TD128E Instruction manual

MSI

MSI RX550-TD128E Instruction manual

MSI RX1900GT-VT2D256E User manual

MSI

MSI RX1900GT-VT2D256E User manual

MSI N9800GT series Instruction manual

MSI

MSI N9800GT series Instruction manual

MSI RX1600PRO-TD128E User manual

MSI

MSI RX1600PRO-TD128E User manual

MSI RX1650PRO-TD256EZ User manual

MSI

MSI RX1650PRO-TD256EZ User manual

MSI NX8800GTS-T2D320E-HD Instruction manual

MSI

MSI NX8800GTS-T2D320E-HD Instruction manual

MSI FX5200-T128 User manual

MSI

MSI FX5200-T128 User manual

MSI RX1600XT-T2D128E User manual

MSI

MSI RX1600XT-T2D128E User manual

MSI RX9250-T128 User manual

MSI

MSI RX9250-T128 User manual

MSI RX1950XT-VT2D256E-HD User manual

MSI

MSI RX1950XT-VT2D256E-HD User manual

MSI N210 series User manual

MSI

MSI N210 series User manual

MSI RX600XT-TD128E User manual

MSI

MSI RX600XT-TD128E User manual

MSI MS-4413 User manual

MSI

MSI MS-4413 User manual

MSI RX700PRO-VT2D128E User manual

MSI

MSI RX700PRO-VT2D128E User manual

MSI N430GT Series User manual

MSI

MSI N430GT Series User manual

MSI RX2600PRO Instruction manual

MSI

MSI RX2600PRO Instruction manual

MSI RX850PRO-TD256E User manual

MSI

MSI RX850PRO-TD256E User manual

MSI RX1650-TD256E User manual

MSI

MSI RX1650-TD256E User manual

Popular Video Card manuals by other brands

Diamond Multimedia ATI Radeon SKU 4870PE51GDT Specification sheet

Diamond Multimedia

Diamond Multimedia ATI Radeon SKU 4870PE51GDT Specification sheet

NEC N8116-29 user guide

NEC

NEC N8116-29 user guide

ATI Technologies RADEON 137-40225-20 user guide

ATI Technologies

ATI Technologies RADEON 137-40225-20 user guide

ATI Technologies RADEON 7000 MAC EDITION user guide

ATI Technologies

ATI Technologies RADEON 7000 MAC EDITION user guide

SIIG aurora Quick installation guide

SIIG

SIIG aurora Quick installation guide

ClearSpeed ClearSpeed Advance e720 user guide

ClearSpeed

ClearSpeed ClearSpeed Advance e720 user guide

DVS Atomix HDMI installation guide

DVS

DVS Atomix HDMI installation guide

NEC N8116-48 user guide

NEC

NEC N8116-48 user guide

Nvidia Quadro Workstation user guide

Nvidia

Nvidia Quadro Workstation user guide

Aztech VGS3D-AGP user manual

Aztech

Aztech VGS3D-AGP user manual

Advoli TB4 Standard installation guide

Advoli

Advoli TB4 Standard installation guide

ELSA ERAZOR III LT user manual

ELSA

ELSA ERAZOR III LT user manual

Gigabyte GV-R7500L User'smanual

Gigabyte

Gigabyte GV-R7500L User'smanual

EMS XtremeRGB-Ex1 user manual

EMS

EMS XtremeRGB-Ex1 user manual

Gigabyte GV-N68T256D user manual

Gigabyte

Gigabyte GV-N68T256D user manual

Matrox Multi Installation and user guide

Matrox

Matrox Multi Installation and user guide

Pioneer PDA-5003 operating instructions

Pioneer

Pioneer PDA-5003 operating instructions

QDI N2 manual

QDI

QDI N2 manual

manuals.online logo
manuals.online logoBrands
  • About & Mission
  • Contact us
  • Privacy Policy
  • Terms and Conditions

Copyright 2025 Manuals.Online. All Rights Reserved.

G52-V0912X3
August 2007
I
n
t
e
r
a
r
t
n
a
S
-
t
i
o
o
r
n
c
i
a
l
M
TEL. 886-2-32345599
FAX. 886-2-32345488
http://www.msi.com.tw
Under the European Union ("EU") Directive on Waste Electrical
and Electronic Equipment, Directive 2002/96/EC, which takes
effect on August 13, 2005, products of "electricaland electronic
equipment" cannot be discarded as municipal waste anymore
and manufacturers of covered electronic equipment will be
obligated to take back such products at the end of their useful
life.
WARNING!!
DO NOT touchthe
cooling system since
it may produce a
certain heat while
processing tasks.
!
CAUTION!!
Do not force theGPU
cooler against the
fragile GPU toavoid
damage to theGPU.
MICRO-STAR INT'L
MS-V091
* All trademarksused in this manual are the soleproperty of theirrespective owners.
VGA is atrademark of International Business Machines Corporation.
Pentium is a registered trademark of Intel Corporation.
Windows is a registered trademark of Microsoft Corporation.
RR
RR
Macrovision Corporation ProductNotice
This product incorporatescopyright protection technologythat is protected by
method claims ofcertain U.S. patentsand other intellectual property rights owned
by Macrovision Corporationand other rightowners. Use of this copyright protection
technology must beauthorized by MacrovisionCorporation, and is intended for
home and otherlimited viewing usesonly unless otherwise authorized by
Macrovision Corporation. Reverseengineering or disassemblyis prohibited.
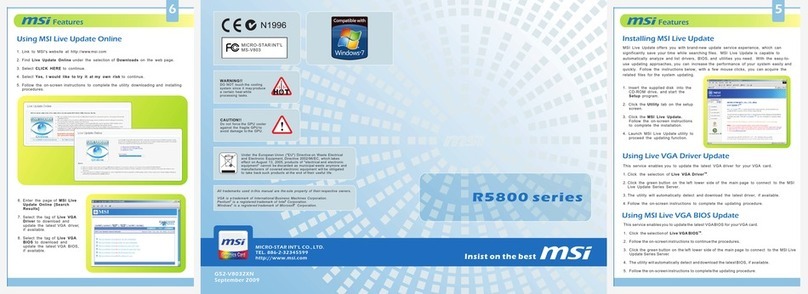
Using MSI Live VGA Driver Update
This service enables you to update the latest VGA driver for your VGA card.
1. To update the MSI Live VGA Driver , click Live VGA Driver item on the left
column of the main page.
TM TM TM
2. This utility will start checking your platform and the information on the VGA card, and
display the information in a list.
3. Click the graph button on the bottom to connect MSI Live Update Series Server.
Then, it will automatically connect the Internet and compare the version of the driver
in the database.
4. It may take several minutes to detect the required drivers. Please wait while
proceeding detection.
5. Click the InstallShield Wizard button on the right side of the table to download and
update the driver. All actions will proceed automatically.
6. Follow the on-screen instructions to complete the updating procedure.
This service enablesyou to updatethe latest VGABIOS for yourVGA card.
1. Toupdate your VGABIOS, click Live VGA BIOS item on theleft column ofthe main page.
TM
TM
2. If your VGA card does not support the Live VGA BIOS function, you will receive a warning
message on thescreen.
TM
3. If your VGAcard do support the Live VGABIOS function, please payattention to themessage
shown on thescreen telling youthat in what circumstance flashing BIOSmay fail toreboot.
4. Click Yes if you would like to try it at your own risk or No to return to the main page with
everything unchanged.
5. If you click Yes to continue, it will check the information and BIOS version of your VGA card,
and list themin a table.
TM TM
6. Click the graphbutton at thebottom to connect the MSI Live Update 3 Server.
TM TM
7. The MSI Live VGABIOS will automatically connect the Internet and search the supported
TM
BIOS in thedatabase of MSI .
8. If it has found one (or several) supported BIOS for your VGA card, click the InstallShield
Wizard button on the right side of the table to have the new BIOS downloaded and updated
automatically.
9. Follow the on-screeninstructions to completethe updating procedure.
Using MSI Live VGA BIOS Update
6MSI Features
5
MSI Features
Installing MSI Live Update
MSI Live Update offers you with brand-new update service experience, which can
significantly save your time while searching files. MSI Live Update is capable to
automatically analyze and list drivers, BIOS, and utilities you need. With the easy-to-use
updating approaches, you can increase the performance of your system easily and quickly.
Follow the instructions below, with a few mouse clicks, you can acquire the related files
for the system updating.
Installing from the Disk
1. Insert the supplied disk into the CD-ROM
drive, and start the Setup program.
2. Click the Utility tab on the setup screen.
3. Click the MSI Live Update. Follow the on-
screen instructions to complete the
installation.
Installing from the MSI Web Site
3. Click Start to Check to download the Live
Update application.
4. Click Install the continue.
5. Follow the on-screen instructions to complete
the installation.
6. Launch MSI Live Update and to enter the
main page of this utility as shown here.
1. Link to MSI's website at http://www.msi.com.tw
2. Find and click Live Update Online on the left
side of the web page to enter MSI Download
Center.
NX8600GT Twin Turbo
Starting Up vBIOS Setup
MSI graphics cards provide a Hot Key for users to start up the vBIOS Setup function with
only a simple touch. With this unique MSI feature, users will be given a delightful and
professional experience in using MSI graphics cards. Follow the steps below to continue:
1. Ensure that the system is powered off.
2. Press the TT button on the bracket of the as
shown on the left to start up the
T
3. Note that it is extremely important to power off the system
before pressing the button. Any attempt to press the
button without powering off the system may cause the damage
to the
graphics card
vBIOS Setup function.
he TT LED grows in Red.
TT TT
vBIOS of the graphics card. For safety concern, we
strongly suggest that do not switch to any other mode at lease
for 15 seconds after shutting down the system.
TM TM
Installing MSI Live Update 3
Quick Installation
4
Getting Started 2
System Requirements
Card Features For reference only
Unpacking
Please check out the following items to make sure that you get the complete product:
VGA card
Disk: Drivers, documentation, and applications
Consult your dealer immediately if anything is missing or damaged.
To install the VGA card, your computer system needs to meet the following requirements:
Intel Pentium III (and above), AMD K7 (and above), or compatible with expansionslot
128MB of system memory
Installation software requires CD-ROM drive
Operation System Support: visit MSI website for further information
Power supply of 350 (and up) watt is highlyrecommended for system stability
TM
RRR
3Getting Started
1
Overview
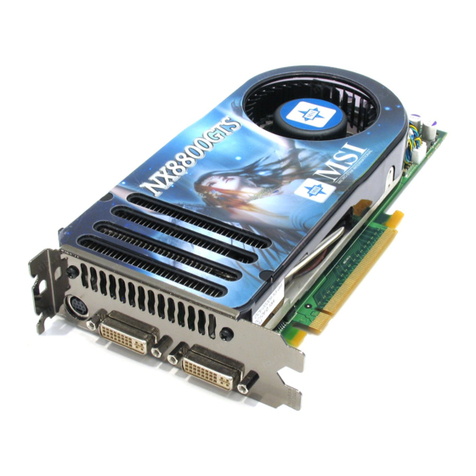
Note: The VGA card shown here may vary from the actualcard.
For further information, please visit MSIwebsite at www.msi.com.tw
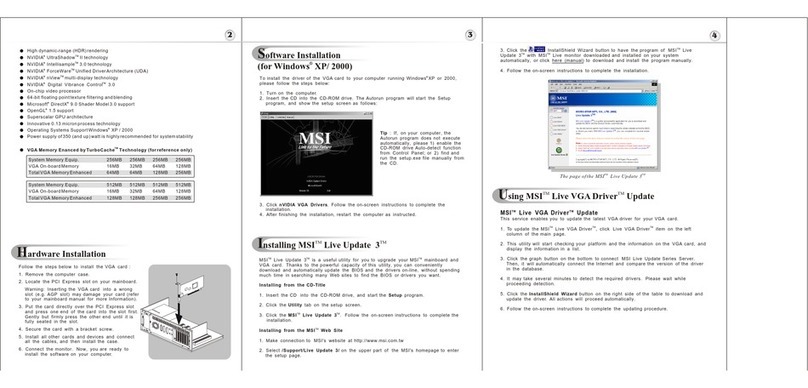
512MB DDR3 memory
256MB DDR3 memory
nVIDIA GeForce 8600GT
PCI Express Interface
SLI Interface
DVI-I Ports
- HDMI supported
- Dual dual-Link DVI output
supported
TV_Out Connector
HDTV-Output integrated
NVIDIA CineFX .0
TM Shading Architecture
TM
Microsoft Vista Features
Vertex shaders
- Support for Microsoft DirectX 10.0 Vertex Shader 4.0
- Encompass' Transform and Lighting
- Displacement mapping
- Geometry instancing
Pixel shades
- Support for DirectX 10.0 Pixel Shader 4.0
- Support for full pixel branching
- Support for Multiple Render Targets (MRTs)
- Infinite-length pixel programs
Next-generation texture engine
Full 128-bit studio-qualityfloating point precisionthrough the entire rendering pipeline,with
native hardware supportfor 32 bpp,64bpp,and 128 bpp rendering modes.
TM
NVIDIA SLI Technology
Patented hardware andsoftware technology allowstwo GPUs to run in parallel to scale
performance
Scales performance onover 60 topPC games and applications
TM
Support for NVIDIAnView multi-display for scalableperformance across two displays
API Support
Complete DirectX support,includingthe latest versionof Microsoft DirectX 10.0 Shader
Model 3.0
Full OpenGL support,including OpenGL2.0
TM
NVIDIA Digital Vibrance Control (DVC) 3.0 Technology
DVC color controlsand DVC imagesharpening controls
TM
NVIDIA UltraShadow II Technology
Designed to enhancethe performance ofshadow-intensive games,like id Software's Doom 3
5
R
R
TM
NVIDIA Intellisample 4.0 Technology
Advanced 16X anisotropicfiltering (up to128 taps)
Rotated-grid antialiasing for removing jagged edgesfor incredible edge quality
Support for advancedlossless compression algorithmsfor color,texture,and z-data at higher
resolutions and frameretes
Fast z-clear
Support for normalmap compression
New transparent supersampling and transparent multisamplingantialiasing modes.
TM
NVIDIA PureVideo Technology
Patented hardware andsoftware technology allowstwo GPUs to run in parallel to scale
performance
Three dedicated videoengines
MPEG-2 HD andWMV HD videoplayback up to 1920 X1080p resolution
H 264 hardwaredecode acceleration
Decryption supported forall standard HDVideo formats-AES-128 CTR mode,AES-128 CBC
mode,and AES-128ECB mode.
Industry's most advancedvideo algorithms
Overlay color temperaturecorrection
Microsoft Video MixingRenderer (VMR) supportfor multiple video windows with fullvideo
quality and featuresin each window
Integrated HDTV output
64-Bit TextureFiltering and Blending
Full floating pointis supported throughoutentire pipeline
Floating point filteringimproves the qualityof images in motion
Floating point texturingdrivers new levelsof clarity and image detail
Floating point framebuffer blending givesdetail to special effects like motionblur and
explosions
Dedicated video hardware reduces CPU utilizationand improves overall system
performance
R
Enabling HDMI Output
**1
Reserve Hole
Fan Connector
**1
Refer to thesection ofEnabling HDMI
Output to enable theHDMI function.
**2
Refer to thesection ofStarting Up vBios
Stepup for the detailed instructions..
Follow the steps to enable HDMI Output function:
1. Find the DVI-to-HDMI adapter that comes with the package,
if provided.
2. Attach the
3. Ensure that the adapter is firmly installed.
below
Consult your dealer to purchase the adapter if it
is not provided.
DVI-to-HDMI adapter to the DVI connector.
4. Use the compliant SPDIF Internal cable to
connect both the SPDIF connectors on the
VGA card and your mainboard. Make sure
to (1) plug the orange cable to the SPDIF-
pin and the black one to the GND-pin on
the mainboard; and (2) plug the other end
(2-pin white connector) of the cable to the
SPDIF connector on the VGA card. Note
that wrong installation may cause the
damage to the VGA card.
SPDIF Internal cable
Plug the 2-pin white connector
to the SPDIF connector on the
VGA card.
Plug the orange (OG) cable to the
SPDIF-pin and the black (BK) one
to the GND-pin on the mainboard.
BK
OG
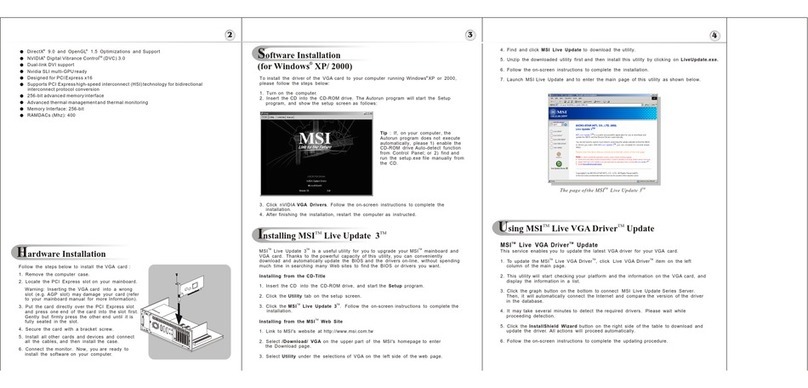
Follow the steps to install the VGA card:
1. Remove the computer case.
2. Locate the expansion slot on your mainboard.
Warning: Inserting the VGA card into a
wrong slot may damage your card (refer to
your mainboard manual for more Information).
3. Put the card directly over the slot
and press one end of the card into the slot
first. Gently but firmly press the other end
until the card is fully seated in the slot.
4. Secure the card with a bracket screw.
5. Install all other cards and devices and
connect all the cables, and then install the
case.
6. Connect the monitor. Now, you are ready to
install the software on your computer.
below
expansion
To install the driver of the VGA card to your
computer,
CD
3. Click nVIDIA VGA Drivers. Follow the on-
screen instructions to complete the
installation.
4. After finishing the installation, restart the
computer as instructed.
please follow the steps below:
1. Turn on the computer.
2. Insert the into the CD-ROM drive. The
Autorun program will start the Setup
program, and show the setup screen as
right.
Software R
Hardware
Tip : If, on your computer, the Autorun program does not execute automatically, please
1) enable the CD-ROM drive Auto-detect function from Control Panel; or 2) find and run
the setup.exe file manually from the CD.
5. Or, use the compliant SPDIF External
cable to connect the SPDIF connector on
the VGA card and the SPDIF-out
connector on the back panel of the
mainboard. Make sure to plug the end
with 2-pin connector of the cable to the
SPDIF connector on the VGA card, and
the other end to the SPDIF-out connector
on the back panel of the mainboard.
SPDIF External cable
Plug the 2-pin connector to
the SPDIF connector on the
VGA card.
Plug this connector to the SPDIF-out
connector on the back panel of the
mainboard.
vBIOS switch Connector
Optional Bracket
SPDIF Connector
**2
vBios Hot key