manuals.online logo
Brands
  1. Home
  2. •
  3. Brands
  4. •
  5. Multitech
  6. •
  7. Network Router
  8. •
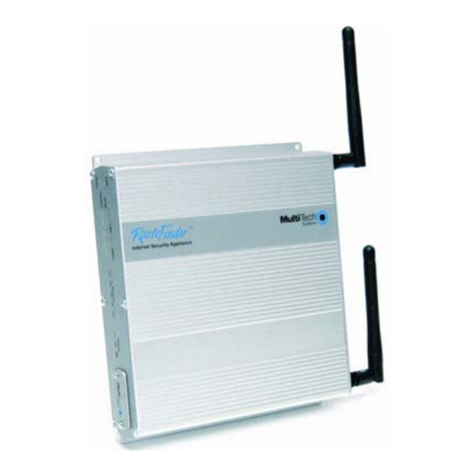
  9. Multitech RouteFinder RF600VPN User manual

Multitech RouteFinder RF600VPN User manual

RF760VPN
RF660VPN
RF600VPN
RouteFinder Configured with DNAT and Aliases
Reference Guide
Remote Client-to-LAN Configuration Using DNAT and Aliasing
Multi-Tech Systems, Inc. RF760/660/600VPN DNAT and Aliasing Reference Guide 2
RF760/660/600VPN Reference Guide
RouteFinder Configured with DNAT and Aliases
S000285C
Rev. A 01/07/03 Initial release
Rev. B 01/29/04 Add RF600/760VPN
Rev. C 11/02/04 & 01/25/05 Software 3.20 & 3.21
DNAT and Aliasing through the RouteFinder
This document applies to the RF760VPN, the RF660VPN, and the RF600VPN. All references to RouteFinder apply to
all three RouteFinder builds.
This document gives an example explaining how to use DNAT and Aliasing on the RouteFinder to allow a remote
workstation to create a Telnet connection to a LAN though the RouteFinder. This document is divided down into three
sections. Section one explains how to configure the RouteFinder. Section two explains how to configure the
Windows 2000 Server on the LAN to accept a Telnet connection from a remote client. Section three explains how to
configure the Windows 2000 remote client to generate a Telnet connection to the LAN server.
The RouteFinder software is pre-installed. Initial configuration is required in order for you to run the Web
Management software and begin operation. The browser-based management interface eases RouteFinder
configuration and management. The VPN functionality is based on IPSec and PPTP protocols and uses Triple DES
168-bit encryption to ensure that your information remains private.
Caution: Use a safe Password! Your first name spelled backwards is not a sufficiently safe password; a password
such as xfT35$4 is better.
Remote Client-to-LAN Configuration Using DNAT and Aliasing
Multi-Tech Systems, Inc. RF760/660/600VPN DNAT and Aliasing Reference Guide (S000285C) 3
Section One
RF660VPN is used only as example. All RouteFinders can be used.
Remote Client-to-LAN Configuration Using DNAT and Aliasing
Multi-Tech Systems, Inc. RF760/660/600VPN DNAT and Aliasing Reference Guide (S000285C) 4
Configuring the RouteFinder with DNAT and Aliasing
Use this procedure to configure the RouteFinder with DNAT and Aliasing. This configuration allows a Windows 2000
Remote Client to Telnet through the RouteFinder to several Windows 2000 Systems located on the LAN.
Connect a workstation to the RouteFinder’s LAN port via Ethernet for site A.
1. Set the workstation IP address to 192.168.2.100 subnet.
3. Turn on power to the RouteFinder and wait until you hear 5 beeps.
4. Bring up your web browser on the workstation. At the Web browser’s address line, type the default Gateway
address of https://192.168.2.1 and hit the Enter key. In some environments, one or more Security Alert screen(s)
display.
Note: Make sure your PC’s IP address is in the same network as the router’s IP Address. WINIPCFG and
IPCONFIG are tools for finding a computer’s default gateway and MAC address. In Windows 98/ME you can type
WINIPCFG. In Windows 2000/NT, you can type IPCONFIG.
At the initial Security Alert screen, click Yes and follow any additional on-screen prompts. (This step is eliminated
when you have generated a CA certificate at Administration > Site Certificate)
5. The Login screen is displayed. Type the default User name of admin (all lower-case), tab to the Password
entry and type the default Password admin (all lower-case); click Login. The User and Password entries are
case-sensitive (both must be all lower-case). The password can be up to 12 characters. You will later want to
change the User and Password entries from the default (admin) to something else. (If Windows displays the
AutoComplete screen, for security reasons, you may want to click No to tell the Windows OS to not remember
the Password.)
Remote Client-to-LAN Configuration Using DNAT and Aliasing
Multi-Tech Systems, Inc. RF760/660/600VPN DNAT and Aliasing Reference Guide (S000285C) 5
6. If someone else is already logged in to the RouteFinder, or you were logged in recently, the message below is
displayed.
Click the Yes Button. The Login screen is displayed. Repeat Step 5.
7. The Web Management Home screen is displayed.
Remote Client-to-LAN Configuration Using DNAT and Aliasing
Multi-Tech Systems, Inc. RF760/660/600VPN DNAT and Aliasing Reference Guide (S000285C) 6
8. Click on Wizard Setup.
a) Enter the Administrator Email Address (can be anything). (Example: [email protected])
b) Enter the Host name for the RouteFinder (can be anything). (Example: RF660VPN.site-A.com)
c) LAN IP Address and Subnet Mask are set to the defaults. This should be acceptable for Site A.
d) Enter the WAN IP Address. This is the PUBLIC STATIC IP address. (Example: 204.26.122.103)
e) Change the Gateway IP address; this is the IP address of the router that connects to the Internet. (Example:
204.26.122.1)
f) Place a checkmark in the box for the Packet Filter Rule: LAN-ANY-ANY-ALLOW. This will enable this rule.
g) Specify any changes to the passwords that you feel are necessary.
h) Click Save to save the settings you just entered.
i) The following screen will display to save changes. Click OK.
j. The following screen will display. Saving your settings will take a few minutes. Since you kept the LAN IP
address the same, it is not necessary to change this system to a new IP address.
Remote Client-to-LAN Configuration Using DNAT and Aliasing
Multi-Tech Systems, Inc. RF760/660/600VPN DNAT and Aliasing Reference Guide (S000285C) 7
9. Click on Networks & Services > Network.
a) Define the IP address of the WAN port (eth1) on the RF660VPN.
For example: Name = WANInterface
IP address = 204.26.122.103
Subnet mask = 255.255.255.255
b) Define the IP address of the first IP alias.
For example: Name = WANInterface1
IP address = 204.26.122.104
Subnet mask = 255.255.255.255
c) Define the IP address of the second IP alias.
For example: Name = WANInterface2
IP address = 204.26.122.105
Subnet mask = 255.255.255.255
d) Define the IP address of the Windows 2000 Professional computer that will be accessed on the LAN side of
the RF660VPN.
For example: Name = Win2k_Pro
IP address = 192.168.2.100
Subnet mask = 255.255.255.255
e) Define the IP address of the Windows 2000 Server computer that will be accessed on the LAN side of the
RF660VPN.
For example: Name = Win2k_Server
IP address = 192.168.2.11
Subnet mask = 255.255.255.255
Note: The screen displays networks after they have been entered.
WANInterface1 204.26.122.104 255.255.255.255
WANInterface2 204.26.122.105 255.255.255.255
Win2k_Pro 192.168.2.100 255.255.255.255
Win2k_Server 192.168.2.11 255.255.255.255
Remote Client-to-LAN Configuration Using DNAT and Aliasing
Multi-Tech Systems, Inc. RF760/660/600VPN DNAT and Aliasing Reference Guide (S000285C) 8
10. Click on Network Setup > Interface. Locate IP Aliases by scrolling to the bottom the screen. Select the
hardware interface, enter the IP Address, enter the Net Mask for each IP alias. Click the Add button.
Add aliases
here
Aliases are
then displayed
in this area
a) Create an IP alias for address 204.26.122.104 where the remote clients can Telnet this address to access
the Win2k Pro computer on the LAN. After this information is entered, it displays in the Existing IP Aliases
box.
For example: Hardware Interface = eth1
IP address = 204.26.122.104
Subnet mask = 255.255.255.255
b) Create an IP alias for address 204.26.122.105 where the remote clients can Telnet this address to access
the Win2k Server computer on the LAN. After this information is entered, it displays in the Existing IP
Aliases box.
For example: Hardware Interface = eth1
IP address = 204.26.122.105
Subnet mask = 255.255.255.255
Remote Client-to-LAN Configuration Using DNAT and Aliasing
Multi-Tech Systems, Inc. RF760/660/600VPN DNAT and Aliasing Reference Guide (S000285C) 9
11. Click on Network Setup > DNAT to set up DNAT re-routing to allow Windows 2000 servers on the private LAN
side of the RF660VPN to be accessible, via Telnet, to clients outside the LAN. In Pre DNAT Network & Service,
define the original target of the IP packets that are to be re-routed. In Post DNAT Network & Service, define the
new target to which the packets are forwarded.
a) Create DNAT re-routing where the remote clients can Telnet the LAN’s Win2k Pro computer.
For example: Pre DNAT Network = WANInterface1
Service = TELNET
Post DNAT Network = Win2k_Pro
Destination Service = TELNET
b) Create DNAT re-routing where the remote clients can Telnet the LAN’s Win2k Server computer.
For example: Pre DNAT Network = WANInterface2
Service = TELNET
Post DNAT Network = Win2k_Server
Destination Service = TELNET
After this information is entered, it displays at the bottom of the screen.
1 WANInterface1 TELNET Win2k_Pro TELNET
2 WANInterface2 TELNET Win2k_Pro TELNET
12. Click on Packet Filters > Packet Filter Rules. The rule Lan – Any – Any – ACCEPT should already be created.
a) Add the rule Any – TELNET – Win2k_Pro – ACCEPT. It allows an Internet client the ability to Telnet to a
Windows 2000 Pro computer on the LAN at Site A. This rule is enabled automatically.
b) Add the rule Any – TELNET – Win2k_Server – ACCEPT. It allows an Internet client the ability to Telnet to a
Windows 2000 Server on the LAN at Site A. This rule is enabled automatically.
After these rules are entered, they display at the bottom of the screen.
1 Any TELNET Win2k_Pro ACCEPT
2 Any TELNET Win2k_Server ACCEPT
This completes the configuration of the RouteFinder at Site A.
Next, configure the Windows 2000 Server on the LAN and the remote client to support a Telnet connection.
Remote Client-to-LAN Configuration Using DNAT and Aliasing
Multi-Tech Systems, Inc. RF760/660/600VPN DNAT and Aliasing Reference Guide (S000285C) 10
Section Two
Configuring Windows 2000 Server at LAN site to support Telnet
Note: This procedure is very similar and can apply to configuring a Windows XP system.
1. Click on Start, point to Settings, then click on Control Panel.
2. When the Control Panel screen opens, double click on Administrative Tools.
3. When the Administrative Tools screen opens, double click on Services. The following screen displays:
4. Scroll down and right-click Telnet service and click on Properties.
5. In the Startup type box, click Automatic, then click on Start and click on OK.
6. The Telnet status should now read Started.
7. This server is now ready to receive a remote Telnet connection.
Remote Client-to-LAN Configuration Using DNAT and Aliasing
Multi-Tech Systems, Inc. RF760/660/600VPN DNAT and Aliasing Reference Guide (S000285C) 11
Section Three
Configuring Windows 2000 Remote Client to Telnet LAN Server
Note: This procedure is very similar and can apply to configuring a Windows XP client.
1. Click on Start, point to Settings, then click on Control Panel.
2. When the Control Panel screen opens, double click on Administrative Tools.
3. When the Administrative Tools screen opens, double click on Services. The following screen is displayed:
4. Right-click the Telnet service and click on Properties.
5. In the Startup type box, click Automatic, then click Start and click OK.
6. The Telnet status should now read Started and is now ready to create a remote Telnet connection.
7. Connect to the Internet as you normally would.
8. Option A: Open a DOS screen and type the following command to connect to the remote LAN Windows 2000
Pro system in the example:
telnet 204.26.122.104 / win2k-pro
Option B: Open a DOS screen and type the following command to connect to the remote
LAN Windows 2000 Server in the example:
telnet 204.26.122.105 / win2k-server
Remote Client-to-LAN Configuration Using DNAT and Aliasing
Multi-Tech Systems, Inc. RF760/660/600VPN DNAT and Aliasing Reference Guide (S000285C) 12
9. If a connection is successful, the following statement will be displayed dealing with your password information
and will ask Do you want to send it anyway(y/n).
10. Answering Yes displays a welcome message.
11. The C: prompt is now in reference to the Win2k server on the LAN and you should be able to access
subdirectories.
This completes the configuration of the Windows 2000 remote client.

Other manuals for RouteFinder RF600VPN

1

This manual suits for next models

2

Other Multitech Network Router manuals

Multitech MTR-L4G1 Installation instructions

Multitech

Multitech MTR-L4G1 Installation instructions

Multitech MultiConnect rCell MTR-H6 User manual

Multitech

Multitech MultiConnect rCell MTR-H6 User manual

Multitech RouteFinder MTASR3 User manual

Multitech

Multitech RouteFinder MTASR3 User manual

Multitech RouteFinder RF102S User manual

Multitech

Multitech RouteFinder RF102S User manual

Multitech MultiConnect rCell 100 Series User manual

Multitech

Multitech MultiConnect rCell 100 Series User manual
Multitech MultiFrad FR3100 User manual

Multitech

Multitech MultiFrad FR3100 User manual

Multitech MultiConnect rCell 100 MTR-H5 User manual

Multitech

Multitech MultiConnect rCell 100 MTR-H5 User manual

Multitech MultiConnect rCell MTR-LAT1-B07 User manual

Multitech

Multitech MultiConnect rCell MTR-LAT1-B07 User manual

Multitech RouteFinder RF850 User manual

Multitech

Multitech RouteFinder RF850 User manual

Multitech RouteFinder RF825-C-Nx User manual

Multitech

Multitech RouteFinder RF825-C-Nx User manual

Multitech MultiConnect rCell MTR-H5 Instruction Manual

Multitech

Multitech MultiConnect rCell MTR-H5 Instruction Manual

Multitech MultiConnect rCell100 Cat M1/NB-IoT Series Installation instructions

Multitech

Multitech MultiConnect rCell100 Cat M1/NB-IoT Series Installation instructions

Multitech Embedded Modem User manual

Multitech

Multitech Embedded Modem User manual

Multitech rCell 500 Series User manual

Multitech

Multitech rCell 500 Series User manual

Multitech RouteFinder RF560VPN User manual

Multitech

Multitech RouteFinder RF560VPN User manual

Multitech RoteFinder RF500S User manual

Multitech

Multitech RoteFinder RF500S User manual

Multitech MultiConnect rCell 100 Series Instruction sheet

Multitech

Multitech MultiConnect rCell 100 Series Instruction sheet

Multitech MultiFRAD FR220 User manual

Multitech

Multitech MultiFRAD FR220 User manual
Multitech MultiConnect rCell 100 Series User manual
Multitech

Multitech MultiConnect rCell 100 Series User manual

Multitech MultiConnect rCell 100 Series User manual

Multitech

Multitech MultiConnect rCell 100 Series User manual

Multitech RouteFinder MTASR2-201 User manual
Multitech

Multitech RouteFinder MTASR2-201 User manual

Multitech RouteFinder MTASR1-100 Technical manual

Multitech

Multitech RouteFinder MTASR1-100 Technical manual

Multitech MultiFrad FR3060 User manual

Multitech

Multitech MultiFrad FR3060 User manual

Multitech MultiConnect rCell 100 Series User manual
Multitech

Multitech MultiConnect rCell 100 Series User manual

Popular Network Router manuals by other brands

H3C MSR 2600 Installation, quick start

H3C

H3C MSR 2600 Installation, quick start

TP-Link Archer VR900 Quick installation guide

TP-Link

TP-Link Archer VR900 Quick installation guide

H3C SR6616 installation guide

H3C

H3C SR6616 installation guide

Advantech B+B SmartWorx SE416 quick start guide

Advantech

Advantech B+B SmartWorx SE416 quick start guide

Patton electronics SMART NODE 4950-NCE quick start guide

Patton electronics

Patton electronics SMART NODE 4950-NCE quick start guide

TRENDnet TEW 632BRP - Wireless Router Quick installation guide

TRENDnet

TRENDnet TEW 632BRP - Wireless Router Quick installation guide

D-Link Express EtherNetwork DI-604 Quick installation guide

D-Link

D-Link Express EtherNetwork DI-604 Quick installation guide

Phoenix Contact TC ROUTER 2002T-4G manual

Phoenix Contact

Phoenix Contact TC ROUTER 2002T-4G manual

Radionics MX-3FG manual

Radionics

Radionics MX-3FG manual

Lancom 800+ user manual

Lancom

Lancom 800+ user manual

Ubiquiti UF-LOCO quick start guide

Ubiquiti

Ubiquiti UF-LOCO quick start guide

Sierra Wireless AirLink MP70 Hardware user's guide

Sierra Wireless

Sierra Wireless AirLink MP70 Hardware user's guide

Trane 4950 0471 Installing and configuring

Trane

Trane 4950 0471 Installing and configuring

Moxa Technologies SDS-3008 Series Quick installation guide

Moxa Technologies

Moxa Technologies SDS-3008 Series Quick installation guide

E-Lins E481v Series user manual

E-Lins

E-Lins E481v Series user manual

Akai APC40 MKII quick start guide

Akai

Akai APC40 MKII quick start guide

Cambium Networks PMP 450 Series user guide

Cambium Networks

Cambium Networks PMP 450 Series user guide

NETGEAR C6250 quick start

NETGEAR

NETGEAR C6250 quick start

manuals.online logo
manuals.online logoBrands
  • About & Mission
  • Contact us
  • Privacy Policy
  • Terms and Conditions

Copyright 2025 Manuals.Online. All Rights Reserved.