manuals.online logo
Brands
  1. Home
  2. •
  3. Brands
  4. •
  5. Multitek
  6. •
  7. Intercom System
  8. •
  9. Multitek MB-11 User manual

Multitek MB-11 User manual

MB-11
USER MANUAL OF OUTDOOR DOOR UNIT WITH
KEYBOARD
It obeys the rules of AEEE regulations.
2
CONTENTS:
Subject Page
Security Warnings 5
Features and Front View 6
•Wall Mount 7
➢Assembly using standard blind casing_________________________7
➢Assembly using raincoat ___________________________________8
Back View 9
Camera and Image Settings 10
Installation Connection and Sound Settings 11
Usage 12
Screen usage 12
Features Usage 13
Call Functions 13
Calling with Apartment Number 13
Call Using Phonebook 13-14
Open Block Door With Password 14
Open Block Door With Proximity Card ____________________________________14
User and System Settings 15
Creating Block Door Password 15
Introduction to Setting Menus __________________________________________ 15
Using the Setting Menus 15
Setting Menu Operations 15
•Version 15
➢Version Display 15
➢Panel Door No Display 15
➢Panel Block No Display 15
3
•Program 16
➢Entering Program Password 16
➢Program Screen 16
➢Change Password Of Enter Program 17
➢Changing the Door Panel Number 18
➢Entering Name in the Door Panel Phonebook ___________________19
➢Using the Keypad for Name Entry ___________________________20
➢Deleting the Door Panel Phonebook __________________________21
➢Door Panel Block Number Replacement ______________________ 22
➢Changing the Time of the Door Automatic Switching _____________ 23
➢Deleting Block Door Passwords _____________________________ 24
➢Entering Total Block Number in the System ___________________ 25
•Proximity Card Operations 26
➢Introduction to Proximity Card Operations Menu ________________ 26
➢Proximity Card Registration ________________________________ 27-28
➢Deleting the Proximity Cards Which Rooms Have _______________ 29
➢Deleting the all Proximity Cards _____________________________ 30
RESETTING THE PASSWORD When The Password Is Forgotten _____________ 31
Numbering of Apartments 32
4
SAFETY WARNINGS
Thank you for choosing Multitek MB-11 video door phone. This user manual was prepared for using the device more
efficiently.
For your own and the device safety, you should obey the security warnings;
1. Read the user manual carefully.
2. Read the safety warnings carefully.
3. Remarks about Transport, Shipment and Preservation
- During transport and shipment keep the product with its case. The case will protect the product against the physical damages.
- Don’t put heavy weight on to the product or the product case. The product might be damaged.
- In case of falling, the product might have permanent damage which will make it non-operational.
- Deformation might be caused in case of extreme air conditions such as hot or cold weather. Life time of the electronic circuits tend to
decrease in such conditions.
4. Situations that might be dangerous to human or natural environment:
- Beware of the sharp pointed edges of the case
- Recycle the product case in the proper recycling bin.
5. Maintenance of the product
- The product doesn’t need periodic maintenance. For maintenance and repair please consult to the authorized services.
- By rubbing with dry cloth, you can clean the product periodically.
- You can keep the product in its case, when you are not using it.
- Before cleaning the product, unplug the connection. Be careful that the cleaning material doesn’t contain any solvent such as alcohol,
gasoline or thinner.
6. Place the product on a plain and stable wall.
7. To prevent any kind of electrical shock, use the product with its original cable.
8. Don’t put any foreign substance in the product. And don’t try to open it with devices that might cause electrical shock.
9. When maintenance and repair are practiced in places other than the authorized services, the product might be damaged.
10. Remarks about the energy consumption of the product
- The product is designed to work 24/7. Yet to prevent energy consumption, it should be unplugged when it won’t be used for a long
period of time. The user should be aware that each of the terminal stations that are left on use energy that is not needed.
In case of malfunctioning please consult to an authorized service.
5
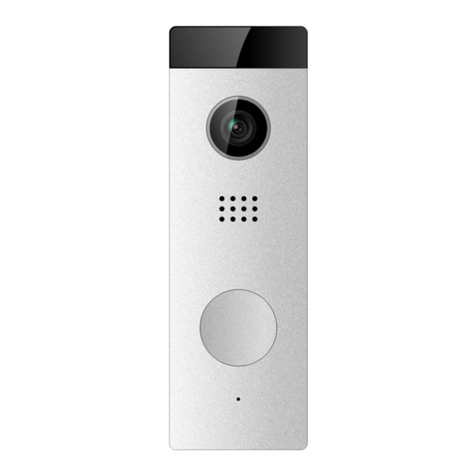
FEATURES:
➢128 X 64 LCD Display
➢Dimensions: 142 X 367 X 10 mm ( Unprotected)
180 X 430 X 28 mm (Protected)
➢Illuminated and aluminum keypad
➢Aluminum Body
➢Lighting LEDs for Night Vision
➢Flush Mounting
➢Angle adjustable Camera
➢Proximity Card Reader
➢Raincoat Protector (Optional)
➢Surface Mounted Mounting Apparatus (Optional)
USAGE:
A. USE OF PROPERTIES:
1. CALLING WITH ROOM NUMBER:
Press # key after dialing the apartment number you want to call.
For Example: If you want to call room number 5, press:
To close the call, press 
2. CALLING ON THE PHONEBOOK:
Press # for open the phonebook.
The information screen for Selection Keys appears.
6
UP DOWN
NEXT PAGE PREVIOUS PAGE
Then the PHONEBOOK screen will appear.
You can use 2 - 8 - 4 - 6 keys on the keypad to select the circle you want to
search. The currently selected circle appears selected in White.
Example: For calling room 01 pressing key 2 to selected the room 01.
Each time the key is pressed, the selection panel will scroll up by 1 line.
When the desired room to call is selected, press the button to call the
apartment.
To close the call, press .
7
3. OPENING THE OUTDOOR WITH PASSWORD
Enter 99 + 4 digit number password with keypad of the door panel.
Example: If the password (of any room) is 2486 you enter the following digits to the door
panel:
+
4. OPENING OUTDOOR WITH CARD
The door can be opened using the previously saved Proximity Card or Keychain.
B. USER AND SYSTEM SETTINGS:
CREATING THE DOOR OPENING PASSWORD:
Special Door Release Password can be created for each apartment.
•The number of the circle to determine the password from the outer door panel is
calling.
For example, for room number 5: Press on the door panel.
•Called room answer and press Doorkeeper calling button on the monitor.
•Press 99 buttons before outdoor panel, then a 4-digit password is defined.
For example, setting 2486 password to apartment 5.
Press,
On the outdoor.
When the Proximity
Card or Keychain is
moved closer to the
CARD section, the
door opens.
8
Note: Consecutive digits like 1234 or 5678 may not be assigned as password. If the door
panel gives an error tone it means the password is not accepted.
ENTER TO SETTING MENUS:
Press # 99 on the standby screens to enter the Setup Menu.
There are 2 options in the Main Menu Screen.
VERSION: The version information of the software and the Door and Block number of the
Panel are displayed.
Press the key to exit the screen.
The version screen closes after 10
seconds.
PROGRAM: All settings and program changes are made with this menu.
Press 2 - 8 to select PROGRAM and press #.
You will be prompted to enter the PROGRAMMING PASSWORD.
White Color Arrow indicates
the currently selected
option. 2 and 8 keys are
used for Up - Down.
# Is used to confirm the
selection.
9
NOTE: ALL OPERATIONS ARE MADE ON THE SETTING MENUS.
THE “PROGRAMMING PASSWORD" IS REQUIRED TO ACCESS THE SETTING
MENUS.
Factory Setting Programming Password: 7447
PROGRAM Screen:
A. CHANGING THE PROGRAMMING PASSWORD:
Press #, while White Color Arrow on the CHANGE PASSWORD.
White Color Arrow indicates
the currently selected
option. 2 and 8 keys are
used for Up - Down.
# Is used to confirm the
selection.
10
You are prompted to enter NEW PASSWORD in the incoming screen.
The password must be 4 digits. Key in the new password via the keypad.
Note: Consecutive digits like 1234 or 5678 may not be assigned as password. If the door
panel gives an error tone it means the password is not accepted.
The following confirmation screen appears at the end of the operation.
B. CHANGING THE DOOR PANEL NUMBER:
For blocks with more than one Door Panel, the number of each door panel must be
defined separately. In factory default settings, DOOR NO is set to 1.
This defining operation is done by selecting DOOR NO in the programming screen.
Press #, while White Color Arrow on the DOOR NUMBER.
11
The current Door Number is displayed on the incoming screen.
You can set the DOOR NUMBER 1 to 4 using the 2 - 8 buttons. Use the 2 key to increase
the No and decrease with the 8 key.
Press #after setting.
Example: To set the Door Number to 4, you have to press 2 button for 3 times.
C. NAME ENTERING THE DOOR PANEL GUIDE:
In order to use the Door Panel Phonebook, the name of the residents must be entered
in advance.
This operation is done via the ”NAME INPUT“ option on the Programming screen.
Use 2 - 8 button to select NAME Input and then press #.
You are asked to enter the Room No and the Room Name in the incoming screen.
12
Example: For room number is 4
First press 4and
Then press #.
You are asked to enter the Room No and the Room Name in the incoming screen.
The keypad is used for Name
Entry. Input name and then
press #
If there is a new entry, enter the
Apartment Number and Name
again. For Exit press .
13
USING THE KEYPAD FOR NAME INPUT
At the name entry, press the key with the letter to be pressed until the desired letter is.
Each press will display the next letter.
Write cursor moves aside after 2 seconds when the desired letter arrives.
The room name can be up to 10 letters.
Use the key for deletion in case of incorrect writing.
Use the #to confirm the entry of Apartment Number and Apartment Name.
14
D. DELETE DOOR PANEL PHONEBOOK:
When the Door Panel Guide is cleared, the saved Proximity Card Records and Door
Open Passwords are not deleted.
This operation is done via the DELETE GUIDE option in the Programming screen.
Use 2 - 8 button to select NAME Input and then press #.
The Operation Screen appears.
The Device Home screen appears when the Delete Phonebook is finished.
15
E. CHANGE BLOCK NUMBER:
For systems with more than one block, the door panels of each block must be defined
separately. The factory default setting is BLOCK NO 1.
This operation is done by selecting BLOCK NO in the programming screen.
Use 2 - 8 button to select BLOCK NO and then press #.
The current Block No is displayed on the incoming screen.
NOTE: To change the block number, you must enter the total number of blocks in
the system from the TOTAL BLOCK option on the Program Screen.
You can set the BLOCK NUMBER 1 to 16 using the 2 - 8 buttons. Use the 2 key to
increase the No and decrease with the 8 key.
Press #, after settings.
Example: To set Block number to 5, you need to press 2 button for 4 times.
16
F. REPLACING THE DOOR AUTOMATIC PULL TIME:
Depending on the type of Door Automatic used, it may be necessary to change the
time of the Door Automatic Relay in the Door Panel. In factory default settings, Door
Automatic Relay Time is set to 1.
This operation is in the programming screen "DOOR AUTOMATIC TIME" is done via.
Use 2 - 8 button to select DOOR AUTOMATIC TIME and then press #.
The Door Automatic Pull Time, which is set on the incoming display, is displayed.
You can set the TIME 1 to 99 using the 2 - 8 buttons. Use the 2 key to increase the No and
decrease with the 8 key.
Press #, after settings.
G. DELETING BLOCK DOOR OPENING PASSWORDS:
When the Door Open Passwords stored in the Door Panel are deleted, the saved
Proximity Card Entries and Phonebook are not deleted.
17
This is done in the Programming screen via the "DELETING ROOM PASSWORDS"
option.
Use 2 - 8 button to select DELETING ROOM PASSWORDS and then press #.
The Operation Screen appears.
When the delete operation is finished, the device returns to the Home Screen.
H. ENTERING OF TOTAL NUMBER OF BLOCKS IN THE SYSTEM:
For systems with more than one block, the total number of blocks in the system must
be entered in each door panel. In factory default settings, TOTAL BLOCK NO is set to
1.
This operation is done by selecting “HOW MANY BLOCKS ARE THERE”in the
programming screen.
18
Use 2 - 8 button to select “HOW MANY BLOCKS ARE THERE” and then press #.
The current Total Block No is displayed on the incoming screen.
Use the 2 key to increase the No and decrease with the 8 key.
Press #, after settings.
Example: To set the Block Count to 4, you need to press 2 button 3 times.
PROXIMITY CARD TRANSACTIONS:
Proximity cards to be used to open the door are introduced via the Door Panel.
Registration of cards, deleting separately or all cards operations are performed in the
PROXIMITY CARD OPERATIONS menu.
The PROXIMITY CARD OPERATIONS menu is entered via the Programming Screen
19
Press the button 6on the programming screen.
The Proximity Card Operations Menu appears.
CARD REGISTRATION: For each apartment you can registration maximum 5 Proximity
Cards.
DELETE CARDS: If the card or cards of a room have disappeared, you can delete the
cards of that room. And by re-recording the existing cards of the circle, you can delete the
lost card in the system.
DELETE ALL CARDS: You can delete all Proximity Cards registration on the door panel.
I. REGISTRATION PROXIMITY CARDS:
You can save the Proximity cards by Door Number to be used to open the Door
Automatic on the Door Panel.
This operation is done by selecting "CARD RECORD" in the Proximity Card
Operations menu.
20
Use 2 - 8 button to select “CARD RECORD”and then press #.
You are asked to enter the Apartment Number to save the cards. For each apartment you
can registration maximum 5 Proximity Cards.
Example: For room number is 4
First press 4and
Then press #.
Closer the Proximity card to card reader

Other Multitek Intercom System manuals
Multitek MB-73 User manual

Multitek

Multitek MB-73 User manual

Multitek MB-12 User manual

Multitek

Multitek MB-12 User manual

Multitek MBT-70 User manual

Multitek

Multitek MBT-70 User manual

Multitek MB-43 User manual

Multitek

Multitek MB-43 User manual

Multitek MB-41 MULTIBUS User manual

Multitek

Multitek MB-41 MULTIBUS User manual

Multitek MB-SES User manual

Multitek

Multitek MB-SES User manual

Multitek DIP40 User manual

Multitek

Multitek DIP40 User manual

Multitek MB-74 User manual

Multitek

Multitek MB-74 User manual

Multitek DIP70 User manual

Multitek

Multitek DIP70 User manual

Multitek DIP40 User manual

Multitek

Multitek DIP40 User manual

Multitek LIP 03 User manual

Multitek

Multitek LIP 03 User manual

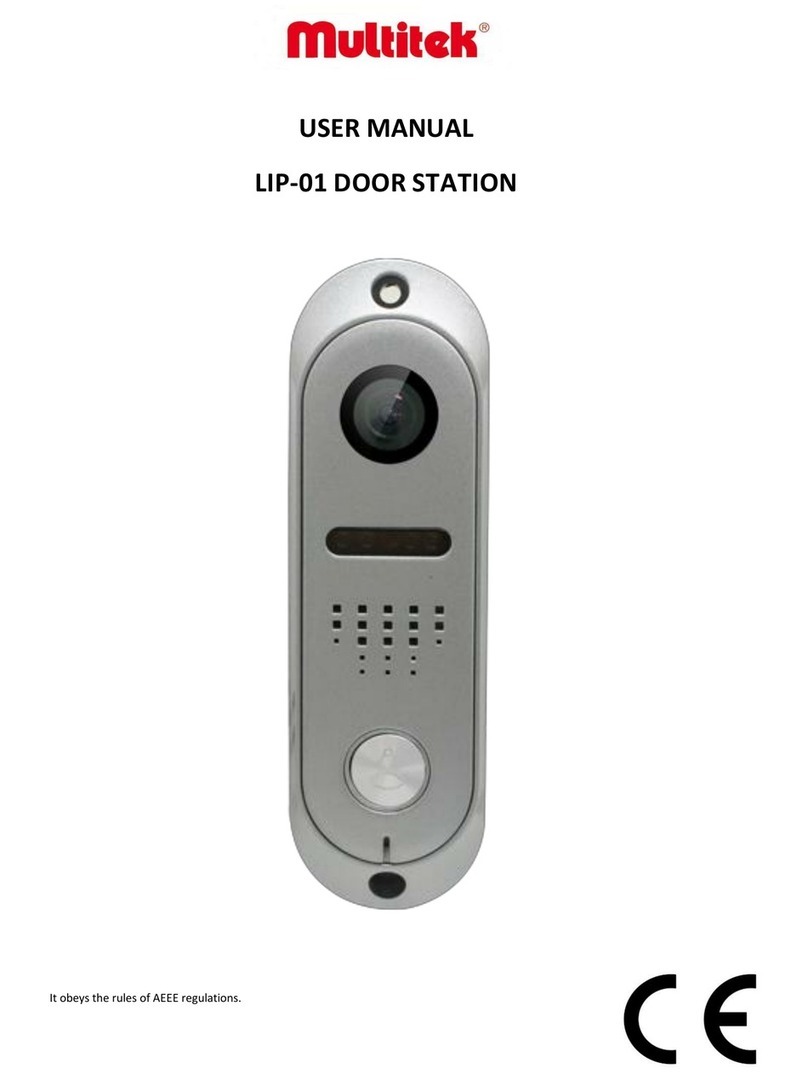
Multitek LIP-01 User manual

Multitek

Multitek LIP-01 User manual

Multitek RL-B17M User manual

Multitek

Multitek RL-B17M User manual

Multitek MB-45 Dimensions and installation guide

Multitek

Multitek MB-45 Dimensions and installation guide

Multitek MULTIBUS MB-IF User manual

Multitek

Multitek MULTIBUS MB-IF User manual

Multitek RL-B43M User manual

Multitek

Multitek RL-B43M User manual
Multitek VIP70 User manual

Multitek

Multitek VIP70 User manual

Multitek MB-40 User manual

Multitek

Multitek MB-40 User manual
Multitek MULTIBUS MB-09 User manual

Multitek

Multitek MULTIBUS MB-09 User manual
Multitek MBA-42 User manual

Multitek

Multitek MBA-42 User manual
Popular Intercom System manuals by other brands

Mircom TX3 Series Programming manual

Mircom

Mircom TX3 Series Programming manual

urmet domus Agora 2 Installation sheet

urmet domus

urmet domus Agora 2 Installation sheet

golmar TKIT632 user manual

golmar

golmar TKIT632 user manual

Vimar ELVOX 0930/000.04 instruction sheet

Vimar

Vimar ELVOX 0930/000.04 instruction sheet

Telguard ML Series installation guide

Telguard

Telguard ML Series installation guide

Fermax VIDEO CITYLINE DUOX 3L User& installer's manual

Fermax

Fermax VIDEO CITYLINE DUOX 3L User& installer's manual

Genway C5-IP-OS-02 user manual

Genway

Genway C5-IP-OS-02 user manual

Trigon Electronics MiniGuard IID Installation and programming instructions

Trigon Electronics

Trigon Electronics MiniGuard IID Installation and programming instructions

ZKTeco VE01-B22L user manual

ZKTeco

ZKTeco VE01-B22L user manual

urmet domus 1083/39 manual

urmet domus

urmet domus 1083/39 manual

CDVI 2EASY CDV-850IP manual

CDVI

CDVI 2EASY CDV-850IP manual

golmar IP ART 7/G+/48 user manual

golmar

golmar IP ART 7/G+/48 user manual

HME DX100 operating instructions

HME

HME DX100 operating instructions

Jula 444-012 operating instructions

Jula

Jula 444-012 operating instructions

Aiphone GH-1AD specification

Aiphone

Aiphone GH-1AD specification

Elvox Giotto 6341 operating instructions

Elvox

Elvox Giotto 6341 operating instructions

Chamberlain LIFTMASTER MUGAPLM user manual

Chamberlain

Chamberlain LIFTMASTER MUGAPLM user manual

AYR 763 user manual

AYR

AYR 763 user manual

manuals.online logo
manuals.online logoBrands
  • About & Mission
  • Contact us
  • Privacy Policy
  • Terms and Conditions

Copyright 2025 Manuals.Online. All Rights Reserved.