manuals.online logo
Brands
  1. Home
  2. •
  3. Brands
  4. •
  5. Multitek
  6. •
  7. Intercom System
  8. •
  9. Multitek RL-B43M User manual

Multitek RL-B43M User manual

USER MANUAL
COLOR VIDEO DOORPHONE KITS
MODEL: RL-B43M
Version 1.0
Product Description...................................1
Features.....................................................1
Package Contents......................................1
Safety Instruction.......................................2
System Installation.....................................2
Operation Instruction.................................4
Technical Specifications............................5
Trouble Shooting.......................................6
Safety Instruction
Product Description
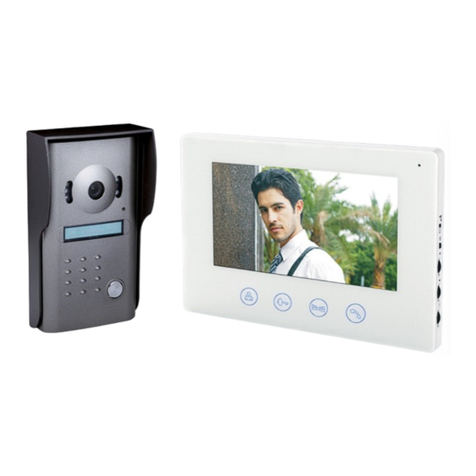
The color video doorphone can be used to monitor, call, intercom and unlock.
It is a product that is very suitable for villa, single house, hotel, office and etc,
giving you the combined benefit of security and convenience.
1) 4.3" T FT s creen w ith lo w p ower c onsumption, n o r adiation a nd h igh
d efinition.
2) Damage-proof, water-proof, oxidation-proof and abrasion-proof metal alloy
panel outdoor unit.
3) Electrically controlled lock release function.
4) Unlock gate outdoor unit.
5) Monitoring the outdoor.
6) Talking volume, brightness and chroma can be adjusted.
7) Enclosed with adapter and 15m cable for DIY installation.
8) The indoor unit can be hung on the wall.
9) 16 chord melodies for option.
Features
Package Contents
·Indoor Unit x 1
1
·Outdoor Unit x 1 ·Adapter x 1 · Rain shade x1
·Bracket x 1 ·15m Cable x 1 ·Screws
2
Caution
·Keep the indoor unit away from high temperature such as near an oven or
under direct sunlight, and high humidity such as bathroom and greenhouse.
·Do not install the indoor unit close to a television or position with strong
jamming- the signals the TV and the intercom use can be interfered with
each other.
·Do not touch the unit with wet hands.
·Avoid throwing, dropping or hitting the units.
·Clean the camera or screen with a soft cloth. Do not use detergent,thinner,
volatile or corrossive liquid.
·Do not expose the camera of the outdoor unit to direct sunlight.
·Use the product under the circumstance of barrier-free and no inteference.
·When a car or a motorbike passes by, the image may be interfered by the
radio wave and become blurred or be cut off.
①②
System Installation
A. Indoor Unit
1) Fasten the bracket of the video indoor unit on the wall with screws.
Adopt 4 x 40PM screws to install it on 86 standard box.
Adopt 4 x 30BA screws to install it on the wall.
2) Hang the indoor unit on the bracket after finishing wire connection. Plug
the enclosed adapter into the sockets of AC power and the unit respectively.
1. To prevent damage, the adapter should be fastened on the wall according
to instruction.
2. Power plug as disconnecting device should be kept convenient to operate.
Bracket
63mm
4
C. Wiring Diagram
B. Outdoor Unit
2
The enclosed cable is 15m. RVV4 x 0.5mm connecting wire can be
2
chosen if you want to lengthen it to 15-50m. RVV4 x 0.75mm connecting
wire can be chosen if you want to lengthen it to 50-100m. Connect the
wiring terminals 1, 2, 3, 4 of indoor unit with the wiring terminals 1, 2, 3, 4
of outdoor unit respectively.
Connect the wiring terminals 5, 6 of indoor unit with the electric-lock
2
through RVV2 x 1.0mm connecting wire.
Monitor
Unlock Talk
Gate Unlock
Operation Instruction
A. Indoor Unit
Microphone
Melody Selection
Brightness
Chroma
Volume
3
Wiring Terminal
1) Take off the screws on the bottom and remove the front cover.
2) Take off the ‘Room No,’ lid and write down your respective room/block
number and cover it again with the lid.
3) Install the Outdoor Unit 1.4m ~ 1.7m above the ground level
(according to the camera effect ).Avoid direct sunlight.
4) Fasten the outdoor unit on the wall with the enclosed screws (4x30BA).
5) Cover the zinc alloy panel and tighten up the screws on the bottom.
Wiring Instruction:
1. Audio wire
2. Ground wire
3. Video wire
4.Power wire
Outdoor Unit Electric-lock
Indoor Unit
Outdoor Gate
m
Talking distance<40cm
56
Trouble Shooting
Problem
No Picture/Signal
·Make sure all the connections are secure and properly
connected.
·Make sure your monitor is plugged into a power source.
·Make sure there is nothing obstructing the view o f t he
c amera.
Solutions
No Picture,
but intercommunication
is normal
No audio when calling
The outdoor unit cannot
call the indoor one
Door Unlock not
Functioning
No one can hear me
outside but I can hear
them after calling
No one can hear me
outside but I can hear
them when monitoring
·Make sure all the connections are secure and properly
connected.
·Make sure there is nothing obstructing the view of the
camera.
·Make sure the volume noch on the indoor unit is turned up.
·Make sure there is nothing interfering with the speaker or
microphone on the indoor unit
or the camera.
·Make sure all the connections are secure and
properly connected.
·Make sure all the connections are secure and properly
connected.
·Make sure the connections with the locks are secure and
properly connected.
·Make sure you have the lock wired to a power source which
is enough to make it operate.
·Press TALK key for two-way intercom.
·Make sure all the connections are secure and properly
connected.
·Press TALK key for two-way intercom since simple touch
MONITOR allows you to see and hear outside but prevents
the outside from hearing you .
·Make sure all the connections are secure and properly
connected.
Technical Specifications
Indoor Unit
AC100-240V 50Hz/60Hz
DC12V 1100mA
4.3
480RGB(H) x 272(V)
95.04mm(H) x 53.86mm(W)
0.107(H) x 0.370(V)
136mm(W) x 143mm(H) x 18.5mm(D)
40S±10%
Static State<1.5W, Working State<5W
10%~90%(RH)
120S±10%
2
50m(4×0.5mm )
-10℃~+40℃
Screen Size
Resolution
Effective Area
Pixel Dimension
Outline Size
Adapter Input Voltage
Adapter Output Voltage&Current
Monitoring time
Working Distance
Power Consumption
Operating Temperature
Talking time
Ralative Humidity
Outdoor Unit
B. Outdoor Unit
1) Press CALL button of outdoor unit to call. The doorbell will ring and the images of visitors
will be shown on the indoor unit. Touch TALK ( ) to activate the intercom. Touch TALK
( ) again to disconnect. Time duration of intercom and image is about 120s.
2) Touch UNLOCK ( ) button to release the electric door lock.
3) Touch GATE UNLOCK ( ) button to release the outdoor gate.
4) Touch MONITOR ( ) button to start monitoring outside. The monitoring time is about
40s. At the same time, you can touch TALK ( ) button to activate intercom with the
visitor at the door and press it again to stop monitor and conversation.
5) Turn the adjust knobs ( ), ( ) and ( ) on the side of indoor unit to adjust the
brightness,chroma and talking volume.
6) 16 chord molodies for option.
Camera
Infrared light
Rain shade
Microphone
Speaker
Call
Room number
Wiring
terminal
Infrared distance
Illumination
Working temperature
Resolution
Viewing angle
>4m
2LUX
-15℃~50℃
CMOS >380TV line,CCD >420TV line
180(H)x104(W)x54(D) mm
60° wide angle
Dimensions

Other Multitek Intercom System manuals
Multitek MB-40 User manual

Multitek

Multitek MB-40 User manual

Multitek DIP40 User manual

Multitek

Multitek DIP40 User manual

Multitek VIP70 User manual

Multitek

Multitek VIP70 User manual

Multitek MB-12 User manual

Multitek

Multitek MB-12 User manual
Multitek MB-SES User manual

Multitek

Multitek MB-SES User manual

Multitek MBA-42 User manual

Multitek

Multitek MBA-42 User manual

Multitek MB-43 User manual

Multitek

Multitek MB-43 User manual

Multitek MBT-70 User manual

Multitek

Multitek MBT-70 User manual

Multitek MB-74 User manual

Multitek

Multitek MB-74 User manual

Multitek RL-B17M User manual

Multitek

Multitek RL-B17M User manual

Multitek MB-73 User manual

Multitek

Multitek MB-73 User manual

Multitek MULTIBUS MB-09 User manual

Multitek

Multitek MULTIBUS MB-09 User manual

Multitek MB-45 Dimensions and installation guide

Multitek

Multitek MB-45 Dimensions and installation guide

Multitek DIP70 User manual

Multitek

Multitek DIP70 User manual

Multitek DIP40 User manual

Multitek

Multitek DIP40 User manual
Multitek LIP-01 User manual

Multitek

Multitek LIP-01 User manual

Multitek LIP 03 User manual

Multitek

Multitek LIP 03 User manual

Multitek MB-41 MULTIBUS User manual

Multitek

Multitek MB-41 MULTIBUS User manual
Multitek MB-11 User manual

Multitek

Multitek MB-11 User manual

Multitek MULTIBUS MB-IF User manual

Multitek

Multitek MULTIBUS MB-IF User manual

Popular Intercom System manuals by other brands

Electra APE.1S1.x&x installation instructions

Electra

Electra APE.1S1.x&x installation instructions

GME th10 instruction manual

GME

GME th10 instruction manual

Mircom TX3 Series installation manual

Mircom

Mircom TX3 Series installation manual

Auta NEOS DIGITAL KVD-1 S1 COAX manual

Auta

Auta NEOS DIGITAL KVD-1 S1 COAX manual

PRASTEL VISIODOOR2 installation manual

PRASTEL

PRASTEL VISIODOOR2 installation manual

Toa EXES-6000 Specifications

Toa

Toa EXES-6000 Specifications

golmar GB2 Nexa Modular user manual

golmar

golmar GB2 Nexa Modular user manual

Vimar ELVOX DUE FILI PLUS 1300 Installer's guide

Vimar

Vimar ELVOX DUE FILI PLUS 1300 Installer's guide

Hollyland MARS T1000 User notes

Hollyland

Hollyland MARS T1000 User notes

golmar Art 7 H /G2+ user manual

golmar

golmar Art 7 H /G2+ user manual

Slinex MA-02 user manual

Slinex

Slinex MA-02 user manual

AES global PRIME6-PROX-IMPK-PE-4GA installation instructions

AES global

AES global PRIME6-PROX-IMPK-PE-4GA installation instructions

VISUAL PLUS XPR EX5 manual

VISUAL PLUS

VISUAL PLUS XPR EX5 manual

Castel AXESS Series manual

Castel

Castel AXESS Series manual

ALC SecuFirst DID701 quick start guide

ALC

ALC SecuFirst DID701 quick start guide

NatComm DS3 user guide

NatComm

NatComm DS3 user guide

2N Helios IP Configuration manual

2N

2N Helios IP Configuration manual

urmet domus 2VOICE 1760/18 Installation handbook

urmet domus

urmet domus 2VOICE 1760/18 Installation handbook

manuals.online logo
manuals.online logoBrands
  • About & Mission
  • Contact us
  • Privacy Policy
  • Terms and Conditions

Copyright 2025 Manuals.Online. All Rights Reserved.