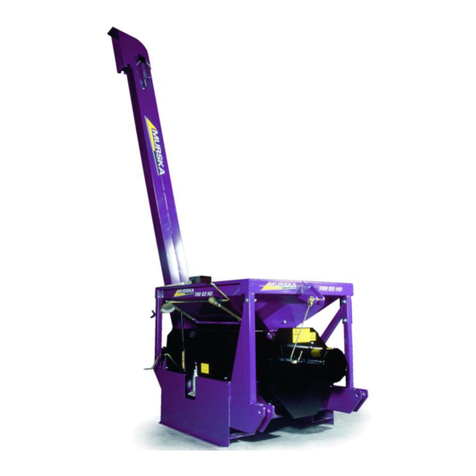
Murska 1400S2X2 User manual

Murska 1400S2X2 / 2000S2X2
Operator`s Manual
V. 7/08
Machine Nr.
Roller Cassette Nr.
Date of Purchase

1

2
INDEX
INDEX................................................................................................................................................................ 2
EC DECLARATION OF CONFORMITY FOR MACHINERY............................................................................ 3
WARRANTY...................................................................................................................................................... 3
PRODUCT IDENTIFICATION........................................................................................................................... 4
CONTROLS & FEATURES............................................................................................................................... 5
ACID PUMP PDH-10......................................................................................................................................... 7
INTRODUCTION............................................................................................................................................... 8
GENERAL SAFETY.......................................................................................................................................... 9
OPERATING INSTRUCTIONS ....................................................................................................................... 11
CHECK-LIST................................................................................................................................................... 12
ROLLER CHECKING AND ADJUSTMENT................................................................................................... 14
ROLLER ADJUSTMENT ............................................................................................................................... 16
ROLLER ADJUSTMENT DURING CRIMPING.............................................................................................. 18
STARTING UP ................................................................................................................................................ 19
CLOSING DOWN............................................................................................................................................ 21
FAULT FINDING ............................................................................................................................................. 22
DAILY MAINTENANCE .................................................................................................................................. 24
END-OF-SEASON MAINTENANCE............................................................................................................... 25
HYDRAULIC ELEVATOR ANGLE ADJUSTMENT ....................................................................................... 26
TOWING BAR ADJUSTMENT ....................................................................................................................... 26
CRIMPING GRADE CHECKING .................................................................................................................... 27
PTO-SHAFTS.................................................................................................................................................. 28
PULLEY ASSEMBLY AND REMOVAL.......................................................................................................... 29
TIGHTENING TORQUE OF BOLTS............................................................................................................... 30
SUSPENSION ................................................................................................................................................. 30
BRAKES, WHEELS........................................................................................................................................ 31
EXTRA HOPPER ............................................................................................................................................ 32
NOTES............................................................................................................................................................. 33
SPARE PART CATALOGUE.......................................................................................................................... 34

3
EC DECLARATION OF CONFORMITY FOR MACHINERY
The CE Mark is on the Machine Identification Label
EC Declaration of Conformity for
Machinery
(Directive 89/392/EEC, Annex II, sub. A; en)
Manufacturer:
Aimo Kortteen Konepaja Oy
Pohjolantie 2
FI-84100 Ylivieska
Finland
Herewith declares that
Murska 1400 / 2000 S2x2
is in conformity with the provisions of the Machine Directive
(Directive 89/392/EEC), as amended, and with national
implementing legislation.
Aimo Korte
Managing Director
WARRANTY
Warranty
Aimo Kortteen Konepaja Oy warrants its products to be in conformance to written specifications and to be
free from defects in workmanship.
The warranty shall not apply to failure or deficiency which has been caused by misuse, neglect, improper
assembly, or unauthorised repair or modification.
Rapid wearing may occur in the rollers if not correctly adjusted.
Please pay particular attention to adjusting them correctly.
Other conditions according to
ORGALIME S 92
Thanks to continuous product development the manufacturer can introduce improvements to the machine.
This does not mean that a machine produced prior to the date of introduction of such improvement, would be
modified by the manufacturer free of charge.

4
PRODUCT IDENTIFICATION
CE-marking
Date of manufacture
Model
ID-number
CE -marking

5
CONTROLS & FEATURES
Hydraulic Rams & Springs
for Roller Tensioning
Scraper knives, adjustments
Feeding door controls
Guard magnets
Taper lock drive pulleys (6pcs)
Feeder drive belt
Feeder belt tensioner

6
Elevator hat adjustment
Tractor brake hose.
Elevator adjusting hose.
Toolbox
Support leg

7
ACID PUMP PDH-10 (ACCESSORY)
Acid nozzles
fitting plate. The minimum
2,5 bar pressure is needed
to work properly.
PDH-10 pump-unit
Filter
Flow control
PDH-10 pump-unit

8
INTRODUCTION
Korte Roller Mill
-model 1400 S2x2
-model 2000 S2x2
Purpose:
The machine can be used for crimping high moisture grains and for rolling dry grains.
Made in Finland, EU.
Technical Data 1400 S2x2 2000 S2x2
Crimping capacity, max. 30 tonnes/h 40 tonnes/h
Power demand 75 kW 95 kW
Hopper capacity 1500 (+ 5000) litres 1500 (+ 5000) litres
Lifting height of elevator 330 cm 330 cm
Length 235 cm 260 cm
Width 235 cm 260 cm
Height without elevator 180 cm 180 cm
Weight 2450 kg 2950 kg
Rotation rate (PTO) 350 - 540 rpm 350 - 540 rpm
Rollers 4 pc 4 pc
Fluted and spring loaded + +
Gear drive + +
Width 700 mm 1000 mm
Diameter 300 mm 300 mm
Weight 160 kg each 190 kg each
Equipment (supplemental)
Ensilage applicator device + +
Maize rollers + +
Elevator extension 1 m and 2 m 1 m and 2 m

9
GENERAL SAFETY
1. While operating, the machine must be on
a solid base.
2. The machine should not be moved when
the grain hopper is full or during filling.
Ensure before using that the hopper is
empty.
3. It is recommended that safety goggles are
used while operating the machine.
4. Keep hands, clothing, tools etc. away
from the hopper.
5. Do not stand on the PTO shaft or
linkage or between the tractor and the
machine.
6. Nobody should enter the tractor cabin
while operating the machine, especially
when making adjustments. Pay attention
to children`s appearance!
7. Maintenance and repairs / adjustments
should be carried out when the machine is
not operating. Tractor engine must be
stopped and the PTO shaft out of gear.
8. If a liquid applicator is used, full
protective clothing should be worn in
accordance with the additive
manufacturer`s safety instructions.
9. A protective mask should be worn
under dusty conditions (dry grain rolling).

10
Read the operator`s manual carefully
before using the machine. Follow the
operation- and safety-instructions
during the crimping.
Keep your arm far off v-belts and
pulleys when the machine is
operating!
Do not step onto the bottom auger.
All guards must be placed and
properly secured when the machine
is operating.
Do not reach out or enter the hopper
while the machine is operating.
Place for operator`s manual.
Keep your body far off the universal
shaft.
Look up proper maintenance from
the instruction manual.
Do not operate the machine with
roller clearence less than 0.3 mm. A
smaller clearence makes the rollers
wear sooner and may cause damage
to the rollers.
Keep your arms far off gearwheels!
Greasing target.
The noise level of the machine when
operating can be between 98 and 116
dB. Ear muffs of approved type for
noise levels above 100 dB must be
worn. Any person who comes close
to the machine for a period of hours
should also wear similar ear muffs.

11
OPERATING INSTRUCTIONS
Recommended Procedures:
Take notice, that the Crimper machine has two pairs of rollers,
a pair on each side. All adjusting, maintenance and operating procedures
apply for both pairs individually.
1. Check-List
Carry out first before proceeding to any other routines, also once a day when the
machine is in daily use, and each time the machine is started after a period of being
idle.
2. Roller Adjustment
Proceed to Roller Adjustment after finishing the Check-List. Check Adjustments once
a day when the machine in daily use.
3. Starting Up
Proceed to Starting Up after finishing the Check-list and Adjustments.
4. Closing Down
Carry out each time the machine is stopped.

12
CHECK-LIST
Carry out first before proceeding to any other routines, also once a day
when the machine is in daily use, and each time the machine is started
after a period of being idle.
1. Check all nuts, bolts and screws for correct tightness. Replace or
tighten if required.
2. Turn Elevator to vertical position and check Elevator Chain tension
(sideways movement should be possible). Adjust the tension if
required. The chain must be adjusted both sides of elevator and ensure
that chain stays in middle of the sprocket wheel.
It’s recommended to use elevator turned to the right (look the picture above), because of the better
flow of grain. If needed to use it to the left , the elevator hat must be turned by hand and watch the
feeding of the grain.
Elevator chain
Elevator chain
tensioner
Elevator hat
Elevator

13
3. Check the Feeder Belt tension. Adjust or replace if required.
4. Check Auger / Elevator Belt tension. Adjust or replace if required.
5. Check Force Feeder. Clean and straighten if necessary.
6. Check and clean the protective magnets.
7. Observe the functioning of the hydraulic components.
8. Apply grease to grease nipples.
9. Check and calibrate the liquid applicator for additive output to
correspond with the average output of the crimper. The proper dosing
is dependent on the preservative used, grain humidity etc.

14
ROLLER CHECKING AND ADJUSTMENT
Re-adjust the rollers always at the beginning of crimping season. During the season check
and correct the roller adjustment at daily basis.
Carry out this adjusting procedure for both pairs of rollers, one side at a time
Roller checking
1. Adjust roller clearance to minimum winding the crank (counter clockwise.)
2. Adjust the roller tension spring to the maximum by pumping the hydraulic pump
to the maximum pressure.

15
3. Check the clearance between rollers with feeler gauge (both ends of roller)
If the clearance between rollers is correct and rollers are parallel, adjustment is
not needed.

16
ROLLER ADJUSTMENT
1. Release Locking Nuts and release all pressure on Spacer Bolts, from both end of
adjustable rollers.
2. Adjust Roller tension Spring to a reasonable tension by pumping the Hydraulic
Hand Pump (half the maximum pressure, see pressure gauge).
Note: when the pressure / tension of hydraulic ram is fully released, the
transmission gears at the rollers may not be in touch. Pump up the pressure up
carefully and ensure, that the gearwheels gets correctly connected.
3. Wind the Roller Adjusting Crank so that the Roller Adjusting Shaft Arm is
pointing straight down.
4. Finger tighten Spacer Bolts.
5. Tighten Spacer Bolts 1/2 turn clockwise
6. Adjuts the rollers with feeler gauge from both ends. Ensure that distance between
the rollers is same at both ends. Minimum distance is 0,3 mm.
7. Tight the Locking nuts.
8. Carry out this adjusting procedure for both pairs of rollers, one side at a time.
If rollers are allowed to touch, excessive wearing will occur which is not covered
by the warranty.
You may now proceed to the Starting Up routine
Do not operate the machine without all the guards in place and properly secured.

17
1 Roller adjusting crank
2 Hydraulic cylinder
3 Spacer bolt
4 Feeder door control
5 Locking nut
2
4
1
5
3

18
ROLLER ADJUSTMENT DURING CRIMPING
Rollers adjust during crimping from rollers adjusting crank. If the grain is too rough
adjust rollers closer to each other by roller adjusting crank ( turn counter clockwise)
and if the grain is too crushed adjust rollers farther from each other by adjusting
crank (turn clockwise)
Sampling shovel

19
STARTING UP
1. Ensure that the Check-list has been carried out.
2. Ensure that the Roller Adjustment has been carried out.
3. Ensure that the Machine is horizontal plane.
4. Ensure the Additive Applicator is calibrated and ready. Close Feeder
Hatches.
5. Fill up the Hopper.
6. Ensure that the distance between the rollers are at least 0,3 mm.
7. Apply maximum tension to the Roller Tensioner Springs by pumping
the Hydraulic Hand Pump until the overload valve is operating (K1400
S2X2 about 120 bar, K2000 S2X2 about 140 bar) , first one side, then
close the valve in hydraulic pipe and tension the other side spring.
8. Check all Guards are fitted and secured.
9. Engage tractor PTO at 540 rpm.
10. Open Feeder Hatch to provide a uniform flow of grain on the rollers,
open first one side, then the other side. As flow increases, tractor revs
may require adjustment.
11. Check that the flow of grain is just sufficient to be pressed without a
build up of grain on the rollers.
12. If dough balls are produced and the grain is mushy, increase the space
between the rollers by turning the Adjusting Crank clockwise.
The towing bar must be adjusted
individually for various tractors to keep the
machine in horizontal position.
This manual suits for next models
1
Table of contents
Other Murska Farm Equipment manuals
Popular Farm Equipment manuals by other brands

Titan Attachments
Titan Attachments JDTS005V2 Operator's manual

Rosensteiner
Rosensteiner Red 5 Operation and maintenance manual

Gaspardo
Gaspardo PINTA Use and maintenance

Rotomec
Rotomec CYCLONE C30-CE5 Operator's manual

Landoll
Landoll Weatherproofer III 2310 Series Operator's manual

Baroness
Baroness LH52 Owner's operating manual