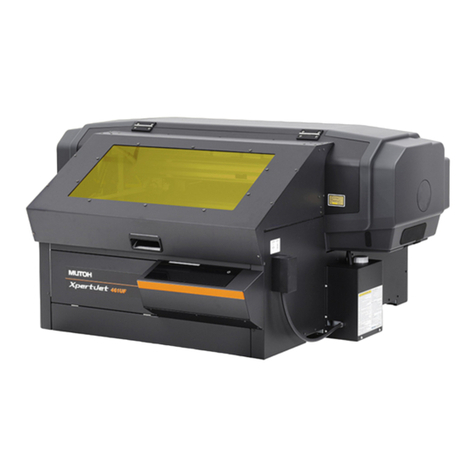
Muton XPJ-1642WR User guide

Site Preparation . . . . . . . . . . . . . . . . . . . . . . . . . . . . . . . 2
Unpacking . . . . . . . . . . . . . . . . . . . . . . . . . . . . . . . . . . . . 4
Assembling . . . . . . . . . . . . . . . . . . . . . . . . . . . . . . . . . . . 8
Connecting Power and Network . . . . . . . . . . . . . . . 14
Printer Initial Setup . . . . . . . . . . . . . . . . . . . . . . . . . . . 16
Test printing . . . . . . . . . . . . . . . . . . . . . . . . . . . . . . . . . 25
Installing MUTOH Status Monitor . . . . . . . . . . . . . . 37
Safety Precautions . . . . . . . . . . . . . . . . . . . . . . . . . . . . 38
• Unauthorized copying or duplication of the whole or part of the contents of this Guide is prohibited.
• Every care has been taken in writing the contents of this Guide, but please contact MUTOH or the dealer you purchased the
product from if you find any unclear, erroneous or otherwise unsatisfactory content in the Guide.
• Please be aware that MUTOH will not be liable in any way for failures or accidents that result from handling or operating the
printer according to any procedures other than those set forth in this Guide.
• Company names and product names that appear in this Guide are registered trademarks of the respective companies.
Unpacking and Initial Setup
Startup Guide
XPJ-1642WR

2 Site Preparation
1 Site Preparation
Choose the location which satisfies the requirements below.
• The floor must be level.
• Avoid vibration from the neighboring devices.
• Low humidity and free from dust.
• Less chance of temperature and humidity changes.
• Avoid direct sunlight.
•Avoidwater.
• Avoid direct air onto the printer.
• Low levels of electromagnetic waves.
The following space is required for installation.
Installation Location Requirements
• Choose the floor that can safely support the weight of this product.
The total weight of printer and stand is 250 kg.
If the floor does not have sufficient load capacity, it can lead to injury from a fall.
• This equipment is not suitable for use in locations where children are likely to be present.
• Keep the work area well ventilated while operating.
Ink odor may cause health problem such as headache, dizziness, or dull. If you experience these symptoms,
stop printer operation and move to fresh air. Seek medical attention if vomit persists.
Minimum Space Requirements
Site Preparation
CAUTION
4,420 mm
2,895 mm
1,000 mm
650 mm
1,000 mm
1,000 mm
Rear
Front
Width x Depth:2,770 mm x 895 mm
Height :1,611 mm *1
:1,712 mm *2
Printer Size
*1Wheninstalling1,000mlinkbagcases.
Theroomheightshouldbeatleast
1,760mm.
*2Wheninstalling2,200mlinkbagcases.
Theroomheightshouldbeatleast
1,861mm.

Site Preparation 3
The installation site must meet the power specification and environmental requirements below.
•Inputvoltage:
AC 100V to 120V±10%
AC 200V to 240V±10%
• Input frequency:
50 / 60Hz ±1Hz
•Inputloadcurrent:
11.5 A (AC 100V to 120V)
6.0 A (AC 200V to 240V)
• Operating condition:
Temperature: 20°C to 32°C
Humidity: 40% to 60%, non condensing
• Printing Condition:
Temperature: 22°C to 30°C
Humidity: 40% to 60%, non condensing
• Change rate
Temperature: No more than 2 °C per 1 hour
Humidity: No more than 5% per 1 hour
• Printer Storage Condition
Without ink filled: Up to 6 months
Temperature: -20°C to 60°C
Humidity: 20% to 80%, non condensing
With ink filled:
Temperature: -5°C to 35°C
Humidity: 20% to 80%, non condensing
• Ink Storage Condition
Black / Cyan / Magenta / Yellow (1,000 ml each, or 2,200 ml each)
Temperature: -5°C to 40°C, Avoid direct sunlight, When unopened
Humidity: 5% to 85%, non condensing
Cleaning bag (600 ml)
Temperature: 10°C to 40°C
Humidity: 80% or less non condensing
Power Specification
Environmental Requirements
4 Unpacking
1Unpacking
Before unpacking, read the instructions below and prepare the necessary items.
• Minimum 4 people are required for unpacking, assembling and installation.
• The items listed below are required for installation and initial setup.
*1 Usable size for Roll media
• Media core diameter: 2 inches or 3 inches
• Outer diameter: Φ200 mm or less
• Width: 500 mm to 1,625 mm
• Weight: 30 kg or less
*2 Optional accessories or supplies.
Unpacking Preparation
Use the designated power cords.
Failure to do so may result in electric shock or fire.
Important!
Your computer must meet the following minimum requirements:
• OS: Windows 10 (32bit/64bit), Windows 8.1 (32bit/64bit)
• CPU: Intel (R) Core (TM) i5 / i7
• Memory: 8GB minimum
•Network:
Use a network port that supports Gigabit Ethernet port, Gigabit Ethernet cable (Category 6 or later)
Unpacking
Computer : 1 Power cord: 1
Gigabit
Ethernet cable: 1
Ink bag: 4
(1,000ml or 2,200ml)
Ink bag case: 4
(1,000ml or 2,200ml)
Roll media : 1
*1,*2 *2
*2*2
Phillips-head screwdriver: 1
WARNING

Unpacking 5
Unpack the product.
Unpacking the printer
• Minimum four people are required for unpacking and moving this product.
• When taking out the product from the packing box, remove the plastic sheet wrapped around the
product, then take out the product. Failure to do so may cause slip and damage to the product.
• Keep the product level while moving it.
[1] Open the packing box and take out the items listed below.
CAUTION
Accessory box
Printerbody
Stand box

6 Unpacking
[2] Check that the following items are included.
*1 Included in the accessory box.
Cabletie:1
*1
*1
Papertowel:5
Cleaningstick:10
*1
*1
Flushingboxsponge:5
*1
Tweezers:1
StartupGuide:
Japanese/English(each)
Wasteinktank:1
*1
Cleaningwiper
forheadheightHigh(grey):1
*1
*1
Mediaflange:2
Printer : 1 Stand box: 1
RequestforUser
Registration&Download:
Japanese/English(each)

Unpacking 7
Unpacking Stand
[1] Open the packing box and take out the items listed below.
[2] Check that the following items are included.
Note
Items marked with an asterisk (*) above are in the accessory box.
Leg (Left)
Leg (Right)
Foot (x2)
Brace
Stand box
*
Hex wrench:1
*
Wing bolt:8
*
Waste ink tank
holder:1
*
Round head screw:12
*
Spring washer:8
*
Fixing bracket:2
*
Leg (Right):1
Leg (Left) :1 Brace :1 Foot:2
Hex head bolt :8

8 Assembling
y
2 Assembling
Follow the steps below to assemble the stand.
Assembling Stand
Minimum two people are required for assembling the stand.
[1] Attach the left leg and right leg to the brace.
• Face the screw hole face (face with notch) on the brace toward the rear side of the printer and attach it to both legs.
• The leg with two warning labels attached is the right leg.
• Put the spring washers on the hex head screws (4 each), then tighten the screws.
[2] Attach the foot to the leg.
• Face the screw holes on the foot toward the front side of the printer and attach it to the leg.
• Put the spring washers on the hex head screws (4 each), then tighten the screws.
• Use the round head screws (×8) to fix the fixing brackets (×2) on the brace and both legs.
Assembling
CAUTION
× 4
Front
Leg (Right)
Warning Label
Brace
Screw holes
× 4
× 8
Front
Leg (Right)

Assembling 9
Follow the steps below to attach the printer to the stand.
[3] Use the round head screws (×4) to attach the waste ink tank holder to
the right leg.
[4] Shake the stand to make sure that each part is firmly attached.
[5] Turn the leveling adjusters (×4) as shown on the left until the stand
does not move.
Attaching Printer
• Minimum four people are required for this process.
• When taking out the product from the packing box, remove the plastic sheet wrapped around the
product, then take out the product. Failure to do so may cause slip and damage to the product.
• Keep the product level while attaching.
[1] Lift the printer with at least four people and mount it on the stand.
• Use two lifting bars to insert into the guide holes at the bottom left and right of the printer, and lift up on the stand.
Leg (right)
Screws
Waste ink tank holder
× 4
Stand
Adjusters Adjusters
CAUTION

10 Assembling
(If you do not have lifting bars) Lift the printer with at least four people and mount it on the stand.
• Use the handholds at the front bottom of the printer.
[2] Use the wing bolts (×8) and attach the printer to the stand.
× 8

Assembling 11
Remove packing materials from the product.
Removing Packing Materials
[1] Remove the protective material at the front cover.
[2] Open the front cover and remove the protective tape from the maintenance cover.
[3] Remove the protective tape from the cap on the cutter.

12 Assembling
[4] Remove the wing bolt to remove the shipping bracket from the carriage.
Important!
Keep the shipping bracket and screws for next use.
[5] Remove the protective tape, then remove the protective material at the back inside of the printer.
Important!
When removing protective materials, do not touch the timing fence (clear part). If it deforms, it will affect print quality.
[6] Remove the tape, and move the edge holders to the left and the right edge.
[7] Remove rest of all the protective tapes.
Timing fence

Assembling 13
Attach the waste ink tank to the printer.
Attaching Waste Ink Tank
[1] Place the waste ink tank on the waste ink tank holder.
[2] Put the waste ink tube in the mouth of the waste ink tank.
[3] Connect the waste ink sensor cable to the waste ink sensor connector.
Important!
• Ensure that the waste ink tube is firmly inserted. Failure to do so may cause ink spillage.
• After connecting the tube to the tank, check that the tube is not bended. Any bending will cause ink spillage.
No goodGood

14 Connecting Power and Network
3ConnectingPowerandNetwork
Follow the steps below to connect the power cord and Ethernet cable.
Connect Power Cord and Ethernet Cable
[1] Check that the front cover is closed.
[2] Connect the power cord and a Ethernet cable to the printer.
Connecting Power and Network

Connecting Power and Network 15
[3] Insert the tip of the cable tie into the hole on the printer to attach it.
[4] Use the cable tie to secure the Ethernet cable to the printer.
[5] Plug the power cord into the wall outlets respectively.

16 Printer Initial Setup
4 Printer Initial Setup
Here is how to get started with your printer.
The printer has a touch-screen panel located on the front right of the printer. The active keys are lit up on the panel for guidance.
• Tap: Lightly touch the key with your finger, then immediately release.
• Long-touch: Keep touching the key.
Initial Setup Flow
Front panel
Printer Initial Setup
Configure the initial settings
Choose and configure the language, unit of length, temperature, and network setting from the front panel.
Activate the printer
Enter the activation code from the front panel.
Perform initial ink charging
Install ink bags into the printer and perform ink charging.
Load a roll media for test printing.
Load a roll media for the nozzle check printing.
Run a nozzle check and perform cleaning
Run a nozzle check print and perform cleaning until all nozzles are clear.
Connect the printer to your computer
Enter the IP address from the touch panel.
Install MUTOH Status Monitor (MSM) and configure the initial setup on MSM.
Initial setup is now complete!

Printer Initial Setup 17
Power on the printer and configure the initial settings on the front panel.
Step 1 Powering on - Initial settings on the front panel
[1] Check that the front cover is closed.
[2] Long press the Power button on the front panel.
• The Power LED (above the Power button) lights up.
Note
Once the Power LED lights up, release the Power button.
[3] Use to select the language.
Tap (Enter).
[4] Tap (Enter).
[5] Tap (Enter).
[6] Sets the IP address of the printer.
• key: Increase the number.
• key: Decrease the number.
•key: Move the cursor to the previous digit.
•key: Move the cursor to the next digit.
Tap (Enter) after entering each digit.
[7] Sets the subnet mask of the printer.
• key: Increase the number.
• key: Decrease the number.
•key: Move the cursor to the previous digit.
•key: Move the cursor to the next digit.
Tap (Enter) after entering each digit.
Language : English
Temp : Celsius [ C]
Length : mm
IP Address :
192. 168. 1. 253
Subnet Mask :
255. 255. 255. 0

18 Printer Initial Setup
Follow the steps below to perform activation.
[8] Sets the gateway.
• key: Increase the number.
• key: Decrease the number.
•key: Move the cursor to the previous digit.
•key: Move the cursor to the next digit.
Tap (Enter) after entering each digit.
[9] The printer will start mechanical initialization.
Step 2 Activation
When the message on the left appears, use one of the following
methods to activate the printer.
"Activation through the front panel" P. 19
"Activation through Internet" P. 19
Note
While “Activation required” is displayed, you can return the initial setting flow (e.g. IP Address etc.) by tapping .
Gateway :
192. 168. 1. 254
Initializing
Activation required

Printer Initial Setup 19
Activation through the front panel
[1] When the message on the left appears, tap (Enter).
[2] Enter the 16-digit activation code.
• key: Increase the number.
• key: Decrease the number.
•key: Move the cursor to the previous digit.
•key: Move the cursor to the next digit.
Tap (Enter) after entering each digit.
Note
To obtain the activation code, please contact your local MUTOH dealer to send it by
email.
[3] When the message on the left appears, long press the Power button
to power off the printer.
• When the message “Power Off” appears on the panel, release the Power
button.
Wait for a few seconds and long press the Power button to reboot the
printer.
Activation through Internet
When the message on the left appears on the front panel, follow the
instructions on the Printer Activation Guide to activate the printer.
Note
To obtain the activation code and the Printer Activation Guide, access to MUTOH Club
from the following URL and click “Register” to complete the user registration.
https://club.mutoh.co.jp/mutoh/guser/
Activation required
0 0 0 0 - 0 0 0 0 - 0 0 0 0 - 0 0 0 0
Activation Succeeded
Reboot Printer
Activation required

20 Printer Initial Setup
Follow the steps below to perform initial ink charging.
Items Required:
•Inkbag:×4
Black, Cyan, Magenta, Yellow
•Inkbagcase:×4
Step 3 Initial Ink Charging
Important!
When performing initial ink charging, make sure that the head height is set to "Low1" (factory default).
1. Perform initial ink charging
[1] When the message on the left appears, tap (Enter).
Note
While “Ink Charge Start -> Enter” is displayed, you can return the initial setting flow (e.g. IP Address etc.) by tapping .
[2] Tap (Enter).
Note
To perform cleaning, use or to choose “Wash Retry? Yes”.
The message on the left will appear.
InkCharge
Start -> Enter
Wash Retry?
No
InsertInkBags
Other manuals for XPJ-1642WR
1
Table of contents
Other Muton Printer manuals

Muton
Muton VJ-1608 Hybrid User manual

Muton
Muton ValuejetVJ-1604 User manual

Muton
Muton XPJ-1641SR User manual

Muton
Muton XPJ-461UF User guide

Muton
Muton XPJ-1642WR User manual

Muton
Muton XPJ-1682D User manual

Muton
Muton XPJ-1682WR User manual

Muton
Muton ValueJet VJ-1627MH User guide

Muton
Muton VJ-1626UH User manual