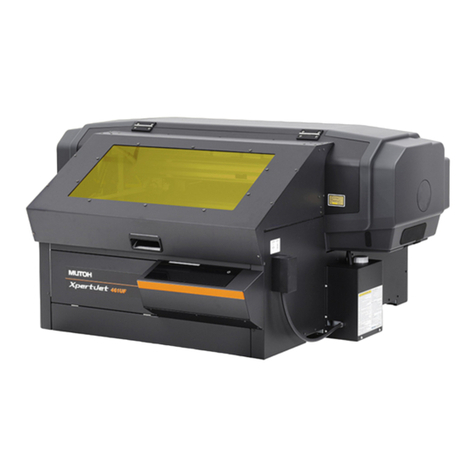
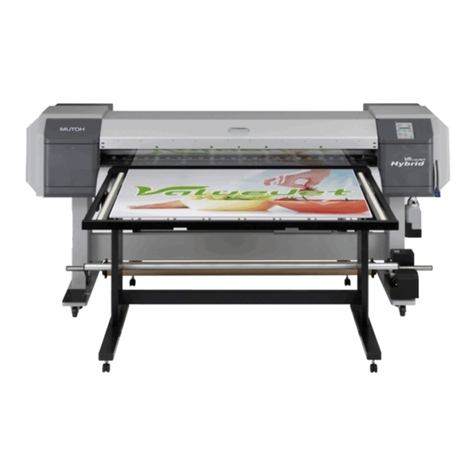
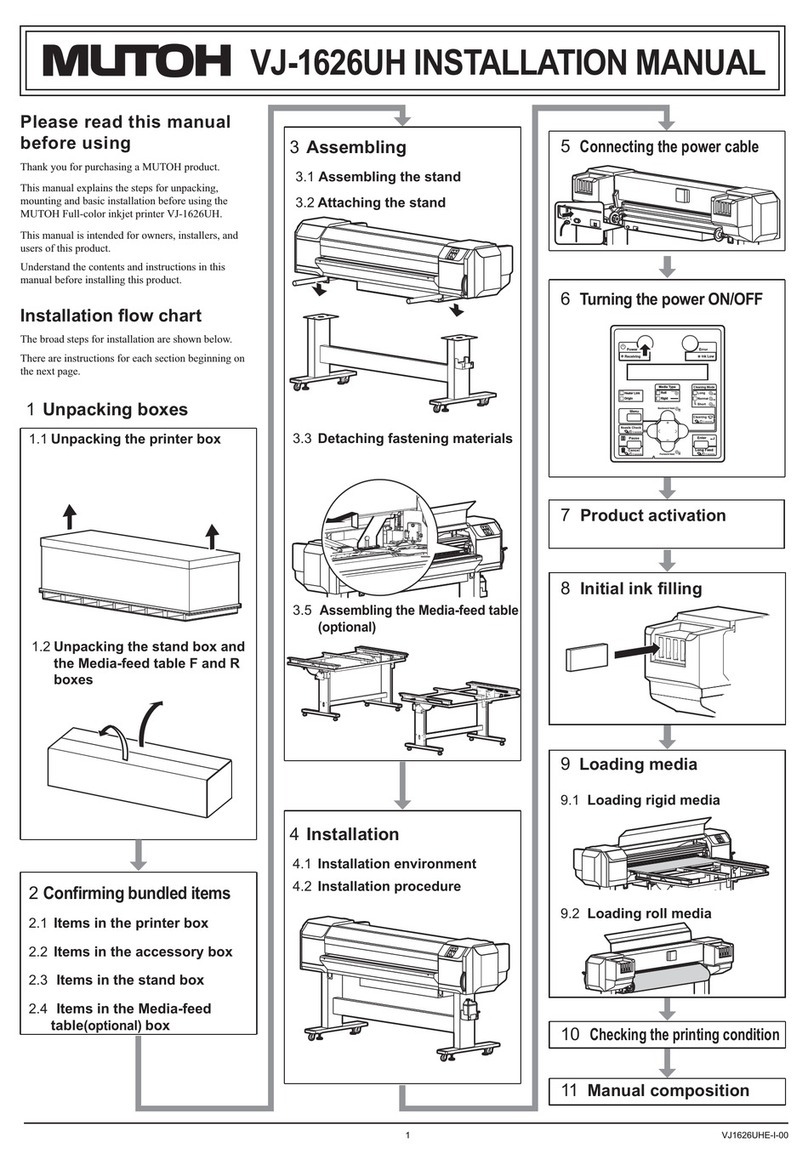
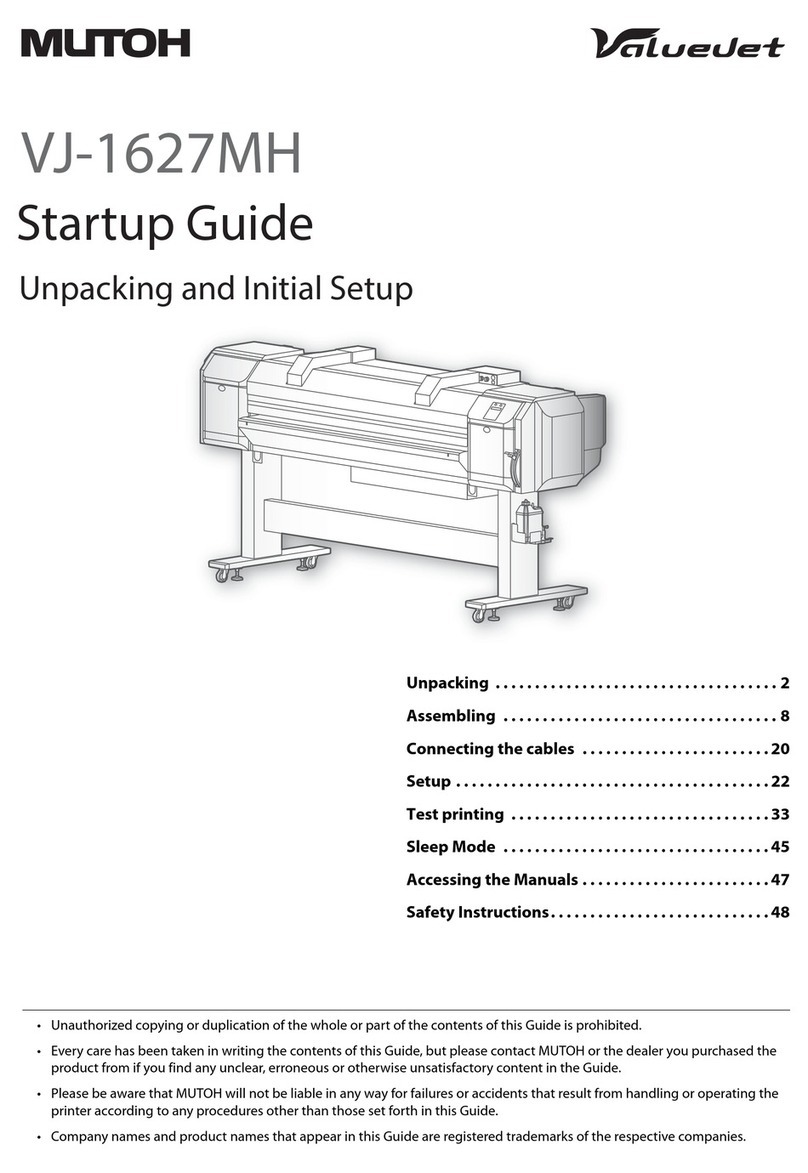
Muton XPJ-1682D User manual

Operations and Maintenance Methods
Operation Manual
XPJ-1682D
• Unauthorized copying or duplication of the whole or part of the contents of this manual is prohibited.
• Every care has been taken in writing the contents of this manual, but please contact MUTOH or the dealer you purchased the
product from if you find any unclear, erroneous or otherwise unsatisfactory content in the manual.
• Please be aware that MUTOH will not be liable in any way for failures or accidents that result from handling or operating the
printer according to any procedures other than those set forth in this manual.
• Company names and product names that appear in this manual are registered trademarks of the respective companies.

For Users in Europe
For Users in the United States
This equipment has been tested and found to comply with the limits for a Class A digital device, pursuant to Part 15 of the
FCC Rules.
These limits are designed to provide reasonable protection against harmful interference when the equipment is operated in
a commercial environment.
This equipment generates, uses, and can radiate radio frequency energy and, if not installed and used in accordance with the
instruction manual, may cause harmful interference to radio communications.
Operation of this equipment in a residential area is likely to cause harmful interference in which case the user will be required
to correct the interference at his own expense.
Installation Location Requirements
This equipment is not suitable for use in locations where children are likely to be present.
The CE marking is a mandatory European marking for certain product groups to indicate conformity
with the essential health and safety requirements set out in European Directives.
By affixing the CE marking, the manufacturer, his authorized representative, or the person placing the
product on the market or putting it into service ensures that the item meets all the essential
requirements of all applicable EU directives and that the applicable conformity assessment
procedures have been applied.

Contents
3
Chapter 1 Basic Operations
Introduction . . . . . . . . . . . . . . . . . . . . . . . . . . . . . . . . . . . . . . . . . . . . . . . . . . . . . . . . . . . . . . . . . 9
Main components of your printer . . . . . . . . . . . . . . . . . . . . . . . . . . . . . . . . . . . . . . . . . . . . . . . . . . . . . . . . . . . . . . . . . . . . . . . . . . 9
Connecting to a Computer. . . . . . . . . . . . . . . . . . . . . . . . . . . . . . . . . . . . . . . . . . . . . . . . . . . . . . . . . . . . . . . . . . . . . . . . . . . . . . . . 12
System configurations of this product. . . . . . . . . . . . . . . . . . . . . . . . . . . . . . . . . . . . . . . . . . . . . . . . . . . . . . . . . . . . . . . . . . . . . 14
Launching/Displaying/Exiting MUTOH Status Monitor (MSM) . . . . . . . . . . . . . . . . . . . . . . . . . . . . . . . . . . . . . . . . . . . . . . 15
Printing area . . . . . . . . . . . . . . . . . . . . . . . . . . . . . . . . . . . . . . . . . . . . . . . . . . . . . . . . . . . . . . . . . . . . . . . . . . . . . . . . . . . . . . . . . . . . . 17
Media size. . . . . . . . . . . . . . . . . . . . . . . . . . . . . . . . . . . . . . . . . . . . . . . . . . . . . . . . . . . . . . . . . . . . . . . . . . . . . . . . . . . . . . . . . . . . . . . . 17
Precautions . . . . . . . . . . . . . . . . . . . . . . . . . . . . . . . . . . . . . . . . . . . . . . . . . . . . . . . . . . . . . . . . . . . . . . . . . . . . . . . . . . . . . . . . . . . . . . 19
Powering ON / OFF . . . . . . . . . . . . . . . . . . . . . . . . . . . . . . . . . . . . . . . . . . . . . . . . . . . . . . . . . . 21
Loading a roll media. . . . . . . . . . . . . . . . . . . . . . . . . . . . . . . . . . . . . . . . . . . . . . . . . . . . . . . . . 22
Load a roll media into the printer . . . . . . . . . . . . . . . . . . . . . . . . . . . . . . . . . . . . . . . . . . . . . . . . . . . . . . . . . . . . . . . . . . . . . . . . . 22
Nozzle check and cleaning . . . . . . . . . . . . . . . . . . . . . . . . . . . . . . . . . . . . . . . . . . . . . . . . . . . 31
Nozzle check . . . . . . . . . . . . . . . . . . . . . . . . . . . . . . . . . . . . . . . . . . . . . . . . . . . . . . . . . . . . . . . . . . . . . . . . . . . . . . . . . . . . . . . . . . . . . 31
Cleaning . . . . . . . . . . . . . . . . . . . . . . . . . . . . . . . . . . . . . . . . . . . . . . . . . . . . . . . . . . . . . . . . . . . . . . . . . . . . . . . . . . . . . . . . . . . . . . . . . 32
Calibrating your printer . . . . . . . . . . . . . . . . . . . . . . . . . . . . . . . . . . . . . . . . . . . . . . . . . . . . . 33
Head alignment . . . . . . . . . . . . . . . . . . . . . . . . . . . . . . . . . . . . . . . . . . . . . . . . . . . . . . . . . . . . . . . . . . . . . . . . . . . . . . . . . . . . . . . . . . 33
Print quality calibration . . . . . . . . . . . . . . . . . . . . . . . . . . . . . . . . . . . . . . . . . . . . . . . . . . . . . . . . . . . . . . . . . . . . . . . . . . . . . . . . . . . 35
Media feed adjustment . . . . . . . . . . . . . . . . . . . . . . . . . . . . . . . . . . . . . . . . . . . . . . . . . . . . . . . . . . . . . . . . . . . . . . . . . . . . . . . . . . . 38
Advanced setting . . . . . . . . . . . . . . . . . . . . . . . . . . . . . . . . . . . . . . . . . . . . . . . . . . . . . . . . . . . 39
Changing the Head Height . . . . . . . . . . . . . . . . . . . . . . . . . . . . . . . . . . . . . . . . . . . . . . . . . . . . . . . . . . . . . . . . . . . . . . . . . . . . . . . 39
Changing holddown pressure using media feed lever. . . . . . . . . . . . . . . . . . . . . . . . . . . . . . . . . . . . . . 40
Canceling or reducing pressure rollers individually . . . . . . . . . . . . . . . . . . . . . . . . . . . . . . . . . . . . . . . . . . . . . . . . . . . . . . . . 41
Operating from Front panel. . . . . . . . . . . . . . . . . . . . . . . . . . . . . . . . . . . . . . . . . . . . . . . . . . 43
Feeding media . . . . . . . . . . . . . . . . . . . . . . . . . . . . . . . . . . . . . . . . . . . . . . . . . . . . . . . . . . . . . . . . . . . . . . . . . . . . . . . . . . . . . . . . . . . 43
Pausing / Restarting printing. . . . . . . . . . . . . . . . . . . . . . . . . . . . . . . . . . . . . . . . . . . . . . . . . . . . . . . . . . . . . . . . . . . . . . . . . . . . . . 43
Canceling printing. . . . . . . . . . . . . . . . . . . . . . . . . . . . . . . . . . . . . . . . . . . . . . . . . . . . . . . . . . . . . . . . . . . . . . . . . . . . . . . . . . . . . . . . 44
Starting printing during warming up . . . . . . . . . . . . . . . . . . . . . . . . . . . . . . . . . . . . . . . . . . . . . . . . . . . . . . . . . . . . . . . . . . . . . . 44
Cutting media . . . . . . . . . . . . . . . . . . . . . . . . . . . . . . . . . . . . . . . . . . . . . . . . . . . . . . . . . . . . . . . . . . . . . . . . . . . . . . . . . . . . . . . . . . . . 45
Menus you can access while printing. . . . . . . . . . . . . . . . . . . . . . . . . . . . . . . . . . . . . . . . . . . . . . . . . . . . . . . . . . . . . . . . . . . . . . 46
Chapter 2 Advanced Operations
Introduction . . . . . . . . . . . . . . . . . . . . . . . . . . . . . . . . . . . . . . . . . . . . . . . . . . . . . . . . . . . . . . . . 53
Operating the keys to use the menus. . . . . . . . . . . . . . . . . . . . . . . . . . . . . . . . . . . . . . . . . . . . . . . . . . . . . . . . . . . . . . . . . . . . . . 53
Panel setup menu . . . . . . . . . . . . . . . . . . . . . . . . . . . . . . . . . . . . . . . . . . . . . . . . . . . . . . . . . . . . . . . . . . . . . . . . . . . . . . . . . . . . . . . . 55

4
Menu 1: Setup . . . . . . . . . . . . . . . . . . . . . . . . . . . . . . . . . . . . . . . . . . . . . . . . . . . . . . . . . . . . . . 59
Setup 1: User Type . . . . . . . . . . . . . . . . . . . . . . . . . . . . . . . . . . . . . . . . . . . . . . . . . . . . . . . . . . . . . . . . . . . . . . . . . . . . . . . . . . . . . . . 59
Setup 2: Spitting . . . . . . . . . . . . . . . . . . . . . . . . . . . . . . . . . . . . . . . . . . . . . . . . . . . . . . . . . . . . . . . . . . . . . . . . . . . . . . . . . . . . . . . . . 75
Setup 3: Side Margin . . . . . . . . . . . . . . . . . . . . . . . . . . . . . . . . . . . . . . . . . . . . . . . . . . . . . . . . . . . . . . . . . . . . . . . . . . . . . . . . . . . . . 76
Setup 4: Media Initial . . . . . . . . . . . . . . . . . . . . . . . . . . . . . . . . . . . . . . . . . . . . . . . . . . . . . . . . . . . . . . . . . . . . . . . . . . . . . . . . . . . . . 77
Setup 5: Media Width . . . . . . . . . . . . . . . . . . . . . . . . . . . . . . . . . . . . . . . . . . . . . . . . . . . . . . . . . . . . . . . . . . . . . . . . . . . . . . . . . . . . 77
Setup 6: Output Mode. . . . . . . . . . . . . . . . . . . . . . . . . . . . . . . . . . . . . . . . . . . . . . . . . . . . . . . . . . . . . . . . . . . . . . . . . . . . . . . . . . . . 77
Setup 7: Method of Cut. . . . . . . . . . . . . . . . . . . . . . . . . . . . . . . . . . . . . . . . . . . . . . . . . . . . . . . . . . . . . . . . . . . . . . . . . . . . . . . . . . . 79
Setup 8: Origin . . . . . . . . . . . . . . . . . . . . . . . . . . . . . . . . . . . . . . . . . . . . . . . . . . . . . . . . . . . . . . . . . . . . . . . . . . . . . . . . . . . . . . . . . . . 80
Setup 9: Prevent Stick menu . . . . . . . . . . . . . . . . . . . . . . . . . . . . . . . . . . . . . . . . . . . . . . . . . . . . . . . . . . . . . . . . . . . . . . . . . . . . . . 81
Setup 10: Standby Heating . . . . . . . . . . . . . . . . . . . . . . . . . . . . . . . . . . . . . . . . . . . . . . . . . . . . . . . . . . . . . . . . . . . . . . . . . . . . . . . 81
Setup 11: Head Travel . . . . . . . . . . . . . . . . . . . . . . . . . . . . . . . . . . . . . . . . . . . . . . . . . . . . . . . . . . . . . . . . . . . . . . . . . . . . . . . . . . . . 81
Setup 12: Multi Strike. . . . . . . . . . . . . . . . . . . . . . . . . . . . . . . . . . . . . . . . . . . . . . . . . . . . . . . . . . . . . . . . . . . . . . . . . . . . . . . . . . . . . 82
Setup 13: Strike Wait . . . . . . . . . . . . . . . . . . . . . . . . . . . . . . . . . . . . . . . . . . . . . . . . . . . . . . . . . . . . . . . . . . . . . . . . . . . . . . . . . . . . . 82
Setup 14: Slant Check . . . . . . . . . . . . . . . . . . . . . . . . . . . . . . . . . . . . . . . . . . . . . . . . . . . . . . . . . . . . . . . . . . . . . . . . . . . . . . . . . . . . 82
Setup 15: Auto Cleaning. . . . . . . . . . . . . . . . . . . . . . . . . . . . . . . . . . . . . . . . . . . . . . . . . . . . . . . . . . . . . . . . . . . . . . . . . . . . . . . . . . 83
Setup 16: Ink Status . . . . . . . . . . . . . . . . . . . . . . . . . . . . . . . . . . . . . . . . . . . . . . . . . . . . . . . . . . . . . . . . . . . . . . . . . . . . . . . . . . . . . . 84
Setup 17: Roll Length. . . . . . . . . . . . . . . . . . . . . . . . . . . . . . . . . . . . . . . . . . . . . . . . . . . . . . . . . . . . . . . . . . . . . . . . . . . . . . . . . . . . . 84
Setup 18: Exhaust Fan . . . . . . . . . . . . . . . . . . . . . . . . . . . . . . . . . . . . . . . . . . . . . . . . . . . . . . . . . . . . . . . . . . . . . . . . . . . . . . . . . . . . 86
Setup 19: Longstore . . . . . . . . . . . . . . . . . . . . . . . . . . . . . . . . . . . . . . . . . . . . . . . . . . . . . . . . . . . . . . . . . . . . . . . . . . . . . . . . . . . . . . 86
Setup 20: CR Maintenance. . . . . . . . . . . . . . . . . . . . . . . . . . . . . . . . . . . . . . . . . . . . . . . . . . . . . . . . . . . . . . . . . . . . . . . . . . . . . . . . 86
Setup 21: Initialization. . . . . . . . . . . . . . . . . . . . . . . . . . . . . . . . . . . . . . . . . . . . . . . . . . . . . . . . . . . . . . . . . . . . . . . . . . . . . . . . . . . . 87
Setup 22: Life Times . . . . . . . . . . . . . . . . . . . . . . . . . . . . . . . . . . . . . . . . . . . . . . . . . . . . . . . . . . . . . . . . . . . . . . . . . . . . . . . . . . . . . . 87
Setup 23: IP Address. . . . . . . . . . . . . . . . . . . . . . . . . . . . . . . . . . . . . . . . . . . . . . . . . . . . . . . . . . . . . . . . . . . . . . . . . . . . . . . . . . . . . . 88
Setup 24: Subnet Mask . . . . . . . . . . . . . . . . . . . . . . . . . . . . . . . . . . . . . . . . . . . . . . . . . . . . . . . . . . . . . . . . . . . . . . . . . . . . . . . . . . . 88
Setup 25: Gateway . . . . . . . . . . . . . . . . . . . . . . . . . . . . . . . . . . . . . . . . . . . . . . . . . . . . . . . . . . . . . . . . . . . . . . . . . . . . . . . . . . . . . . . 89
Setup 26: Header Dump . . . . . . . . . . . . . . . . . . . . . . . . . . . . . . . . . . . . . . . . . . . . . . . . . . . . . . . . . . . . . . . . . . . . . . . . . . . . . . . . . . 89
Setup 27: Heater Control . . . . . . . . . . . . . . . . . . . . . . . . . . . . . . . . . . . . . . . . . . . . . . . . . . . . . . . . . . . . . . . . . . . . . . . . . . . . . . . . . 90
Setup 28: Start Feed . . . . . . . . . . . . . . . . . . . . . . . . . . . . . . . . . . . . . . . . . . . . . . . . . . . . . . . . . . . . . . . . . . . . . . . . . . . . . . . . . . . . . . 90
Setup 29: Alert Buzzer . . . . . . . . . . . . . . . . . . . . . . . . . . . . . . . . . . . . . . . . . . . . . . . . . . . . . . . . . . . . . . . . . . . . . . . . . . . . . . . . . . . . 91
Setup 30: Internal LED Lights . . . . . . . . . . . . . . . . . . . . . . . . . . . . . . . . . . . . . . . . . . . . . . . . . . . . . . . . . . . . . . . . . . . . . . . . . . . . . 91
Setup 31: Front Interlace . . . . . . . . . . . . . . . . . . . . . . . . . . . . . . . . . . . . . . . . . . . . . . . . . . . . . . . . . . . . . . . . . . . . . . . . . . . . . . . . . 91
Setup 32: Temporary . . . . . . . . . . . . . . . . . . . . . . . . . . . . . . . . . . . . . . . . . . . . . . . . . . . . . . . . . . . . . . . . . . . . . . . . . . . . . . . . . . . . . 92
Menu 2: Test Print. . . . . . . . . . . . . . . . . . . . . . . . . . . . . . . . . . . . . . . . . . . . . . . . . . . . . . . . . . . 93
Test Print 1: Nozzle Check F. . . . . . . . . . . . . . . . . . . . . . . . . . . . . . . . . . . . . . . . . . . . . . . . . . . . . . . . . . . . . . . . . . . . . . . . . . . . . . . 93
Test Print 2: Mode Print. . . . . . . . . . . . . . . . . . . . . . . . . . . . . . . . . . . . . . . . . . . . . . . . . . . . . . . . . . . . . . . . . . . . . . . . . . . . . . . . . . . 93
Test Print 3: Setup List . . . . . . . . . . . . . . . . . . . . . . . . . . . . . . . . . . . . . . . . . . . . . . . . . . . . . . . . . . . . . . . . . . . . . . . . . . . . . . . . . . . . 94
Test Print 4: Palette. . . . . . . . . . . . . . . . . . . . . . . . . . . . . . . . . . . . . . . . . . . . . . . . . . . . . . . . . . . . . . . . . . . . . . . . . . . . . . . . . . . . . . . 94
Test Print 5: Adjust Head . . . . . . . . . . . . . . . . . . . . . . . . . . . . . . . . . . . . . . . . . . . . . . . . . . . . . . . . . . . . . . . . . . . . . . . . . . . . . . . . . 95
Menu 3: Cleaning . . . . . . . . . . . . . . . . . . . . . . . . . . . . . . . . . . . . . . . . . . . . . . . . . . . . . . . . . . . 98
Menu3: Cleaning . . . . . . . . . . . . . . . . . . . . . . . . . . . . . . . . . . . . . . . . . . . . . . . . . . . . . . . . . . . . . . . . . . . . . . . . . . . . . . . . . . . . . . . . . 98
Menu 4: Menu Option . . . . . . . . . . . . . . . . . . . . . . . . . . . . . . . . . . . . . . . . . . . . . . . . . . . . . . . 99
Menu4: Menu Option . . . . . . . . . . . . . . . . . . . . . . . . . . . . . . . . . . . . . . . . . . . . . . . . . . . . . . . . . . . . . . . . . . . . . . . . . . . . . . . . . . . . 99
Menu 5: System Info. . . . . . . . . . . . . . . . . . . . . . . . . . . . . . . . . . . . . . . . . . . . . . . . . . . . . . . . 100
Menu 6: Sleep Mode . . . . . . . . . . . . . . . . . . . . . . . . . . . . . . . . . . . . . . . . . . . . . . . . . . . . . . . 101

5
Sleep Mode 1: Cleaning Setting . . . . . . . . . . . . . . . . . . . . . . . . . . . . . . . . . . . . . . . . . . . . . . . . . . . . . . . . . . . . . . . . . . . . . . . . . . 101
Sleep Mode 2: Start . . . . . . . . . . . . . . . . . . . . . . . . . . . . . . . . . . . . . . . . . . . . . . . . . . . . . . . . . . . . . . . . . . . . . . . . . . . . . . . . . . . . . . 102
Menu 7: Display . . . . . . . . . . . . . . . . . . . . . . . . . . . . . . . . . . . . . . . . . . . . . . . . . . . . . . . . . . . . 103
Display 1: Language . . . . . . . . . . . . . . . . . . . . . . . . . . . . . . . . . . . . . . . . . . . . . . . . . . . . . . . . . . . . . . . . . . . . . . . . . . . . . . . . . . . . . 103
Display 2: Temperature . . . . . . . . . . . . . . . . . . . . . . . . . . . . . . . . . . . . . . . . . . . . . . . . . . . . . . . . . . . . . . . . . . . . . . . . . . . . . . . . . . 103
Display 3: Length . . . . . . . . . . . . . . . . . . . . . . . . . . . . . . . . . . . . . . . . . . . . . . . . . . . . . . . . . . . . . . . . . . . . . . . . . . . . . . . . . . . . . . . . 104
Menu 8: Job Status . . . . . . . . . . . . . . . . . . . . . . . . . . . . . . . . . . . . . . . . . . . . . . . . . . . . . . . . . 104
Menu9: Roll Length Manage . . . . . . . . . . . . . . . . . . . . . . . . . . . . . . . . . . . . . . . . . . . . . . . . 105
Roll Length Manage1: Print. . . . . . . . . . . . . . . . . . . . . . . . . . . . . . . . . . . . . . . . . . . . . . . . . . . . . . . . . 106
Roll Length Manage2: Simple Print. . . . . . . . . . . . . . . . . . . . . . . . . . . . . . . . . . . . . . . . . . . . . . . . . . . 106
Roll Length Manage3: Scan . . . . . . . . . . . . . . . . . . . . . . . . . . . . . . . . . . . . . . . . . . . . . . . . . . . . . . . . 107
Roll Length Manage4: Roll Length . . . . . . . . . . . . . . . . . . . . . . . . . . . . . . . . . . . . . . . . . . . . . . . . . . . 108
Roll Length Manage5: Auto Scan . . . . . . . . . . . . . . . . . . . . . . . . . . . . . . . . . . . . . . . . . . . . . . . . . . . . 108
Menu chart . . . . . . . . . . . . . . . . . . . . . . . . . . . . . . . . . . . . . . . . . . . . . . . . . . . . . . . . . . . . . . . . 109
Setting menu 1. . . . . . . . . . . . . . . . . . . . . . . . . . . . . . . . . . . . . . . . . . . . . . . . . . . . . . . . . . . . . . . . . . . . . . . . . . . . . . . . . . . . . . . . . . 109
Setting menu 2. . . . . . . . . . . . . . . . . . . . . . . . . . . . . . . . . . . . . . . . . . . . . . . . . . . . . . . . . . . . . . . . . . . . . . . . . . . . . . . . . . . . . . . . . . 110
Setting menu 3. . . . . . . . . . . . . . . . . . . . . . . . . . . . . . . . . . . . . . . . . . . . . . . . . . . . . . . . . . . . . . . . . . . . . . . . . . . . . . . . . . . . . . . . . . 111
Menu during printing. . . . . . . . . . . . . . . . . . . . . . . . . . . . . . . . . . . . . . . . . . . . . . . . . . . . . . . . . . . . . . . . . . . . . . . . . . . . . . . . . . . . 112
Chapter 3 Maintenance
Maintenance. . . . . . . . . . . . . . . . . . . . . . . . . . . . . . . . . . . . . . . . . . . . . . . . . . . . . . . . . . . . . . . 114
Agitating ink. . . . . . . . . . . . . . . . . . . . . . . . . . . . . . . . . . . . . . . . . . . . . . . . . . . . . . . . . . . . . . . 115
Agitating ink . . . . . . . . . . . . . . . . . . . . . . . . . . . . . . . . . . . . . . . . . . . . . . . . . . . . . . . . . . . . . . . . . . . . . . . . . . . . . . . . . . . . . . . . . . . . 115
Checking ink and replacing ink bag . . . . . . . . . . . . . . . . . . . . . . . . . . . . . . . . . . . . . . . . . 117
Checking ink level . . . . . . . . . . . . . . . . . . . . . . . . . . . . . . . . . . . . . . . . . . . . . . . . . . . . . . . . . . . . . . . . . . . . . . . . . . . . . . . . . . . . . . . 117
When it becomes time to replace ink bag . . . . . . . . . . . . . . . . . . . . . . . . . . . . . . . . . . . . . . . . . . . . . . . . . . . . . . . . . . . . . . . . 118
Replacing ink bag . . . . . . . . . . . . . . . . . . . . . . . . . . . . . . . . . . . . . . . . . . . . . . . . . . . . . . . . . . . . . . . . . . . . . . . . . . . . . . . . . . . . . . . 118
Emptying waste ink tank . . . . . . . . . . . . . . . . . . . . . . . . . . . . . . . . . . . . . . . . . . . . . . . . . . . 121
Emptying waste ink tank. . . . . . . . . . . . . . . . . . . . . . . . . . . . . . . . . . . . . . . . . . . . . . . . . . . . . . . . . . . . . . . . . . . . . . . . . . . . . . . . . 121
Cleaning. . . . . . . . . . . . . . . . . . . . . . . . . . . . . . . . . . . . . . . . . . . . . . . . . . . . . . . . . . . . . . . . . . . 123
Head cleaning. . . . . . . . . . . . . . . . . . . . . . . . . . . . . . . . . . . . . . . . . . . . . . . . . . . . . . . . . . . . . . . . . . . . . . . . . . . . . . . . . . . . . . . . . . . 123
Cleaning of cleaning wiper . . . . . . . . . . . . . . . . . . . . . . . . . . . . . . . . . . . . . . . . . . . . . . . . . . . . . . . . . . . . . . . . . . . . . . . . . . . . . . 126
Cleaning around the capping unit . . . . . . . . . . . . . . . . . . . . . . . . . . . . . . . . . . . . . . . . . . . . . . . . . . . . . . . . . . . . . . . . . . . . . . . 129
Cleaning around the print head . . . . . . . . . . . . . . . . . . . . . . . . . . . . . . . . . . . . . . . . . . . . . . . . . . . . . . . . . . . . . . . . . . . . . . . . . . 131
Cleaning the color sensor . . . . . . . . . . . . . . . . . . . . . . . . . . . . . . . . . . . . . . . . . . . . . . . . . . . . . . . . . . . . . . . . . . . . . . . . . . . . . . . . 133
Inside cleaning . . . . . . . . . . . . . . . . . . . . . . . . . . . . . . . . . . . . . . . . . . . . . . . . . . . . . . . . . . . . . . . . . . . . . . . . . . . . . . . . . . . . . . . . . . 135
Replacing consumable parts . . . . . . . . . . . . . . . . . . . . . . . . . . . . . . . . . . . . . . . . . . . . . . . . 136

6
Replacing absorption material for the flushing box . . . . . . . . . . . . . . . . . . . . . . . . . . . . . . . . . . . . . . . . . . . . . . . . . . . . . . . 136
Replacing Cutter . . . . . . . . . . . . . . . . . . . . . . . . . . . . . . . . . . . . . . . . . . . . . . . . . . . . . . . . . . . . . . . . . . . . . . . . . . . . . . . . . . . . . . . . 138
Replacing the cleaning wiper . . . . . . . . . . . . . . . . . . . . . . . . . . . . . . . . . . . . . . . . . . . . . . . . . . . . . . . . . . . . . . . . . . . . . . . . . . . . 140
Replacing Adapter’s plug. . . . . . . . . . . . . . . . . . . . . . . . . . . . . . . . . . . . . . . . . . . . . . . . . . . . . . . . . . . . . . . . . . . . . . . . . . . . . . . . 142
Moving or transporting the printer. . . . . . . . . . . . . . . . . . . . . . . . . . . . . . . . . . . . . . . . . . 148
Moving the printer . . . . . . . . . . . . . . . . . . . . . . . . . . . . . . . . . . . . . . . . . . . . . . . . . . . . . . . . . . . . . . . . . . . . . . . . . . . . . . . . . . . . . . 148
Transporting the printer. . . . . . . . . . . . . . . . . . . . . . . . . . . . . . . . . . . . . . . . . . . . . . . . . . . . . . . . . . . . . . . . . . . . . . . . . . . . . . . . . 149
Long-term storage . . . . . . . . . . . . . . . . . . . . . . . . . . . . . . . . . . . . . . . . . . . . . . . . . . . . . . . . . . . . . . . . . . . . . . . . . . . . . . . . . . . . . . 150
Performing initial charging after head cleaning . . . . . . . . . . . . . . . . . . . . . . . . . . . . . . . . . . . . . . . . . . . . . . . . . . . . . . . . . . 154
Chapter 4 Appendix
Messages and Error Messages . . . . . . . . . . . . . . . . . . . . . . . . . . . . . . . . . . . . . . . . . . . . . . 158
Status messages . . . . . . . . . . . . . . . . . . . . . . . . . . . . . . . . . . . . . . . . . . . . . . . . . . . . . . . . . . . . . . . . . . . . . . . . . . . . . . . . . . . . . . . . 158
Error message display and remedies . . . . . . . . . . . . . . . . . . . . . . . . . . . . . . . . . . . . . . . . . . . . . . . . . . . . . . . . . . . . . . . . . . . . . 160
Error requiring restart . . . . . . . . . . . . . . . . . . . . . . . . . . . . . . . . . . . . . . . . . . . . . . . . . . . . . . . . . . . . . . . . . . . . . . . . . . . . . . . . . . . 163
Troubleshooting . . . . . . . . . . . . . . . . . . . . . . . . . . . . . . . . . . . . . . . . . . . . . . . . . . . . . . . . . . . 164
Installation and initial setup troubleshooting. . . . . . . . . . . . . . . . . . . . . . . . . . . . . . . . . . . . . . . . . . . . . . . . . . . . . . . . . . . . . 164
Boot-up troubleshooting . . . . . . . . . . . . . . . . . . . . . . . . . . . . . . . . . . . . . . . . . . . . . . . . . . . . . . . . . . . . . . . . . . . . . . . . . . . . . . . . 165
Media-related troubleshooting . . . . . . . . . . . . . . . . . . . . . . . . . . . . . . . . . . . . . . . . . . . . . . . . . . . . . . . . . . . . . . . . . . . . . . . . . . 166
Printing-related troubleshooting . . . . . . . . . . . . . . . . . . . . . . . . . . . . . . . . . . . . . . . . . . . . . . . . . . . . . . . . . . . . . . . . . . . . . . . . 168
The media is jammed . . . . . . . . . . . . . . . . . . . . . . . . . . . . . . . . . . . . . . . . . . . . . . . . . . . . . . . . . . . . . . . . . . . . . . . . . . . . . . . . . . . 172
Specifications of this product . . . . . . . . . . . . . . . . . . . . . . . . . . . . . . . . . . . . . . . . . . . . . . . 175
List of specifications. . . . . . . . . . . . . . . . . . . . . . . . . . . . . . . . . . . . . . . . . . . . . . . . . . . . . . . . . . . . . . . . . . . . . . . . . . . . . . . . . . . . . 175
Options / Supply list. . . . . . . . . . . . . . . . . . . . . . . . . . . . . . . . . . . . . . . . . . . . . . . . . . . . . . . . 178
Revision History . . . . . . . . . . . . . . . . . . . . . . . . . . . . . . . . . . . . . . . . . . . . . . . . . . . . . . . . . . . 179

7
Chapter 1 Basic Operations
Introduction . . . . . . . . . . . . . . . . . . . . . . . . . . . . . . . . . . . . . . . . . . . . . . . . . . . . . 9
Main components of your printer. . . . . . . . . . . . . . . . . . . . . . . . . . . . . . . . . . . . . . . . . . . . . . . . 9
Connecting to a Computer . . . . . . . . . . . . . . . . . . . . . . . . . . . . . . . . . . . . . . . . . . . . . . . . . . . . . 12
System configurations of this product . . . . . . . . . . . . . . . . . . . . . . . . . . . . . . . . . . . . . . . . . . 14
Launching/Displaying/Exiting MUTOH Status Monitor (MSM). . . . . . . . . . . . . . . . . . . . 15
Printing area . . . . . . . . . . . . . . . . . . . . . . . . . . . . . . . . . . . . . . . . . . . . . . . . . . . . . . . . . . . . . . . . . . . 17
Media size . . . . . . . . . . . . . . . . . . . . . . . . . . . . . . . . . . . . . . . . . . . . . . . . . . . . . . . . . . . . . . . . . . . . . 17
Precautions . . . . . . . . . . . . . . . . . . . . . . . . . . . . . . . . . . . . . . . . . . . . . . . . . . . . . . . . . . . . . . . . . . . . 19
Powering ON / OFF. . . . . . . . . . . . . . . . . . . . . . . . . . . . . . . . . . . . . . . . . . . . . . 21
Loading a roll media . . . . . . . . . . . . . . . . . . . . . . . . . . . . . . . . . . . . . . . . . . . . 22
Load a roll media into the printer . . . . . . . . . . . . . . . . . . . . . . . . . . . . . . . . . . . . . . . . . . . . . . . 22
Nozzle check and cleaning . . . . . . . . . . . . . . . . . . . . . . . . . . . . . . . . . . . . . . 31
Nozzle check. . . . . . . . . . . . . . . . . . . . . . . . . . . . . . . . . . . . . . . . . . . . . . . . . . . . . . . . . . . . . . . . . . . 31
Cleaning . . . . . . . . . . . . . . . . . . . . . . . . . . . . . . . . . . . . . . . . . . . . . . . . . . . . . . . . . . . . . . . . . . . . . . . 32
Calibrating your printer . . . . . . . . . . . . . . . . . . . . . . . . . . . . . . . . . . . . . . . . . 33
Head alignment. . . . . . . . . . . . . . . . . . . . . . . . . . . . . . . . . . . . . . . . . . . . . . . . . . . . . . . . . . . . . . . . 33
Print quality calibration . . . . . . . . . . . . . . . . . . . . . . . . . . . . . . . . . . . . . . . . . . . . . . . . . . . . . . . . 35
Media feed adjustment. . . . . . . . . . . . . . . . . . . . . . . . . . . . . . . . . . . . . . . . . . . . . . . . . . . . . . . . . 38
Advanced setting . . . . . . . . . . . . . . . . . . . . . . . . . . . . . . . . . . . . . . . . . . . . . . . 39
Changing the Head Height . . . . . . . . . . . . . . . . . . . . . . . . . . . . . . . . . . . . . . . . . . . . . . . . . . . . . 39
Changing holddown pressure using media feed lever. . . . . . . . . . . . . . . . . . . . . . . . 40
Canceling or reducing pressure rollers individually . . . . . . . . . . . . . . . . . . . . . . . . . . . . . . 41
Operating from Front panel . . . . . . . . . . . . . . . . . . . . . . . . . . . . . . . . . . . . . 43
Feeding media . . . . . . . . . . . . . . . . . . . . . . . . . . . . . . . . . . . . . . . . . . . . . . . . . . . . . . . . . . . . . . . . . 43
Pausing / Restarting printing . . . . . . . . . . . . . . . . . . . . . . . . . . . . . . . . . . . . . . . . . . . . . . . . . . . 43
Canceling printing . . . . . . . . . . . . . . . . . . . . . . . . . . . . . . . . . . . . . . . . . . . . . . . . . . . . . . . . . . . . . 44
Starting printing during warming up . . . . . . . . . . . . . . . . . . . . . . . . . . . . . . . . . . . . . . . . . . . 44
Cutting media . . . . . . . . . . . . . . . . . . . . . . . . . . . . . . . . . . . . . . . . . . . . . . . . . . . . . . . . . . . . . . . . . 45
Menus you can access while printing . . . . . . . . . . . . . . . . . . . . . . . . . . . . . . . . . . . . . . . . . . . 46

8

Introduction 9
1Introduction
Main components of your printer
Front side
Introduction
Media cut groove
Manually cut the media along
the groove.
Pressure rollers
Keep the media in place to
ensure proper feeding.
The holddown pressure can be
individually reduced or canceled
by slide lock levers on the
pressure rollers.
Platen
Media is printed on here.
There is an adsorption
fan inside.
Media feed lever
Push the lever to lower the
pressure rollers to keep the
media flat while printing.
Pull it to release the media.
The holddown pressure
can be changed between
High and Normal using this
lever.
Edge holder
Place it on the edge of the
media to prevent media curl
while printing.
While not printing, slide
them to the left and right
side edges of the platen.
Carriage
The print head is installed
on the carriage.
Adjuster
Waste ink tank
Collect waste ink produced
during printing and cleaning
cycle. Empty the tank as
needed.
Stand
Media guide
Front media path that
the heater is installed
inside to dry the print.
Front cover
Open this cover when loading a roll
media or removing a media jam.
It is normally closed.
Maintenance cover L
Open this cover for cleaning.
It is normally closed.
Front panel
⇒Front panel P. 11
Maintenance cover R
Open this cover for cleaning
or replacing consumables.
It is normally closed.
Internal LED lights
The lights allows you to
inspect inside of the printer
or your print during
printing.
Cutter
Automatically cut the media
after printing.

10 Introduction
The printer has a touch-screen panel located on the front right of the printer. The active keys are lit up on the panel for guidance.
• Tap: Lightly touch the key with your finger, then immediately release.
• Long-touch: Keep touching the key.
Rear side
Front panel
Network interface cable connector
AC inlet
12345678
Ink slots
Insert a high-capacity ink
pack adapter into the slot.
Media feed slot
Insert the front edge of the
media into this slot and pass
it to the front side to load it
into the printer.
Media feed lever
Hold down or release the
media. This lever is interlocked
with the media feed lever on
the front side.
Roll media holder
Attach the media anges to both ends of a roll
media and load it onto the roll media holder.
Media guide
Pass a roll media through
the media guide.
Slot number

Introduction 11
Front panel
1
Status Bar Indicates the printer status by LED light.
• Working normally: Solid green
• Error/Alert state: Solid red (error) or flash red (alert)
2
Display Displays the printer status, setting menu, errors and so on.
3
[Home] key:
Access to or exit the menu.
4
[Cancel] key:
• Pause the print job. While pausing, tap the key again to resume printing.
• While the printer is not printing, tap the key to cut the media.
5
Arrow keys:
When you have entered the setup menu, the arrow keys are used to select a menu or enter a value.
• key: Go to the previous item.
• key: Return to the upper level menu without saving the change.
• key: Go to the sub menu.
• key: Go to the next item.
While the printer is in standby mode, it is used to feed media, run a nozzle check F, or perform head
cleaning.
• key: Feed the media backward. Long-touch to feed it with high speed.
• key: Tap to run a nozzle check F.
• key: Tap to perform cleaning.
• key: Feed the media forward. Long-touch to feed it with high speed.
6
[Power] button:
• Long press to power on the printer. The Power LED (above the Power button) turns on with a solid
white light.
• While the power is on, long press the button to power off the printer. In the Off state, the Power
LED lights off.
Note
The symbol means “standby”. Even the Power LED turns off, the device still consumes some
power unless the power cords are disconnected. This state is referred to as the power being “off” in
this Manual.
7
[Enter] key:
Use the Enter key to select a menu or confirm a value.
• While the printer warms up, tap the Enter key to start printing immediately before fully warming
up.
1
2
34
5
6
7

12 Introduction
Connecting to a Computer
Important!
Make sure your computer meets the following requirements.
• OS: Windows 11, Windows 10, Windows 8.1
• CPU: Intel (R) Core (TM) i5 / i7
• Memory: 8GB minimum
•Network:
Use a network port that supports Gigabit Ethernet, and an Ethernet cable that supports Category 6 Gigabit Ethernet or later.
[1] Connect the Gigabit Ethernet cable to the printer.
[2] Insert the tip of the cable tie into the hole on the printer to attach it.

Introduction 13
[3] Use the cable tie to secure the Ethernet cable to the printer.
[4] Connect the Gigabit Ethernet cable to the computer.
[5] Use the front panel on the printer to assign the IP address, subnet mask and gateway.
"Setup 23: IP Address" P. 88, "Setup 24: Subnet Mask" P. 88, "Setup 25: Gateway" P. 89
Note
• The illustration above shows the peer-to-peer connection between this product and computer.
• If you are using the LAN connection, make sure that your printer and computer are on the same subnet.

14 Introduction
System configurations of this product
<Print Support Software>
To get the best out of this product, use the MUTOH Print Server (MPS) function
available from MUTOH Status Monitor (MSM).
You can download the latest version of MSM from the MUTOH Club Server.
(To use MPS, specify the output port of RIP software to MPS.)
*1MUTOH Club
By signing up for MUTOH Club, it oers free useful contents including
- download the latest version of application, operation manual
- download media prole
- check printer information
(printer information uploaded through MSM can be viewed)
MUTOH Club server
Log into MUTOH Club.
https://club.mutoh.co.jp/mutoh/guser
Internet
MUTOH Status Monitor (MSM)
Oers wide range of service including
- monitor printer status, ink level and media remaining in
real time.
- control your printer through remote panel.
- perform printer maintenance
- access to MUTOH Print Server (MPS)
By signing up for MUTOH Club, you can get the latest
service.
*Some of the service require internet access.

Introduction 15
Launching/Displaying/Exiting MUTOH Status Monitor (MSM)
Launching MSM
Windows 11 / Windows 10
Double click the MSM icon on the Desktop.
Windows 8.1
• In the [Start] screen, click [Desktop].
• Double click the MSM icon on the Desktop.
Note
Launching from the Start Menu of Windows
• Windows 11 / Windows 10
From the [Start] menu, click [All Programs] (or [All Apps]) - [MUTOH] - [MUTOH Status Monitor].
•Windows8.1
Right click somewhere the [Start] screen tiles are not displayed to display the application bar, and click [All Apps].
Displaying MSM
Double click the MSM icon in the task tray.

16 Introduction
The remote panel allows you to view the printer status or remotely operate your printer.
Displaying remote panel
Click [Remote Panel].
• The remote panel opens.
Exiting MSM
Right click the MSM icon in the task tray, and click [Exit].
Note
While using your printer, do not exit MSM. To close the MSM window, click [Settings] - [Close].
Windows 8.1
Click the Down Arrow in the [Start] screen.
Click [MUTOH Status Monitor].

Introduction 17
Printing is always started from Origin position (print start point) with following margin on all sides of a page as shown here.
Media that meet the requirements below can be used on this printer.
Printing area
Media size
Roll media diameter 150 mm maximum
Media core diameter 2 inches: 50 mm to 52 mm
3 inches: 75.5 mm to 79 mm
Weight 30 kg or less
Width 500 mm to 1,625 mm
Maximum thickness 2.8 mm (When the head height is set to “High”)
Important!
The default head height is set to “Low”.
In the “Low” setting, media up to 0.3 mm thick can be loaded on the printer.
Note
Contact your local MUTOH dealer about roll media recommended for your printer.
a
c
bd
Printable Area
Media feeding direction
a=5 mm *1
b=5 mm to 25 mm
c=5 mm
d=5 mm to 25 mm
*
1
The value of “a” will be 15 mm in the following cases:
• Immediately after media initialization
• When feeding the media backward by using
The value of “a” will be 40 mm in the following cases:
• When Media Initial menu is set to “Top&Width”
• After cutting the media

18 Introduction
Note the following points when handling the media.
• Use the media under an appropriate environment.
The appropriate temperature and humidity for printing are as follows.
• Do not use media which is folded, cut, or torn.
• The size of media can change according to changes in humidity in the printing environment.
Before using media, leave media for 1 hour in the printing environment to adapt it to the environment.
Performing printing without adapting media to the printing environment may cause media jams due to gaps or wrinkles
in the media. Print quality is also affected.
• When using the printer in a low-humidity environment, the cut media may stuck and may not come down. In such a case,
open the front cover after the media is cut to remove the media.
• Do not touch the print side.
Moisture and oil on your hands may affect the print quality.
• Do not leave media set in the printer for a long time.
Some media has a tendency to bend, causing media jams and degradation of print quality.
Avoid using such media especially in winter, in dry conditions, and when printing formal documents.
• Do not discard the individual box and bag. Use them for storing media.
When storing roll media after use, follow these precautions to avoid print defects caused by cockling.
• After removing your roll media from the scroller, wind it back onto the roll properly and put it in the original plastic bag.
Then store it in the package it came in.
• Avoid high temperature, high humidity, and direct sunlight when storing media.
• Keep the media dry.
Cautions on handling media
Recommended Printing
Environment
Temperature 22 to 30 °C
Humidity 40 to 60%, No condensation
Change rate Temperature: No more than 2 °C per 1 hour
Humidity: No more than 5% per 1 hour
Precaution on storing media after use

Introduction 19
Use the printer with its power turned permanently on. When you are not using the printer, always leave the power on and put
the printer into the sleep mode while not in use. In the sleep mode, the printer will periodically circulate the ink inside the printer
and carry out head cleaning automatically. If you do not put the printer into the sleep mode, the ink inside the printer could
settle out and/or coagulate, causing poor image quality or printer failure.
Before installing a new ink bag, invert the ink bag back and forth to agitate ink.
Periodical ink agitation is also required when prompted on the operation panel.
Otherwise, the ink inside the bags settles or coagulates and may cause poor print quality or a malfunction.
If the printer is not used for a long time, the print head nozzles can get clogged causing damage to the printer.
• Before using an ink bag, make sure to read the Safety Data Sheet (SDS).
• Do not disassemble Ink bag.
Ink may come into contact with your eyes or skin, causing irritation or allergic reaction.
• Wear protective equipment (gloves, goggles or eye protection, protective mask, protective clothing) when handling ink.
• Be cautious that ink does not get into your eye or make a contact with your skin.
When ink gets into your eye or make a contact with your skin, wash with water immediately.
If left as it is, it may cause red eye or light inflammation. If it is necessary, please see your doctor immediately.
• DO NOT drop or hit an ink bag.
Ink may leak from the bag.
• Be sure to use the ink before it expires.
The expired ink should be disposed of as industrial waste. The empty ink bag should be put in a plastic bag and should be
disposed of according to the local regulations.
• MUTOH strongly recommends to use genuine ink.
This printer is designed to bring out the best performance when using with the MUTOH genuine ink.
Non-MUTOH ink may cause print defects or damage to the printer.
Precautions
Do not turn the power off
Important!
If you need to leave the printer unused for extended period of times (more than one month), please contact your local MUTOH
dealer.
Agitate the ink bags
Please use this product at least once a week
Please handle ink bag carefully

20 Introduction
This product requires regular user maintenance.
• Run a nozzle check before and after printing.
If nozzle missing is found, run a head cleaning.
• Clean the cleaning wiper and around the print head once a week.
• If you are not using the printer for an extended period*, run a head cleaning once a week.
If you may not be able to perform weekly head cleaning, perform [Longstore] ( "Long-term storage" P. 150).
*"Extended period" means one to four weeks.
• Clean inside of your printer once a month.
• Regularly check the waste ink tank and empty the tank as needed.
In this product, there are some parts required to be replaced after a long-term use.
• User replaceable parts: Absorption material for the flushing box, Cutter, Cleaning wiper
• Parts required to be replaced by service personnel: Motors, Pumps, Print heads
Conduct periodic maintenance
Some parts need to be replaced periodically
Table of contents
Other Muton Printer manuals

Muton
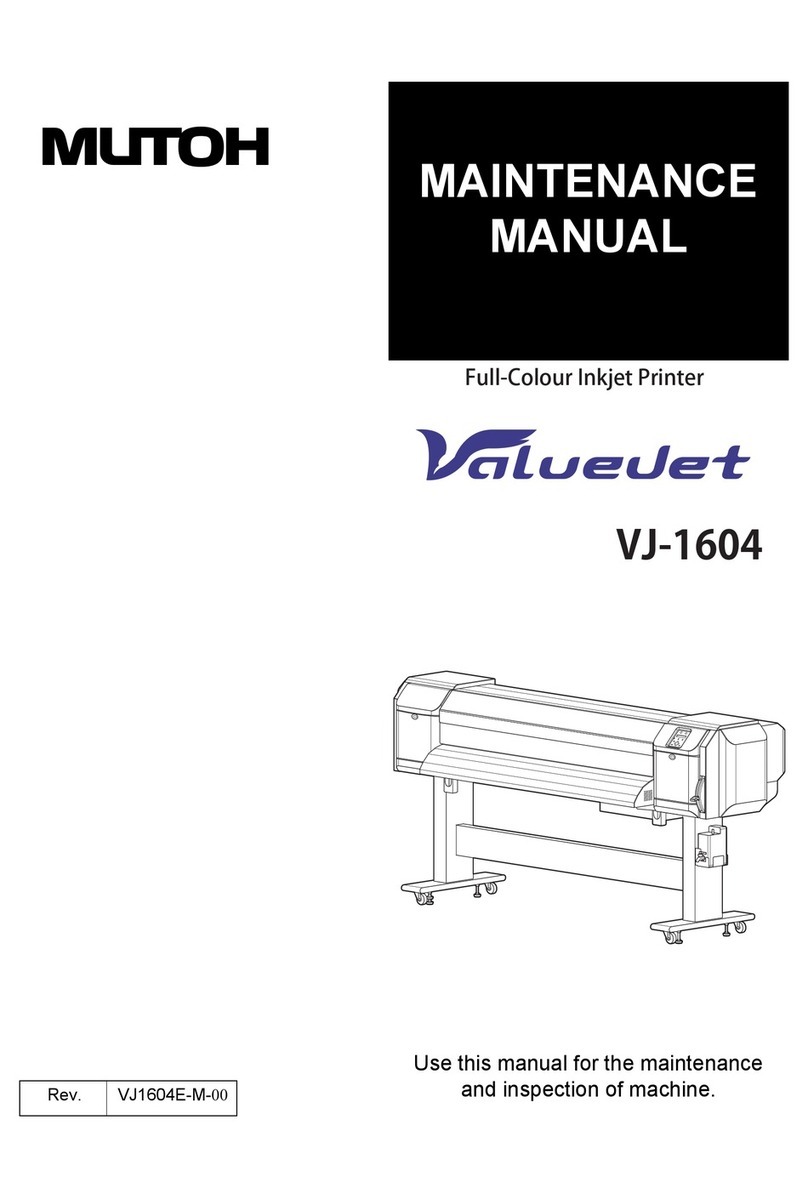
Muton VJ-1626UH User manual

Muton
Muton XPJ-1642WR User guide

Muton
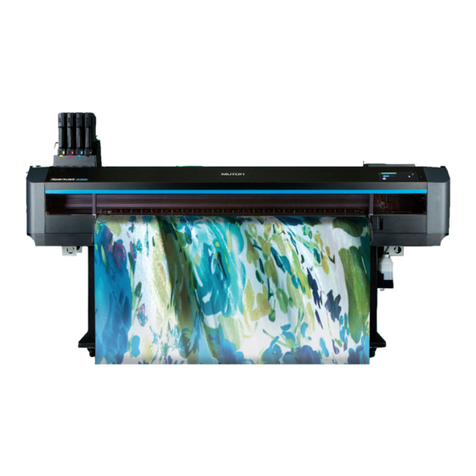
Muton ValueJet VJ-1627MH User guide

Muton
Muton ValuejetVJ-1604 User manual

Muton
Muton VJ-1608 Hybrid User manual

Muton
Muton XPJ-1682WR User manual

Muton
Muton XPJ-461UF User guide

Muton
Muton XPJ-1641SR User manual

Muton
Muton XPJ-1642WR User manual
Popular Printer manuals by other brands

Samsung
Samsung ML-2551N user guide

Canon
Canon Pixma iP6000 installation instructions

Konica Minolta
Konica Minolta magicolor 7450 installation guide

Stahl
Stahl Hotronix DUAL Air Fusion Operator's manual

Epson
Epson WorkForce WF-M1030 Start here

Infinite Peripherals
Infinite Peripherals PP-50 Developer's guide