© MuxLab Inc. 2017
Installation
For the source (TX), connect one or two line level audio sources and/or a microphone. For more
information on how to configure the unit and the Ethernet switch, check MuxLab’s website, the
500811 Operation Manual and the 500755-AMP-RX Quick Installation Guide.
Note: Do not block the ventilation holes. Do not attempt to open the housing. There are no user-
serviceable parts inside the amplifier. Opening the unit will void your warranty.
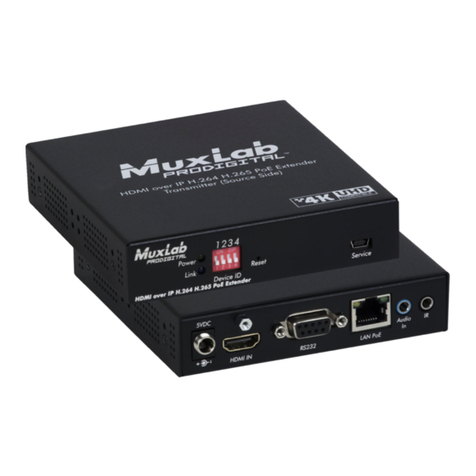
1. Use a Cat5/5e/6 cable between the unit and the 1Gig Ethernet Switch.
2. Connect microphone as show below. Use the removable connector supplied with the unit.
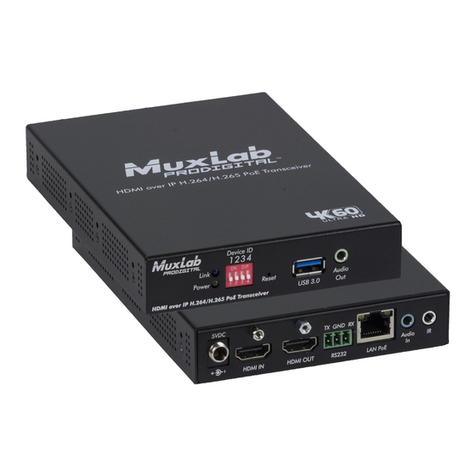
3. If the configuration is point-to-point: use the DIP Switches to select a unique Device ID (DIP
switch positions #1, #2 and #3) for each Transmitter present on the network and configure
each Receiver Device ID to the corresponding selected Transmitter. A 1Gig Ethernet Switch
is not required but may be used. Note that this step is not necessary if the MuxLab Network
Controller (500811) is used. Also if point-to-point is created without a network (TX to RX
direct connect), then the TX and RX should have the same address, but any setting is OK.
4. If the configuration is a point-to-multipoint or multipoint-to-multipoint:
You will need to use an Ethernet Switch with 1Gig ports and DHCP Server support. In
addition IGMP Protocol support is required for the multipoint-to-multipoint case. Verify that
the Ethernet Switch is configured correctly and that the DHCP Server is enabled and
that the IGMP Protocol is enabled for multipoint-to-multipoint applications. See the
support documentation on MuxLab’s website regarding how to configure an Ethernet Switch.
Connect all Transmitters and Receivers to the Ethernet Switch.
5. An IR Emitter and Sensor is not included, but may be purchased separately. If purchased, IR
control signals may initiate from control software on a PC, tablet, or smartphone connected to
the network, so that only IR Emitters are required next to the audio equipment. You can
differentiate the IR Sensor and the IR Emitter by looking at the 3.5 mm plug. The IR Sensor
is using a Stereo Plug (3 Contacts) and the IR Emitter a mono plug (2 Contacts). Set the IR
direction (Dip switch position #5, set to ON=Emitter, or OFF=Sensor).
6. Position the IR Sensor so that it is directed at the hand-held remote control. For a clear IR
signal reception, aim the hand-held remote control at the top of the IR Sensor enclosure.
7. Position the IR Emitter as close as possible to the source’s IR Sensor. For a clear IR signal
reception, the IR Emitter can be glued on the source’s IR Sensor. The IR Emitter’s signal is
transmitted from the side of the enclosure.
8. This product supports RS232 bidirectional communication. On the Transmitter, the RS232
port is configured as a DCE; and on the Receiver as a DTE. Please connect your RS232 cable
accordingly. The default settings are 9600, N, 8, 1.
9. To send an RS232 packet to a specific device, you need to put the IP address in front of the
packet. This communication is meant to be machine to machine; and hexadecimal codes
must be used. For example, to send the message “Hello” to a device having an IP address of
192.168.168.55 IP, send the following hexadecimal string: 0xC0 0xA8 0xA8 0x37 0x48
0x65 0x6C 0x6C 0x6F. (or “192 168 168 55 H e l l o” in hexadecimal).
10. Powering the Transmitter via an external power supply is only necessary where a PoE
Ethernet Switch is unavailable. In this case, connect a 5 VDC power supply to the unit.
Basic Operation
1. Navigating the menu to configure unit settings (via the push/turn dial):
a. To navigate the menu: When in menu mode, turn the dial to cycle through the menu.
b. To select a menu item: Push the dial when the desired menu is displayed.
c. To select a setting within a menu: Turn the dial and push to select desired setting. If the
setting is not selected before the timeout occurs, the unit returns to menu mode without
the setting change. This timeout affects all menus except the VOL (0-87) menu.
2. Menus & Settings:
a. VOL (0-87): Set main volume level [0 to 87]
b. INPUT: Select audio source [IN #1, IN #2, MIC, IN #1 + MIC, IN #2 + MIC]
c. LOW VOL: Set IN #1/IN #2 attenuation when MIC DETECT is active [-20 to 0dB]
d. BASS: Set IN #1/IN#2 bass level [-14 to +14dB]
e. TREBLE: Set IN #1/IN#2 treble level [-14 to +14dB]
f. MIC TYPE: Set type of Mic used [ELECTRET, DYNAMIC, CERAMIC]
g. MIC GAIN: Set Mic gain when MIC DETECT is active [0 to +26dB]
h. MIC BASS: Set Mic bass level [-14 to +14dB]
i. MIC TREBLE: Set Mic treble level [-14 to +14dB]
j. MIC DETECT: Set Mic detection sensitivity [0 to 63, where 0 = OFF]
k. LIGHT: Set backlight mode [AUTOMATIC, ALWAYS ON, ALWAYS OFF]
l. FACTORY RESET: Reset the unit to factory defaults, which are [VOL=0, INPUT=IN
#1, LOW VOL=0, BASS=0, TREBLE=0, MIC TYPE=ELECTRET, MIC GAIN=0,
MIC BASE=0, MIC TREBLE=0, MIC DETECT=0, LIGHT=AUTOMATIC]
m. SAVE: Saves the current settings, which are load on power-up
Troubleshooting
The following table describes possible symptoms, probable causes and solutions regarding the unit:
Bad UTP cable or Switch
not PoE
Try a new UTP cable and/or use an external
power supply.
No audio or freezing
audio
Check input level on display, and turn the
volume up. Check speaker type and
connections.
Check the audio source equipment.
Check DIP switch address.
IGMP not enabled, or not
working properly.
Check the Ethernet Switch configuration
and enable the IGMP protocol.
Defective audio cable, or
equipment incorrectly
connected or grounded.
Change cable, or verify wiring interface.
Try grounding equipment on each side to a
safety ground.
Software cannot detect
the 500755-AMP
Computer not on the same
subnet or wrong IP Address
Verify the network IP Address & mask.
If you still can’t diagnose the problem, please call MuxLab Customer Technical Support at
877-689-5228 (toll-free in North America) or (+1) 514-905-0588 (International).

