5 Network Settings
The ENCOMPASS CM1 is most commonly configured to contact a Muzak server via the Public Internet
(Pull Model). It may also be configured to be contacted by a server running Muzak’s Command software
(Push Model). It is important to configure the IP Settings for the appropriate model. Details should be
included in the installation work order.
To set the IP address, press the enter button on the faceplate to access the on-screen menu. Use the
down Tbutton to scroll to Net Settings and then press enter.
Pull Model: DHCP addressing is most commonly used in this model. From the factory, DHCP is set to No.
To toggle the DHCP setting to Yes, press and hold the up Sand down Tbuttons for two seconds.
To set a static address, DHCP should be set to No. Press the down Tbutton once to display IP Address.
To change the IP address, press and hold the up Sand down Tbuttons for two seconds. A cursor will
show on the first digit of the address. Use the up Sand down Tbuttons to set each digit. Press the
enter button to move to the next digit. Upon completion, press the enter button to store the address in the
ENCOMPASS CM1 memory. Each segment of a valid IP address ranges from 0 to 255. Leading zeros
are necessary for segments lower than 100. Gateway and Netmask must also be set, following the same
method. If DHCP is set to Yes, these will be done automatically. Server and Port will be preset at the
factory. Should they be changed, contact NOC Control for current settings.
Push Model: DHCP must be set to No. The IP Address will be provided in the installation work order.
Follow the instructions in the paragraph above to set the IP address.
What to Expect
Upon applying power, the LCD on the face of the ENCOMPASS CM1 will illuminate green and begin a startup routine.
Approximately 15 seconds later, the unit will begin playing audio and the LCD will display the artist name and song title.
If the unit is installed on a network, follow the steps under Network Settings (5), above, to set the IP address. At this
point, contact Muzak NOC by calling 800 327.6549. A network operator will collect installation details. If the unit is
installed on a network, the network operator will confirm remote that the unit is remotely addressable.
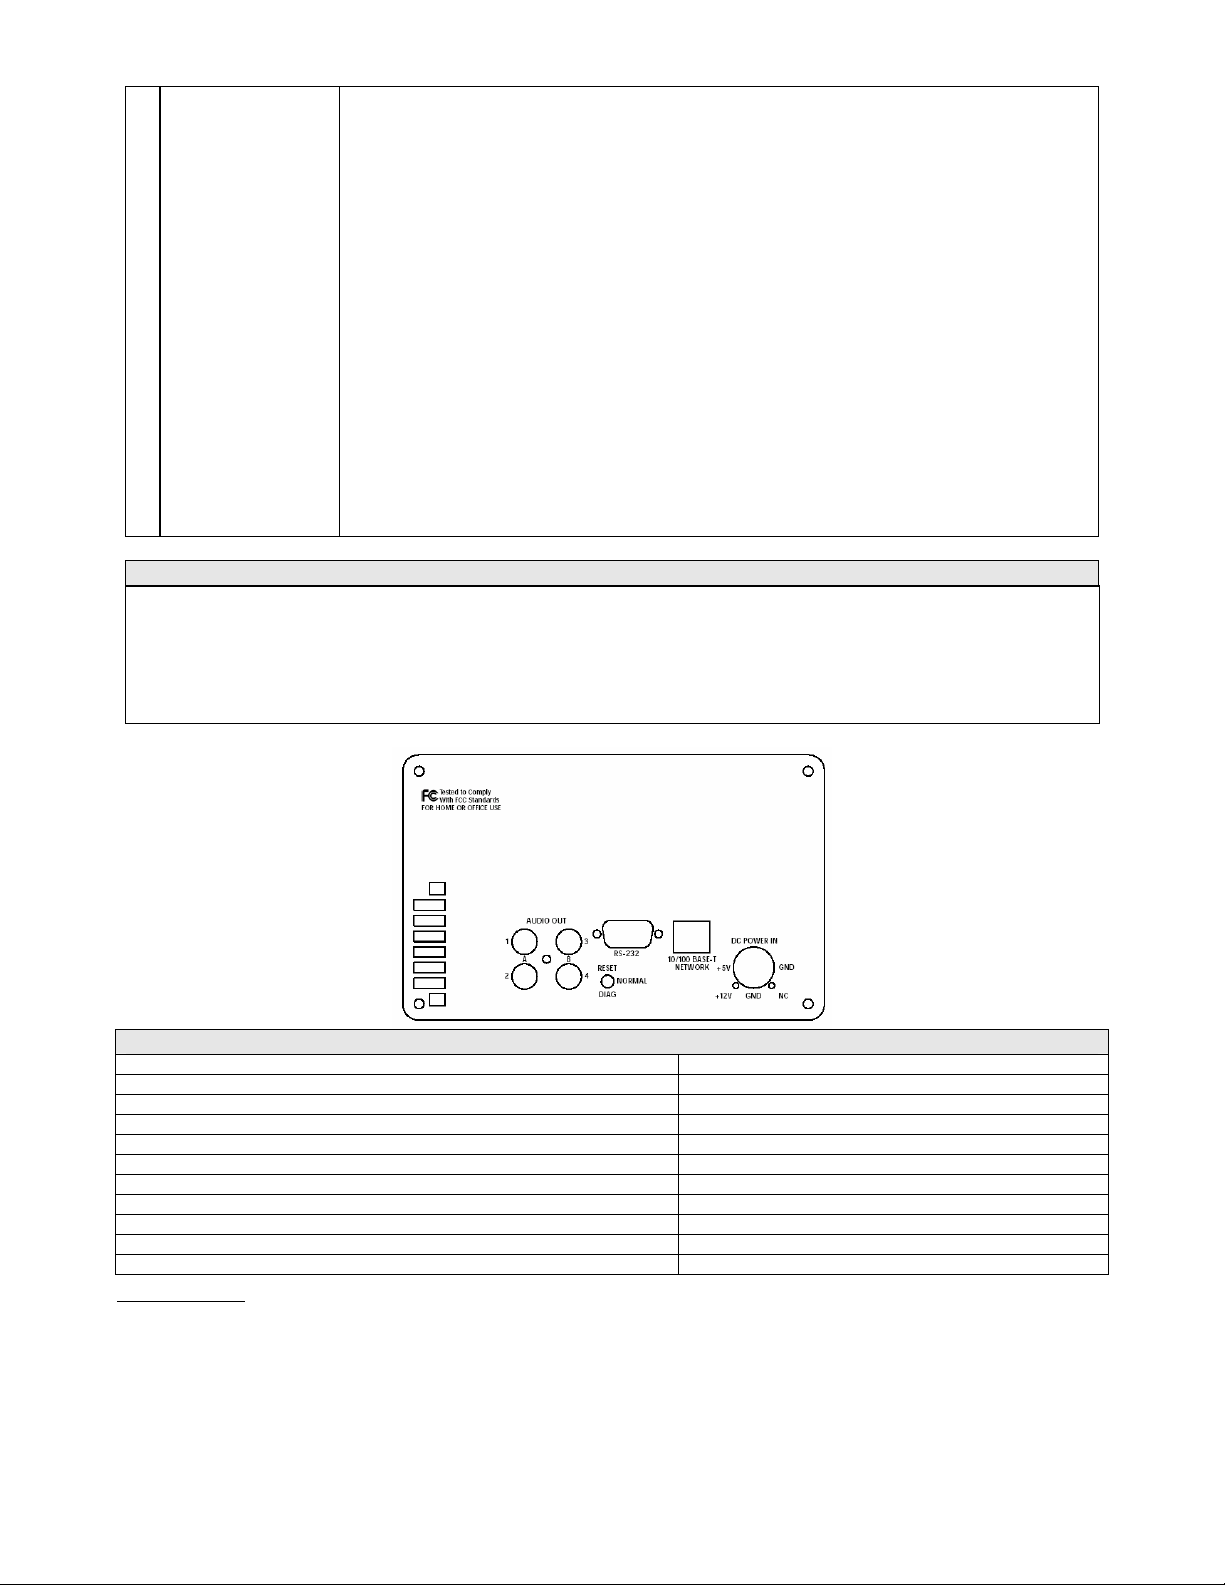
Environmental Operating Conditions & Physical Specifications
Use Indoor
Audio Unbalanced, 10K
Altitude -975’ to 9,900’
Temperature Range 5 o to 55 o C
Relative Humidity 8 to 90% non-condensing
Weight (without power supply) 8.6 pounds
Dimensions (H x W x D) 4.5" x 6.8" x 8.25"
Power (Supply Voltage) Input: 90-230 VAC, 50/60 Hz Output: +5V/3.5A
Power Consumption <30 watts
Device Approval FCC Class A
Power Supply Approvals FCC, UL, CSA, VDE
Troubleshooting
Under normal operating circumstances, the LCD will display the Artist and Song title playing. When any other message is
displayed, technical help may be obtained by calling Muzak NOC at 800 327.6549.
Last Updated: 16 October 2005, Version 2.0 / Based on Firmware 5.08


