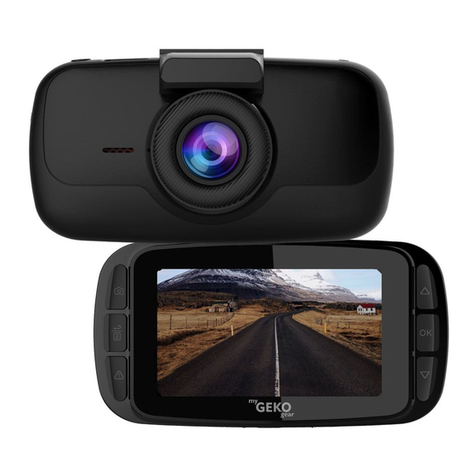
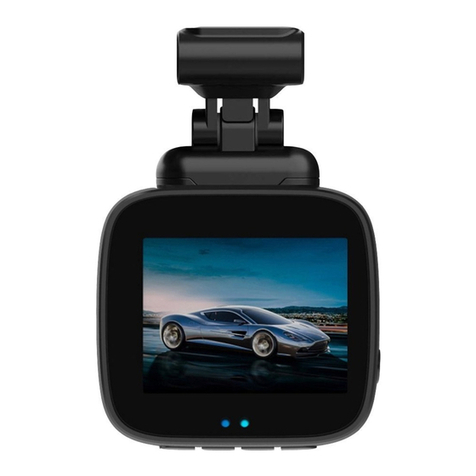
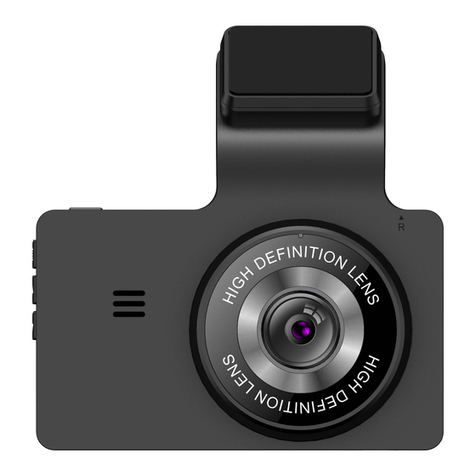
myGEKOgear Orbit 535 User manual

Orbit 535
User Manual

I. Package Contents
DVR*1 Magnetic Bracket*1 Car Charger*1 User Manual*1
SD Card*1 SD Card Reader*1 Card Case*1 Extra 3M*1
II. Camera Introduction

1. UP Button:
a) In Menus: Navigate UP
b) In Recording Mode: Wi-Fi ON.
2. DOWN Button:
a) In Menus: Navigate DOWN
b) In Recording Mode: Mute/UnmuteAudio
3. M/MENU Button:
a) Recording PAUSED: Short press to open the MENU, long press to cycle through
[Photo Mode], [Playback Mode], and back to [Video Mode].
b) Recording ON: Short press to manually LOCK the current recording.
4. OK Button:
a) While Recording: START/PAUSE.
b) In Menus: OK/Confirm.
c) While off: Short press for 1 second to turn on
d) While on: Long press for 3 seconds to turn off
5. SD Card Slot
6. Speaker
7. Camera Lens
8. Reset hole
9. Display
10. Work indicator
11. Power Cable –Type: Mini-USB
12. GPS Port –for external GPS module (not included)
13. 3MAdhesive Windshield Pad
Dash Cam Installation
2. Attach the Orbit 535 to the magnetic mounting bracket. Pay attention to the tab (see picture
below) and install the camera onto the windshield with this tab facing the rear of the car.

3. Remove the protective film from the adhesive sticker and affix the mount onto the desired
location on the windshield. Again, make sure the tab is facing the rear of the car.
4. Connect the power cord to the Mini-USB port of the Orbit 535 and the cigarette lighter end to the
power port.
5. Carefully manage and run your wiring along the window trim.
6. Insert a C10/U3 or higher, 8GB or larger, Micro SD card.
Notice:
a. Use a genuine high-speed SD card Class 10 (C10/U3) or higher, 8GB or above. Insufficient card
capacity or insufficient card speed will result in incompatibility or unstable recording. When using a
new card, please format the card in the menu and set the date and time before use.
b. After the power is turned on, check whether the indicator light of the vehicle is normally on. If the
indicator light is not on, first check whether the magnetic bracket is placed backwards, and replace
the other side of the magnetic bracket to fix it with the host.
V. Settings
1. Recording Settings
a. Recording interface
When the Orbit 535 is powered on, it begins recording automatically, indicated by the flashing
red dot in the viewfinder and flashing blue indicator light on the right side of the camera.
During recording, the following shortcuts are available:
1. M Button –LOCK the current recording. When the memory card becomes full, locked
recordings are protected from being overwritten by loop recording.
2. UP Button –Press to activate Wi-Fi.
3. DOWN Button –Press to toggle audio recording ON and OFF.

Notice: While accessing the MENU or when recording is PAUSED, the camera will auto-resume
recording if no activity is detected for 10 seconds.
v
b. [Video] Menu
While Recording is PAUSED, press the M button to enter the first page of the menu. Navigate using
the UP/DOWN buttons and press OK to confirm your selections and adjust settings.
Recording Time
time
GPS
Signal
Resolution
G-Sensor
Video Mode
File Locked
Water Mark
Date Time
Loop Recording
Motion Detection
WDR
Record
Audio
Recording
Speed
Signal

1. [Resolution]: Select the video resolution. [4K, 2K, 1080P] (Default: 4K)
2. [Record Audio]: Enable or disable audio recording. [Off/On] (Default: On)
3. [G-Sensor]: Set the G-Sensor sensitivity for automatic recording emergency lock.
[Off/Low/Medium/High] (Default: Low)
4. [Loop Recording]: Select the maximum duration of individual recordings. [Off/1 Minute/3
Minutes/5 Minutes] (Default: 3 Minutes)
5. [WDR]: Toggle Wide Dynamic Range. [Off/On] (Default: On)
6. [Sharpness]: Set image sharpness. [Strong/Normal/Soft] (Default: Normal)
7. [Exposure]: Adjust light exposure levels. (Default: 0.0)
8. [Parking Mode]: The camera will capture security recordings when the car is turned off.
[Off/G-sensor/Time Lapse] [Default: OFF]
a. OFF: Parking Mode OFF.
b. G-Sensor: When the camera is powered OFF with the power button, the camera’s
G-Sensor will automatically wake the camera and record a video when it detects a
collision.
Important Notice: [Parking Mode: G-Sensor] requires an always-on
power source to function.
c. Time-Lapse Record: When the car is turned OFF, the camera will change to
time-lapse mode and record 1FPS video until turned off manually or the car is
turned on again.
Important Notice: [Parking Mode: Time-Lapse Record] requires a
professional 3-wire hardwire installation to function.
9. [Date Stamp]: Display a Time/Date Stamp in recordings. [Off/On]
10. [Motion Detection]: When enabled, the camera will only record when motion is detected. If
no motion is detected for 10 seconds, the camera will automatically PAUSE recording.
When motion is detected again, recording will RESUME automatically. (Default: Off)
Notice:
This product has a G-Sensor loop function. This system reserves 30% of the memory card’s

capacity to store recordings locked by the G-Sensor. The remaining 70% of the SD card is used to
store normal loop recorded video files. When locked files exceed 30% of the memory card’s
capacity, locked videos will begin to loop record over the oldest locked files, deleting old recordings
one at a time, in favor of creating new recordings.
When playing the video recorded by the product, be sure to use a media player that supports the
H.265 format to avoid playback issues.
2. Photo Mode
In the main camera interface, press the OK button to pause the video recording, and then long
press the M button once to enter [Photo Mode]. Press OK to take a photo.
3. Playback Settings
While recording is PAUSED, long press the M button for 2 seconds to enter [Photo Mode], then
long press the M button once more to enter [Playback Mode]. Use the UP/DOWN buttons to select
a video, then press OK to PLAY/PAUSE the selected video. Long press the M button to exit
[Playback Mode] and cycle back to [Video Mode].
playback video
In [Playback Mode], press the M button to bring up the Playback menu.

Delete: Delete videos/photos. [Delete Current/DeleteAll]
Protect: Lock/Unlock videos/photos. [Lock Current/Unlock Current/Lock All/Unlock All]
4. [Setup] Menu (Wrench Icon)
While recording is PAUSED, short press the M button to enter menu page 1, then press the M
button again to enter menu page 2, the [Setup Menu]. Use the UP/DOWN buttons to navigate and
the OK button to confirm your selections. Press the M button to go back in the menu.

1. [Wi-Fi]: When turned ON, the Wi-Fi connection information (SSID/Password) will appear.
After connecting, the RoadCam app takes over control of the camera. To restore the
camera’s controls, press the UP/DOWN buttons to select “WI-FI_OFF” and press OK to
turn off Wi-Fi.
2. [Date/Time]: Set time/date information here.
3. [Screen Saver]: Set the Screen Saver/Sleep interval. [Off/1 Minute/3 Minutes/5 Minutes]
(Default: Off)
4. [Beep Sound]: Enable/Disable button sounds. [Off/On]
5. [Driver Fatigue Alert]: Off, 2 Hours, 3 Hours, 4 Hours can be selected, the system defaults
to off
6. [Language]: Select display language.
7. [Speed Unit]: Toggle between KM/H and MPH speed units. *Requires an external GPS
module to detect and display current speed. (Sold Separately)
8. [Default Setting]: Reset the camera to factory settings.
9. [Format]: Format the SD card, deleting all contents.
10. [Firmware Version]: View the current installed firmware version.
5. Wi-Fi Operation and RoadCam Smartphone App
1. Download and install the "RoadCam" app from the iOS App Store or Google Play Store to your
phone.
2. Open the Settings Menu on your smartphone and make sure Wi-Fi is enabled.
3. Open the Wi-Fi Connections Menu on your smartphone and tap the Wi-Fi SSID of the “Orbit 535”
to connect. The password is: 12345678.
4. After the connection is successful, launch the RoadCam app to control the Orbit 535.
5. To disconnect Wi-Fi and restore the camera’s controls, press the UP/DOWN buttons to select
“WI-FI_OFF” and press OK to turn off Wi-Fi.
6. If no connection is made with the camera within 10 minutes of being enabled, Wi-Fi will turn off
automatically to reduce the camera’s power consumption.
Notice: When Wi-Fi is connected, the menu button on the camera will be disabled, and you will
need to control the camera through your smartphone. Disable Wi-Fi or close the RoadCam App
and disconnect your smartphone to restore normal controls.
6. GPS
Notice: This product supports an external GPS module to display speed information. It is not
included in the package. If you purchase a third-party GPS module, please take note of the
following requirements:
a. 2.5mm TRRS connector
b. The diameter of the collar must be less than 4mm. (See below)
7.Indicator Lights
Red light: On –Power On; Off –Power Off
Blue light: Off –Recording Paused; Flashing –Recording; Rapid Flashing –Error/Upgrading
VI. Product Parameters
1. Video encoding format: H.265
2. Video file format: TS
3. Power supply: car charger power supply 12V to 5V
4. Supports C10/U3 SD cards, up to 128GB
5. Recording function
6. External GPS module supported
7. Reset function
8. Working voltage: DC: 5V
9. Picture file format: JPG
10. Video resolution: 4K
11. Aspect ratio: 4:3
12. Rated current: ≤350mA
13. Rated working voltage: 5V
15. Rated working current: ≤350mA
16. Rated power: ≤1.75W
17. Working temperature: -20 - 70 degrees
18. Working humidity: 15-85%RH
19. Storage temperature: -40--80 degrees
VII. Common Troubleshooting Issues

1. Camera is not recording
•Format the TF card through the machine
•Format the SD card in a PC/Mac to the FAT32 file system
•Replace with a new memory card
2. Memory Error
•Format the SD card
3. Screen freezes or crashes
•Format the SD card
•Replace the SD card with a Class 10/U3 (or higher) memory card
4. Recordings have no sound
•Set [RecordAudio] to ON in the menu
•Toggle mute audio from OFF to ON by pressing the DOWN button while recording
5. Screen goes black after a few minutes
•Check [Screen Saver] setting in the main menu.
6. Screen is blurry or goes black while recording
•Format the SD card
•Perform a factory reset in the menu.
•If the above suggestions do not work, replace the SD card with a new C10/U3 card.
7. The M/MENU button does not work
•Press the OK button to PAUSE recording and try again.
•Disable Wi-Fi and close the RoadCam app to restore full control to the camera.
8. After connecting power, the camera does not turn on
•Ensure the tab on the magnetic bracket is facing the interior of the car before connecting
the camera
VIII. Precautions
1. To ensure the highest possible video quality, check for obstructions in front of the lens, and clean
the lens regularly with a soft lens cloth.
2. To reduce wear and tear on the camera and its internal components, avoid long-term exposure to
the sun or extreme hot/cold environments.
3. Upon inserting a new SD card, format the SD card in the camera’s menu first, otherwise there
may be a card read error.
4. To avoid card speed or card read errors, format your SD card regularly.
5. It is recommended to replace the SD card every six months, to minimize the chance of a fault

that may result in corrupted or lost recordings.
6. If the recording date is incorrect, enter the menu and re-enter the time and date information.
IX. Disclaimer
1. Follow the setup and usage instructions in the printed materials included with this dash cam.
2. Do not set install the Orbit 535 where it obstructs or reduces the driver’s view. Ensure that your
use of the dash cam is in compliance with the relevant vehicle regulations of your state, province,
region, or country.
3. If audio or other information/signals related to in-vehicle activity are to be recorded, you should
post necessary recording notices to occupants of the vehicle.
4. Do not change camera settings or operating modes while the vehicle is in motion.
5. Optional driving warning signals, including any visual or audible reminders, should not replace
your decision-making and judgment.
6. Avoid placing the camera in a conspicuous place when no one is in the vehicle to avoid attracting
thieves.
7. Avoid exposing the Orbit 535 to direct sunlight or extreme temperatures (high or low), as these
factors can degrade or damage the device.
8. Inspect and verify proper camera operation once at least every 6 months, including testing the
memory card, to ensure the camera is functioning and recordings are captured properly. On each
use, you should verify that the camera assembly, indicator lights, and sounds are functioning. If
there are any signs of non-operation or malfunction, immediately seek a replacement product or
check if it is covered by any applicable warranty.
9. Dash cams may have additional functions such as transmitting and recording sounds, GPS
signals, or recording other identifying information. If you have privacy concerns about these
features, follow the instructions in this manual to disable these features.
10. Please use the Orbit 535 dash cam for its intended purpose. Do not use it in an illegal manner,
or in a way that may physically damage the device or create a hazard to the safe operation of the
vehicle or its occupants.
Support
Before contacting a service team member, back up all important data stored on the microSD card.
Data may be lost after repairs are made. The customer service team does not back up your data
and is not responsible for loss of data.
For technical support please email us: service@mygekogear.com
Warranty
Our products carry a 12-Month limited warranty from the date of
purchase, covering manufacturing defects or faults in workmanship. For questions,
support, or warranty claims, contact us at service@mygekogear.com.

*IMPORTANT: Proof of original purchase is required for warranty service.
This manual suits for next models
1
Table of contents
Other myGEKOgear Dashcam manuals

myGEKOgear
myGEKOgear ORBIT 950 Owner's manual

myGEKOgear
myGEKOgear Orbit 960 Owner's manual

myGEKOgear
myGEKOgear ORBIT 130 Owner's manual

myGEKOgear
myGEKOgear ORBIT 1120 Owner's manual

myGEKOgear
myGEKOgear Orbit 530 Owner's manual

myGEKOgear
myGEKOgear ORBIT 500 Owner's manual

myGEKOgear
myGEKOgear Scout Pro User manual

myGEKOgear
myGEKOgear Infiniview User manual

myGEKOgear
myGEKOgear ORBT 956 Owner's manual

myGEKOgear
myGEKOgear ORBIT 1400 Owner's manual