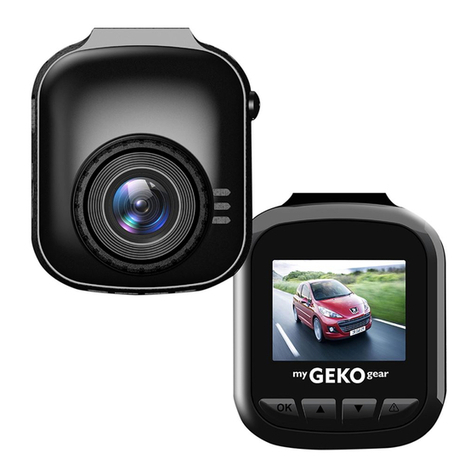
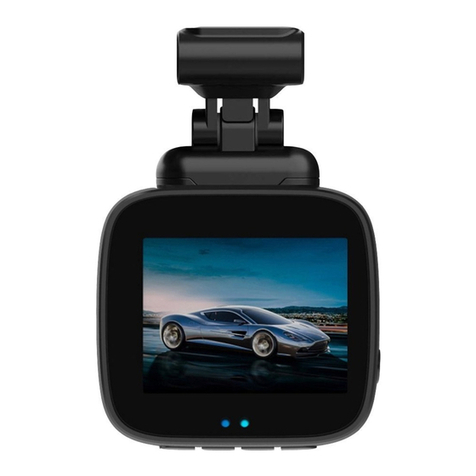
myGEKOgear ORBIT 1120 Owner's manual

1
DASH CAMERA ORBIT 1120
Quick User Manual

2
Disclaimer
1. Please follow the set-up and usage instructions in the print material that came with
this Dashboard Camera (dash cam) product.
2. You should not set/install this dash cam at a place that would obstruct or reduce a driver’s
view;make sure your usage complies withpertinent vehicle codes of your state, province,
territory or country.
3. You should post the required notices of recordation to occupants inside the vehicle, if
voices or other information/signal pertaining to in-vehicle activities will be recorded.
4. You should not change the dash cam’s setting or mode of operation or when the vehicle is
in motion.
5. The optional driving warning signals, including any visual or audible reminding signals,
should not replace your decision-making and judgment that are needed for the proper
operation of the vehicle.
6. You should not leave the dash cam in a visible spot when no one is inside the vehicle, to
avoid attracting break-ins to steal the unit, or other property.
7. You should avoid extended exposure of the dash cam to direct sunlight or extreme
temperatures (either high or low temperature) which tend to degrade or damage the unit
and its normal functionality.
8. You should examine, check and/or verify the dash cam at least every six (6) months,
including the associated memory cards, to ensure the video reception and recording are
working properly. For each use, you should verify that the dash cam unit, the visible lights
and the audible sounds are working normally. If there are signs of non-operation or
mal-function, you should immediately seek to replace the product and check to see if
the product is covered under any applicable warranty.
9. The dash cam unit may have additional functionality, such as transmission and recordation
of audible or GPS signal or other identification information. If you have privacy concerns
about these functions, make sure you follow the instruction to disable these functions.
10. You should use the dash cam unit in the way it is intended. You should not use the dash
cam unit in a way that would be illegal or that tends to physically damage the unit, or
tends to cause danger to the safe operation of the vehicle or the occupants.
3
Attention Please!
【About Usage】
1. If your vehicle still provides power to your cigarette 12-volt charger please unplug
the device when you turn off your vehicle and plan to have it parked for a long
period of time to avoid draining the power from your vehicle's battery.
2. The embedded super capacitor can help to save your recorded file even if the
power is off.
3. To avoid breaking down the file recorded, don’t eject the micro SD card
immediately after powering off.
4. We suggest using adapter provided to view the footage on the micro SD card.
5. To enable detecting and monitoring function, the power supplier must be
enabled.
【About Micro SD Card】
1. Please use microSD card with the size / memory at least 8GB, Class 10 (up to
64GB).
2. Be sure to format Micro SD card before usage.
To format card press once and you will get to settings→Format memory Card
→OK
3. The following information is the card capacity and recording time.
(Reference only)
Resolution
16GB
32GB
64GB
128GB
1920*1080 (F)
175min
370min
755min
1510min
Product features may change according to region in
which it is purchased without notice.

4
Thank You!
Thank you for purchasing the ORBIT 1120 dash camera.
This user manual contains technical specifications and instructions for use, operate,
and install. Please read this manual carefully before using.
Product Overview
This product is a high-definition digital video camera, with high-quality digital audio
& video, and USB charging function.
Package Contents
Orbit 1120 Dash Cam 3M Sticker Mount Interconnect Cable
32GB Micro SD Card and Adapter Car Charger User Manual

5
Product Features
1. Single Cam, 130 degree high resolution wide angle lens
2. Built-in 200 mAh lithium battery can be charged while video recording function
3. Seamless Video
4. 3.0 inch LCD
5. Built-in Microphone
6. Built-in Speaker
7. Support Micro SD card up to 64GB
8. SOS File Locking Function
9. Loop Recording, Time and Date Stamp
10. 50Hz/60Hz Refresh Rate
11. Supports PC USB Connection
Dash Cam Button Layout
1. TF card slot 2. Up 3. Menu
4. Down
5.
Mic
6.
Reset
7. Power
8.
Lock
9.
Mode
10. Ok 11. USB port 12. Bracket Mounting Point
12

6
Power On
Insert the car charger cable into the car’s cigarette lighter and the other end into the Micro-USB
port on the device. Make sure to input the microSD Card into the microSD Card slot on device.
After turning on, the system will start recording automatically. The LED light will turn flashing
when recording mode has started.
*Reminder: Please format microSD card before you start recording.
Power Off
Hold down the power button at least 5 seconds to turn off device. To avoid breaking down the
last file recorded, do not eject the SD Card immediately after powering off.
If you need to turn it back on simply hold the power button for at least 4 seconds.
Settings:
6
Where to Install Your Dash Cam
1. To have a better view, try to install at the top center of the windshield.
2. Make sure the lens is located in a place where the windshield wiper can
clean the window to ensure view is clear.
3. Make sure the device is not installed in a place where it will interfere with the safety bag.
4. Make sure the device will not be obstructed by the windshield’s sun control film
(window tint).
5. Clean the area you desire to have the dash cam placed before sticking the device, and DO
NOT move the device for a 24-hour period.
How to Install Your Dash Cam
1. Insert a C10/U3 or higher, 8 GB or larger, MicroSD card. (32 GB MicroSD card included)
Notice:
•Use a genuine high-speed SD card Class 10 (C10/U3) or higher, 8GB or above. Insufficient
card capacity or insufficient card speed will result in incompatibility or unstable recording.
When using a new card, please format the card in the menu and set the date and time
before use.
•After the power is turned on, check whether the power indicator light is on. If the
indicator light is not on, first check whether the power cable is correctly plugged in.
2. Remove the protective film from the 3m tape on the bracket.
3. Affix the mount onto the desired location on the windshield.
4. Connect the power cord to the Mini-USB port of the Orbit 1120 and the 12V plug to the 12V
outlet port.
5. Carefully manage and run your wiring along the window trim.
6. Dash cam will automatically turn on once the ignition is on

7
Power ON
1. Insert the car charger cable into the car’s cigarette lighter and the other end into the Micro-
USB port on the device.
2. Make sure to input the microSD Card into the microSD Card slot on device.
3. After turning on, the system will start recording automatically. The LED light will turn flashing
when recording mode has started.
*Reminder: For the first time, please format microSD card before you start recording. Please refer
to page 3 of instructions.
Power Off
Hold down the power button at least 5 seconds to turn off device. To avoid breaking down the
last file recorded, do not eject the SD Card immediately after powering off.
If you need to turn it back on simply hold the power button for at least 3 seconds.
LED
Blue - indicates recording
Red - Indicates charging
Battery Charge
1. Directly connect the car charger with charging cable in USB interface of the device.
2. USB charging, use the USB cable to connect it to the computer.
Micro SD Card Insert and Removal
1. Insert the Micro SD card into the Micro SD card slot on the dash cam.
2. To take out the Micro SD card, please gently press down the Micro SD card and it will pop out
from the slot.
Caution!
•Please pay attention to the direction of the Micro SD card when inserting.
•If you are going to upgrade bigger capacity Micro SD card, please refer to the compatible
•microSD card brands on www.mygekogear.com or contact myGEKOgear customer service.
•Please use a high-speed Micro SD card (Class10 or above).

8
Menu
1. To enter menu, press OK to stop the recording
2. Short press the menu button , a sub menu will appear; short press the up arrow button
, or the down arrow button to navigate. Press the ok button , to enter the setting. Use
up and down button to navigate selections. Press OK to select or menu button
to exit selection.
3. To exit the menu, short press the menu button again to exit.
4. Press OK to start the recording again
Menu Options
1. Recording Setting (Page 1)
•Resolution: 1080P FHD/ 720P/ VGA
•Loop Recording: Off/1 Minute/3 Minute/5 Minutes
•Wide Dynamic Range: Off/On
•Exposure: +3/+2/+1/0/-1/-2/-3
•Motion Detection: Off/On
•Microphone: Off/On
•Date Stamp: Off/on
•G-Sensor: Off/ Low/ Medium/ High *When 1g=9.80m/s, the video will be saved
automatically
G-sensor can be selected by 2G-4G-6G-8G,the original mode is
4G.
•Parking Guard: Off/ On
2. System Setting (Page 2)
•Screen Saver: Off/30 Second/1 Minute/2 Minutes
•Frequency: 50Hz/60Hz
•Key Sound: Off/ On
•Language: English/French/Chinese/Japanese
•Date/ Time: Set up YYYY/MM/DD HH:MM:SS
•Record Audio: Off/ On
•Format: Cancel/OK
•Default Setting: Cancel/OK
•Version: shows the firmware version
Recording Mode
When red dot is blinking, it means dash cam is in the recording mode. In recording mode, you can:
•Audio Recording (Default ON): Press down arrow button to mute audio
recording. Press down arrow button again to unmute audio recording.
•Lock Recording File: Dash cam records in loop. Older file will be overwritten later
when stored Press M or Lock Button to lock the file. The locked file will be saved
in a different folder and will not be deleted later.
•Screen Off: Press power button to turn off screen. Press power button again
to turn the screen back on.

9
Photo Mode
When red dot is blinking, it means dash cam is in the recording mode. Press OK to stop
recording. Then, press M to enter Photo mode. In Photo mode, you can:
•Take a photo: Press the OK button and the screen will flash once when taking
photo.
•Enter Photo Menu: Press Menu to enter photo menu. Short press the up arrow
button , or the down arrow button to navigate. Press the ok button , to
enter the setting. Use up and down button to navigate selections. Press OK
to select or menu button to exit selection. Press Menu 2 times to enter
Photo mode
oCapture Mode: Single Shot/ 2s Delay/ 5s Delay/ 10x Delay
oResolution: 8M/5M/3M/2M/1.3M/VGA
oContinues Shooting: Off/On
oQuality: Fine/Normal/Economy
oSharpness: Strong/Normal/Soft
oWhite Balance: Auto/Daylight/Cloudy/Tungsten/Fluorescent
oColor: Norma/Black and white/Sepia
oISO: Auto/100/200/400
oExposure: +2/+1/0/-1/-2
oAnti-Shaking: Off/On
oQuick Review: Off/2 seconds/5 seconds
oDate Stamp: On/Off
Playback Mode
When red dot is blinking, it means dash cam is in the recording mode. Press OK to stop
recording. Then, press M 2 times to enter Playback mode. In Playback mode, you can:
•Playback: To navigate a file, press up arrow or down arrow button to
navigate files.
•Enter Playback Menu: Press Menu to enter photo menu. Short press the up
arrow button , or the down arrow button to navigate. Press the ok button
, to enter the setting. Use up and down button to navigate selections. Press
OK to select or menu button to exit selection. Press Menu 1 times to enter
back to Playback Mode
oDelete: Delete Current/Delete All
oProtection: Lock One/Unlock One Lock All/Unlock All
oSlideshow: 2 seconds/5 seconds/8 seconds

10
USB mode
Connect the USB cable to a computer through a USB port, turn on the dash cam and it will
appear as a USB Disk: in this mode, you can access the video and photo files.
Battery
1.The power is shown as below:
Full Half Charge Low Empty
2.The dash cam can be charged via 3 ways, the red LED will be on when charging, which will last
180 minutes. And the red light will turn off when it’s fully charged.
•Using a power adapter
•By USB cable
•Charging with on-board power supply
Specifications
LCD Screen
3.0”TFT LCD screen
Video Resolution
FHD 1920X1080 30fps / HD 1280X720 30fps
Lens
130 degree wide angle
Languages
English/Russian/Chinese/Korean/Japanese
Photo Format
JPEG
Video Format
MOV / H.264
G-sensor
YES
Loop Recording
YES
USB Interface
USB 2.0
Working Temperature
0°C~60°C / 32°F~140°F
Storage Temperature
-10°C~70°C / 14°F~158°F
Memory card
Micro SD card up to 64GB, Class 10 or above
Power
5V/1.5A
Battery Capacity
Li-battery 200mAh

11
Common Troubleshooting Issues
1. Camera is not recording or taking photos
•Format the TF card through the machine.
•Format the SD card in a PC/Mac to the FAT32 file system.
•Replace with a new memory card.
2. Memory error or file error
•Format the SD card.
3. Screen freezes or crashes
•Format the SD card.
•Replace the SD card with a Class 10/U3 (or higher) memory card.
4. Recordings have no sound
•Set [Record Audio] to ON in the menu.
•Toggle mute audio from OFF to ON by pressing the DOWN button while recording.
5. Screen goes black after a few minutes
•Check [Screen Saver] setting in the main menu.
6. Screen is blurry or goes black while recording
•Format the SD card.
•If the above suggestions do not work, replace the SD card with a new C10/U3 card.
•If the image is dark when recording the sky or water, revise the EV setting.
7. The M/MENU button does not work
•Press the OK button to PAUSE recording and try again.
8. After connecting power, the camera does not turn on
•Ensure the tab on the magnetic bracket is facing the interior of the car before connecting the
camera.
Precautions
1. To ensure the highest possible video quality, check for obstructions in front of the lens, and clean
the lens regularly with a soft lens cloth.
2. To reduce wear and tear on the camera and its internal components, avoid long-term exposure to
the sun or extreme hot/cold environments.
3. Upon inserting a new SD card, format the SD card in the camera’s menu first, otherwise there may
be a card read error.
4. To avoid card speed or card read errors, format your SD card regularly.
It is recommended to replace the SD card every six months to minimize the chance of a fault that
may result in corrupted or lost recordings.
5. If the recording date is incorrect, enter the menu and re-enter the time and date information
Disclaimer
1. Follow the setup and usage instructions in the printed materials included with this dash cam.
2. Do not set/install the BH100 where it obstructs or reduces the driver’s view. Ensure that your use
of the dash cam is in compliance with the relevant vehicle regulations of your state, province,
region, or country.
3. If audio or other information/signals related to in-vehicle activity are to be recorded, you should
post necessary recording notices to occupants of the vehicle.
4. Do not change camera settings or operating modes while the vehicle is in motion.
5. Optional driving warning signals, including any visual or audible reminders, should not replace
your decision-making and judgment.
6. Avoid placing the camera in a conspicuous place when no one is in the vehicle to avoid attracting
thieves.
7. Avoid exposing the BH100 to direct sunlight or extreme temperatures (high or low), as these
factors can degrade or damage the device.
8. Inspect and verify proper camera operation once at least every 6 months, including testing the

12
memory card, to ensure the camera is functioning and recordings are captured properly. On each
use, you should verify that the camera assembly, indicator lights, and sounds are functioning. If
there are any signs of non-operation or malfunction, immediately seek a replacement product or
check if it is covered by any applicable warranty.
9. Dash cams may have additional functions such as transmitting and recording sounds, GPS signals,
or recording other identifying information. If you have privacy concerns about these features,
follow the instructions in this manual to disable these features.
10. Please use the dash cam for its intended purpose. Do not use it in an illegal manner, or in a way
that may physically damage the device or create a hazard to the safe operation of the vehicle or its
occupants.
Firmware Updates
1. Check the current firmware version of the dashcam in the menu settings to ensure you are not
downloading the same firmware or incorrect version.
2. Download the firmware file onto a computer and insert the SD card into the computer.
3. Format the SD card and then drag the bin file of the firmware onto the SD cards folder.
4. Once the firmware bin file has been dragged into the SD card, unplug the SD card from the
computer, insert the SD card into the dashcam and power the dash cam on, it will automatically
begin flashing the firmware.
Contact Service Team
Need more information? Visit our website via www.mygekogear.com
Feel free to contact our service team at service@mygekogear.com if you have any
additional questions.
Before Contacting a Service Team Member
Please back up all important data stored in the microSD card. The data in the microSD card may
be deleted during repair.
The customer service team does not back up your
data. myGEKOgear is not responsible for any loss on
data.

13
CAMÉRA DE TABLEAU DE BORD ORBIT 1120
Manuel d’utilisateur

14
Avis de non-responsabilité
1. Veuillez suivre les instructions de configuration et d’usage se trouvant dans les documents
qui sont venus avec cette caméra de tableau de bord.
2. Vous ne devriez pas mettre/installer la caméra à un endroit qui obstruerait ou réduirait la
vue du conducteur; assurez-vous que son usage soit conforme aux codes routiers de votre
état, province, territoire, ou pays.
3. Vous devriez aviser les occupants à l’intérieur du véhicule si leur voix ou tout autre
information/signal à propos de leurs activités sera enregistré par la caméra.
4. Vous ne devriez pas changer les paramètres ou le mode d’opération de la caméra pendant
que le véhicule est en mouvement.
5. Les signaux d’avertissement de conduite optionnels, incluant tous les signaux visuels et
auditifs, ne devraient pas remplacer le jugement et la prise de décisions nécessaires à
l’opération adéquate d’un véhicule.
6. Vous ne devriez pas laisser la caméra dans un endroit visible quand il n’y a personne à
l’intérieur du véhicule pour éviter d’attirer le cambriolage de l’appareil et autre propriété.
7. Vous devriez éviter l’exposition prolongée de la caméra aux rayons du soleil ou à des
températures extrêmes (soit hautes ou basses) qui pourraient détériorer ou endommager
l’appareil et son fonctionnement normal.
8. Vous devriez examiner, tester et/ou vérifier la caméra au moins à tous les (6) mois, incluant
les cartes mémoires, pour s’assurer que la réception et l’enregistrement vidéo fonctionnent
adéquatement. À chaque utilisation, vous devriez vérifier que la caméra, les lumières
visibles et les sons auditifs fonctionnent normalement. S’il y a des signes de panne ou de
défaillance, vous devriez immédiatement entreprendre les démarches pour remplacer le
produit et voir si le produit est couvert par une quelconque garantie valable.
9. La caméra pourrait être munie de fonctionnalités additionnelles, telles que la transmission
ou l’enregistrement de signaux audio ou de GPS, ou d’autres informations d’identification.
Si vous avez des inquiétudes vis-à-vis ces fonctions, assurez-vous de suivre les instructions
pour les désactiver.
10. Vous devriez utiliser la caméra de la manière dont elle a été conçue. Vous ne devriez pas
l’utiliser d’une façon qui serait illégale, qui pourrait l’endommager physiquement, ou qui
pourrait porter atteinte à la sécurité des passagers ou la conduite sécuritaire du véhicule.

15
Attention !
【
À propos de l’utilisation
】
1. Si votre véhicule alimente toujours le chargeur 12 volts même quand il est éteint,
veuillez débrancher l’appareil lorsque vous planifiez le laisser stationné
pendant une longue période de temps pour éviter de vider la batterie de votre
véhicule.
2. Le super condensateur intégré peut aider à sauvegarder les fichiers même
quand l’appareil est éteint.
3. Pour éviter de briser les fichiers sauvegardés, ne pas éjecter la carte micro SD
4. immédiatement après avoir éteint l’appareil.
5. Nous suggérons d’utiliser l’adaptateur fourni pour visionner la carte SD.
6. Pour active les fonctions de détection ou de surveillance, le fournisseur de
courant doit être activé.
【À
propos de la carte micro SD
】
1. Veuillez utiliser une carte microSD qui a une mémoire d’au moins 8Go,
Classe 10 (jusqu’à 64Go).
2. Assurez-vous de formater la Micro SD avant l’utilisation.
3. Pour formater, appuyer et vous entrerez dans les paramètres. Choisissez
4. « Formater la carte mémoire » et appuyer sur OK .
5. Voici les informations sur la capacité des cartes et le temps
6. d’enregistrement.(En tant que référence seulement)
Résolution
16GB
32GB
64GB
128GB
1920*1080 (Av)
175min
370min
755min
1510min
*Les caractéristiques du produit peuvent changer selon la
région où il a été acheté, sans préavis.

16
Merci !
Merci d’avoir acheté la caméra de tableau de bord ORBIT 1120.
Ce manuel d’utilisateur contient les spécifications techniques et les instructions pour
son utilisation, son opération, et son installation. Veuillez lire ce manuel
attentivement avant l’utilisation.
Vue d’e ns em ble du
produit
Ce produit est une caméra digitale haute-définition, avec une haute qualité audio et
vidéo, et une fonction de charge USB.
Contenus du paquet
Caméra Orbit 1120 Support d'autocollant 3M Câble d’interconnexion
Carte Micro SD de 32 Go et adaptateur Chargeur pour voiture Manuel d’utilisateur

17
Caractéristiques du produit
1. Caméra unique, objectif grand angle haute résolution de 130 degrés
2. La batterie au lithium intégrée de 200 mAh peut être chargée pendant la fonction
d'enregistrement video
3. Vidéo transparente
4. ACL de 3,0 pouces
5. Microphone intégré
6. Haut-parleur intégré
7. Prise en charge de la carte Micro SD jusqu'à 64 Go
8. Fonction de verrouillage de fichier SOS
9. Enregistrement en boucle, horodatage
10. Taux de rafraîchissement de 50 Hz/60 Hz
11. Prend en charge la connexion USB du PC

18
Power On
Insert the car charger cable into the car’s cigarette lighter and the other end into the Micro-USB
port on the device. Make sure to input the microSD Card into the microSD Card slot on device.
After turning on, the system will start recording automatically. The LED light will turn flashing
when recording mode has started.
*Reminder: Please format microSD card before you start recording.
Power Off
Hold down the power button at least 5 seconds to turn off device. To avoid breaking down the
last file recorded, do not eject the SD Card immediately after powering off.
If you need to turn it back on simply hold the power button for at least 4 seconds.
Settings:
LED:
Description des boutons et autres fonctions
1. Fente pour carte TF 2. En haut 3. Menu
4. Bas 5. Micro 6. Réinitialiser
7. Pouvoir 8. Serrure 9. Mode
10. D'ACCORD 11. Port USB 12. Point de montage du support
Où installer la caméra de tableau de bord
Meilleur endroit
de montage
Pare-brise
Brancher au chargeur de
la voiture
Attention : Nous ne sommes pas responsables de tout dommage
causé à, ou causé par, le sac gonflable à cause du mauvais
emplacement de la caméra à proximité de celui-ci.
12

19
1. Pour une meilleure vue, essayer d’installer au milieu du haut du pare-brise.
2. S’assurer que les lentilles sont situées là où les essuie-glaces peuvent nettoyer le pare-
brise pour garantir une vue claire.
3. S’assurer que l’appareil n’est pas installé là où il pourrait entraver le sac gonflable.
4. S’assurer que l’appareil ne sera pas obstrué par la pellicule pour soleil du pare-brise
(teintage du pare-brise).
5. Nettoyer la zone où vous désirez installer la caméra avant d’y coller celle-ci, et NE
PAS déplacer l’appareil pendant 24 heures.
A llum er l’appare il
Insérer le câble du chargeur dans le briquet de la voiture et l’autre bout dans le port Micro-USB
de l’appareil. S’assurer d’insérer la carte microSD dans la fente appropriée. Après avoir allumé
l’appareil, celui-ci commencera à enregistrer automatiquement. La lumière LED clignotera quand
le mode enregistrement aura débuté.
*Note : Veuillez formater la carte microSD avant de l’utiliser. Se référer à la page 3 pour les
instructions.
Éte indre l’appare il
Tenir le bouton d’alimentation enfoncé pendant au moins 5 secondes pour éteindre l’appareil.
Pour éviter de briser les fichiers sauvegardés, ne pas éjecter la carte micro SD immédiatement
après avoir éteint l’appareil.
Si vous avez à le rallumer, tenir le bouton enfoncé pendant au moins 3 secondes.

20
LED
Bleu- indique l'enregistrement
Rouge - indique la charge
Chargement de la batterie
1. Brancher directement au chargeur pour voiture et le câble de chargement dans la fente USB
de l’appareil.
2. Pour chargement USB, utiliser le câble USB pour brancher dans un ordinateur.
Insérer et retirer une carte Micro SD
1. Insérer la carte Micro SD dans la fente pour carte Micro SD de la caméra.
2. Pour retirer la carte Micro SD, appuyer doucement sur la carte Micro SD et elle devrait sortir de la
fente.
Attention!
1. Veuillez faire attention à l’orientation de la carte Micro SD lors de l’insertion.
2. Si vous planifiez utiliser une carte Micro SD d’une plus grande capacité, veuillez vérifier les
cartes compatibles au www.mygekogear.com ou contacter le service à la clientèle de
myGEKOgear.
3. Veuillez utiliser une carte Micro SD à haute vitesse (classe 10 ou supérieur).
Menu
1. Pour accéder au menu, appuyez sur OK Pour arrêter l’enregistrement
2. Appuyez brièvement sur le bouton de menu , un sous-menu apparaîtra; Appuyez brièvement
sur le bouton flèche haut , ou le bouton flèche vers le bas pour naviguer. Appuyez sur le
bouton ok , pour entrer le paramètre. Épuiser et vers le bas pour parcourir les
sélections. Appuyez sur OK pour sélectionner ou sur le bouton de menu pour quitter la
sélection.
3. Pour quitter le menu, appuyez à nouveau brièvement sur le bouton de menu pour quitter.
Table of contents
Languages:
Other myGEKOgear Dashcam manuals

myGEKOgear
myGEKOgear Orbit 535 User manual

myGEKOgear
myGEKOgear ORBIT 500 Owner's manual

myGEKOgear
myGEKOgear Orbit 960 Owner's manual

myGEKOgear
myGEKOgear ORBIT 1400 Owner's manual

myGEKOgear
myGEKOgear Infiniview User manual

myGEKOgear
myGEKOgear Orbit 118 User manual

myGEKOgear
myGEKOgear ORBIT 930 Owner's manual

myGEKOgear
myGEKOgear Orbit 530 Owner's manual

myGEKOgear
myGEKOgear ORBIT 130 Owner's manual

myGEKOgear
myGEKOgear ORBT 956 Owner's manual