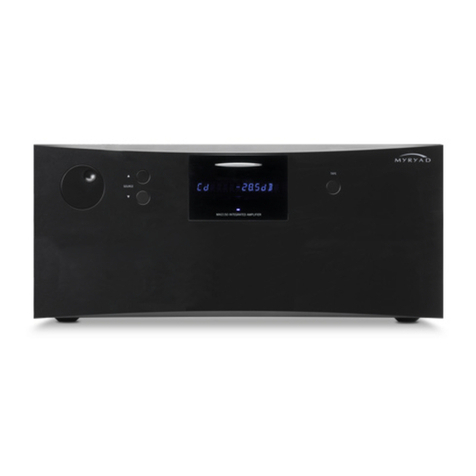
Myryad MXA2080 User manual

MX SERIES
MXA2080 Power Amplifier
Owner’s Manual

2
CONTENTS
• Introduction 2
• Installation and Safety 2
• Power Inlet 3
• Smart My-Link® Input/output 3
• Line Input 3
• Line Output 3
• Loudspeaker Output 3
• Remote Trigger
Control Input/Output, 4
• Rear Panel Diagrams 4
• Front Panel Controls 5
• Standby Ellipse 5
• Loudspeaker Output
Protection and Muting 5
• Fault Condition Indication 6
• Trouble-Shooting Guide 7
• Specifications 7
INTRODUCTION
The Myryad MXA2080 Power Amplifier has
been designed to provide a flexible solution
to a wide range of power amplifier
requirements. It can be used with the
Myryad MXP2000 Stereo Preamplifier (or
other high quality preamplifier) to deliver
audiophile quality stereo. Alternatively it can
be partnered with the MXI2080 Integrated
Amplifier (which uses identical power
amplifiers) for bi-amplification of suitable
loudspeakers. It can also be used in multi-
channel or multi-room installations to
provide two channels of amplification, easily
controlled via its My-Link or DC trigger
control inputs.
Each amplifier channel has a line input plus
a directly linked line output both on high-
quality gold-plated RCA phono sockets and
a loudspeaker output on a pair of solid
metal gold-plated 5-way binding posts.
The MXA2080 may be controlled remotely
via the My-Link communications bus when
used with other Myryad products. My-Link
allows remote control of standby and mute
functions. In addition to this, the MXA2080
may be switched into or out of standby
remotely using its DC trigger input.
Applications of the MXA2080 Power
Amplifier include:
• Use in conjunction with the MXP2000
Stereo Preamplifier in a high quality
stereo system
• Various bi-amplifier or tri-amplifier
configurations together with the
MXI2080 Integrated Amplifier or
MXP2000 Preamplifier.
• Use in conjunction with the MXD6000
Digital Preamplifier-Processor - for
example to drive surround or rear
channels.
• Use in a multi-room setup, possibly
together with other MXA2080s, to
deliver high-quality audio to a number
of different rooms.
INSTALLATION AND
SAFETY
This amplifier generates a significant
amount of heat when operating and thus
requires good ventilation. Do not place it on
a rug or other soft surface into which it
could sink, obstructing the air inlets in its
underside. Do not allow papers or cloth to
obstruct the ventilation grille in the top
cover. The amplifier should not be installed
in a built-in situation such as a bookcase or
cabinet unless proper ventilation is
provided. If the amplifier is moved shortly
after operation take care not to touch the
heatsinks, which are accessible from below,
as they may be very hot. The amplifier is
designed for use in moderate climates.
CAUTION: TO PREVENT A FIRE OR
SHOCK HAZARD, DO NOT PERMIT THIS
PRODUCT TO BECOME WET. IF LIQUID
IS ACCIDENTALLY SPILLED ON IT,
IMMEDIATELY SHUT OFF ITS POWER
AT THE WALL SOCKET AND UNPLUG
THE AC POWER CORD. ALLOW
SUFFICIENT TIME FOR COMPLETE
EVAPORATION TO OCCUR BEFORE
OPERATING THE UNIT AGAIN. IF THE
LIQUID IS ANYTHING BUT WATER
AND/OR ALCOHOL, A QUALIFIED
SERVICE TECHNICIAN SHOULD
EXAMINE THE UNIT BEFORE IT IS USED
AGAIN
Do not remove the cover, or attempt to
modify or repair the amplifier yourself. Refer
all servicing to a qualified technician.
ACCESSORIES
Your Myryad Power Amplifier is supplied
complete with the following accessories:
• My-Link interconnect (0.5m RCA-RCA)
• Separate mains power cord to suit
country of sale.

3
SETTING UP YOUR
SYSTEM
1
2
3
7
6
6
4
4
5
5
REMOTE
TRIGGER
LEFT
CHANNEL
SPEAKER
RIGHT
CHANNEL
SPEAKER
MY-LINK
LINE LINE
IN IN
OUT OUT
OFF ON
POWER
+
-
+
-
REAR PANEL
CONNECTIONS
1. Power Inlet
Before making any connection, check that
the mains voltage setting printed on the
rear panel is the same as your local mains
supply.
Plug the female (socket) end of the power
cord into the power inlet on the rear of the
amplifier. Plug the male (plug) end of the
cord into a "live" wall socket or a suitable
heavy-duty extension cable.
UK version: The mains plug is supplied
fitted with a 5A fuse. It should only be
replaced with a fuse of the same rating
(13A) which complies with BS1362.
2. Power Switch
Press one side of this rocker switch (the
side nearer the edge of the rear panel) to
switch amplifier ON and the other side
(towards the speaker terminals) to switch it
OFF. When the POWER switch is in the
OFF position all power is disconnected from
the amplifier. In this condition the amplifier
cannot be powered up from the front panel
or the My-Link or remote trigger. When the
POWER switch is in the ON position (and
the power cord correctly inserted and
plugged into a live wall socket) the amplifier
will power up in standby mode (see FRONT
PANEL CONTROLS, STANDBY, below).
It is recommended that the POWER switch
be turned OFF if the amplifier is not going
to be used for an extended period of time.
IMPORTANT: Make sure the POWER
switch is turned OFF before making or
changing any connections to the amplifier.
3. Smart My-Link®
When the MXA2080 is used in a system
with other Myryad products (e.g. MX-Series,
M-Series, Cameo or Z-Series) all may be
joined together via the My-Link. This will
allow all the products to be remotely
controlled via the infra-red receiver on, for
example, an MXP2000 Preamplifier or
MXI2080 Integrated Amplifier.
When joined via the My-Link, the MXA2080
will respond to STANDBY and MUTE
operations on the preamplifier (whether
operated from the front panel or by remote
control). For example, if both the
preamplifier and the MXA2080 are in
STANDBY, then switching the preamplifier
out of standby will also bring the MXA2080
out of standby. In this way an MXP2000 +
MXA2080 can be operated with the same
ease as an integrated unit. If a number of
MXA2080s are being used in a multi-amp
or multi-room system all the amplifiers may
be My-Linked so that they can be controlled
as one.
Use a short RCA-to-RCA (phono-to-phono)
interconnect cable to connect from the MY-
LINK OUT socket on the integrated or
preamplifier to the MY-LINK IN socket on
the MXA2080. A suitable 0.5m long My-Link
cable is supplied with the MXA2080. A
second cable can then run from the MY-
LINK OUT socket on the MXA2080 to the
MY-LINK IN socket on a third Myryad
component (if desired) and so on – in
“daisy-chain” fashion. Inexpensive
interconnects may be used as the My-Link
bus carries only control signals, not audio,
so these cables have no effect on sound
quality.
Please note:
• Manually switching the MXA2080 into
standby will not switch other My-Linked
units into standby.
• When the My-Link is connected it is
recommended that no connection be
made to the REMOTE TRIGGER input
(see below).
4. Line inputs
The line inputs can be driven from the line
outputs of any good quality preamplifier
(such as the Myryad MXP2000) or any
other suitable line level source. High quality
RCA-to-RCA (phono-to-phono)
interconnects should be used.
5. Line outputs
The line outputs are directly connected to
the line inputs - without buffering. The line
outputs allow power amplifiers to be “daisy-
chained” so that more complex multi-
amplifier
or multi-room systems may be built.
6. Loudspeaker outputs
Each channel is capable of driving any
loudspeaker with a rated impedance of 4
ohms or greater. The loudspeaker terminals
are high-current binding-posts, coded red
and black.
CAUTION: THE RED TERMINALS ARE
MARKED WITH A HAZARD SYMBOL TO
INDICATE THAT THEY CAN BE LIVE,
READ ALL THE LOUDSPEAKER WIRING
INSTRUCTIONS CAREFULLY. IT IS
RECOMMENDED THAT READY-MADE
LEADS BE USED WHERE POSSIBLE.
For correct imaging it is important that the
two loudspeakers are wired "in phase". To
ensure correct phasing wire the black (-)
terminal on the amplifier to the black or "-"
terminal on the loudspeaker. The red (+)
terminal on the amplifier should be wired to
the red or "+" terminal on the loudspeaker.
4
7. Remote Trigger Control input/output
If the MXA2080 is being used in a system
without a Myryad preamplifier, processor or
integrated equipped with My-Link, the
REMOTE TRIGGER input may be used to
allow the MXA2080 to be remotely switched
into or out of STANDBY.
If your preamplifier or processor has a
TRIGGER output which delivers a DC
trigger signal when the unit is switched on
(or out of standby) then it can be linked to
the MXA2080 to switch that out of/into
standby also. A lead must be used which is
fitted with
a 3.5mm mini-jack plug to connect to the
MXA2080’s REMOTE TRIGGER input
socket. The lead must be wired according
to the rules below
Remote Trigger Control Details
Connector to MXA2080 REMOTE TRIGGER input:………………………………………………… 3.5mm mini-jack plug
Jack plug wiring:………………………………………………………………………………………….. sleeve negative, tip positive
Trigger voltage:…………………………………………………………………………………………… DC, 4.5V to 24V
Nominal loading of MXA2080 REMOTE TRIGGER input:…………………………………………… 2200 Ohms
Operation: TRIGGER voltage change from 0 to +ve:… MXA2080 switched from standby to
active
TRIGGER voltage change from +ve to 0:… MXA2080 switched from active to
standby
IF YOU ARE IN ANY DOUBT ABOUT MEETING ANY OF THESE CRITERIA, OR PREPARING A SUITABLE LEAD, ASK YOUR DEALER OR
INSTALLER TO HANDLE THIS FOR YOU.
Note: If the TRIGGER input is active when
the rear panel POWER switch is turned ON,
then the amplifier will not power up into
standby mode as usual. It will power up
immediately into its “active” state - with its
normal power-on mute delay (see FRONT
PANEL CONTROLS, STANDBY below).
The REMOTE TRIGGER output is wired
directly to the input. Using this output,
further MXA2080s, or other products, may
be connected from a single trigger source
without needing any special adaptors.

5
USING YOUR
MXA2080
1
FRONT PANEL
CONTROLS
1. Standby
When the amplifier is plugged into a live
wall socket and the POWER switch is
turned ON, it will power up in "standby"
mode and the central standby LED (Light
Emitting Diode) in the display window will
glow red. In this mode only a small part of
the internal circuitry of the amplifier is
powered up, so it consumes very little
power and all loudspeaker outputs are
isolated by relays.
When the STANDBY ellipse is touched the
MXA2080’s circuitry will be activated, but
the loudspeaker outputs will remain muted
for a short period to allow the internal
voltages to stabilise. During this delay
period the standby LED will flash blue.
Following the delay the standby LED will
glow blue continuously and the outputs will
be de-muted.
When the STANDBY ellipse is touched
again the amplifier will be returned to
standby mode and the standby LED will
glow red.
Please note: When the power amplifier is
remotely activated from another unit, there
may be a time difference between the
closing of the loudspeaker output relays of
the two units. This is normal and no cause
for concern.
CAUTION: WHEN IN STANDBY MODE
THE INTERNAL CIRCUITRY OF THE
MXA2080 IS STILL LIVE, SO ALL SAFETY
PRECAUTIONS MUST BE FOLLOWED
2. Loudspeaker output protection
and muting
When the amplifier is in standby mode the
loudspeaker output terminals are isolated
from the amplifier by high quality relays.
When the amplifier is first switched on from
standby mode the loudspeaker outputs
remain disconnected for a few seconds to
allow the internal voltage levels to settle.
The loudspeaker outputs are immediately
disconnected again when the amplifier is
switched back into standby mode.
The same loudspeaker mute relays are
used to protect both the amplifier and your
loudspeakers against possible damage. If
any one of a number of fault modes is
detected in any channel (loudspeaker
output short circuit, amplifier overheating,
amplifier DC fault) the loudspeaker will be
disconnected from that amplifier channel to
protect both. In the case of a short circuit
the loudspeaker will be re-connected after a
few seconds, but will be disconnected again
if the fault persists. If overheating has
caused the protection system to operate,
then it will take some time for the module’s
heatsink to cool sufficiently to allow the
loudspeaker to be re-connected (probably
between ten and twenty minutes depending
upon the room temperature and ventilation).
The amplifier will cool more quickly if it is
switched to standby mode.
The protection circuit in each channel of the
MXA2080 is totally independent of the
other. When a channel’s protection is
activated, for whatever reason, only that
channel’s speaker relay will open muting
only that channel.

6
FAULT CONDITION
INDICATION
Each of the MXA2080’s power amplifier
channels has an intelligent loudspeaker
protection system. If a fault occurs in either
power amplifier channel it will report the
nature and location of the fault using five
LEDs in the amplifier’s display window.
When a fault occurs, the display will change
as follows.
First the display will show the fault type –
numbered from 1 to 5 – indicated by the
number of blue LEDs illuminated starting
from the leftmost.
~~~~
Fault type 1
~~~
Fault type 2
~~
Fault type 3
~
Fault type 4
Fault type 5
A blue LED illuminated is shown “” and no
LED illuminated is shown “~”.
The above display will appear for about 2
seconds, after which it will change to show
which channel is faulty. The channel is
indicated by illuminating all LEDs, but only
the one relating to the faulty module
location will be blue “”, the others will be
red “”.
Hence:
Left channel fault
Right channel fault
This display will appear for about 2
seconds, after which it will alternate with the
“Fault type” display. The displays will
continue to alternate while the fault persists,
or until the unit is switched off or into
standby.
The table below indicates what action
should be taken when a fault is reported.
“Overheat” and “Short-circuit” faults can
usually be cured by checking your amplifier
setup. The other faults indicate a failure
within the amplifier so the unit must be
returned for service.
Fault Type Description of Fault Action required
1
“Overheat”
Amplifier channel has overheated
Make sure that ventilation grilles in amplifier’s top cover and bottom chassis are not obstructed.
Allow amplifier channel to cool - typically 10 - 20 minutes depending upon the room temperature
and ventilation - after which the channel’s loudspeaker will be re-connected. The amplifier will
cool more quickly if switched to standby. When the loudspeaker is re-connected, make sure
that the volume is not set too high – i.e. that the sound is clean and undistorted. If the sound is
distorted on loud passages, reduce the volume setting. If the problem persists return unit to
approved Service Agent.
2
“Short-circuit”
Loudspeaker wiring short-circuited,
or very low impedance loudspeaker
connected, or too many loudspeakers
wired in parallel to one amplifier
channel
Switch amplifier POWER off at rear.
Check that load on each channel is no less than 4Ω(one 4Ωspeaker or two 8Ωspeakers to
each channel).
Check loudspeaker wiring – at both amplifier and speaker ends.
Make sure there are no small strands of wire that might be causing a short circuit.
Re-wire if necessary.
If the problem persists return unit to approved Service Agent.
3
Excessive positive DC output
Return unit to approved Service Agent.
4
Excessive negative DC output
Return unit to approved Service Agent.
5
AC power failure to power amplifier
channel
Return unit to approved Service Agent.

7
TROUBLE-
SHOOTING GUIDE
Some of the most common problems:
No sound from any channel:
• Power turned off or system in standby
mode. Check that the standby LED in
the display window is lit blue.
• Input connections loose or missing.
Check that all connections are secure.
• UK version only: The fuse in the mains
plug has failed. Check and replace if
necessary.
No sound from one channel only:
Loudspeaker cable pulled loose.
Check all connections, both at the
loudspeakers and amplifier.
• Interconnect cable pulled loose or
making poor contact. Check and, if
necessary, un-plug and re-plug all
relevant cables.
• Protection relay has operated because
of a short circuit loudspeaker wire or
amplifier overheating (see Fault
Condition Indication on Page 6).
Carefully check all wiring after
switching amplifier POWER OFF.
Allow amplifier to cool.
Incorrect operation - some functions not
working:
• Control processor latched. Switch off
POWER on rear panel and wait for 5
minutes. Then switch POWER on and
switch out of standby. Normal
operation should resume.
Amplifier fails to respond to Smart My
Link® remote commands from Myryad
Preamplifier, Preamp-Processor or
Integrated:
• My-Link cable is loose or not
connected. Check connections on all
linked units.
Loud buzz or hum:
• Interconnect cable pulled partially out
of its socket.
• Defective interconnect cable.
SPECIFICATIONS
8 Ohms: 80 WContinuous rated power output, stereo: 4 Ohms: 120 W
THD: @ 80% rated power, 8 Ohms, 20Hz-20kHz) 0.02 %
Signal/Noise ratio (A weighted, ref. 80W) >116 dB
Input sensitivity (ref. 80W into 8 Ohms) 900 mV
Input impedance 60 k Ohms / 440 pF
Frequency response 20Hz - 20kHz ± 0.2 dB
96kHz -2 dB
Physical Specification
Dimensions (width x height x depth) 436 x 95 x 355 mm
Weight (net) 10.2 kg
Power Requirements
Voltage (set internally) 120 or 230 V

8
Myryad Systems Ltd.
2 Pipers Wood, Waterberry Drive
Waterlooville, Hants, PO7 7XU
Tel: +44 (0) 23 9226 5508
Fax: +44 (0) 23 9223 1407
www.myryad.co.uk
For further information,
Please contact
Myryad direct or visit:
www.myryad.co.uk
Stock No: 0ST0012400 A
Table of contents
Other Myryad Amplifier manuals

Myryad
Myryad mi 120 User manual

Myryad
Myryad MX Series User manual

Myryad
Myryad MP100 User manual

Myryad
Myryad Z142 User manual

Myryad
Myryad MA120 User manual

Myryad
Myryad MDP 500 User manual

Myryad
Myryad Z162 User manual

Myryad
Myryad MXA0151 User manual

Myryad
Myryad Z140 User manual

Myryad
Myryad ZMINI Z40 User manual
Popular Amplifier manuals by other brands

Broadcast Tools
Broadcast Tools 2x10 DA Installation and operation manual

powersoft
powersoft Ottocanali 4K4User Guide v 1.6March 2013Ottocanali... user guide

Philips
Philips SDW5005 Specifications

Origin Effects
Origin Effects DELUXE61 owner's manual

Cloudyx
Cloudyx CL-250W instruction manual

Toshiba
Toshiba SB-M30 Service data