manuals.online logo
Brands
  1. Home
  2. •
  3. Brands
  4. •
  5. Myryad
  6. •
  7. Amplifier
  8. •
  9. Myryad Z Series User manual

Myryad Z Series User manual

www.myryad.co.uk
Z-S e r ie s
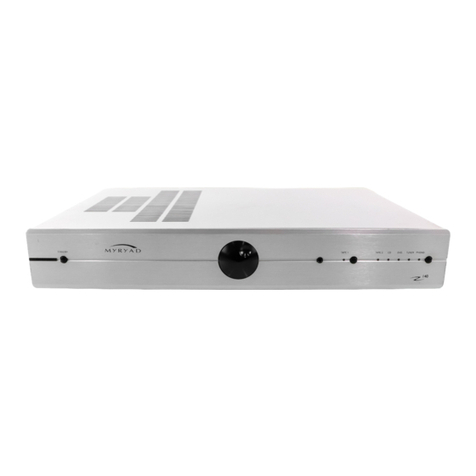
Z350 Integrated Amplifier
Owner’s manual
2
CONTENTS
INTRODUCTION INSTALLATION AND SAFETY
ACCESSORIES
The Myryad Z350 Integrated Amplifiers have been designed to deliver
a combination of high quality sound reproduction and elegant styling.
The Z350 Integrated amplifiers can accept up to six line-level input
sources, and fives digital input sources. Outputs are provided for
one pair of loudspeakers, for headphonesand for an auxiliary power
amplifier . All functions can be operated using the infra-red remote
control handset supplied.
The Z350 generates a modest amount of heat and requires ventilation.
Do not place it on a rug or other soft surface into which it could sink,
obstructing the air inlets in its underside. Do not allow any
obstruction to the ventilation slots in the top cover. If a number of
Z-Series units are stacked on top of one another, the Z350 should be
placed on top. The Z350 should not be installed in a built-in situation
such as a bookcase or rack unless proper ventilation is provided.
CAUTION: THIS APPARATUS MUST NOT BE EXPOSED TO DRIPPING
OR SPLASHING. OBJECTS FILLED WITH LIQUIDS SUCH AS VASES
MUST NOT BE PLACED ON THE APPARATUS.
THE REAR PANEL POWER SWITCH DISCONNECTS MAINS LIVE
ONLY. THE POWER CORD MUST BE DISCONNECTED FROM THE
REAR OF THE APPARATUS, OR THE WALL SOCKET, TO PROVIDE
TOTAL ISOLATION. ONE OR OTHER OF THESE CONNECTIONS MUST
BE READILY ACCESSIBLE WHEN THE APPARATUS IS IN USE.
Do not remove the cover, or attempt to modify or repair any item
yourself. Refer all servicing to a qualified technician.
Your Z350 is supplied complete with the following accessories:
• Mains Cable
• MSR1 Remote
• Owner's Manual
•
• Installation and Safety 2
• Accessories 2
• Setting up your Ampligier 3
Rear panel connections
• Operating your Ampligier 4
Front panel controls
• Remote Control 5
• Loudspeaker Output Protection and Muting 6
• Installing and replacing batteries in the remote control 7
• Trouble-shooting guide 7
• Specifications 7
Introduction 2
BT ANT
PER OUT
R
L
BYPASSAUXTAPESACDCD
R
L
SPEAKERS LEFT
RIGHT
ONOFF
POWER
FUSE: T6.3AL /250V
USB DAC OPTICAL COAXIAL
R L
XLR
DIGITAL
INPUT
USE O NLY WITH A 250V F USE
MINIMUM SPEAKER IMPEDANCE 4
MINIMUM IMPEDANCE DES HAUT PARLEURS 4
www.myryad.co.uk
DESIGNED IN ENGLAND BY MYRYAD
SYSTEMS LTD MADE IN CHINA
POWER RATING
400W
230V
50/60Hz
S/N
3
SETTING UP YOUR AMPLIFIER
REAR PANEL CONNECTIONS
1. Power inlet
Before making any connection, check that the mains voltage setting
printed on the rear panel is the same as your local mains supply. Plug
the female (socket) end of the power cord into the power inlet on the
rear of the amplifier. Plug the male (plug) end of the cord into a “live”
wall socket or a suitable heavy duty extension cable.
2. Power Switch
Press one side of this rocker switch (the side nearer the edge of the
rear panel) to switch the amplifier ON and the other side (towards the
speaker terminals) to switch it OFF. When the POWER switch is in the
OFF position all power is disconnected from the amplifier. In this
condition the amplifier cannot be powered up from the front panel
or the remote control. When the POWER switch is in the ON position
(and the power cord correctly inserted and plugged into a live wall
socket) the amplifier will power up in standby mode (see Front Panel
Controls, STANDBY).
IMPORTANT: Make sure the POWER switch is turned OFF before
making or changing any connections to the amplifier.
3. Loudspeaker outputs
The loudspeaker outputs are capable of driving all loudspeakers with
rated impedances in the range 4Ωto 16ΩThe loudspeaker
terminals are high–current binding–posts, coded red or black. The
terminals on the left side of the amplifier (viewed from the front) and
marked “L” should be wired to the left-hand loudspeaker. Those on
the right, marked “R”, should be wired to the right-hand loudspeaker.
For correct stereo imaging it is important that the two loudspeakers
are wired “in phase”. To ensure correct phasing wire the black (–)
terminal on the amplifier to the black or “–” terminal on the
loudspeaker. The red (+) terminal on the amplifier should be wired to
the red or “+” terminal on the loudspeaker.
The loudspeakers should be positioned as recommended by the
loudspeaker manufacturer. The two loudspeakers should always be
placed at equal distances from the main listening position and
usually spaced a similar distance apart. It is generally best to keep
the loudspeakers away from room corners and many loudspeakers
work best away from all walls.
.
1
2
3
4
567891011121314
15
4. XLR input
Connect the audio output cables from a XLR to these sockets.
5. PER out
Connect the audio input cables from a amplifier to these sockets.
6. Bypass input
Connect the audio output cables from a preamp to these sockets.
7. AUX input
The audio output from any line level source may be connected to this
input.
8. Tape input
The Tape inputs are suited to any type of tape recorder, including
high-quality “3-head” types which allow you to monitor the signal off
the tape whilst it is being recorded.
9. SACD input
Connect the audio output cables from a SACD player to these sockets.
10. CD input
Connect the audio output cables from a CD player to these sockets. If
you do not have a CD player then any other line level source may be
connected to this input.
Note: this input is for an audio signal, not for the digital output from
your player.
15. BT ANT
Receive for bluetooth signal.
13. USB DAC
Connect the audio output cables from a pc to these usb sockets.
11. Coaxial input
Connect the audio output cables from a CD player to these digital
sockets.
12. Optical input
Connect the audio output cables from a CD player to these digital
sockets.
14. USB disk input
USB for connecting external disk.
PHONES
MUTE
SOURCE
350
4
OPERATING YOUR AMPLIFIER
452 1 6
FRONT PANEL CONTROLS
7
3
1. Standby
When the amplifier is plugged into a live wall socket and the POWER
switch is turned ON, it will power up in “standby” mode and the LED
(Light Emitting Diode) in the display will glow red. In this mode only
a small part of the internal circuitry of the Z350 is powered up, so it
consumes very little power and its inputs and outputs are isolated by
relays.
CAUTION: WHEN IN STANDBY MODE THE INTERNAL CIRCUITRY IS
STILL LIVE, SO ALL SAFETY PRECAUTIONS MUST BE FOLLOWED.
2.
The infra-red (IR) remote control receiver is mounted behind the
window, just to the left of the display. It must not be obscured when
the amplifier is to be operated using the remote control handset.
Where possible it is best to arrange that the IR window is in
“line-of-sight” of the remote handset.
Infra-red receiver
3.
All functions accessible through multifunctional touch screen.
Display
5.
These buttons scroll up or down through the inputs to select the
source you wish to listen to. The display shows which input has been
selected.
Source select and
pq
6.
When you press the MUTE button the output (loudspeaker, amplifier)
will be mute release.
Mute
7.
The volume control adjusts the sound level for both loudspeakers (via
the amplifier outputs).
Volume control
4. Headphone socket
The headphones socket will accept a standard 6.35mm stereo jack
plug or adapter. All types of headphones of any impedance may be
used, with one exception: electrostatic headphones are usually
supplied with an adapter unit which must be connected directly to
the loudspeaker terminals. Insertion of a plug into the headphones
socket automatically disconnects the loudspeakers, silencing them.
In order to resume listening to loudspeakers you must unplug the
headphones from this socket. The headphones output is not muted
when switching in and out of STANDBY mode, so it is recommended
that headphones are unplugged from the amplifier before switching
to standby mode and plugged in again after switch-on.
When the STANDBY ellipse is touched (3 second) the Z350 circuitry
will be activated, but the outputs will remain muted for a short period
to allow the internal voltages to stabilise. During this delay period the
LED on turns blue in the display and the display will indicate “MYRYAD”.
When the STANDBY ellipse is touched (3 second) again the amplifier
will be returned to standby mode. The standby LED will glow red
again and the display will be extinguished.
5
REMOTE CONTROL
TUNING
SOURCE
MUTE DIMMER
MEM
PRESET FREQ
BAND ENTER
MENU
OK
FAVORITE
F1
VOLUME
A-B PROG
AUX
CD/NWP AMP
MSR1
RETURN
Selects source input SOURCE
DIMMER
VOLUME Volume Up/Down on
integrated amplifier
Play/Pause
RETURN Return to the previous
OK Confirms/Selects item.
Navigate and select from
Repeat Chapter/Title/Disc
Random play
Screen On/Off
Scan back
Scan forward
Skip forward to next chapter
Skip back to previous chapter
Stop
MUTE
Mute on integrated amplifier
AMP
Switches integrated amplifier
into/out of standby
(press and hold)
Device mode shift button
(placing at AMP position)
6
LOUDSPEAKER OUTPUT PROTECTION AND MUTING
When the amplifier is in standby mode the loudspeaker output
terminals are isolated from the amplifier by high quality relays. When
the amplifier is first switched on from standby mode the loudspeaker
outputs remain disconnected for a few seconds to allow the internal
voltage levels to settle. The same process occurs when the amplifier
is switched back into standby mode. This power-on mute does not
disconnect the headphone socket, so it is recommended that
headphones are unplugged from the amplifier before switching to
standby mode and plugged in again after switch-on.
The same loudspeaker mute relay is used to protect both the amplifier
and your loudspeakers against possible damage. If any one of a
number of fault modes is detected (loudspeaker outputs short circuit,
amplifier overheating, amplifier DC fault) the loudspeakers will be
disconnected from the amplifier to protect both. In the case of a short
circuit or DC fault the loudspeakers will be re-connected after a few
seconds, but will be disconnected again if the fault persists. If
overheating has caused the protection system to operate, then it will
take some time for the heatsinks to cool sufficiently to allow the
loudspeakers to be re-connected (probably between five and fifteen
minutes depending upon the room temperature and ventilation). The
amplifier will cool more quickly if it is switched to standby mode, or if
the POWER is switched OFF.
7
INSTALLING AND REPLACING BATTERIES
The remote handset uses two 1.5 V type AAA batteries. To fit new
batteries first open the battery compartment at the base of the
handset and remove any existing batteries. Fit the new ones as
directed by the symbols moulded inside the battery compartment,
then replace the battery compartment cover.
The batteries should always be removed if they are discharged
(indicated by no remote control operation or by operation only at very
short range), or if the remote control is not going to be used for an
extended period.
TROUBLE-SHOOTING GUIDE
SPECIFICATIONS
Possible solutions to some of the most common problems:
No sound:
• Power turned off or system in standby mode. Check that the red
STANDBY LED in the amplifier is illuminated and that the relevant
source component is also active.
• An inoperative input has been selected (e.g. CD input with no CD
playing).
• An input has been selected with no source connected.
• Protection relay has operated because of a short circuit loudspeaker
wire or amplifier overheating. Carefully check all wiring after
switching the amplifier POWER OFF to allow it to cool.
Sound in one channel only:
• Loudspeaker cable pulled loose. Check all connections, both at the
loudspeakers and amplifier.
• Interconnect cable pulled loose or making poor contact. Check and,
if necessary, un-plug and re-plug all relevant cables.
Loud buzz or hum:
• Interconnect cable pulled partially out of its socket.
• Defective interconnect cable.
Continuous average power output 8Ω: 130 W
4Ω: 200 W
THD (at 80% rated power, 8Ω, 20Hz-20kHz) 0.01%
Inputs XLR, CD , SACD, TAPE, AUX, BYPASS, BT, USB, USB DAC, OPTICAL, COAXIAL
Outputs PRE OUT, SPEAKERS
Input sensitivity (ref. rated power) 300 mV (user trimmable 220-880mV)
Maximum input level >2 Vrms
Input impedance 47 kΩ
Frequency response (20Hz-40kHz) ±0.5 dB
Signal/Noise ratio (A-weighted, ref. rated power) >97 dB
Optical Specifications 192 k
USB Specifications 768 kHz/32 bit, DSD512
BT Specifications Bluetooth 5.0
Dimensions (w x h x d) 436 × 115 × 377 mm
Weight (net) 12.3 kg
Our policy is one of continuous product improvement, we reserve the right to
change the designs and specifications without notice.
All information is given in good faith. The manufacturer accepts no responsibility
for errors, omissions or incorrect assumptions.
This symbol means do not dispose of as municipal waste.
Re-use or recycle wherever possible. Electrical/Electronic
Equipment may contain substances harmful to the
environment. For environmentally sound methods of disposal,
please contact your local government agency.
Revision: 1.0
Myryad Systems Ltd.
www.myryad.co.uk

This manual suits for next models

1

Other Myryad Amplifier manuals

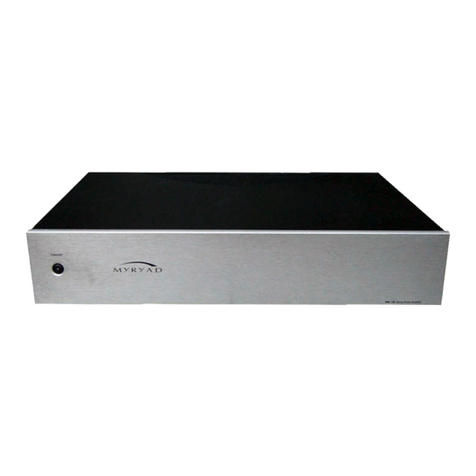
Myryad Z162 User manual

Myryad

Myryad Z162 User manual

Myryad MXA2080 User manual

Myryad

Myryad MXA2080 User manual

Myryad MDP 500 User manual

Myryad

Myryad MDP 500 User manual

Myryad MXD4000 User manual

Myryad

Myryad MXD4000 User manual

Myryad Z142 User manual

Myryad

Myryad Z142 User manual

Myryad Z140 User manual

Myryad

Myryad Z140 User manual

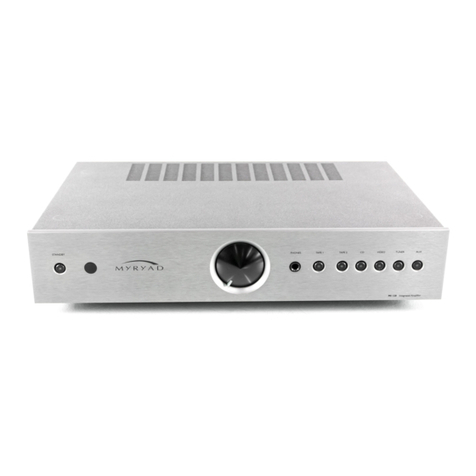
Myryad MA500 User manual

Myryad

Myryad MA500 User manual

Myryad mi 120 User manual

Myryad

Myryad mi 120 User manual

Myryad MA120 User manual

Myryad

Myryad MA120 User manual

Myryad MI 240 User manual

Myryad

Myryad MI 240 User manual

Myryad MDP 500 G6 User manual

Myryad

Myryad MDP 500 G6 User manual

Myryad ZMINI Z40 User manual

Myryad

Myryad ZMINI Z40 User manual

Myryad MP100 User manual

Myryad

Myryad MP100 User manual

Myryad MXA0151 User manual

Myryad

Myryad MXA0151 User manual

Myryad MX Series User manual

Myryad

Myryad MX Series User manual

Popular Amplifier manuals by other brands

Choice Select CHO4053 instruction manual

Choice Select

Choice Select CHO4053 instruction manual

Rane MA 4 datasheet

Rane

Rane MA 4 datasheet

AudioSource AMP100VS owner's manual

AudioSource

AudioSource AMP100VS owner's manual

McGREGOR 14971 operating instructions

McGREGOR

McGREGOR 14971 operating instructions

Audio Research D-150 owner's manual

Audio Research

Audio Research D-150 owner's manual

Starke eversolo AMP-F2 product manual

Starke

Starke eversolo AMP-F2 product manual

Marantz PM-80 user guide

Marantz

Marantz PM-80 user guide

ATI Technologies ATP 7500 owner's guide

ATI Technologies

ATI Technologies ATP 7500 owner's guide

Federal Signal Corporation 300SA instruction manual

Federal Signal Corporation

Federal Signal Corporation 300SA instruction manual

ETS HPDA-6 instructions

ETS

ETS HPDA-6 instructions

Denon PMA-1600NE Service manual

Denon

Denon PMA-1600NE Service manual

DS18 ZXI Series owner's manual

DS18

DS18 ZXI Series owner's manual

AntennaWorks 8877 user guide

AntennaWorks

AntennaWorks 8877 user guide

Swan Song Audio Mini Black quick start guide

Swan Song Audio

Swan Song Audio Mini Black quick start guide

Pepperl+Fuchs HiD2824 manual

Pepperl+Fuchs

Pepperl+Fuchs HiD2824 manual

Opus DCL20-K2 Installation and user manual

Opus

Opus DCL20-K2 Installation and user manual

Marantz SM-11S1 Service manual

Marantz

Marantz SM-11S1 Service manual

NuPrime DAC-10H user manual

NuPrime

NuPrime DAC-10H user manual

manuals.online logo
manuals.online logoBrands
  • About & Mission
  • Contact us
  • Privacy Policy
  • Terms and Conditions

Copyright 2025 Manuals.Online. All Rights Reserved.