Instructions on assembly and use
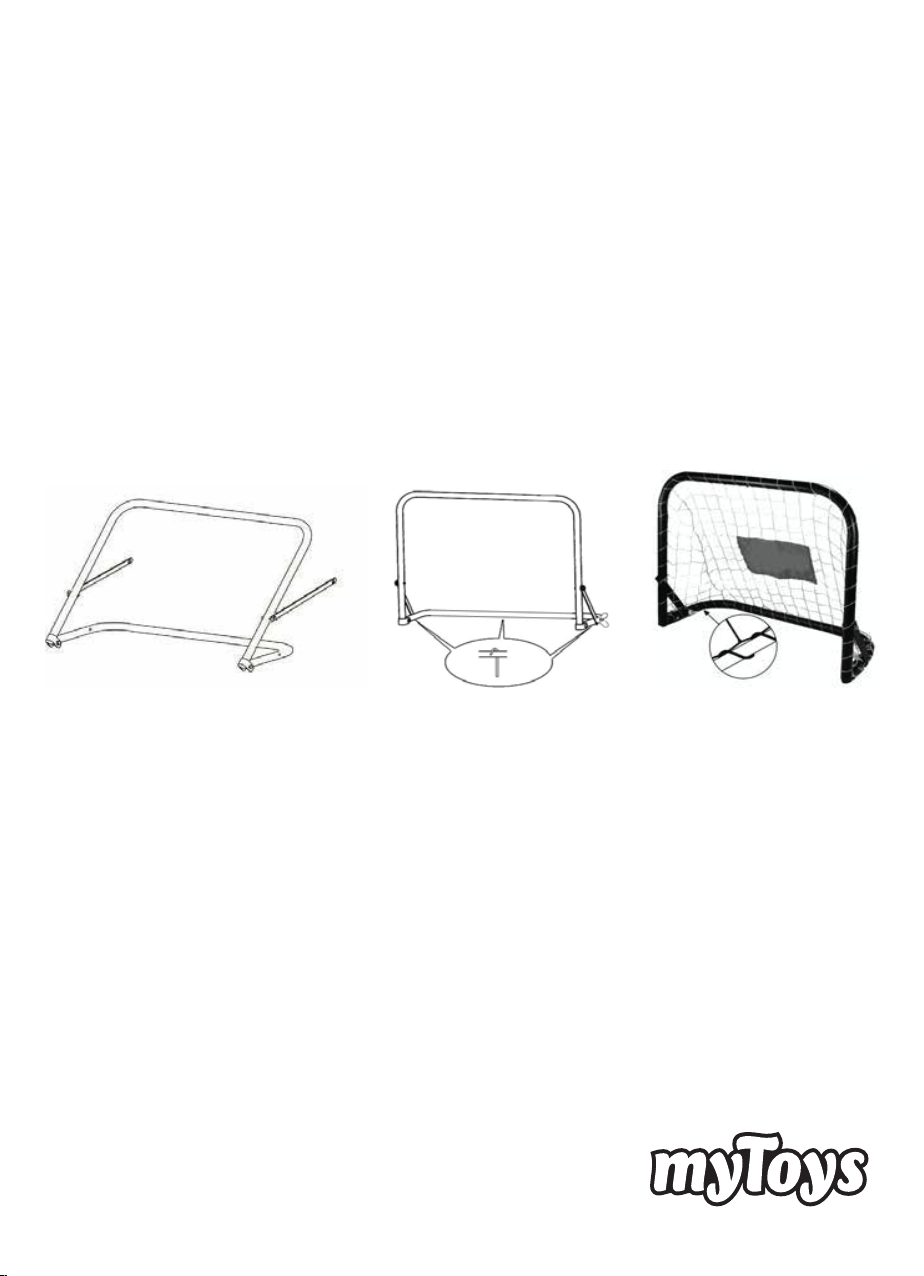
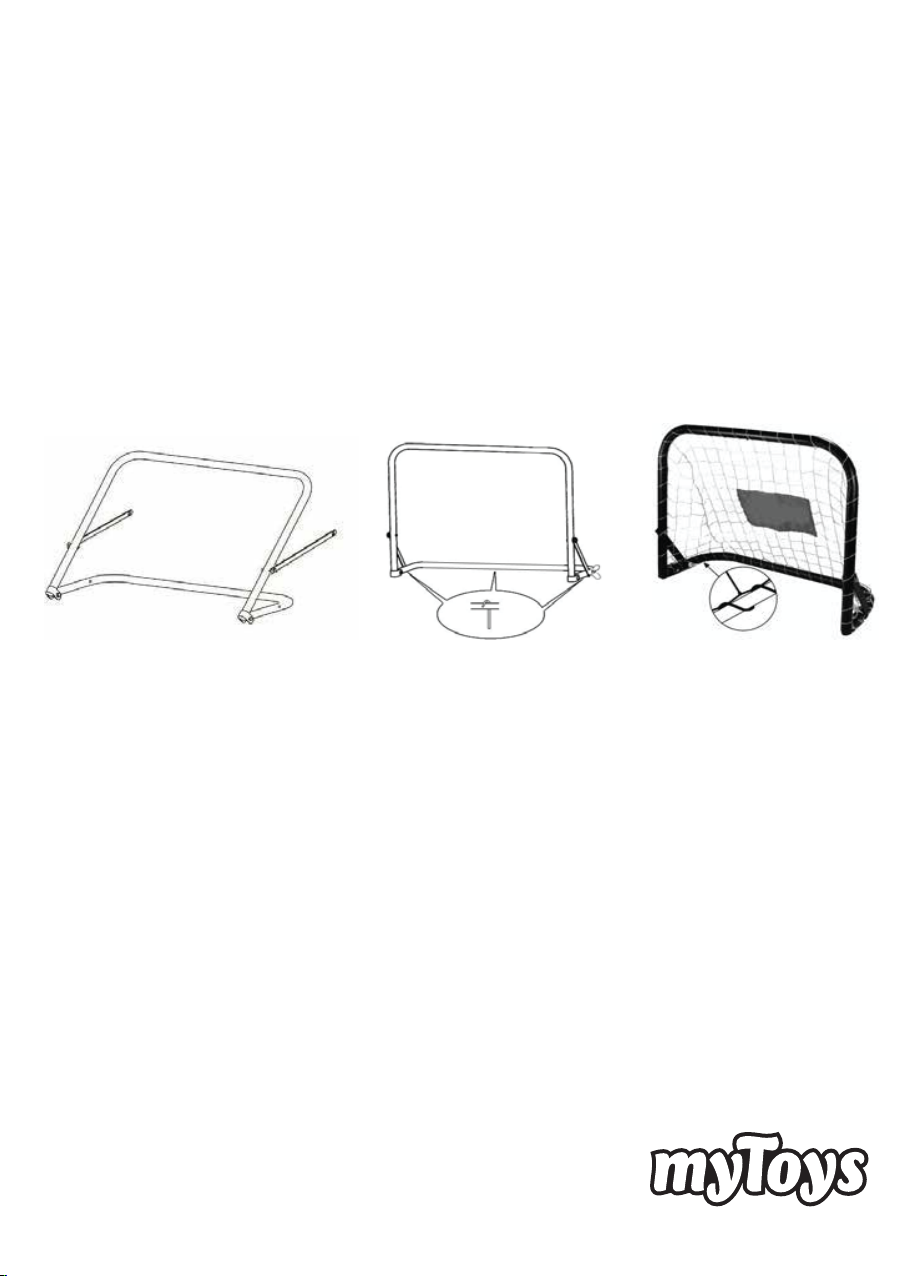
1. ASSEMBLY OF THE GOALS
Notice: Lubricate the connection assemblies on the narrow ends a bit before starting the
assembly. That facilitates the assembly and extends the durability of the product! Assemble
the goals as indicated in fig. 1 and fig. 2.
2. ASSEMBLY OF THE GOAL NET
The little flags sewed in the net indicate the upper goal corners. Fasten the goal net on the
goal frame by threading the cord as indicated in fig. 3 around the tubes and knotting the
loose ends.
3. STAND LOCKING OF THE GOAL
Finally fix the goal frame by means of the pegs on the ground. Ascertain that the ground is
suitable for the application of pegs (e.g. no water pipes for sprinkler devices!). Make sure
that the pegs are completely driven into the ground and have firm position. Avoid
protruding fastenings (risk of stumbling). Never play with an unsecured goal or never leave
the goal unsecured respectively.
fig. 1 fig. 2 fig. 3
Please read these instructions carefully. The instructions are an integral component of
the product. Therefore, please store them and the packaging carefully in case questions
arise in the future. Please always include these instructions when handing on the
product to a third party. This product must be assembled by an adult. This product is not
designed for industrial use. The use of the product requires certain capabilities and skills.
Always adjust according to the age of the user and use for the purpose it has been
designed for.
TECHNICAL SPECIFICATIONS
Item weight: 2,5 kg
Dimensions when assembled: 60 x 45 x 24 cm
Football Specifications: Ø 120mm, 2.0 psi/0.138 bar
EN USAGE INSTRUCTIONS
- Only set up the goal on level ground.
- Please keep a minimum distance of at least 3 m to any surrounding obstacles.
- Secure the goal to keep it from toppling over — even if not in use.
- For repairs, please only use original parts.
- Avoid exposing the product unnecessarily to bad weather conditions. Keep it in a cool
and dry storage area.
- Check for any rust on the product and remove it immediately. Pushing together the
metal parts could lead to the protective layer being scratched and rust developing.
- Do not climb on the goal frame or net or hang from the goal posts. There is a risk of
injury!
- Children should only use the product when they are under adult supervision.
MAINTENANCE AND STORAGE
Use a dry or damp cloth only to clean the product; do not use special cleaning agents!
Check the product for damage or traces of wear and tear
before and after each use. Do not make any structural changes. For your own safety,
please use original spare parts only. If parts become damaged or if sharp edges or corners
should develop, the product may not be used any more. Store the product in a safe place
where it is protected from the elements, cannot be damaged, and cannot injure anyone.