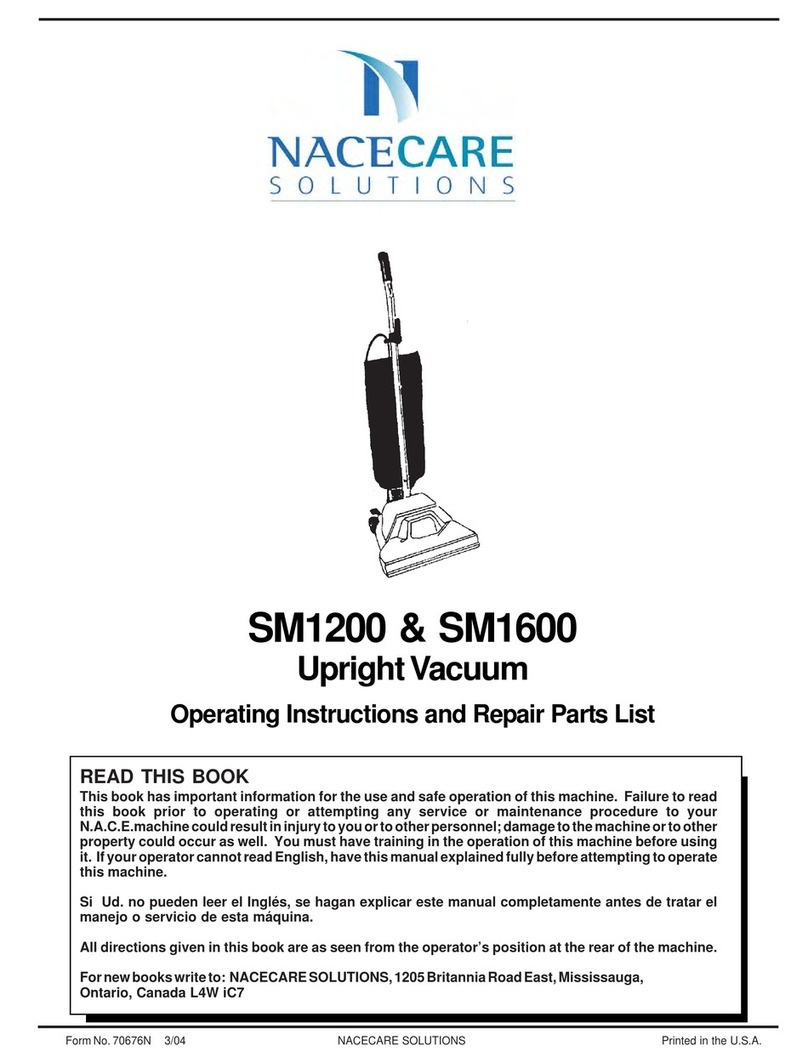
Nacecare DM1400 Use and care manual

DM1400 & DM1800
UprightVacuum
Operating Instructions and Repair Parts List
FormNo.70720N 3/04 NACECARE SOLUTIONS Printed in the U.S.A.
READ THIS BOOK
This book has important information for the use and safe operation of this machine. Failure to read
this book prior to operating or attempting any service or maintenance procedure to your N.A.C.E.
machinecouldresultininjurytoyouortootherpersonnel;damagetothemachineortootherproperty
could occur as well. You must have training in the operation of this machine before using it. If your
operator cannot read English, have this manual explained fully before attempting to operate this
machine.
Si Ud. no pueden leer el Inglés, se hagan explicar este manual completamente antes de tratar el
manejo o servicio de esta máquina.
All directions given in this book are as seen from the operator’s position at the rear of the machine.
Fornewbookswriteto: NACECARESOLUTIONS,1205BritanniaRoadEast,Mississauga,Ontario,
Canada L4W iC7

Page -2- N.A.C.E. Operator's Manual - DM1400 & DM1800
OperatorSafetyInstructions............................................................................................................. 3
Introduction&MachineSpecifications............................................................................................. 7
GroundingInstructions .................................................................................................................... 8
HowToAssembleTheMachine ....................................................................................................... 9
TheControls..................................................................................................................................... 12
HowToOperateTheMachine .......................................................................................................... 14
Maintenance .................................................................................................................................... 15
HowToChangeTheFilterBag ............................................................................................ 15
HowToCleanTheFilterCartridge ....................................................................................... 16
HowToReplaceTheBrush ................................................................................................. 16
HowToChangeTheDriveBelt ............................................................................................ 17
TheVacuumIndicatorLight ................................................................................................. 17
TheCircuitBreaker.............................................................................................................. 17
BrushPerformanceIndicatorLights.................................................................................................. 18
SECTION II Parts and Service Manual
Drawing#1UpperCanisterAssembly ..............................................................................................20
Parts List #1 Upper Canister Assembly............................................................................................ 21
Drawing#2BrushHousingAssembly...............................................................................................22
Parts List #2 Brush Housing Assembly ............................................................................................23
Parts List #3 Hose Wand and Handle Assembly .............................................................................. 24
Table of Contents

Page -3-
N.A.C.E. Operator's Manual - DM1400 & DM1800
OPERATOR SAFETY INSTRUCTIONS
WARNING AVERTISSEMENT ADVERTENCIA
Forthesafeoperationofthis machine,readandunderstandalldangers, warningsand
cautions. Look for these symbols:
DANGER: If you do not follow the instructions in a DANGER, severe bodily injury or death can occur to
theoperatorand/orotherpersonnel.
WARNING: If you do not follow the instructions in a WARNING, injury can occur to you or to other
personnel.
CAUTION: If you do not follow the instructions in a CAUTION, damage can occur to the machine.
WARNING: To reduce the risk of fire, electric shock, or injury:
1. You must have training in the operation of this machine before using it. READ THE
INSTRUCTION BOOK.
2. Do not use outdoors or on wet surfaces.
3. Donotleavevacuumcleanerunattendedwhenpluggedin. Turnofftheswitchandunplugthe
electricalcordwhen notinuseand beforeservicing.
4. Do not allow to be used as a toy. Close attention is necessary when used by or near
children.
5. Use only as described in this manual. Use only manufacturer's recommended attachments.
6. Do not use with damaged cord or plug. If vacuum cleaner is not working as it should, has
beendropped,damaged,left outdoors,ordroppedintowater, returnittoaservice center.
7. Do not pull or carry by cord, use cord as a handle, close a door on cord, or pull a cord around
sharpedges orcorners. Do notrunvacuum cleanerover cord. Keepcord awayfrom heated
surfaces.
8.Connect toaproperlygrounded outletonly(refer toGroundingInstructions).
9. Do not use extension cords or outlets with inadequate current carrying capacity.
10. Turnoffallcontrolsbeforeunplugging.
11. Do not unplug by pulling on cord. To unplug, grasp the plug, not the cord.
12. Donot handleplug orvacuumcleaner withwet hands.
13. Do not put any objects into openings. Do not use with any opening blocked, keep free of
dust, lint, hair, and anything that may reduce airflow.
14. Thisvacuum cleanercreates suctionandcontainsa revolvingbrush. Keep hair,loose
clothing,fingersand allpartsof bodyawayfrom openingsandmoving parts.
15. Do not pick up anything that is burning or smoking, such as cigarettes, matches or hot
ashes.

Page -4- N.A.C.E. Operator's Manual - DM1400 & DM1800
SAVE THESE INSTRUCTIONS
WARNING: To reduce the risk of fire, electric shock, or injury:
16. Belt pulleyscan becomehot duringnormal use. To prevent burns,avoid touchingthe belt
pulleywhenservicingthedrivebelt.
17. Do not use to pick up flammable or combustible liquids such as gasoline, or use in areas
wherethey may be present.
18.Unplug the machine beforeservicing the belt orbrush. The brush may startsuddenly and
cause injury.

Page -5-
N.A.C.E. Operator's Manual - DM1400 & DM1800
CONSIGNES DE SÉCURITÈ DE L'UTILISATEUR
AVERTISSEMENT
Pour utiliser cet appareil en toute sécurité, il faut lire et coprendre tous les consignes de danger,
d'avertissement et d'attention. Soyez attentif aux symboles que voici.
DANGER: Ne pasrespecter les consignes d'unavis deDANGER,peut occasionner lamort ou des
lesionscorporellesgravespourl'utilisateuret/oud'autrespesonnes.
AVERTISSEMENT: Nepasrespecter lesconsignesd'un AVERTISSEMENTpeutoccasionner deslesions
corporellespourl'utilisateuret/oud'autrespersonnes.
ATTENTION: Nepasrespecterlesconsignesd'unavisd'ATTENTIONpeutoccasionnerdesdommage
àl'appareil.
AVERTISSEMENT: Pour réduire le risque de feu, de choc électrique, ou de blessure:
1. Vousdevezrecevoiruneformationappropriéeavantdevousservirdecetappareil. LISEZLE
MANUELDECONSIGNESDUFABRICANT.
2. Ne pas utiliser à l'extérieur ou sur des surfaces mouillées.
3. Ne laissez pas l'aspirateur seul quand il est branché. Fermez le commutateur et débranchez
l'appareillorsquevousnel'utilisezpasouavantlenettoyageoul'entretien.
4. Ne permettez pas que l'aspirateur soit utilisé comme un jouet. Une attention particulière est
nécessarielorsqu'il est utilisé parou près d'un enfant.
5. Suivez strictement les recommandations d'utilisation de ce manuel. Utilisez uniquement les
accessoiresrecommandésparlefabriquant.
6. N'utilisez jamais l'aspirateur si le cordon ou la fiche sont endommagés. Si l'aspirateur ne
foncitionne pas comme il le devrait, s'il a été échappé, s'il est endommagé, s'il a été laissé à
l'extérieurouéchappédansl'eau,retournez-leàuncentredeserviceavantdel'utiliser.
7. Ne tirez pas l'aspirateur ou le transportez par le cordon. N'utilisez pas le cordon en guise de
poignée. Ne fermez pas uen porte sur le cordon ou tirez le cordon sur des bordures ou des
coins pointus. Ne passez pas l'aspirateur sur le cordon. Tenez le cordon à distance des
surfaces chauffantes.
8. Brancheztoujours l'aspirateur dans une prise à trois (mise àterre).
9. N'utilisez pas des rallonges ou des prises qui n'ont pas une capacité suffisante pour trans-
porterlecourant.
10. Mettez sur arrêt tous les boutons de commande avant de débrancher.
11. Ne débranchez pas l'aspirateur en tirant sur le cordon. Pour débrancher, tenez la fiche et
nonpas le cordon.
12. Ne manipulez pas la fiche ou l'aspirateur avec les mains mouillées.
14. N'insérez rien dans les ouvertures. N'utilisez pas l'aspirateur si des ouvertures sont
bloquées. Assurez-vous qu'elles soient dégagées de poussière, de mousse, de cheveux ou
detout autre chose quipourrait réduire lepassage de l'air.
15. Cet aspirateur crée de la succion et contient une rouleau-brosse tournant. Tenez les parties
mobiles et les ouvertures loin des cheveux, du linge, des doigts et de toute partie du corps.

Page -6- N.A.C.E. Operator's Manual - DM1400 & DM1800
16. Ne remassez pas de objets qui brûient ou fument comme les cigarettes, les allumettes ou
lescendres chaudes.
17. Les pouliesde lacourroie peuventdevenir chaudespendant l'utilisationnormale. Pour
prévenirdes brûlures, évitez de toucher la poulie lors de l'entretien dela courroie.
18. Débrancher lamachine avant defaire l'entretiende la courroieou debrosse. La brosse
peutdémarrersoudainementetcauserdesblessures.
CONSERVEZ CES INSTRUCTIONS
AVERTISSEMENT: Pour réduire le risque de feu, de choc électrique, ou de blessure:

Page -7-
N.A.C.E. Operator's Manual - DM1400 & DM1800
PowerSupply 120V-60Cycle 120V-60Cycle
VacuumMotor 1050 Watts 1050 Watts
BrushRPM 4300rpm 4300rpm
Cord 50 ft.3-wire 50ft.3-wire
Wheels(2) 2.7" x 1.25" 2.7" x 1.25"
Wand 21" extends to 33.5" 21" extends to 33.5"
Hose 1.5" x 18.5" 1.5" x 18.5"
extends to 72" extends to 72"
AgitatorBrush ChevronBrushPattern ChevronBrushPattern
CleaningWidth 14" 18"
Filter Bags 6 lt, 2-ply disposable 6 lt, 2-ply disposable
Weight(lesspower
cord) 20 lbs. 20.5 lbs.
ShippingWeight 26 lbs 26.75lbs
VacuumDimensions 10.5 x 14.25 x 46.5 10.5 x 14.25 x 46.5
Warranty OneYear OneYear
Model DM1400 DM1800
INTRODUCTION
TheDM1400&DM1800areuprightvacuumsforcleaningcarpet. Thesemachinesareusedtoremovedrymaterial
fromcarpet. These machines areintended forcommercial use.
MACHINE SPECIFICATIONS

Page -8- N.A.C.E. Operator's Manual - DM1400 & DM1800
GROUNDINGINSTRUCTIONS
Preparation:
The following are instructions for connection to the
power supply and the electrical ground.
This machine must be connected to the electrical ground to
protect the operator from electrical shock. The machine has
anapproved powercord withthree conductorsand aplug
with three terminals. Connect the plug to a receptacle that
has three holes and is connected to the electrical ground.
Thegreen (or greenand yellow) conductorin the cordis the
groundwire. Never connect thiswire to anyterminal other
thanthe groundpin terminal.
DANGER: Improper connection of
the equipment-grounding conductor can result
in risk of electric shock. Check with a qualified
electrician or service person if you are in doubt
as to whether the outlet is properly grounded.
Do not modify the plug provided with the
appliance. If it will not fit the outlet, have a
proper outlet installed by a qualified
electrician.
This machine is for use on a 110 to 120 VoltAC 60 cycle
electric circuit. Make sure you have the correct frequency
andvoltage beforeconnecting the powercord toan outlet.
The machine has a plug as shown in figureA.
WARNING: Always use this machine with anAC
three-conductor electrical system connected to
the electrical ground. Replace any worn, cut or
damaged cords. Replace any damaged plugs,
receptacles or connector bodies.
WARNING: Do not cut, remove, or break the
ground terminal. Do not try to fit a three-termi-
nal plug into a receptacle or connector body
that does not fit the plug, see your Authorized
N.A.C.E. Dealer to get an authorized person to
make the connection.
WARNING: Do not move the machine over an
electrical cord. Always lift the cord over the
machine.
EXTENSIONCORDS:
Useonly anapproved extension cordwith threeconductors,
a plug with three terminals and a connector body with three
holes. This machine has a power cord with wire size 18
AWG (AWG meansAmerican Wire Gauge).
WARNING: If you use an extension cord, use an
extension cord with minimum wire size 16 AWG.
Do not use an extension cord longer than 50
feet. Do not join two extension cords.
FIGURE A
Grounded
Outlet Box
Grounding Blade
is longest of the
three blades

Page -9-
N.A.C.E. Operator's Manual - DM1400 & DM1800
INSTRUCTIONS VISANT LA MISE A LA TERRE
PREPARATION:
Consignes pour brancher l'appareil a la source d'energie
et pour la mise à la terre.
Cetappareil doit être mise à la terreafin d'eviter lerisque de
chocélectrique. Cet appareil estpourvu d'uncordon muni de
trois conducteurs et d'une fiche munie de trois bornes.
Brancher la fiche à une prise qui a trois tous et est mise à la
terre. Leconducteur vert (ouvert etjaune) dans lecordon
est le fil neutre. Ne jamais attacher ce conducteur à une
borneautre quela borne àterre.
DANGER: Un conducteur de terre
mal raccordé peut entraîner un risque de choc
électrique. Consulter un electricien ou un
technicien qualifié si vous n'êtes pas certain
que la prise est correctement mise à la terre. Ne
pas modifier la fiche fournie avec l'appareil. Si
elle ne peut être insérée dans la prise, faire
installer une prise adéquate par un électricien
qualifié.
Cet appareil est destiné à un circuit de 110 à 120 volts et 60
cycles. S'assurer que l'appareil est branché à une prise de
courant ayant la même configuration que la fiche. Cet
appareil est muni d'une fiche de mise à la terre semblable à
celle illustrée par la FigureA.
AVERTISSEMENT: Toujours employer cet
appareil avec un système électrique AC à trois
conducteurs, raccordé à la mise à la terre.
Remplacer tout cordon usé, coupé ou
endommagé. Remplacer toute fiche ou prise
endommagée.
AVERTISSEMENT: Ne pas couper, briser, ou
enlever la prise de terre. Ne pas chercher à
brancher la fiche à trois bornes, à une prise que
ne lul correspond pas. Si la prise ne correspond
pas à la fiche, contacter votre agent de vente
autorisé des appareils N.A.C.E. afin qu'une
personne qualifiée effectue le branchement.
AVERTISSEMENT: Ne pas faire passer l'appareil
sur le cordon électrique. Soulever toujours le
cordon pour faire passer l'appareil en dessous.
LESRALLONGES:
Utiliseseulement unerallonge approuvéeà troisfils
conducteurs,munie d'une ficheà trois borneset d'une prise
à trois trous. Cet appareil est muni d'un cordon électrique
dont les fils sont de calibre 16AWG (AWG signifieAmerican
WireGauge).
AVERTISSEMENT: Si vous utilisez une rallonge,
celle-ci doit avoir un calibre de fil minimum de
16 AWG. Ne pas utiliser de rallonge qui dépasse
50 pieds (15 mètres) de long. Ne pas raccorder
deux rallonges ensemble.
FIGURE A
Boîte de Prise
de Terre
LALAMEDE
TERREESTLA
PLUSLONGUE
DESTROIS
LAMES
Note:AuCanada,l'utilisationd'unadaptateur
temporairen'estpasautoriséeparleCode
canadiendel'électricité.

Page -10- N.A.C.E. Operator's Manual - DM1400 & DM1800
Figure2
Figure3
Figure5 Figure4
HOW TO ASSEMBLE THE MACHINE
Toassemblethemachine,followthisprocedure:
1. Removethebrushhousing,vacuumbags,hose,
wand,handleassembly, canisterhousing,and
tools from the carton.
2. Removethecanisterhousingandthebrush
housing from the plastic bags.
3. Install the canister housing on the brush housing.
To install the canister housing, follow this proce-
dure:
a. Positioncanisterhousingoverbrushhousing
(seefigure2).
b. Alignpivotairway(A)and canistersupport
pivot(B) withopenings (C andD) inbottom of
canisterhousing(seefigure2).
c. Lowercanisterhousingcompletelyontobrush
housing until pin clicks into place and latches
(seefigure3).
4. Install the handle assembly to the canister hous-
ing. To install the handle assembly, follow this
procedure:
a. Inserthandletube inthe upper canister
housing(seefigure4).
b. Lowerhandlecompletelyintocanisterhousing
until mark on handle tube is below flush (see
figure 5, item A). This insures the handle is
properlyseated.
c. Push handle latch into lock position (see
figure 5, item B).
CB
AD
A
BMarkon
handletube.

Page -11-
N.A.C.E. Operator's Manual - DM1400 & DM1800
Figure7
Figure6
5. Install the wand assembly in the right rear canister
housing (see figure 6, item A).
6. Position wand handle so that handle is towards
the front of the machine (see figure 7, item A).
7. Attach hose to wand and canister (see figure 7).
To attach hose properly, depress lock on canister
(see figure 7, item B).
8. Snapthe crevice (B) andupholstery (C) tools into
thetool retaineron rearof canisterhousing (see
figure6).
A
B
C
A
B
B

Page -12- N.A.C.E. Operator's Manual - DM1400 & DM1800
Figure9
THE CONTROLS
The Handle Release Pedal (See figure 8, item A)
Thehandle release pedal is onthe lower left side ofthe
machine. Press the pedal to release the handle and start
the brush motor. The brush motor will not run unless the
ON/OFF switch is in the "I" position.
The ON/OFF Switch (See figure 9)
The ON/OFF switch is on handle. Put the switch in the
"I" position to start the vacuum motor. Put the switch in
the "O" position to stop the vacuum motor. Putting the
switch in the off position will also shut off the brush
motor.
The Height Adjustment (See figure 8, item B)
The height adjustment is located on the lower right side
of the machine. Press the front of the pedal with your
footwhen vacuuming shorter carpet. Pressthe back of
thepedalwithyourfootwhenvacuumingthicker,longer
carpet.
The Wand (See figure 8, item C)
The wand is in the holder in the back of the canister
housing. Thewandhasatelescopingfeature(seefigure
11). The crevice tool and the upholstery tools fit the end
of the wand. The wand has a suction control sleeve (see
figure10). Fornormalvacuumingkeepsuctioncontrol
sleeveclosed. Toreducesuction, whencleaningdrapes
orfurniture,opensuctioncontrolsleeve.
Figure11
Figure8
A
B
C
Figure10

Page -13-
N.A.C.E. Operator's Manual - DM1400 & DM1800
Figure12
Figure13
Canister Door (Seefigure 12, item A)
The canister door release is in the upper part of the
canister housing. Lift to open door.
NOTE:Door willnot closewithout aproperly mounted
filterbag. See page 11 forfilter bag mounting instruc-
tions.
The Vacuum Indicator Light (See figure 12, item B)
The vacuum indicator light is on the top of the canister
housing. The indicator light comes on when the airflow to
thevacuum motoris obstructed.
NOTE:Seepage 17forinstructions onhowto removean
obstruction.
The Cord Storage Hooks (See figure 13)
The cord storage hooks are on the back of the canister
housing. The lower cord hook is also a carrying handle.
Thelower cordhook rotatesto provideaquick cord
releaseandtoeasecordremoval.
A
B

Page -14- N.A.C.E. Operator's Manual - DM1400 & DM1800
HOW TO OPERATE THE MACHINE
CAUTION: To prevent damage to the machine,
do not allow large objects to be pulled into the
lower housing or the attachments.
NOTE: The machine comes with a filter bag installed
in the canister housing.
UsetheDM1400 &DM1800as acarpetcleaner oras an
upholstery cleaner. To operate the machine as a carpet
cleaner,followthisprocedure:
1. Removethepowercordfromthecordstorage
hooks, by rotating the lower cord hook 180° (see
figure14).
2. Connect the electrical plug to the electrical
outlet.
3. Put the ON/OFF switch in the "I" position (see
figure9).
4. Pressthehandle releasepedal (seefigure8,
item A).
5. Pull the handle toward you to the best operating
position.
6. Movethemachineforwardandbackwardoverthe
carpet.
Tooperatethemachineasan upholstery cleaner,follow
thisprocedure.
1. Make sure the ON/OFF switch is in the "O"
position.
2. Push the handle forward until it locks in position.
NOTE: the machine comes with a crevice tool
attachment and an upholstery tool attachment.
Select the tool needed for the cleaning opera-
tion.
3. Removethewandfromthecanisterhousing.
4. Connect an accessory tool to the end of the
wand, or directly to the hose (see figures 15 and
16).
NOTE:Pushbutton onwandhandleto release
the hose from the wand (see figure 16, item A).
5. Put the ON/OFF switch in the "I" position.
6. Movethetooloverthe areatobecleaned.
Figure14
Figure15
Figure16
A

Page -15-
N.A.C.E. Operator's Manual - DM1400 & DM1800
MAINTENANCE
WARNING: To prevent injury, always remove
the electrical plug from the electrical outlet
before doing any maintenance or repairs to
the machine.
WARNING: Maintenance and repairs must be
done by authorized personnel only. Use only
genuine N.A.C.E. parts.
How To Change The Filter Bag
Themachineusesadisposablepaperfilterbag. Tochange
thepaperfilterbag,followthisprocedure:
1. Make sure the ON/OFF switch in the "O"
position and that the machine is disconnected
fromthepowersupply.
2. Open the front ofthe canister housing. Toopen
the canister housing, lift the release handle (see
figure17).
3. Graspcardboard inlet onboth sides of thebag
(see points A and B on figure 19) and slightly
rotate and pull bag out.
5. Install a new filter bag. To install a new filter bag,
followthisprocedure:
a. Unfoldthefilterbag.
b. Hold the bag by the cardboard inlet.
c. Place the bottom of the cardboard inlet into
theslot underthe bagadaptor (seefigure 18,
item A)
d. Puttheopeningofthecardboardinletoverthe
bagadapter (seefigure 18, itemB).
e. Make sure the cardboard is pushed all the way
onthebag adapter(figure19)or thedoorwill
not latch.
f. Closethe canister housing.
Figure17
Figure18
Figure19
AB
A
B

Page -16- N.A.C.E. Operator's Manual - DM1400 & DM1800
Figure20
Figure21
How To Change The Filter Cartridge
Change the filter cartridge whenever it is dirty or suction
performance decreases. To change the filter cartridge,
followthisprocedure:
1. Make sure the ON/OFF switch is in the "O"
position and the machine is disconnected from
thepowersupply.
2. Openthecanisterdoor.
3. Removethefilterbag.
4. Removethefiltercartridge(seefigure20).
5. Replacefiltercartridgeandfilterbag(seefigure
21).
CAUTION: Check the filter cartridge while
changing the paper bag. Replace the filter
cartridge when dirty or when the vacuum
suction performance drops off even with a
clean filter bag.
How To Replace The Brush
WARNING: To prevent injury, unplug machine
before cleaning or replacing brush. Brush
may start suddenly and cause injury.
1. Put the machine on its side.
2. Turn the knobs which secure the nozzle plate.
Seefigure22.
3. Lift the nozzle plate up to remove it.
4. Lift the brush assembly up to remove it.
5. Install the new brush assembly.
6. Install the nozzle plate.
7. Put the machine on its wheels.
WARNING: To reduce the risk of injury from
moving parts, unplug before servicing.
Figure22

Page -17-
N.A.C.E. Operator's Manual - DM1400 & DM1800
Figure23
Figure24
How To Change the Drive Belt
WARNING: To prevent injury, unplug machine
before cleaning or replacing brush. Brush
may start suddenly and cause injury.
Tochangethedrivebelt,followthisprocedure:
1. Put the machine on its side.
2. Lift the nozzle plate up to remove it.
3. Lift the brush assembly up to remove it (see
figure23).
4. Removethedrivebeltfromthebrushpulley.
5. Removethedrivebeltfromthemotorshaft.
6. Putoneend ofthe new drivebelt aroundthe
motorshaft.
7. Putthe otherend ofthe drive beltaround the
brushpulley.
8. Install the brush assembly in the brush housing.
9. Install the nozzle plate.
10. Put the machine on its wheels.
WARNING: To reduce the risk of injury from
moving parts, unplug before servicing.
The Vacuum Indicator Light
Ifthe vacuum indicatorlight (1)comes on,(seefigure
24) or the motor stops, do the following:
1. Put the ON/OFF switch in the "O" position (2).
2. Removetheelectricalplugfromtheelectrical
outlet.
3. Checkthe vacuumhose for anobstruction. If
there is an obstruction in the vacuum hose,
removetheobstruction.
4. Check the brush assembly in the lower housing.
If there is an obstruction in the brush assembly,
removetheobstruction.
5. Check the filter bag. If the filter bag is over 1/2
full, change or empty the bag.
6. Check the filter cartridge. If the filter is dirty,
changethefilter.
Thermal Overload
Athermal overload isused to protectthe vacuum motor.
Ifthemotoroverheats,thethermaloverloadwillstop
the motor. If the motor stops, let the motor cool before
restarting the machine. Check filters. If the motor
continues to stop, consult an authorized service person.

Page -18- N.A.C.E. Operator's Manual - DM1400 & DM1800
TheUTV14&UTV18uprightvacuumshave3brush
performanceindicatorlights(seefigure25). Theyare
GREEN, YELLOW and RED. They work in the following
manner:
NormalOperation:
• The GREEN light is on when the brush drive motor is
on and the brush height setting is correct for the
carpet.
NOTE: It is normal for the red or yellow light to inter-
mittently turn on and off as high or low surfaces are
encountered.
BrushHeightTooHigh:
• The YELLOW light will continue to stay on when the
brush height is too high for the carpet. Lower the
brushheight setting.
BrushHeightTooLowor BrushHasJammed:
• The RED light will continue to stay on when the brush
height setting is too low for the carpet. Raise the
brush height setting. The RED light will come on if the
brush is jammed.
• If the RED light is on continuously for 10 seconds, the
electronic safety stop will protect the brush motor by
turningitoff.
• Toresetthebrushdrivemotor,put theoperating
handlein the upright position. Turnthe ON/OFF
switch to the off position. Restart the machine.
• If the brush height was too low, raise the brush height
setting.
• Ifthebrushwas jammed,unplugthevacuum andclear
thebrush.
BRUSH PERFORMANCE INDICATOR LIGHTS
Figure25

Page -19-
N.A.C.E. Operator's Manual - DM1400 & DM1800
DM1400 & DM1800
UprightVacuum
Repair Parts List

Page -20- N.A.C.E. Operator's Manual - DM1400 & DM1800
N.A.C.E.
DM1400 & DM1800
Drawing #1 Upper Canister Assembly 3/04
1
2
3
4
5
6
7
8
5
9
11 10
12
13
14
15
16
17
18 19 20
22
21
23 24 25
26
27
28 293031
32
33
34
35
36
37
38
39
40
This manual suits for next models
1
Table of contents
Other Nacecare Vacuum Cleaner manuals

Nacecare
Nacecare NBV 180 User manual

Nacecare
Nacecare RSV 100 Specifications

Nacecare
Nacecare PPR 200A User manual

Nacecare
Nacecare TP4X User manual

Nacecare
Nacecare PSP180 User manual

Nacecare
Nacecare RBV 150 User manual

Nacecare
Nacecare HD 14 User manual

Nacecare
Nacecare SM1200 Use and care manual

Nacecare
Nacecare RSV 130 User manual

Nacecare
Nacecare Wide Area Vacuum User manual