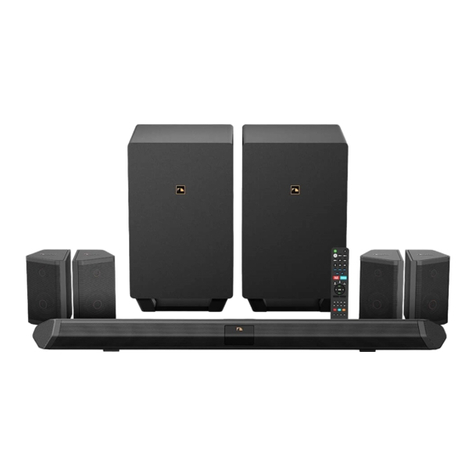
Nakamichi DRAGON 11.4.6 User manual

Owner’s Manual
11.4.6

2222
DRAGON is designed and manufactured to operate within defined design limits, and misuse may result in electric shock or fire. To prevent DRAGON from
being damaged, the following rules should be observed for its installation, use and maintenance. Please read the following safety instructions before
operating DRAGON. Keep these instructions in a safe place for future reference.
WARNING: To reduce the risk of fire or electric shock, do not expose DRAGON to rain or moisture.
IMPORTANT SAFETY INSTRUCTIONS
This lightning flash with arrowhead symbol within an equilateral
triangle is intended to alert user to the presence of not isolated
dangerous voltage within the product that may be sufficient
magnitude to constitute a risk of shock to persons.
The exclamation point within the equilateral
triangle is to alert the user to the presence of
important operating and servicing instructions
in the literature accompanying the appliance.
Warning: This equipment is a Class II or
double insulated electrical appliances. It has
been designed in such way that it does not
require a safety connection to electrical earth.
Read, keep and follow all instructions.
Heed all warnings.
Do not use DRAGON near water.
Clean only with a dry cloth.
Do not block any ventilation openings. Install in accordance with the
manufacturer’s instructions.
Do not install near any heat sources such as radiators, heat registers,
stoves, or other apparatus (including amplifiers) that produce heat.
Do not defeat the safety purpose of the polarized or grounding-type
plug. A polarized plug has two blades with one wider than the other. A
grounding type plug has two blades and a third grounding prong. The
wide blade or the third prong are provided for your safety. If the
provided plug does not fit into your outlet, consult an electrician for
replacement of the obsolete outlet.
Protect the power cord from being walked on or pinched, particularly
at plugs, convenience receptacles, and the point where they exit from
DRAGON.
Only use attachments / accessories specified by the manufacturer.
Use only with the cart, stand, tripod, bracket, or table specified by the
manufacturer, or sold with DRAGON. When a cart is used, use caution
when moving the cart / DRAGON combination to avoid injury from
tipover.
Unplug DRAGON during lightning storms or when unused for long
periods of time.
Refer all servicing to qualified service personnel. Servicing is required
when DRAGON has been damaged in any way, such as when the power
supply cord or plug is damaged, liquid has been spilled or objects have
fallen into DRAGON, DRAGON has been exposed to rain or moisture,
does not operate normally, or has been dropped.
To reduce the risk of electric shock or component damage, switch off
the power before connecting other components to DRAGON.
Unplug the power cord before cleaning DRAGON. A damp cloth is
sufficient for cleaning. Do not use a liquid or a spray cleaner on
DRAGON. Do not use abrasive cleaners.
Always use the accessories recommended by the manufacturer to
ensure compatibility.
When moving DRAGON from an area of low temperature to an area of
high temperature, condensation may form in the housing. Wait before
turning on DRAGON to avoid causing fire, electric shock, or component
damage.
Slots and openings in the back and bottom of the cabinet are provided
for ventilation. To ensure reliable operation of DRAGON and to protect
it from overheating, be sure these openings are not blocked or
covered. Do not place DRAGON in a bookcase or cabinet unless proper
ventilation is provided.
Never push any objects into the slots and openings on DRAGON’s
enclosure. Do not place any objects on the top of DRAGON. Doing so
could short circuit parts causing a fire or electric shock. Never spill
liquids on DRAGON.
When connected to a power outlet, power is always flowing into
DRAGON. To totally disconnect power, unplug the power cord.
Do not overload power strips and extension cords. Overloading can
result in fire or electric shock.
The wall socket should be located near DRAGON and be easily
accessible.
Keep DRAGON away from moisture. Do not expose DRAGON to rain or
moisture. If water penetrates into DRAGON, unplug the power cord
and contact your dealer. Continuous use in this case may result in
fire or electric shock.
Do not use DRAGON if an abnormality occurs. If any smoke or odor
becomes apparent, unplug the power cord and contact your dealer
immediately. Do not try to repair DRAGON yourself.
Avoid using dropped or damaged appliances. If DRAGON is dropped
and the housing is damaged, the internal components may function
abnormally. Unplug the power cord immediately and contact your
dealer for repair.
Continued use of DRAGON may cause fire or electric shock.
Do not install DRAGON in an area with heavy dust or high humidity.
Operating DRAGON in environments with heavy dust or high humidity
may cause fire or electric shock.
Ensure that the power cord and any other cables are unplugged
before moving DRAGON.
When unplugging DRAGON, hold the power plug, not the cord. Pulling
on the power cord may damage the wires inside the cord and cause
fire or electric shock. When DRAGON will not be used for an
extended period of time, unplug the power cord.
To reduce risk of electric shock, do not touch the connector with wet
hands.
Insert the remote control batteries in accordance with instructions.
Incorrect polarity may cause the battery to leak which can damage
the remote control or injure the operator.
The marking label of the subwoofer was located on the external
bottom enclosure of the product.
The equipment shall be used at maximum 95F ambient temperature.
See the important note and rating located on the back of the unit.
WARNING - This equipment is not waterproof. To prevent a fire or
shock hazard, do not place any container filled with liquid near the
equipment (such as a vase or flower pot) or expose it to dripping,
splashing, rain or moisture.
To prevent injury, DRAGON must be securely attached to the floor /
wall in accordance with the installation instructions.
CAUTION - Danger of explosion or fire if batteries are mistreated.
Replace only with the same or specified type.
Do not leave the batteries exposed to direct sunlight for a long
period of time with doors and windows closed. Do not disassemble
the batteries or dispose of it in fire.
Where the MAINS plug or appliance coupler is used as the
disconnect device, the disconnect device shall remain readily
operable.

3333
1. Meet DRAGON
Package Contents
Controls & Connections
2. Set Up
Main Unit and Subwoofers
Surround Speakers
PerfectHeight Mechanism
3. Connect
Power on DRAGON
Set up HDMI ARC/eARC with your TV
Recommended Device Audio Settings
Configure your TV for 4K120/8K60
Video Passthrough
Using Bluetooth®Wireless Audio
4. Control
Remote Functions
Surround, Equalizer (EQ) & Night Mode (DRC)
5. Personalize
BASS and Treble
Channel Configuration
Subwoofer Adjustments
Channel Volume Adjustments
Height Channel Volume
Adaptive Height Dispersion
Save your Favorite Settings
Using the INFO button
Learn more about DRAGON’s advanced functions by scanning the QR Code or
visiting: bit.ly/dragon-advanced-guide
13.1 CONNECTING YOUR TV VIA DIGITAL OPTICAL / AUX IN
13.2 EXTERNAL AUDIO OUTPUT
13.3 INTEGRATE DRAGON WITH LEARNING UNIVERSAL REMOTES
Table of Contents
6. On-Screen Display
Using the OSD
Audio Settings
Video Settings
Calibration Settings
System Settings
7. Surround Demo & Channel Test Tracks
8. Mobile Application
Installation
Functions
9. Firmware Upgrade
Check the Firmware Version
Perform a Firmware Upgrade
10. Reconnect Components
Check Wireless Components
Connection Status
Re-pairing Subwoofers
Re-pairing Surround Speakers
11. Product Information
Specifications
Glossary
Legal and Compliance
12. Support
Warranty Information
Sound Optimization Tips
Help & Troubleshooting
5
6
12
13
14
17
18
21
22
23
25
27
32
33
34
35
36
37
38
39
42
43
44
45
49
53
55
57
57
60
61
63
67
70
72
75
76
78

4444
section 1
Meet dragon

5555
1.1 Package Contents
DRAGON main unit x 1
HDMI 2.1 Cable x 1
(Length: 6.5 ft)
Remote Control w/
Batteries x 1
BASS VOL
ALL CH
STEREO SURROUND
SB
SB
SS
SS
TR
TR
CR
CR
ENTER
SUB
SUB
RETURN
INFO
HOME
TV HDMI 2 HDMI 3
OPT
HDMI 4
USB
AUX
OUTPUT
ADAPTIVEHEIGHT DISPERSION
FAVORITESETTINGS
21
FH FH RH RH
SURROUNDSPEAKERS
Surround Speaker Power Cables x 2
Subwoofer Power Cables x 2
(Length: 10 ft each)
Main Unit Power Adapter x 1
(Length: 5 ft)
Main Unit
Power Cable x 1
(Length: 5 ft)
Dual 8” Wireless Subwoofers x 2 Omni-Motion
Reference Surrounds x 2

6
1.2 Controls & Connections
A. Main Unit
DEMO
Play Dolby®Atmos and channel test tones.
POWER
Turn ON or
STANDBY DRAGON
INPUT
Switch audio source VOLUME - / +
Decrease or
increase the volume
Top View
Bottom View
Aux Out
Opt Out
Aux In
Opt In
USB
DC IN
3.5mm stereo analog audio output
Optical audio output
3.5mm stereo analog audio input
Optical audio input
For firmware upgrade only
Power Supply
HDMI IN
[2] / [3] / [4]:
HDMI
Out (TV) [1]:
HDMI 2.1 input*
HDMI 2.1 output with
ARC/eARC*
BEST
*All the HDMI inputs and output support 4K120, 8K60, Dolby Vision,
4K HDR Passthrough, HDCP 2.3, VRR, ALLM, QFT

7
1.2 Controls & Connections
B. Quad Subwoofers
Back of Subwoofers
Left Subwoofer Right Subwoofer
L
PAIRING
1
2
3
4
1
2
3
4
Power Switch
1
Power Port
2
Pairing Status Indicator
3
Pairing Button
4
PAIRING R

8
1.2 Controls & Connections
C. Omni-Motion Reference Surrounds
Back of Surround Speakers
Top of Surround Speaker
Power Port
Pairing Button with
Status Indicator
PerfectHeight
Mechanism (Pg 14)

9
Back of Remote Control
D. Remote Control
1.2 Controls & Connections
Insert Batteries before using the Remote Control (AAA Batteries x 2)
1. Gently slide the back cover in the direction indicated by the arrow until it is fully detached.
2. Insert 2 x AAA Batteries and gently push the cover back into place.
Bluetooth or Infrared Transmission Switch
Switch the remote control's transmission mode with DRAGON between Bluetooth or Infrared.
Once TV HDMI connection is established, use your TV / content device’s remote control to power ON the entire system. Always
use your TV’s remote control to power OFF the entire system.
Infrared Transmission Mode allows
Learning Universal Remotes to
control DRAGON. Scan QR code to
access Section 13.3 for more info.
Bluetooth: The default mode (recommended). Allows remote control to communicate with DRAGON without line of sight with main unit
Infrared: Use only when programming a universal remote to work with DRAGON
Bluetooth or Infrared
Transmission Switch

10
E. Optional Accessories
1.2 Controls & Connections
Pair DRAGON’s main unit and surround speakers with optional mounting accessories from Nakamichi.
Wall Mounts (Sold Separately)
Main Unit
Wall Mount Bracket Surround Speaker
Wall Mount Bracket
Speaker Stands (Sold Seperately)
Nakamichi recommends using
speaker stands for
best fit with the surround speakers.
Optional Nakamichi DRAGON Surround Speakers stands.
Purchase your main unit wall mount here:
https://bit.ly/main-unit-mount
Purchase your Speaker Stands here:
bit.ly/dragon-speaker-stands
If you are unfamiliar with power tools, installation, or the layout of electrical wiring in the walls of your home, consult a professional installer.
Purchase your surround speakers
wall mount here:
https://bit.ly/surround-speak-
ers-mount

11
section 2
Set up

12
2.1 Main Unit & Subwoofers
Refer to the back of each subwoofer to check if it is the Left or Right subwoofer.
DRAGON’s main unit can be wall mounted with our optional, custom designed wall bracket. See Section 1.2E, pg 10.
Do not block the vents at the rear and bottom of the Main Unit. These vents are essential for performance. Leave a minimum of an inch of
gap around these ventilation holes.
Wireless antennas are built into the main unit and wireless subwoofers. Keep all speaker units away from water and metal objects.
For optimal bass performance, leave a few inches of gap around the subwoofer ports and grilles.
If bass performance seems too strong/overpowering, or you have a room with uneven wall distances, refer to Section 12.2, pg 76 to
optimize DRAGON for your room acoustics.
Wireless subwoofers and surround speakers provide ultimate placement flexibility that suits your listening environment.
Allows bass frequencies to blend with front channels.
Corner placement maximizes bass performance.
i. Front corners of the room (Recommended)
DRAGON Right
Sub
Left
Sub
If placement (i) is not possible, move the subwoofers to other locations
along the front stage, or closer to the center of the room.
ii. Center
DRAGON
Right
Sub
Left
Sub
BEST
BETTER
Recommended if placement (i) or (ii) are not possible in your room.
iii. Diagonal
DRAGON
iv. Back of Room
DRAGON
Right
Sub
Left
Sub
Right
Sub
Left
Sub
Right
Sub
Left
Sub

13
2.2 Surround Speakers
Note: Illustration is not to scale. Speaker stands are not included.
The bottom speaker driver of the
surround speakers should be at ear level.
For optimal performance, position the
surround speaker such that the back
surrounds are pointed directly at the
listener's seating area.
Wireless antennas are built into each
wireless speaker. Keep all speakers away
from fish tanks, water and metal objects.
Purchase optional speaker stands
and wall mounts customized for
DRAGON here:
bit.ly/dragon-speaker-stands
DRAGON Right
Sub
Left
Sub
Option B Option B
Option A Option A
Refer to the back of each surround speaker to check if it is the Left or Right surround speaker.

14
Setting PerfectHeight
Rotate the adjustable PerfectHeight Mechanism so that the position marker points towards with the listening area.
The PerfectHeight Mechanism is an innovation developed by Nakamichi that allows height effects to be directed towards the
listener, regardless of placement, room shape or seating position.
2.3 PerfectHeight Mechanism
A. Setting PerfectHeight
Top of Surround Speaker
Max Max

15
2.3 PerfectHeight Mechanism
The PerfectHeight Mechanism is designed to be rotated up to 90° from its default position. Do not force or twist the mechanism beyond its
designed range of movement.
Does your room have uneven ceilings? Optimize height channel balance by referring to Section 12.2, pg 77.
Placement 1: Back of Couch
DRAGON Right
Sub
Left
Sub
Placement 2: Side of Couch
DRAGON Right
Sub
Left
Sub
Recommended position marker: Position II Recommended position marker: Position I
(Default)
B. Reference Placement

16
section 3
CONNECT

17
3.1 Power On DRAGON
1. Connect power to the subwoofer. Toggle the power
switch to “ON” position.
(Applies for right subwoofer)
2. Connect power to the surround speakers.
Note: No power switch for surround speakers.
1
2
3
L
PAIRING
1
2
3. Connect power to the main unit (Bottom)
4. The Subwoofer and Surround Speakers are automatically connected when the main unit is turned on.
Once the main unit is powered off, the subwoofers and surround speakers will go into standby mode. You do not need to turn off the subwoofers
and surround speakers after each use.
(Applies for left surround speaker)
1
2
Side of main unit

18
3.2 Set up HDMI ARC/eARC with your TV
A. Establishing a Connection
Side of main unit
Side/Back of TV
ARC / EARC
Connect to the HDMI TV (ARC/eARC)
port of theTV.
Connect to the HDMI TV (ARC/eARC)
port of the main unit.
HDMI Cable
HDMI Audio Return Channel (ARC)/enhanced Audio Return Channel (eARC) offers two-way communication between your audio system and TV over
a single HDMI connection. Essentially, HDMI ARC/eARC enables a single TV’s HDMI port to function as both a video input and audio output.
eARC supports advanced audio formats, including Dolby Atmos TrueHD and Dolby Atmos Digital Plus™.
Do not connect DRAGON to a TV via Bluetooth. Bluetooth audio connections are unable to deliver surround sound to sound systems and will
degrade overall sound quality.
Using the Nakamichi HDMI 2.1 cable, connect DRAGON to your TV's HDMI IN (ARC/eARC) port.

19
B. Audio Settings for TV
3.2 Set up HDMI ARC/eARC with your TV
For brand specific TV audio
settings, scan QR code or visit:
bit.ly/dragon-best-sound
Visit bit.ly/dragon-best-sound for expanded list of TVs’ audio settings instructions. Visit
bit.ly/dragon-hdmi-cec-settings or scan QR Code for HDMI-CEC setup instructions by device.
If your devices are not listed on our website, please check with the device manufacturer’s manual.
Configure your TV's audio settings for optimal surround sound output to DRAGON.
Setting the audio output:
Go to Settings > Sound.
Select Speaker Settings. Set to HDMI Audio Out.
For eARC equipped TVs, check your TV settings and turn on eARC mode if available.
This might be found under the advanced/expert options of your TV.
Setting the audio format:
Go to Settings > Sound > Additional Settings.
Select Speaker Audio Format.
Set as Dolby Digital / DTS / Bitstream (whichever is available).
CEC is an HDMI protocol that allows the TV to control DRAGON’s functions (e.g. power, volume, source selection) via a single
TV remote.
Requirements
1. Your TV is CEC enabled. (Check with your TV manufacturer for more information)
2. DRAGON and TV are connected via a HDMI cable through the ARC/eARC ports.
Enabling CEC
From the TV’s SYSTEM menu, enable CEC^ and ARC^ functions.
From the CEC menu, select Device Discovery to register DRAGON with the TV.
Enable CEC for TV only. Do not enable CEC for other device sources or inputs may switch randomly.
To disable CEC on DRAGON, see pg 44 (Disabling HDMI CEC One Touch Play).
* Steps may differ based on TV brand. Refer to your TV’s user manual for more information.
^ HDMI-CEC TV trade names: Samsung (Anynet+), LG (SIMPLINK), Vizio (CEC), Sony (Bravia Sync), TCL (CEC), Hisense (CEC), Philips (EasyLink), Sharp (Aquos
Link), Panasonic (HDAVI Control / EZ Sync / Viera Link). Naming may differ based on TV brand. Refer to your TV’s user manual for more information.
Disclaimer: All brand names on this page belong to their respective copyright holders, and used for non-profit, informational purposes only.
C. Set Up Control Communication Between DRAGON and TV

20
Disclaimer: All brand names on this page belong to their respective copyright holders, and used for non-profit, informational purposes only.
D. Connecting Content Devices
3.2 Set up HDMI ARC/eARC with your TV
HDMI cables transmit both audio and video. To view video from devices connected to the audio system, turn DRAGON on, then set the audio
system input to HDMI 2, 3 or 4. Set your TV input to the HDMI ARC / eARC port which DRAGON is connected to.
Switch the DRAGON’s source to TV when playing from the TV’s built in streaming apps, or audio from devices connected to the TV. Audio is
passthrough using TV’s ARC/eARC connection. Dolby Atmos and DTS:X audio are not supported on ARC connection.
Connect devices with the same HDCP standards for seamless switching between sources. If there are devices with different HDCP standards,
connect all HDCP 2.3 devices to DRAGON while connecting HDCP 1.4 devices to TV to avoid audio and video instability.
Use our Perfect Device Matching Tool to
create a custom setup guide based on your
TV and devices. Scan QR code or visit
bit.ly/dragon-perfect-device-matching
Connect these devices
directly to your TV via HDMI
Streaming
Devices
Gaming
(Xbox Series X, Playstation 5, etc)
Blu-ray Player
TV
Satellite TV Box
Cable TV Box
Connect TV HDMI ARC / eARC to
DRAGON HDMI 1 eARC
Connect these devices directly
to DRAGON Via HDMI
Using a TV without HDMI
eARC/ARC? Scan this QR code to
learn how to connect your TV to
DRAGON. bit.ly/dragon-optical
Other manuals for DRAGON 11.4.6
1
Table of contents
Other Nakamichi Speakers System manuals

Nakamichi
Nakamichi SHOCWAFE ULTRA 9.2 eARC User manual

Nakamichi
Nakamichi Shockwafe Pro 7.1 User manual

Nakamichi
Nakamichi DRAGON 11.4.6 User manual

Nakamichi
Nakamichi NK SHOCKWAVE User manual

Nakamichi
Nakamichi SHOCKWAFE ELITE User manual

Nakamichi
Nakamichi Shockwafe Pro 7.1 User manual

Nakamichi
Nakamichi NK12 User manual

Nakamichi
Nakamichi DRAGON LILY User manual