manuals.online logo
Brands
  1. Home
  2. •
  3. Brands
  4. •
  5. NANOLUX
  6. •
  7. Lantern
  8. •
  9. NANOLUX LED PAD1200 User manual

NANOLUX LED PAD1200 User manual

The fixture is suitable for indoor environment. Do not install your fixture in wet or
outdoor environment. Do not operate the fixture close to combustible materials. The
fixture will get hot during operation. Do not touch the fixture during or right after
operation. Make sure the power cord does not touch any hot part of the fixture. Make
sure the light bars are clean and inserted correctly. The normal operating environment
temperature should be below 104°F. Exceeding the maximum environmental
temperature will stress electronic components, which will lead to shorter lifetime and
decreased reliability.
● Comply with local installation regulations.
● Store the fixture in a dry and clean environment, with an ambient temperature of
-10°C ~ 50°C and ambient humidity of less than 90% RH. It is recommended that
the fixture shall not stay unused for more than six months. If it has stayed unused
for more than six months, please test to ensure fixture is functioning at 100%.
● Please keep products safe. Avoid mechanical pressure, excessive vibration and
dropping the unit during the process of assembly to protect the light bar and track.
● Keep away from water, oil and organic solvent, or it will reduce the efficacy and have
the potential risk of electric leakage.
● All equipment, devices and machines shall be effectively grounded.
● Regularly check and clean the dust from LED PAD.
1. Disconnect from power supply before general care.
2. Remove the dust from the LED PAD by using low-pressure compressed air.
3. Clean the diode array with a soft cloth to prevent it from being scratched.
4. Be sure not to touch the diode with your bare hands, even after the LED PAD is
disconnected from power supply.
● It is recommended that you contact a licensed electrician or an expert if any of the
following happens:
1. The cable or the plug has been damaged.
2. The unit has been exposed to rain.
3. Significant changes in the unit performance.
4. Fixture dropped and corner of its enclosure got bent.
● There are no serviceable parts inside the LED PAD. Opening the LED PAD will void
its warranty.
Nanolux warrants manufacturing defects of this product if it is used under normal
operating conditions for a period of five (5) years from the original date of purchase. If
the product shows manufacturing defects within this period and that defect is not
caused by user error or improper use, Nanolux shall, at its discretion, either replace
or repair the product by using applicable new or refurbished parts. For any service,
return the product to your shop along with the original sales receipt.
SCOPE OF USE AND MAINTENANCE
ALWAYS COMPLY WITH LOCAL
INSTALLATION REGULATIONS AND CODES
OPERATING
MANUAL
LED PAD1200
&
LED PAD720
NCCS-RTU/0-10V COMPATIBLE
WARRANTY
TROUBLE SHOOTING
Problem
One or more
fixtures are
completely off.
Disconnect from power source.
Broken cable or wire connecting
controller to fixture or wire
connecting fixture to fixture.
The power supply settings do
not match with local AC
voltage and frequency.
Make sure power is on and
cables are plugged in.
Dimming
failure
LED PAD will
not come on.
Probable cause(s) Possible fixes or
corrective maintenance
Repair or replace any
damaged cables if necessary.
Disconnect fixture from the
power supply. Check settings
and correct if necessary.
-04-
Designed by NANOLUX in California
Made in China
PATENTED PRODUCTS, COUNTERFEITING NOT ALLOWED.
a
f
c
d
e
b
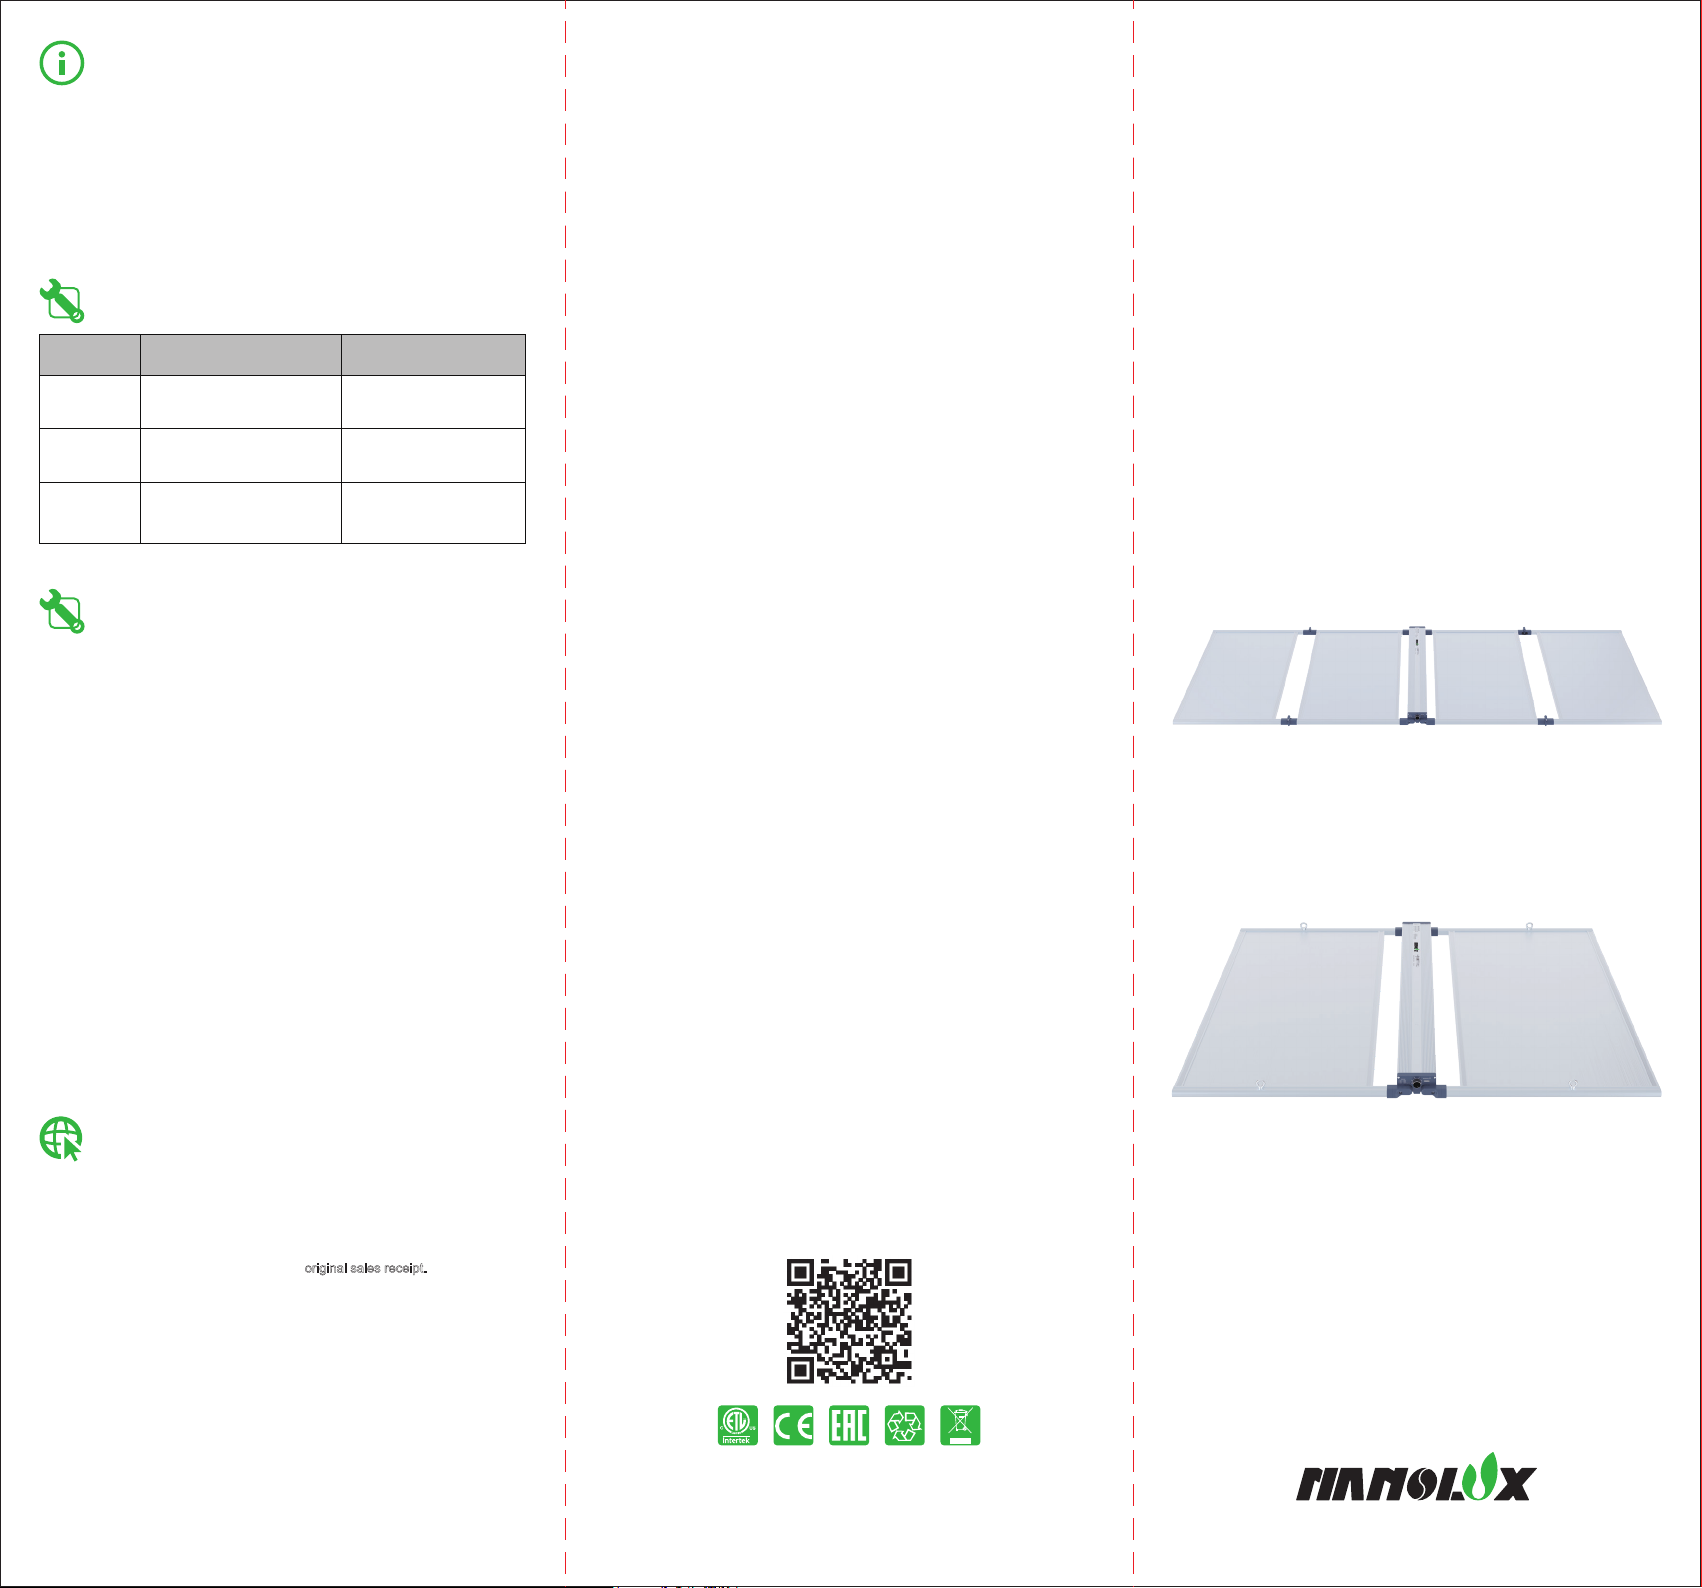
LED PAD720 Fixture Hanging
1. First take the fixture out of the packing.
2. Unfold the fixture (Fig.a) and place it on a sturdy and flat surface with the diode
array facing downward (Fig.b).
3. Attach the carabiners from the YO-RATCHETS to the ring bolts (Fig.b).
4. Hang the fixture in the required location. Make sure the fixture hanging is level.
LED PAD1200 Fixture Hanging
1. First take the fixture out of the packing.
2. Unfold half of the fixture (Fig.c) and place it on a sturdy and flat surface with the
middle diode array facing downward (Fig.d).
3. Attach the carabiners from the YO-RATCHETS to the ring bolts (Fig.d).
4. Hang the fixture in the required location. Make sure the fixture hanging is level.
5. Unfold the whole fixture (Fig.e) and make sure the fixture hanging is level (Fig.f).
TECHNICAL SPECIFICATIONS
ASSEMBLY INSTRUCTIONS
ABOUT PRODUCT
LED PAD1200 LED PAD720
AC120V-277V
1200W 720W
3480µmol/s 2090µmol/s
Full Spectrum
86.6x43.3x1.9inch / 44.3lbs
2200x1100x48mm / 20.1kgs
44.1x43.3x1.9inch / 24.7lbs
1120x1100x48mm / 11.2kgs
≧50,000hrs
1: 240W, 2: 400W,
3: 550W, 4: 720W,
5: 880W, 6: 1040W, 7: 1200W,
0: OFF/RTU&0-10V compatible
1: 140W, 2: 240W,
3: 330W, 4: 430W,
5: 530W, 6: 630W, 7: 720W,
0: OFF/RTU&0-10V compatible
120°
Lifetime
Model
Light Distribution
Dimming
Input Voltage
Input Frequency
Input Power
Light Output PPF
Spectrum
Dimension /
Weight
It is recommended that you keep a mounting height of 8”-20”(20cm-50cm) above
canopy for optimal light efficiency and uniformity. Growers should regularly monitor the
temperature at the canopy level to ensure the height of the fixture is appropriate, as
canopy temperature and ambient room temperature can differ.
CAUTION:
Don’t remove the protective cover to prevent damage to diode until installed.
PLEASE READ THESE INSTRUCTIONS
FIRST BEFORE INSTALLATION
Welcome to purchase and use this new Nanolux LED PAD. We have done everything
to ensure a product of long lifespan and safe operation, but the installation and use of
the product is at the responsibility of the user. Incorrect use or installation can lead to
failure and damage to the LED PAD. Damage to the LED PAD or electronic circuitry as
a result of incorrect installation or use will revoke your warranty. Read this manual
carefully before installing your LED PAD.
-02- -03-
* Subject to change without notice, Tolerance ±10%.
Ring Bolt
LED Driver
Box
Max 60 Units
Max 60 Units
LED
LED LED LED
LED LED
RTU input interfaceDimming Knob
NCCS-0-10V input/output interface
Input Plug
Efficacy 2.9µmol/J
50/60Hz
This model is compatible with NCCS-RTU/0-10V. When using the function, please
rotate the Dimming Knob to 0.
Insert telephone wire into the jack of the fixture and 0-10V Lighting Controller, and then
Dimming function on the LED PAD fixture is enabled.
● Maximum of 120 units can be controlled by 0-10V Lighting Controller.
● Simulate sunrise and sunset for dimming.
● Turn off the device automatically following the setting time and temperature.
In & Out jacks included on the fixture allows for multi-fixtures connected in parallel.
DIMMING FUNCTION
CAUTION:
After installation, verify installation was a success by cycling the lights on/off a few
times, by setting 'over temperature shut down' to a low value like 85°F, and rubbing the
temperature probe with your fingers, tricking the 0-10V Lighting controller/NCCS RTU
into an over temperature condition and shutting the lights off. Then leave the probe
alone, and after recommended 10-15 minutes the 0-10V Lighting controller/ NCCS
RTU should turn all the lights back on.
For detailed instructions, please refer to 0-10V Lighting Controller operating manual.
RTU is removed from the fixture during operation, the fixture will automatically turn off
after 10 seconds. If the RTU loses communication with the DTU for any reason, the
fixture will automatically turn off after 10 minutes. If the fixture continues to turn off for
any reason during operation with the RTU in NCCS mode, replace the RTU and
confirm it is communicating with the DTU.
For further NCCS RTU customer support and tech support pages, visit www.
nanoluxtech.com.
When using 0-10V Lighting controller, please insert 0-10V module control wire into the
RJ11 jack of a Nanolux fixture. If 0-10V Lighting controller loses communication with
fixture due to some type of errors, especially resulting from short circuit, fixture will
shut off automatically in 5 seconds. Fixture will turn back on if errors are fixed.

This manual suits for next models

1

Other NANOLUX Lantern manuals

NANOLUX LEDex F630 User manual

NANOLUX

NANOLUX LEDex F630 User manual

NANOLUX LEDex F110 User manual

NANOLUX

NANOLUX LEDex F110 User manual

NANOLUX LED PGF18 User manual

NANOLUX

NANOLUX LED PGF18 User manual

NANOLUX LED SN720 Pro User manual

NANOLUX

NANOLUX LED SN720 Pro User manual

Popular Lantern manuals by other brands

Intermatic Malibu LZ406SM instructions

Intermatic

Intermatic Malibu LZ406SM instructions

National Geographic 90-48500 operating instructions

National Geographic

National Geographic 90-48500 operating instructions

AS LED Lighting MidPower Line HML-057057 Mounting instructions

AS LED Lighting

AS LED Lighting MidPower Line HML-057057 Mounting instructions

ETC IRIDEON AR500 Disassembly instructions

ETC

ETC IRIDEON AR500 Disassembly instructions

rexlight Odin quick start guide

rexlight

rexlight Odin quick start guide

MPOWERD Luci Pro Series instruction manual

MPOWERD

MPOWERD Luci Pro Series instruction manual

Forest lighting FL-ALC-90WXXK-YYZZ Installation instructions manual

Forest lighting

Forest lighting FL-ALC-90WXXK-YYZZ Installation instructions manual

Larson Electronics RUL-10 instruction manual

Larson Electronics

Larson Electronics RUL-10 instruction manual

unios Evio EVIO0907 manual

unios

unios Evio EVIO0907 manual

Emos PROFI PLUS ZR1612 manual

Emos

Emos PROFI PLUS ZR1612 manual

Panasonic EY37C2 Service manual

Panasonic

Panasonic EY37C2 Service manual

LIVARNO home 398633 2107 Instructions for use

LIVARNO home

LIVARNO home 398633 2107 Instructions for use

Dorcy Camping Equipment owner's manual

Dorcy

Dorcy Camping Equipment owner's manual

Harbor Breeze PL125BK manual

Harbor Breeze

Harbor Breeze PL125BK manual

Thorn CIVITEQ Series installation instructions

Thorn

Thorn CIVITEQ Series installation instructions

WAGNER KYOTO manual

WAGNER

WAGNER KYOTO manual

StreamLight Super Siege operating instructions

StreamLight

StreamLight Super Siege operating instructions

RZB Leuchten TENUO instructions

RZB Leuchten

RZB Leuchten TENUO instructions

manuals.online logo
manuals.online logoBrands
  • About & Mission
  • Contact us
  • Privacy Policy
  • Terms and Conditions

Copyright 2025 Manuals.Online. All Rights Reserved.