6
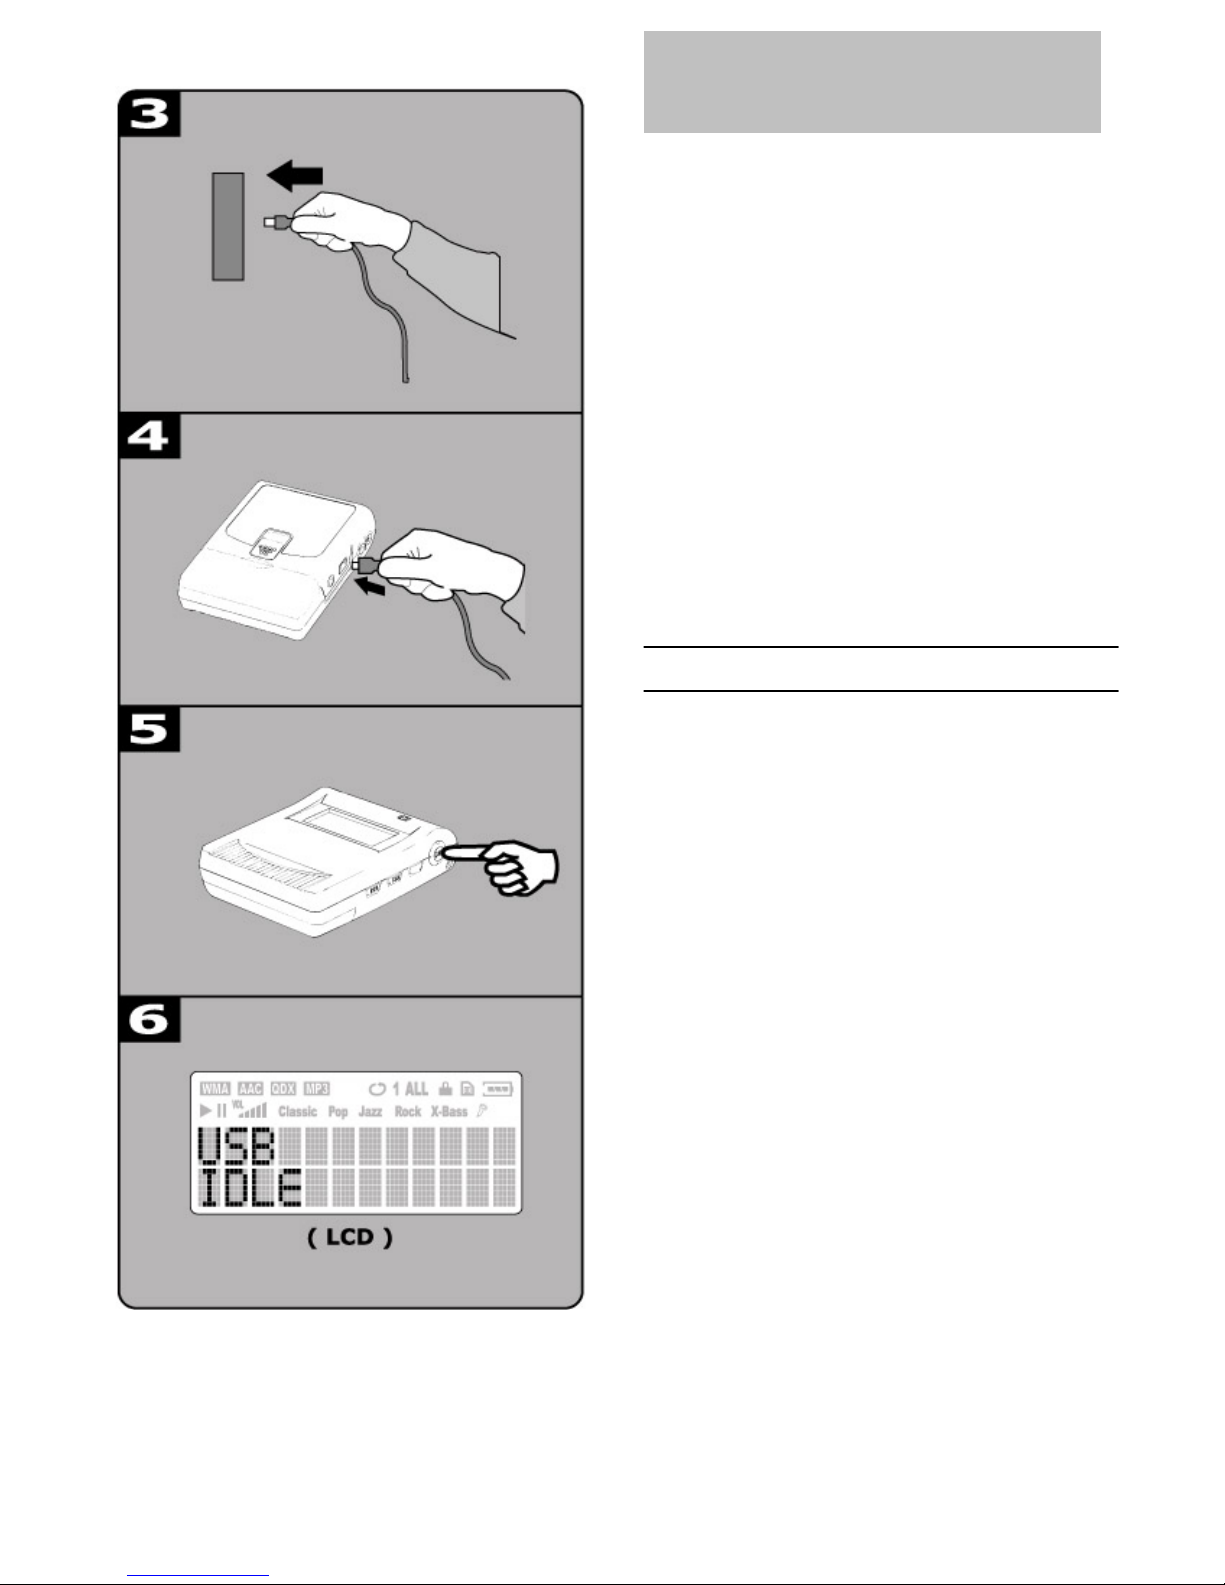
Before using the unit, MP3 music shall be download ed
from computer to the unit. Data files such as pictures,
documents or applications can also download and be
stored in the unit for a fast, safe and high speed mobile
data storage use.
Minimum System Requirement
Windows : Microsoft Windows 98, Windows
98SE, Windows Me!, Windows
2000 Professional and Windows
XP or above
Hardware : Pentium MMX 200 or above
30MB free hard disk space
One available USB port
4x CD-ROM or higher
Macintosh OS : MAC OS 9.2
Mac Hardware : 30MB free hard disk space
One available USB port
4x CD-ROM or higher
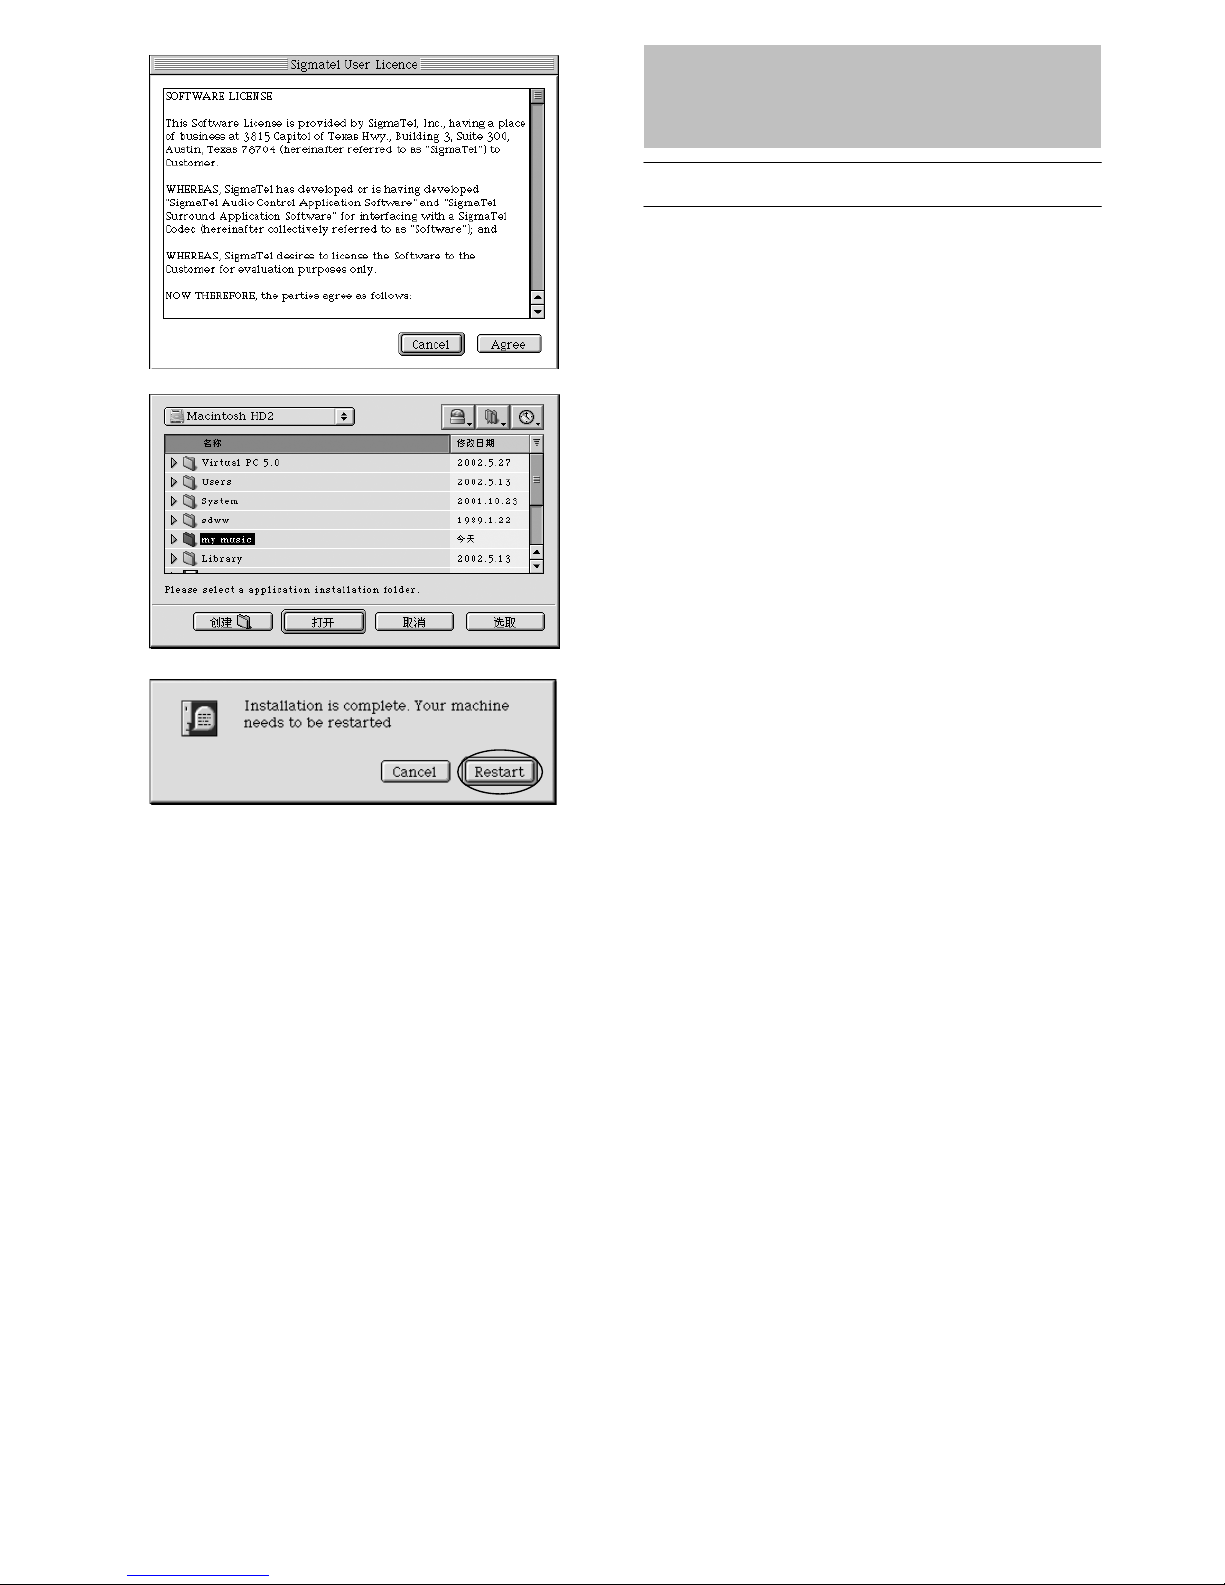
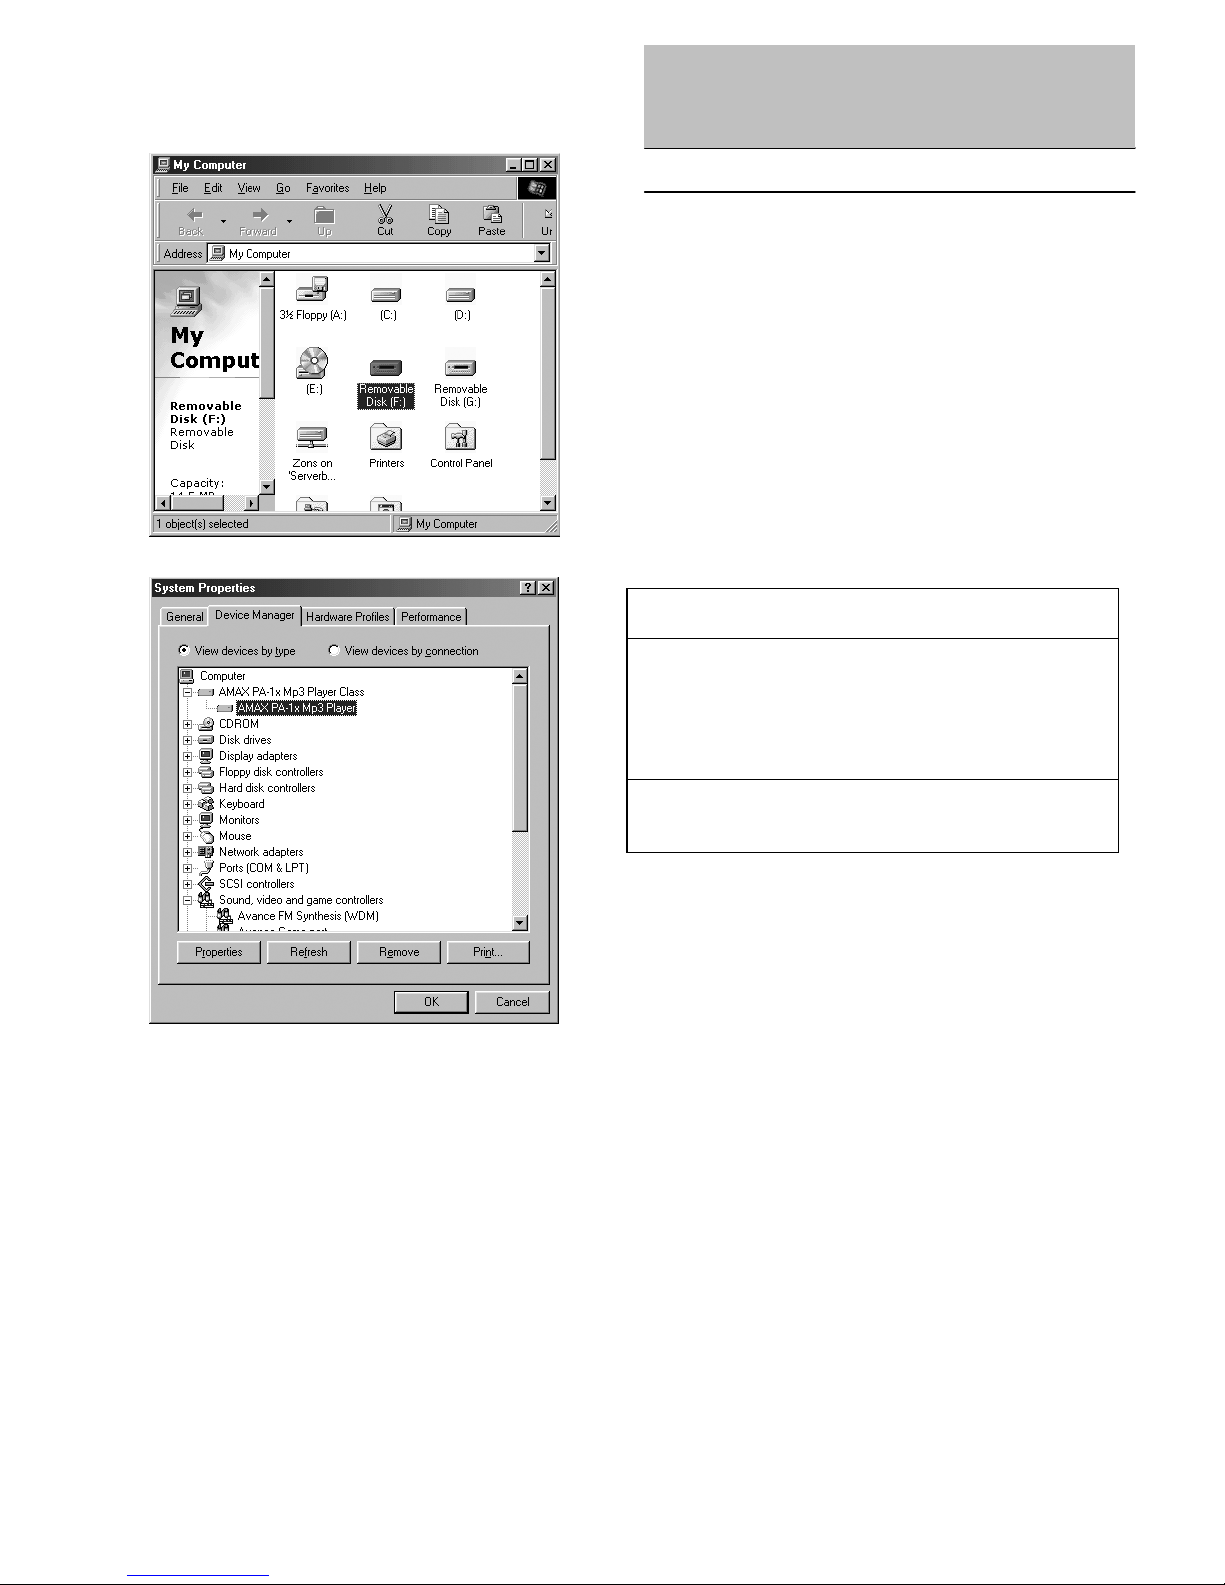
Install Software
1. Insert the Manual CD into the CD-ROM
driver. If theCD menu program does not
run automatically, do steps 2 through 3.
Otherwise, skip to step 4.
2. Click Start -> Run
3. In the Run dialog, type D:\ShowMenu.EXE
(where D:\ isyour CD-ROMdrive) and
click OK.
4. The CD menu screen will display.
Select PA11 from Product Model list. Click on [Set
up Driver] button. It is to setup the driver.
5. Follow the instructions on the screen.
Click on the Right Arrow button to start
Installation. Keep on clicking on the Right
Arrow or Yes button if want to install by
default (recommended). Otherwise please
change the options to install manually.
6. When prompted to restart your system, take
the Installation CD out from the CD-ROM
and keep it in a security place. Then select
the Yes, I want to restart my computer
now option and then click the Finish button.
(Continued on next page)
For Windows