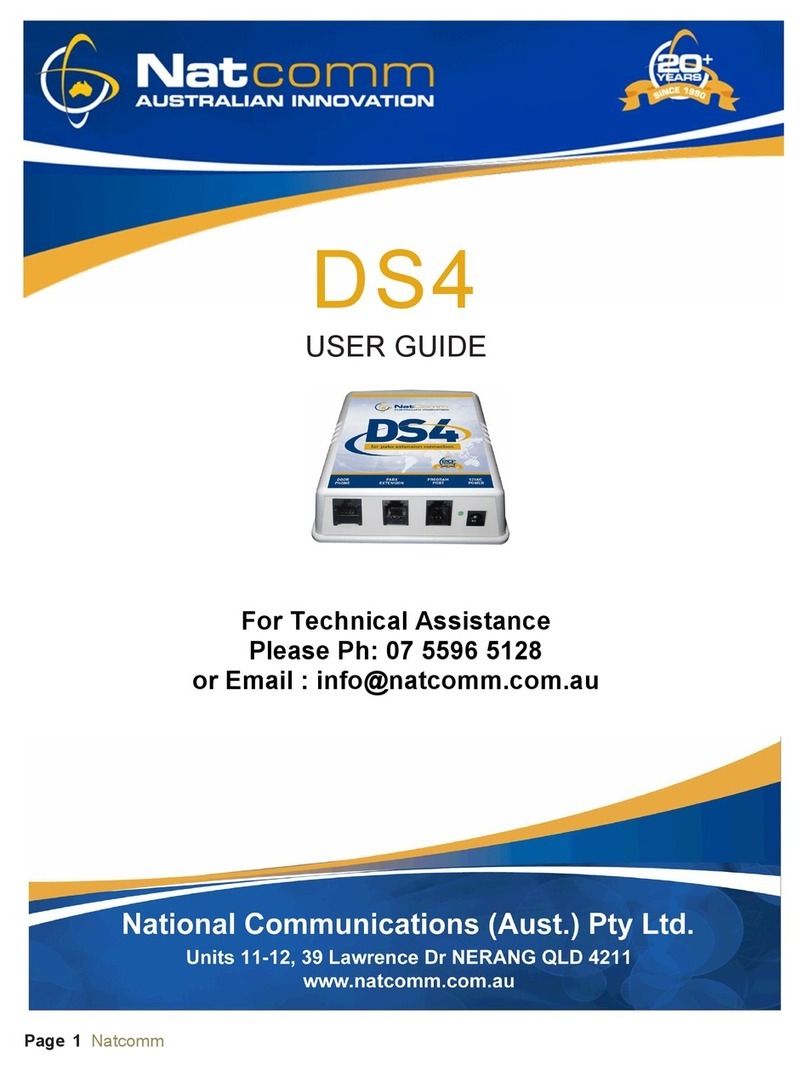
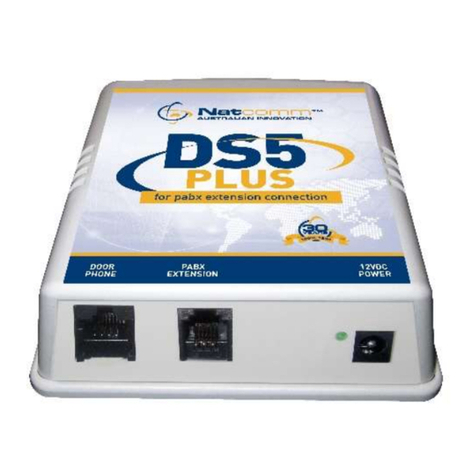
NatComm DS-SIP User manual

DS-SIP
USER GUIDE
For Technical Assistance
Please Ph: 07 5596 5128
or Email : info@natcomm.com.au

DESCRIPTION
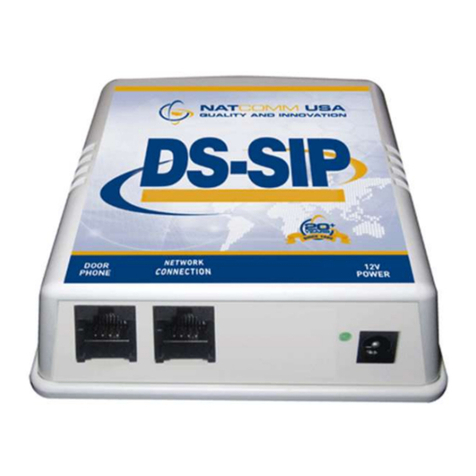
DS-SIP is a Door Station Controller designed to operate with Any NATCOMM
Door Phone Intercom (see page 3).
DS-SIP has a full Analog Telephone Adaptor (ATA) incorporated within its design.
The ATA should be set to ‘Hot Dial’ (called ‘Hot Line’) your desired PBX Extension
or Extension Group whenever it is triggered by an attached NATCOMM Door
Phone.
DS-SIP can be connected to ANY Point on a Local Area or Wide Area
Network, such as :
* Any Internal Network Point of a LAN
* Direct to a Network Switch
* Direct to a Network Modem used for LAN or WAN
Once connected, DS-SIP will connect to the Network via DHCP
A Windows based program (called Natcomm SIP Controller) is supplied for
your DS-SIP unit. This program is designed for use on PC running Windows 7
or later (on your same network). Install the program by double clicking the
supplied Program file. The program will install and a Natcomm Icon will be
installed on the desktop.
You will be emailed an FTP Link to download the DS-SIP setup program :
Natcomm_IP_Controller.exe
DS-SIP is supplied as a complete kit, ready for quick and easy installation by a
technician or an end user with some IT experience.
A connection box and a short CAT5 cable is supplied to connect DS-SIP to the
Door Phone Intercom and its Internal Relays to 1 or 2 Door LOCKS OR Gates.

DOOR PHONE RANGE
A choice of Four Door Phones is provided for use with our range of Door Station Controller units:
Model DP1 - SURFACE MOUNT
Molded plastic unit, designed for easy surface mounting
direct onto your wall surface.
Blue LED Night illumination. (100mm Wide, 133mm High, 32mm Depth).
Model DP2 - FLUSH MOUNT Compact Size
Marine Grade Stainless Steel face plate.
Touch Switch operation.
Available in Vertical (displayed) or Horizontal Orientation.
Blue LED Night illumination.
Optional Surface Mounting Kit is available.
(107mm Wide, 204mm High, 30mm (D).
Model DP3 - FLUSH MOUNT Standard Size
Marine Grade Stainless Steel face plate.
Fitted with a Sealed Perspex Camera Hole and rear Mounting Studs
to allow you to fit your own Camera.
Touch Switch operation. Vertical or Horizontal orientation.
Blue LED Night illumination.
Optional Surface Mounting Kit is available.
(130mm Wide, 264mm High, 37mm Depth).
Model DP5 - FLUSH MOUNT Standard Size
Fitted with intelligent Pedestrian Access Keypad.
Touch Switch operation with 99 User Codes.
Available in Vertical (displayed) or Horizontal Orientation
Marine Grade Stainless Steel Face plate.
Blue and White LED Night illumination.
Supplied with Wall Mount Box to assist installation.
Optional Surface Mounting Kit is available.
(130mm Wide, 264mm High, 30mm Depth).

DOOR PHONE COVERS
If your Door Phone is not under cover, a Strong Transparent DOOR PHONE COVER
is highly recommended to prevent water from gradually permeating through to the
electronics of the Door Phone. RRP is just $39.00.
Model DPC1 for DP1 Door Phone
Model DPC2 for DP2 Door Phones
Model DPC3 for DP3 and DP5 Door Phones
You can alternatively use one of our Surface Mounting Kits which provides a Rain
deflector. See below.
SURFACE MOUNTING KITS
Stainless Steel (304) Surface Mounting Kits are available for all Model DP2 to DP5
Door Phones, so that your Door Phone can be mounted onto a wall surface, rather
than into it.
Two separate surface mounting kits are available, to cater for the different sized DP2-
DP5 Door Phones:
Model SMK2 for DP2 Door Phones
Model SMK3 for DP3 and DP5 Door Phones

Natcomm Page 5
OPERATION
DS-SIP is designed for use with ANY IP or Cloud PBX System. It can connect to
ANY Network Point. The IP Address of DS-SIP is then set up as an Extension and
it can be called if required from Any Handset on the same PBX system.
A ‘Hot Dial Extension Address’ is then programmed in DS-SIP via its Administration
menu.
Then when a visitor at the door or gate presses the call button on your NATCOMM
Door Phone, DS-SIP will immediately go ‘Off Hook’ and Dial the Hot Dial Extension
Number. At the same time, DS-SIP will generate a ‘Ring Back’ tone to the Door
Phone Intercom so that the visitor hears that they are being connected.
A PBX user can then answer the Door Phone Intercom call and will be immediately
connected to the visitor so that they can communicate. Communication is Loud and
Clear. The Volume of the Door Phone can be increased or decreased via the
supplied program. The Hang Up tone detection circuit will automatically terminate
the Intercom call after the user hangs up
If you have a LOCK MECHANISM fitted, you can open a gate or door lock during a
call to allow your visitor to enter, by simply pressing * * on your telephone keypad.
LOCK RELAY 2
If you use the SECOND LOCK CONTROL FACILITY fitted, you can also open an
ALTERNATIVE gate or door lock during this call, by pressing * 2 on your
telephone. This command will release Gate Lock 2 until you Hang Up the
telephone.
Pressing *3 can also close the second internal relay and leave it closed.
Pressing *4 can also open the second internal relay and leave it open.
The SECOND LOCK RELAY option can alternatively be used to START and STOP
another Device such as a VIDEO CAMERA, DISPLAY MONITOR, RECORDER or
to TURN ON and then TURN OFF a 12V LIGHT or a 115V Light (if a separate
115V relay that is also supplied and installed by a technician or electrician).

Page 6 Natcomm
SIP INSTALLATION
A Windows based program (called Natcomm SIP Controller) is supplied for
your DS-SIP unit. This program is designed for use on PC running Windows 7
or later (on your same network). Install the program by double clicking the
supplied Program file. The program will install and a Natcomm Icon will be
installed on the desktop.
Connect DS-SIP to the Network
Using the supplied CAT5 cable connect the NETWORK port of DS-SIP to your
Internet Network, at a convenient Network Point or direct to a Switch or
Modem-Router. Connect the Supplied Power Adaptor and Switch the Power
ON.
Wait 1-2 minutes while DS-SIP ‘bots up’ and registers to your Network
Double Click the Icon to open the program. Once the program has loaded,
Click for IP Address
After a short delay, the
program will then display the IP
Address, Gateway Address
and Subnet Mask of DS-SIP.
The Password is : root
Enter the Password and then Click Login to Enter the Advanced
Settings area. This is where you can set up the SIP settings of the device.
SIP Parameter Setup
Refer to pages 17-20 for all SIP set up instructions).
A) Setting up the Extension Number
B) Setting Up a Username and Password
C) Setting Up the Network Server IP address
D) Changing from DHCP to Static IP
E) Changing the Speaker Volume of the Intercom connected to DS-SIP
F) Changing the Microphone Volume of the Intercom connected to DS-SIP
G) Load all Changes into the Internal ATA
H) Downloading the ATA User Guide for full ATA setting details.
5
4
(
1
2
3
4
5
6

Natcomm Page 7
CONNECTING THE DOOR PHONE
Our Door Phones all use a 4 Pin Phoenix Socket on the rear of the Door Phone for
Connection to ANY Natcomm Controller. A 4 Pin Phoenix Plug is supplied with all
Door Phones which allows 4 wires from the Door Phone to connect to the DS-SIP
Controller. A solid core cable should be used to interconnect the devices. Cat5
cable is ideal and will allow the units to be up to 300m apart without any loss of
performance.
Model DP1 DOOR PHONE
DP1 is designed to be mounted onto your wall surface. With DP1 this is done
by separating the Door Phone unit from the integral backing plate, secured by
a screw underneath the unit. The backing plate should then be screwed to the
wall surface, before re-attaching the Door Phone with the securing screw.
With DP1 this is done by separating the Door Phone unit from the integral
backing plate, secured by a screw underneath the unit. The backing plate
should then be screwed to the wall surface, before re-attaching the Door Phone
with the securing screw.
Model DP2-5 DOOR PHONES
Our DP2-DP5 are by default designed for Flush Mounting, or they can all be
Surface Mounted onto your wall surface using the appropriate Surface Mount
Kit (SMK). Wall Mount Screws are supplied with all units.
AUDIO & POWER CONNECTION
Audio Connection – The Centre 2 Pins of the Door Phone Socket are the Audio
Pair. They should connect to the 2 Pins either side of the Centre 2 pins of the 8 pin
RJ45 socket of DS-SIP (Pins 4 & 5). Polarity is not important.
If you plan to use the interface unit, then the terminals for the GREEN and RED
wires should be connected to the center 2 positions of the 4 position Phoenix Plug.
Power Connection – The Outer 2 Pins of the Door Phone Socket are the Power
Pair. They should connect to the 2 Pins either side of the Centre 2 pins of the 8 pin
RJ45 socket of DS-SIP (Pins 3 & 6). Polarity is not important.
If you plan to use the interface unit, then the terminals for the YELLOW and BLACK
wires should be connected to the outside positions of the 4 position Phoenix Plug.
The LED on the DOOR PHONE should turn ON (DS-SIP must be ON).

Page 8 Natcomm
LOCK CONTROL
DS-SIP is provided with TWO internally fitted relays which can be used to control
TWO LOCKS or ONE LOCK and ONE OTHER DEVICE such as a Video Camera,
Recorder or Light. Relay Specification - Dry Relay Contacts rated at 12V/1Amp.
Do not use the supplied DS-SIP Controller 12V plug pack to also provide 12V power for
the lock, as this may cause damage to DS-SIP. You must use a separate 12V source, with
a maximum rating of 12V/1A.
LOCK 1 RELAY FACILITY
To OPEN the Door/Gate Lock after answering a call from your DOOR PHONE you
need to press ** on your telephone. The lock will remain open for 15 seconds
(Default setting). It can be set from 01-99 secs.
Your Door/Gate Lock can also be OPENED at any time by calling the DS-SIP
Extension Number and pressing** . The Door/Gate Lock will remain UNLOCKED
for 15 seconds (can be 01-99 secs). You do not need to receive a call from the
Door Phone first.
LOCK 2 RELAY FACILITY
To OPEN the ALTERNATIVE Door/Gate Lock after answering a call from your
DOOR PHONE you need to press *2 on your telephone. The lock will remain open
until you HANG UP your telephone.
Your ALTERNATIVE Door/Gate Lock can also be OPENED at any time by picking
up any telephone and dialling *2. The Door/Gate Lock will be LOCKED as soon as
you hang up. You do not need to receive a call from the Door Phone first.
With the LOCK 2 facility, you can also call into DS-SIP, press *3 and then HANG
UP at any time, which will CLOSE the Internal Relay and leave it closed.
You can also call into DS-SIP, press *4 and then HANG UP at any time, which will
OPEN the Internal Relay and leave it open.

Natcomm Page 9
LOCK INSTALLATION
The contacts of each Internal relay of DS-SIP are accessed by the supplied
connection adaptor, which has 8 screw terminals.
Both DS-SIP Relays are Dry Contact Relays rated at 12V/1A. The polarity of the
Relay connection wires is not important.
Lock 1 should connect to the Brown and Orange terminals.
Lock 2 or Device 2 should connect to the Blue and White terminals.
NOTE- Do not use the supplied DS-SIP Controller 12V plug pack to also provide 12V power for the lock, as this may
cause damage to DS-SIP. You must use a separate 12V source, with a maximum rating of 12V/1A.

Page 10 Natcomm
BALANCE POT ADJUSTMENT
Your DOOR PHONE is preset at the factory for maximum performance.
Our sophisticated circuitry is designed to measure the background noise present at
your site and then apply maximum gain.
In almost all cases you SHOULD NOT NEED TO MAKE ANY ADJUSTMENTS.
If you are using Two Door Phones, it is possible that you will need to adjust the
POT of one or both Door Phones to suit your specific site conditions.
For Models DP2-DP5, a balance POT is provided in case you experience one of
the following:
Audio is distorted.
Audio (speech) can only be heard in 1 direction.
Should you encounter one of these problems, you will need to make slow careful
adjustments in one direction or the other until speech can be heard in both
directions and without distortion.
The balance POT is located on the back of DOOR PHONE under a small 3mm
removable black plastic plug. It should be adjusted using a small flat blade
screwdriver.
IMPORTANT NOTES
If you need to adjust the Pot
1)
You will require TWO PEOPLE to adjust your Door Phone Pot.
2)
Wait 10 seconds after answering before adjusting the Pot.
3)
DO NOT use a telephone in close proximity to the door phone, as
feedback interference will affect the Balance Pot settings.
NOTE : The Balance POT does not increase volume. Moving it when unnecessary may
cause deterioration in audio quality or a loss of audio in one direction.

Natcomm Page 11
CALL TERMINATION OPTIONS
DS-SIP has a Hang Up tone detector that will automatically terminate Intercom calls
when they are complete. However, there are also 2 other methods of Intercom Call
termination:
1. BY THE USER PRESSING ANY TOUCH TONE (0-9)
The person answering the Intercom Call can terminate the Intercom call by pressing
ANY Touch Tone number (0-9) on their telephone keypad at the completion of their
announcement.
Note : # and * cannot be used to terminate a call.
2. AFTER A FIXED PERIOD OF TIME
DS-SIP will terminate an Intercom call after a programmable length of time.
The default connection time for DS-SIP is : 99 seconds.
You can change the Maximum Page Call Duration for any period of time between
10-99 seconds in Programming Mode.
These are back-ups in case any of the above methods fails to take place.
DS-SIP Hang Up tone detection is very reliable and you are very unlikely to
need either above option. They are provided in case DS-SIP is exposed to
significant EMI Interference which could possibly affect Hang Up tone
detection.

Page 12 Natcomm
PROGRAMMING OPTIONS
DS-SIP Switch provides for Three User Programmable settings.
Allowable Range : 01 to 99
Default Setting is : 15 seconds
Allowable Range : 01 to 99
Default Setting is : 00 seconds
Relay 2 can be used in Two different ways :
Lock Operation - If you want to operate Relay 2 to control a Door or Gate
Lock using the command *2, you should leave the setting as 00 (The
Default)
Device Operation - If you want to operate Relay 2 to control another device
by Closing as soon as the Intercom is Triggered, then you should enter a
value of 01-99 in this area, this value is the time in seconds that the Relay will
remain closed AFTER HANG UP. This facility will allow you to for example to
control a Video Recorder and where the Video Recorder remains recording
for 01-99 seconds after Hang Up.
Relay 1 Closure Time
To Change from the Default Setting, in programming Mode,
Press : #1xx
Where xx = number of seconds and can be 01-99
For example, press #125 for 25 seconds
Relay 2 Operation
To Change from the Default Setting, in programming Mode,
Press : #2xx
Where xx = number of seconds and can be 01-99
For example, press #215 for 15 seconds

Natcomm Page 13
Allowable Range : 15 to 99
Default Setting is : 99 seconds
PROGRAMMING PROCEDURE
You can program 1 or more parameters, in any order, during the same programming
call. Should you need to program DS-SIP, please follow the procedure below :
1) Call the Extension Number to which DS-SIP switch is connected.
DS-SIP switch will Answer after 1 ring (you should hear 1 beep)
After the ‘beep’, press # # (you should hear 3 beeps)
(This will take you into program mode)
2) Change the settings as per the details on Pages 11-12.
You will hear a single beep after each correct entry
3) Hang Up when Programming is complete.
Maximum Call Time
To Change from the Default Setting, in programming Mode,
Press : #3xx
Where xx = number of seconds and can be 01-99
For example, press #345 for 45 seconds

Page 14 Natcomm
SIP Advanced Settings Menu
1. Enter Extension Number and Username and Password (if used)
2. Set the Hot Line Number
Go into the Phone 1 Menu
Enter Phone 1
Then Enter Your
Extension Number
User Name
Password
Set to Hot Line
and enter Number
Then Scroll Down to
the Bottom of the Page
and
Then You MUST Click
When complete
You MUST Click Reload
See Above
1
B
4
Save
A & B
2
3
4
3
2
A

Natcomm Page 15
Enter NETWORK SERVER IP ADDRESS
Go into the SIP Menu
A & B
Enter the SIP Menu
Enter Here Your
SIP Server IP Address
Make sure the
Send Registration Request
with Expire Time Is ticked.
It should only be unticked for a direct peer to
peer IP connection.
Then Scroll Down to
the Bottom of the Page
You MUST Click
1
2
3
4
Save SIP Settings
C
4

Page 16 Natcomm
Changing from DHCP to Static IP
Go into the Settings Menu
Enter Settings Menu
Deselect DHCP
Here
Enter Static IP Settings
Here
or Here
Scroll Down to the Bottom of
the Page
You MUST Then Click
1
2
3
4
Save and Reload
D

Natcomm Page 17
Changing Intercom Speaker and Microphone Volume
Go into the Localization Menu
E & F
Enter Localization Menu
Scroll Down until you reach
FXS Port (see Arrow below)
The Input port and Output port gain
are set by default at 0
You can Decrease the Gain down to -
12db or Increase the Gain up to 18db
For Speaker Volume, change the
Output Gain
For Microphone Volume, change the
Input Gain
Then Scroll Down to the
Bottom of the Page
You MUST then Click
If you do not need to
make any further
changes, go to Section G
and Reload. Otherwise
your changes will not be
effected.
1
2
3
save

Page 18 Natcomm
Now Reload to Effect Your Changes
Go into the Reload Menu
Downloading the ATA User Guide
Go into the Users Guide Menu
Leave the Default Setting Unchanged
‘Reset and execute Main Application’
Now Click
There will be a short delay
while the ATA resets itself
Reset
Select the Users Guide Menu
A PDF User Guide will then download
to your PC
G
H

Natcomm Page 19
NOTES

Page 20 Natcomm
SPECIFICATIONS
Dimensions (inches) : 4.2 (W) x 4.2 (D) x 1.7 (H)
Dimensions (mm) : 106 (W) x 106 (D) x 43 (H)
Weight : 6 ounce or 170g
Power Supply : 12VDC/1A minimum
(Centre +ve only)
Network Connector : RJ 45 8 pin
Intercom Port Connector : RJ 45 8 pin (4 center)
Power Connector : 2.5mm barrel connector
FCC & IC COMPLIANT : Supplier Number NC
WARRANTY
This device is guaranteed against defects from workmanship for a period
of two years (24 months) from the date of purchase.
In the event of a problem, please call ph (07) 5596 5128 for assistance
and if necessary, a Return Authorization. You should then return your
unit, along with the proof of purchase date, and a written statement
about the nature of the problem.
The Manufacturers obligation is solely to repair or replace the product.
The product may be replaced at the discretion of the Manufacturer. The
warrantor is not liable for any incidental or consequential damages due
to such defects.
This Warranty shall not apply to any unit which has been subject to
alteration, modification, abuse, negligence, accident, external voltage/
lightning surge, excessive water exposure or used in any manner
contrary to these instructions.
The user is responsible for freight costs to the repair point. The
warrantor will be responsible for freight costs in returning this unit back
to the user.
Damage caused to this device or attached equipment by lightning
strikes, over voltage surge or excessive water is not covered under this
warranty.
THE CASE IS SEALED AT THE FACTORY.
OPENING THE CASE WILL VOID THE WARRANTY.
Other manuals for DS-SIP
1
Table of contents
Other NatComm Controllers manuals