NELSEN WATER NWTS Assembly instructions

1", 1-1/4", 1-1/2", 2" & Twin Control Valves
NWTS Homeowners Guide


11
Table of Contents
Bypass Operation .................................................................................................................................................................................................................... 1
Button Operation & Function....................................................................................................................................................................................... 1
Setting Time of Day............................................................................................................................................................................................................... 2
User Displays................................................................................................................................................................................................................................ 2
Regeneration & Error Screens.................................................................................................................................................................................... 2
NWTS Water Treatment Systems.......................................................................................................................................................................... 3
Water Softener Maintenance...................................................................................................................................................................................... 4 - 5
Error Codes..................................................................................................................................................................................................................................... 6
Troubleshooting......................................................................................................................................................................................................................... 7 - 8
Warranty............................................................................................................................................................................................................................................. 9
ByPass Operation
Normal Operation
Treated Out Untreated In
Bypass Operation
Untreated Out Untreated In
To shut off water to the system, please position
arrow handles as shown in the bypass operation
diagram to the right. If your valve doesn’t look like
the diagram, contact your service technician for
instructions on how to shut off water.
Button Operation and Function
Scrolls to the next display.
Pressing once and releasing will schedule
a regeneration at the preset delayed
regeneration time.
Pressing again and releasing will cancel the
regeneration.
Pressing and holding for 3 seconds will initiate an
immediate regeneration
Pressing while in regeneration will advance to the
next cycle.
Pressing in the program levels will go backwards to
the previous screen.
Changes variable being displayed.
Holding for 3 seconds initiates a control
reset. The software version is displayed
and the piston returns to the home/
service position re-synchronizing the valve.
Used with a twin valve, 1.0
, holding for
at least 3 seconds causes a switch in
the tank in Service without cycling the
regeneration valve. After tank switch, days remaining
and capacity remaining status is retained for each
tank until the next regeneration.
CLOCK NEXT UP DOWN
REGEN
CLOCK
NEXT
UP DOWN REGEN
CLOCK NEXT
UP
DOWN REGEN
CLOCK
NEXT
UP DOWN REGEN
CLOCK
NEXT UP DOWN REGEN
CLOCK NEXT UP
DOWN
REGEN
CLOCK NEXT UP DOWN
REGEN
CLOCK NEXT
UP
DOWN REGEN
Button Operation & Functions

22
Push NEXT until time of day
screen is displayed. Press
and hold CLOCK until
SET TIME is displayed and
the hour flashes once. Press
por quntil the correct
hour is displayed.
Then press NEXT. The
minutes will flash.
Press por quntil the
correct minute is displayed.
Press NEXT to return to the
Displays. Time of day should
only need to be set after
power outages lasting more
than 8 hours, if the battery
has been depleted and a
power outage occurs, or when daylight savings time
begins or ends. If a power outage lasting more than
8 hours occurs, the time of day will flash on and off
which indicates the time of day should be reset. If a
power outage lasts less than 8 hours and the time
of day flashes on and off, the time of day should be
reset and the battery replaced.
Setting Time of Day
CLOCK NEXT UP DOWN REGEN
TIMESET
AM
CLOCK NEXT UP DOWN REGEN
TIMESET
AM
When the system is operating, one of five displays
may be shown. Pressing NEXT will alternate
between the displays shown below.
User 1
Typical user display. Shows
Time of Day.
Softening, Filtering and
Regen Today may be active
in all user displays.
User 2
Shows volume remaining
to regeneration. This screen
will not be viewed if the
control is set for time-clock
operation.
User 3
Displays number of days
to next regeneration.
Not shown with metered
regeneration.
User Displays
CLOCK NEXT UP DOWN REGEN
TIMESET
FILTERING
NORMAL
MIN
x1000
NOR
BACKWASH
AM
CLOCK NEXT UP DOWN REGEN
SET
SOFTENING
FILTERING
REGEN
TODAY
NORMAL
MIN
x1000
NOR
CAPACITY
BACKWASH
REMAINING
GAL
CLOCK NEXT UP DOWN REGEN
SET
FILTERING
DAY
NORMAL
MIN
x1000
NOR
BACKWASH
REMAINING
User 4
Flow Rate. Displays present
flow rate. Not viewed
(along with SOFTENING
or FILTERING Icon) if
ALT A or ALT b is set in
CONFIGURATION 4 and the valve is currently in
Standby. When 1.0
is set in CONFIGURATION 1, the
display will indicate the tank currently in Service (“A”
or “b”) in the left most digit.
User 5
Displays total volume in
gallons since last reset. If
a meter is not used, this
display will be shown but 0
will be displayed.
PRESS qFOR 3 SECONDS TO RESET TO 0.
CLOCK NEXT UP DOWN REGEN
SET
SOFTENING
FILTERING
NORMAL
MIN
x1000
NOR
BACKWASH
GAL
CLOCK NEXT UP DOWN REGEN
SET
FILTERING
NORMAL
x1000
BACKWASH
GAL
Regen Screen
Displays the time remaining
in the current cycle.
Pressing REGEN advances
to the next cycle.
Error Screen
Alternated flashing Err and error code every 3
seconds. Clear by disconnecting the power supply at
the PC board and reconnecting or press NEXT and
REGEN simultaneously for 3 seconds.
In Alternator Systems
when a unit is waiting to
initiate the first cycle step of
regeneration, “REGEN Pndg”
is displayed.
“STbY” is displayed in
Alternator Systems when a
valve is in Standby state.
“REGEN Pndg RINSE FILL” is
displayed whenever a zero-
capacity tank has transferred to an off-line state and
is currently waiting to initiate the second portion of a
regeneration cycle. Viewed only when Delayed Rinse
and Fill is set to ON.
Regen & Error Screens
TIME
REGEN MIN
BACKWASH
REMAINING
REGEN
REGEN
FILL RINSE
Alternate

33
NWTS Water Treatment Systems
Control Valve
Air Pocket
Media
Support Bed
Filter Media
Distributor Tube
Basket Distributor
Brine
Tank
Control Valve
Softener Tank
Safety
Brine
Valve
Air Check
Ion Exchange
Resin
Distributor Tube
Basket
Distributor
Single Tank Softener
Air Injection Oxidation (AIO) Filter System
Control Valve
Softener Tank
Safety
Brine
Valve
Air Check
Ion Exchange
Resin
Distributor Tube
Basket
Distributor
Brine Tank
Twin Tank Softener

44
Maintenance of Your Conditioner
Salt: Salt is vital to your system working correctly.
Not only must a softener have salt, but it should be
the proper type to insure efficient recharging of the
unit. Ask your dealer what type of salt may best suit
your needs. Always have an adequate supply of salt
on hand. Check the salt level of your brine tank every
couple of weeks initially to determine how much
salt you use - this will depend on how much water
you use. As a rule of thumb, with 20 gpg hard water,
about a 1/2 lb. of salt per person per day is used. In
other words, a family of four uses 60 lbs. of salt a
month. Fill the tank approximately three-fourths full,
with a minimum of 12" of salt. If your household does
not use much water, do not fill your
salt keeper over 1/2 full, salt bridging may occur in
the brine tank. This may result in hard water due to
ineffective regeneration. DO NOT USE Block Salt.
Block salt does not dissolve quickly enough to
provide a good regeneration.
Cleaning Salt Tank: The salt tank may require periodic
cleaning. Inspect the salt tank at least once a year for
buildup of insoluble materials. It is recommended to
periodically clean the salt tank no matter what kind
of salt you are using. REMEMBER: Salt is the fuel to
run your water conditioner. Buy the best clean salt
available.
Operating Conditions
Your water conditioner has been designed to
adequately handle up to 100 grains per gallon
of hardness as well as up to 2 ppm of ferrous
bicarbonate iron. This is iron that is dissolved in
water and not visible to the eye in a freshly drawn
sample. After standing in contact with air, the ferrous
iron will become oxidized to the ferric state and start
to precipitate as a reddish brown floc. It can be seen
and may cause discolored water. In order for your
softener to remove the iron, air (oxygen) must be
kept from coming in contact with water until after it
has been passed through the water conditioner. In
some cases, additional equipment may be required
to treat water supplies having special characteristics,
such as: ferric hydroxide iron, iron bacteria, low pH,
taste and odors, etc. If any question should exist,
contact your dealer.
This water softener is not intended to be used for
treating water that is microbiologically unsafe or of
unknown qual-ity without adequate disinfection before
or after treatment.
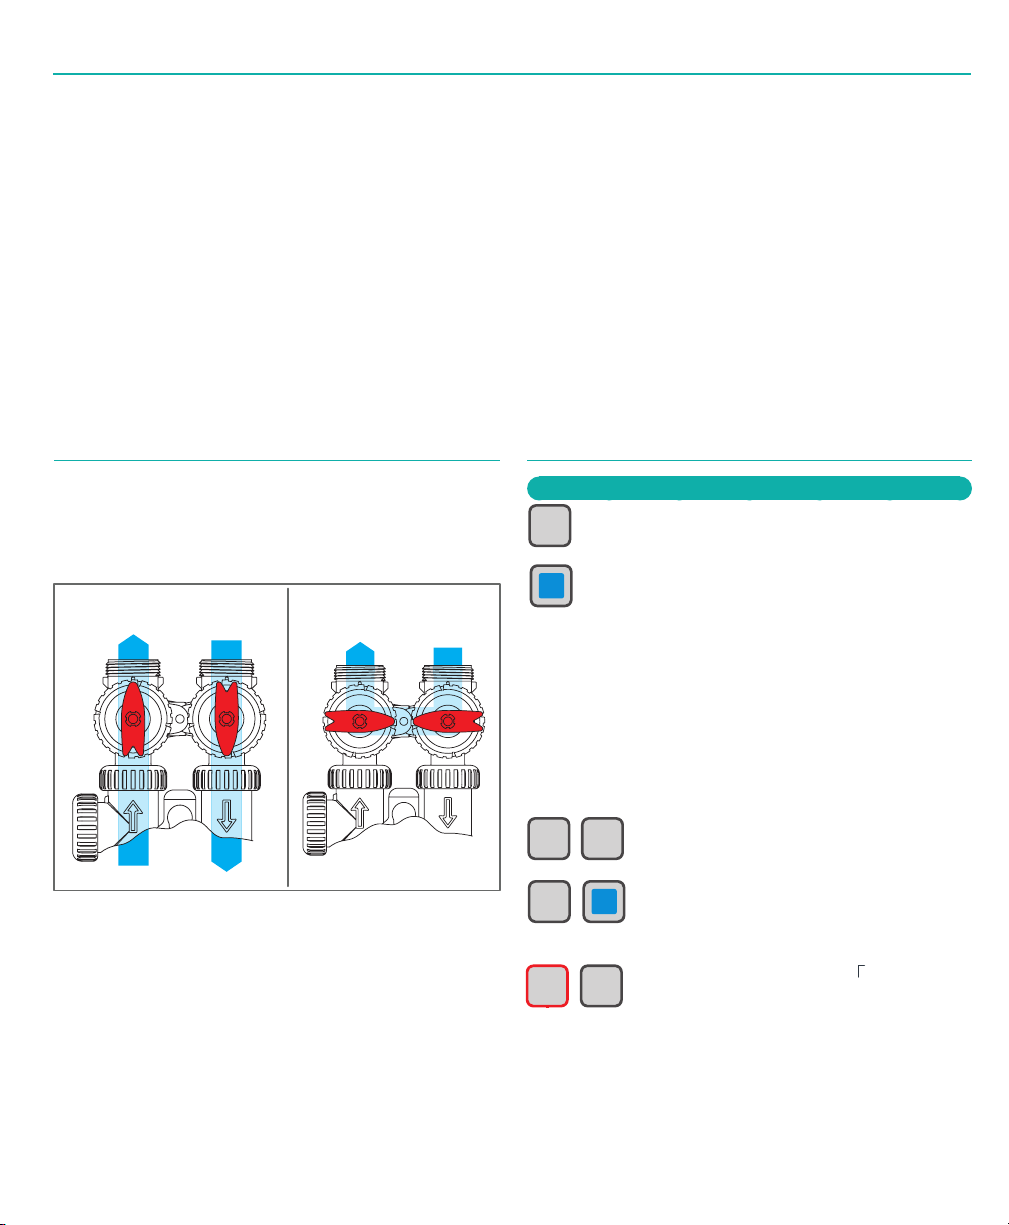
Water Conditioner Draining Procedure
In cold weather climates it is common for plumbing
systems that are not in use to be “winterized“ or
drained of all water to prevent any damage that may
be caused by the excessive expansion of water when
it freezes. To prevent damage to a water softener
it must be properly drained also. A simple way to
properly drain or winterize a water softener is to use
compressed air to force all of the water out of the
softener mineral tank. The following procedure will
explain the process:
1) Initiate the softener into a manual regeneration
cycle. After the refill cycle, advance control to
backwash and allow it to complete the backwash
cycle (this will clean the media) and start into
the brine-draw cycle. Allow the regeneration to
continue in the brine draw cycle until the brine is
drawn out of the salt tank and the air check at the
bottom of the brine pick-up tube shuts off. This
should be done with each tank. NOTE: Be sure
you have salt in the brine tank and allow 1 hour
minimum to make a saturated brine. It is important
that any liquid left in the softener tank when you
finished blowing out system be saturated brine
solution to prevent any damage to the softener.
At this time no more brine is introduced into the
softener and the slow rinse process begins.
2) Turn the water supply inlet and outlet valves off to
the water softener as soon as the air check shuts off
and no more brine is being drawn into the softener
(at the beginning of the slow rinse process).
3) Unplug the electric power leaving the softener
control valve in the brine draw cycle.
4) Remove the brine refill elbow assembly from
the control valve. Remove the refill flow control
retainer assembly from the elbow. Reinstall the
elbow assembly and secure with the locking clip.
Disconnect the brine tube at the top of the salt keeper
and force air into the brine tube toward the softener
mineral tank and control valve. The air will force the
brine/water solution that was drawn into the mineral
tank out to drain through the control valve drain
line. (An air compressor blow gun attachment with
a portable air compressor works well.) Reinstall
the brine line flow control retainer inside of the refill
elbow assembly. Reinstall the brine refill elbow
assembly and secure with locking clip.
CAUTION: You do not want to apply any more
pressure than necessary to force the brine/water out
of the mineral tank.
Water Softener Maintenance

55
Water Softener Maintenance
The small amount of brine/water that may be left in
the mineral tank will not expand enough to cause any
damage to the softener when it freezes.
If your softener is equipped with an optional bottom
drain on the mineral tank, you will have to follow
all of the same procedures with the exception of
the need for compressed air. With the brine tube
disconnected from the salt keeper, raise it to a level
above the softener control valve and temporarily
secure it in this position. Now open the drain valve
at the bottom of the mineral tank and allow all brine/
water to drain from the mineral tank.
CAUTION: If a hose is connected to the drain valve
to direct the brine/water to a floor drain be sure it
runs downward and is unobstructed. When brine/
water quits running at the drain, be sure to leave
the drain valve open until you start the system up
again.
5) At this time the salt keeper has very little water
left in it. What liquid is left in the salt keeper is
saturated brine, provided that there is still salt left
in the tank. Saturated brine will not freeze solid
and cause any damage and does not have to be
drained any further from the brine tank.
If there is no salt left in the salt keeper when the
system is drained we recommend dumping all
of the water out of the brine tank at this time.
See brine tank cleaning instructions. (#2 in
Miscellaneous section, below)
6) CAUTION: It is important at this time to be
assured that the inlet/outlet water supply piping
is properly drained. Depending on how the water
supply piping was routed to the water softener
control valve, a water loop or trap may have been
created. Sometimes drain valve(s) are installed
at the bottom of the loop to assure all water
can be drained out. If not it may be necessary
to disconnect the control valve from the piping
system and open the inlet/outlet valve(s) to allow
all the water to drain from the piping. This should
be done after the rest of the plumbing system is
drained.
7) Draining or winterizing of your softener is
complete.
MISCELLANEOUS
1. Salt Usage: See your water conditioning
professional for a recommendation on the best
type of salt for your application.
2. Brine Tank Cleaning:
a. Remove brine tank cover.
b. Scoop out as much old salt as possible.
c. Disconnect brine tubing from safety brine valve
at brine well.
d. Remove safety brine valve from brine well.
e. Place one hand in brine well to hold overflow nut
and remove 2-piece overflow.
f. Remove brine well and optional grid plate, if
used, from brine tank.
g. Remove any remaining salt and/or impurities
from brine tank.
h. Using clean water and a brush or rag, wipe and
rinse inside of brine tank. Wipe and rinse the grid
plate and brine well.
i. Reassemble brine tank reversing steps c - f.
Note: If grid plate is used and it is damaged or
cracked, replace with new one.
j. Put brine tank in place making sure there is no
debris or foreign material beneath it.
k. Reconnect brine tubing to safety brine valve.
l. Manually add 6 inches of water to the brine tank
(or to approximately 1” above the grid plate, if
used).
m. Add new salt.
Important: Do not add the old salt which
was removed earlier unless it is clean and not
mushy. We recommend using new salt.
n. Follow the disinfection instructions found at top
of page.
o. Put on brine tank cover.

66
Error Codes
101 Unable to start = Valve not sensing valve movement with motor output energized
102 Motor Stalled = Valve unable to find next cycle postion (stalled)
103 Motor ran too long = Valve unable to find next cycle position
104 Valve Homing = Valve unable to find Home position.
106 Alt MAV ran too long = Alt MAV motor ran to long - unable to find proper park position
107 Alt MAV Stalled = Alt MAV motor ran to short, stalled - unable to find proper park position
109 Invalid motor state = Control can no longer operate properly due to the detection of an invalid motor
state
201 Invalid regen step = Control can no longer operate properly due to the detection of an invalid
regerneration cycle step - Internal Software Error
202 Unexpected Stall = Motor encountered a unexpectetd stall which it was able to recover from and
proceed normally
402 Power Down Memory = Control can no longer operate properly due to a check sum error for the
Operational Data and Status Section of E2PROM memory
403 Program Memory = Control can no longer operate properly due to a check sum error for the
Programming Section of E2PROM memory
404 Diagnostic Memory = Control can no longer operate properly due to a check sum error for the
Diagnostic Section of E2PROM memory
405 History Memory = Control continues to operate normally w/check sum error for the History Section of
E2PROM memory, however error is recorded in Error Log
406 Contact Memory = Control can no longer operate properly due to a check sum error for the Contact
Screen Section of E2PROM memory
407 Status Ram = Control can no longer operate properly due to corrupted data detected in the
Operational Data and Status Section of RAM memory. Once generated, the Error Mode is not entered
nor an error display viewed, instead previously stored data (<6h
408 Diagnostic RAM = Control can no longer operate properly due to corrupted data contained in the
Diagnostic Section of RAM memory. Once generated, the Error Mode is not entered nor an error
display viewed, instead previously stored data (<6 Hours old) is u
410 Config Download = Configurator file downloaded to the control was not originally uploaded from
another control with the identical software revision

77
1. Control valve stalled in regeneration A. Motor not operating A. Replace Motor
B. No electric power at outlet B. Repair outlet or use working outlet
C. Defective transformer C. Replace transformer
D. Defective PC board D. Replace PC board
E. Broken drive gear or drive cap assembly E. Replace drive gear or drive cap assembly
F. Broken piston retainer F. Replace drive cap assembly
G. Broken main or regenerant piston G. Replace main or regenerant piston
2. Control valve does not regenerate A. Transformer unplugged A. Connect transformer
automatically when REGEN button B. No electric power at outlet B. Repair outlet or use working outlet
is depressed and held C. Broken drive gear or drive cap assembly C. Replace drive gear or drive cap assembly
D. Defective PC board D. Replace PC board
3. Control valve does not regenerate A. Bypass valve in bypass position A. Put control valve in service position
automatically but does when B. Meter connection disconnected B. Connect meter to PC board
REGEN button is depressed C. Restricted/stalled meter turbine C. Remove meter and check for free rotation
or foreign matter
D. Programming error D. Check control valve set-up procedure
E. Defective meter E. Replace meter
F. Defective PC board F. Replace PC board
4. Time of day flashes on and off A. Battery back-up maintains time-of-day up A. Reset time of day and replace battery on PC Board
to 2 years in event of power outage and (Lithium coin type battery 2032)
battery is not depleted. Time of day flashes
when battery is depleted.
B. Prior to 2/2007, PC board did not have B. Reset time of day.
battery back-up - capacitor held time of day
up to 2 hours. Power outage > 2 hours.
5. Softener delivers hard water. A. Bypass valve is open or faulty. A. Close bypass valve or replace.
B. No salt or low salt level in brine tank. B. Add salt to brine tank and maintain salt level
above water level.
C. Softener fails to draw brine. C. See problem #10.
D. Excessive water usage. D. Check gallon capacity settings.
E. Insufficient brine level in brine tank. E. Check brine refill setting and refill flow restrictor
for blockage.
F. Resin level inadequate. F. See problem #7.
G. Meter faulty. G. Test meter and clean or replace meter.
H. Raw water hardness fluctuation. H. Test raw water hardness and adjust settings to
highest known hardness.
6. Unit uses too much salt. A. Improper brine refill setting. A. Check brine refill setting for proper salt dosage
B. Improper settings. B. Check water hardness and reevaluate capacity
setting specification
C. Excessive water in brine tank. C. See problem #9.
D. Leaking faucets, toilets, etc... D. Repair or replace those items.
E. Brine line flow control out of place E. Replace Brine line flow control.
7. Loss of resin. A. Backwash controller missing. A. Install backwash controller.
B. Faulty distributor tube assembly. B. Check distributor tube assembly for cracks or holes.
C. Air being drawn in through brine system. C. Check for leaks in brine lines, fittings, or air check.
Repair or replace.
D. Air in water supply system D. 1. Install upper distributor if missing.
2. Ensure that water supply system has an air
eliminator.
8. Softener delivers salty water. A. Low water pressure. A. Check incoming water pressure - Must remain at
minimum of 25 psi.
B. Excessive water in brine tank. B. See problem #9.
C. Wrong size injector. C. Install correct injector.
9. Excessive water in brine tank. A. Plugged injector. A. Remove injector and clean ports.
B. Faulty piston/seal assembly. B. Replace piston/seal assembly.
C. Plugged or kinked drain line. C. Correct any kinking or plugging of drain line.
D. Backwash flow controller closed off. D. Check backwash flow controller.
E. Defective brine line flow control. E. Replace brine refill flow control.
Troubleshooting

88
10. Softener fails to draw brine. A. Injector is plugged, absent/missing oring(s) A. Remove injector and clean ports/replace if necessary
B. Faulty piston assembly B. Check piston assembly
C. Brine line connection leak C. Inspect brine line during refill cycle for leaks.
D.
Drain line plugged creating excess back pressure
D. Inspect drain line for blockage
E. Drain line too long or too high E. Refer to drain line specifications
F. Low inlet pressure F. Increase inlet pressure to a minimum of 25 psi
11. Continuous flow to drain. A. Piston assembly failure. A. Replace piston assembly
B. Motor failure. B. Replace motor
C. Circuit board failure. C. Replace circuit board
12. Loss of water pressure. A. Iron build-up in resin. A. See problem #13
B. Resin bed fouled with sand or sediment. B. Re-bed softener and install sediment filter ahead
of softener
C. Resin bed mushing due to high amount C. Re-bed softener. Install dechlorination system ahead
of oxidizers in water supply (chlorine) of softener
13. Iron in softened water. A. Iron has fouled resin bed. A. Use iron reducing resin cleaner to clean resin bed,
and increase salt dosage or regenerate more
frequently or re-bed softener. Install an Iron System
ahead of the softener.
B. Iron is not in a soluble state. B. Test water to determine type of iron, install iron
reduction system.
C. Prefilter failure. C. Check prefilter.
D. Iron level excessive. D. Install iron reduction system.
E. Control fails to regenerate. E. See problem #3.
14. Absent or incomplete LED display A. Transformer unplugged A. Plug transformer into uninterrupted outlet
B. No electric power at outlet B. Repair outlet or use working outlet
C. Defective transformer C. Replace transformer
D. Battery < 3 volts D. Replace 2032 battery
E. Defective PC board E. Replace PC board
15. Control does not display correct A. Power outage > 2 years A. Reset time of day time of day
B. Power outage < 2 years, time of day flashing B. Replace lithium coin type battery on circuit board
battery depleted Model 2032 battery
16. No “softening” or “filtering” display A. Bypass valve in bypass position A. Put bypass valve in service position
when water is flowing
B. Meter connection disconnected B. Connect meter to PC board
C. Restricted/stalled meter turbine C. Remove meter and check for free rotation, clean
foreign material
D. Defective meter D. Replace meter
E. Defective PC board E. Replace PC board
17. Control valve regenerates at A. Twin Alternating softener can regenerate wrong time of day at any time
18. Relay does not energize
a. Relay driver programmed on "Time" A. Programmed incorrectly A. Reprogram
B. Defective relay, See figure below B. Replace Relay
C. Defective PC Board C. Replace PC Board
D. Faulty wire connections between D. Check and repair wire connections
PC board and relay
b. Relay driver programmed on "Gallons" A. Programmed incorrectly A. Reprogram
B. Faulty meter connection B. Repair or replace meter assembly
C. Defective relay, See figure below C. Replace Relay
D. Defective PC Board D. Replace PC Board
E. Faulty wire connections between E. Check and repair wire connections
PC board and relay
19. Relay energized during regeneration A. Relay programmed as "on REGEN gallons" A. Reprogram
Troubleshooting

99
Water Conditioner
Limited Warranty
We warrant this water conditioner, when installed according to factory recommendations, to be free from
defects in materials and workmanship as follows:
Limited Warranty
This water conditioner unit is assembled from the finest industry components available. Each individual
component used in the assembly of our equipment is covered by the original equipment manufacturer’s
warranty. All components, except those specifically listed below, are warranted for a period of one (1) year
from date of installation to the original purchaser to be free of defects in materials and workmanship subject to
the manufacturer’s conditions and/or the conditions shown below.
Mineral Tanks
The fiberglass, polyglass or composite mineral tanks used in the assembly of this unit are warranted to be free
of defects in materials and workmanship for a period of ten (10) years on 6" - 13" size tanks, and five (5) years
on 14" and larger size tanks used for softener/filtration applications, subject to the original manufacturer’s
conditions and/or the conditions shown below. Warranty does not cover sandblasting of tank caused by faulty
distribution systems, fractures caused by external impact and exposure to vacuum.
Control Valves
The NWTS Series control valve (if used in the assembly of the unit) is warranted to be free of defects in
materials and workmanship for a period of five (5) years subject to the original manufacturer’s conditions and/
or the additional conditions shown below.
Conditions
1. This warranty only covers water conditioners installed for residential use. Water conditioners installed for
commercial or industrial applications are guaranteed for one (1) year from the date of installation.
2. Installation must be made in accordance with legal or local codes and manufacturer’s recommendations.
3. Failure must not result from misuse, alteration, fire, lightning, power surges or neglect.
4. Water pressure must not exceed 100 p.s.i. and water temperature must not exceed 100 degrees.
5. Damage or failure of a Product or Part caused by friction, wear, chemical attack, or debris build-up on wear
parts. “Wear Parts” include, but not limited to: pistons, piston rods, seals spacers, end cap quad rings and
brine valve on all piston operated valves, as well as valve disk flappers on Autotrol valves, and parts requiring
replacement under recommended maintenance procedures, such as filter housing orings and gaskets.
Subject to the above terms and conditions we will replace and/or repair, at our option, any parts of the water
conditioner found defective in materials and workmanship. Defective parts must be returned, freight pre-paid,
by your dealer, who will supply a replacement furnished by the company. This warranty does not cover labor,
shipping charges, damages caused by delays of consequential damages or other causes beyond our control.
This warranty is to the original purchaser and is not transferable after the third year to any subsequent
owner(s).
No other guarantee or warranty, expressed or implied, is applicable to our product. No repair or replacement
made under the terms of the warranty shall extend this warranty.
Installing Dealer _______________________________________________________________________________________
Dealer's Phone ______________________________________________________Installation Date ___________________

©Nelsen Corporation Part No: NWTS HOMEOWNERS GUIDE Rev: 0519
Other NELSEN WATER Water Filtration System manuals
Popular Water Filtration System manuals by other brands

Franklin Water Treatment
Franklin Water Treatment PNR1-0948 Installation instructions and owner's manual

Bestway
Bestway 58516 owner's manual

Aqua Flo
Aqua Flo AQUV AQUV-8R12 owner's manual

Circutor
Circutor AFQm IP54 instruction manual

PREMIER TECH
PREMIER TECH Rewatec Ecoflo ST-500 owner's manual

Solmetex
Solmetex Hg5 Installation and maintenance instructions