manuals.online logo
Brands
  1. Home
  2. •
  3. Brands
  4. •
  5. Neomitis
  6. •
  7. Thermostat
  8. •
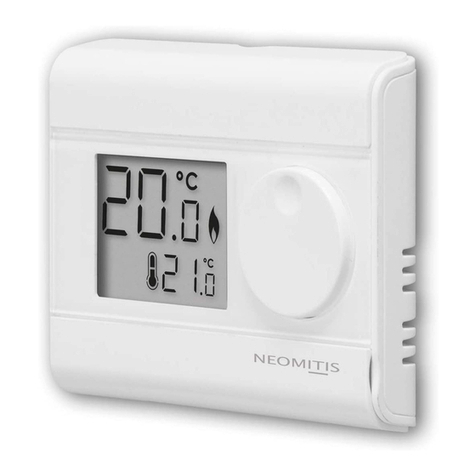
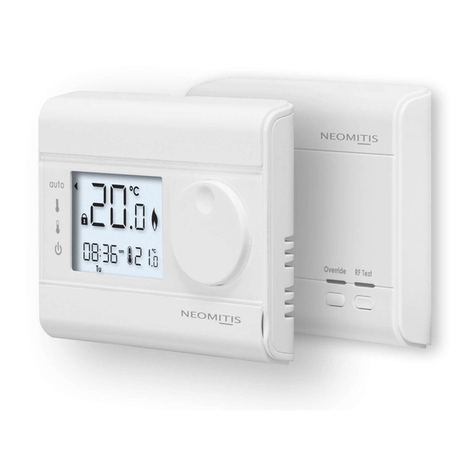
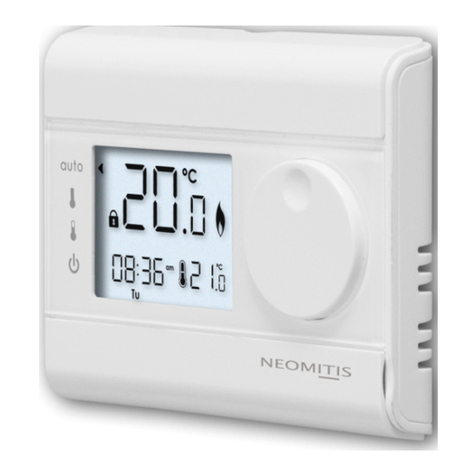
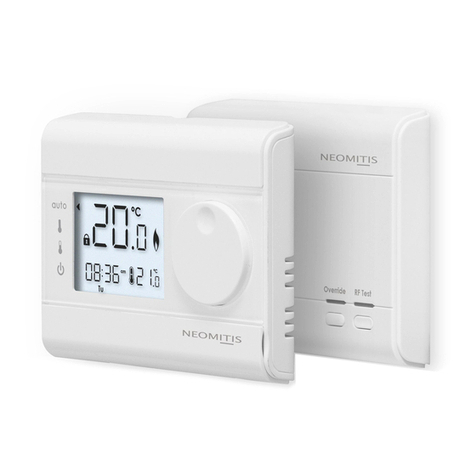
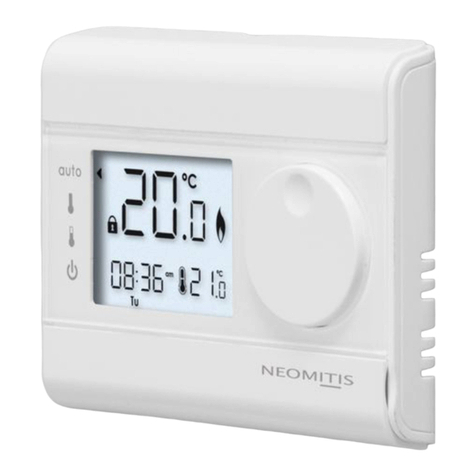
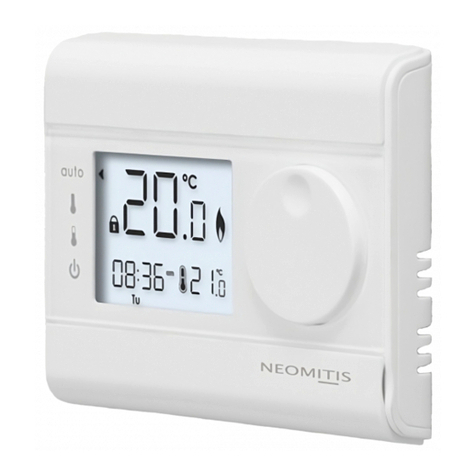
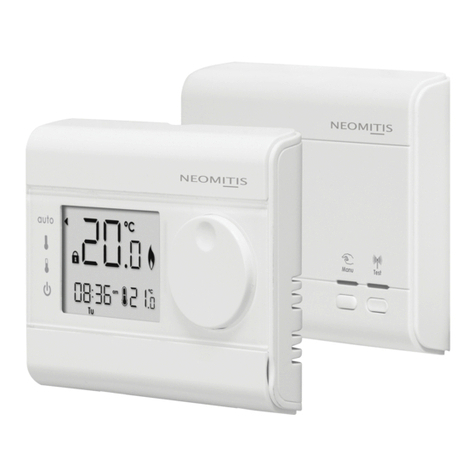
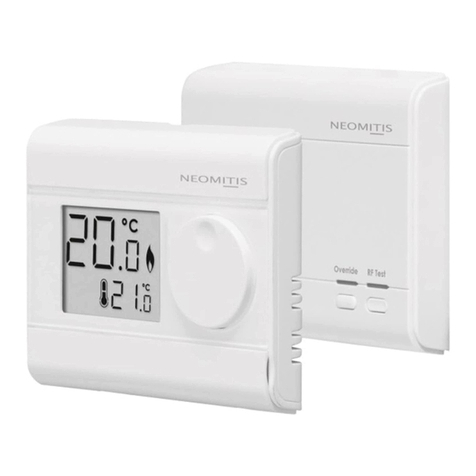
  9. Neomitis RT7 RF User manual

Neomitis RT7 RF User manual

Overview ..................................................................................................1
Controls and display ...............................................................................1
Settings .....................................................................................................1
Initial power up ..................................................................................................1
Pairing procedure .............................................................................................2
Programming ...........................................................................................2
Set day and clock..............................................................................................2
Set the program day .........................................................................................2
Set the program Comfort period .....................................................................2
Temperatures setting .........................................................................................3
Operating.................................................................................................3
Mode selection and description ......................................................................3
Manual: a temporary change..........................................................................3
Boost ....................................................................................................................3
Factory settings...................................................................................................4
Troubleshooting .......................................................................................4
Technical specications .........................................................................4
What is a room thermostat......................................................................4
RTE7RFa NEO ENG FP V02 29 05 2015
RT7 RF
WIRELESS 7 DAY PROGRAMMABLE
ROOM THERMOSTAT AND RECEIVER
1
OPERATING INSTRUCTIONS
1- To start: insert the two AA bat-
teries provided into the battery
compartment.
 Oncebatteriesarettedall
symbolswillbedisplayedon
the LCD screen as shown for
two seconds.
2- After 2 seconds, the LCD will
show:
- The ambient temperature (°C)
solid.
 -RFiconashes.
Note: Whenthebatteriesmustbechanged,alowbatterylevelindicator
appears on the device.
Remembertotakeusedbatteriestobatterycollectionpointssotheycan
berecycled.
Programming sliders sequences:
Time/day Day to be programed Comfort period setting
Comfort temperature Eco temperature Run
• Thermostat
am
Tu
C
C
Batteries
compartment
Rotarydial
Enter/boost
button
Reset
button
RF test button
Modeslider
Programming
slider
LCDdisplay
• LCD Display
ThankyouforpurchasingourRT7RF,wireless
7dayprogrammabledigitalroomthermos-
tat.
It is by listening to your requirements we
have created and designed our products
tobeeasytooperateandinstall.
It is this ease of operation that is intended
tomakeyourlifeeasierandhelpyousave
energy and money.
OVERVIEW
CONTROLS AND DISPLAY
INITIAL POWER UP
SETTINGS
Measured room
temperature
Pairing icon
Advanced
settings
Lock
function
Mode
indicator
Hour Days
Programmed
Comfort period
Low battery
icon
Frost protection
icon
Callforheat
icon
Text informations
Temperature
setpoint
Comfort or
Eco mode
icon
SET THE PROGRAM COMFORT PERIOD
2- Turnthedialtosetthetime.
MovetheProgramslidertothe
nextpositiontoconrm/nish
this setting.
1- TosettherstComfortstart
time, move the Programming
slidertoposition .
Thedefaulttimeis6:30am.
2
Option 2:Multidayprogramming.
Selectrstdaybypressingenter
thenturnthedialtoright,toadd
additionaldaystobeprogram-
med and press toconrm
eachadditionalday.
MovetheProgramslidertoany
otherpositiontoconrm/nishthis
setting.
2- Option 1:Singledayprogram-
ming.
 Rotatedialtodayrequired,eg
Monday, press . Under-
scorewillbecomesolid.
 MovetheProgramslidertoany
otherpositiontoconrm/nish
this setting.
SET THE PROGRAM DAY
1- MovetheProgrammingslider
to position . The current day
settingisashing.Thedefaultday
is Monday.
1- MovetheProgrammingslider
to position . Underscoring of
Mondayisashing.
Mo = Monday ; Tu = Tuesday ; We = Wednesday ;
Th = Thursday ; Fr = Friday ; Sa = Saturday ; Su = Sunday
2- Toselectthecurrentday,turn
thedialclockwise,toincrement
the day.
 Turnthedialcounter-clockwise,
to decrement the day.
Press toconrm.
am
Tu
C
C
4- To set the current time, turn the
dialclockwise,toincrementthe
time,turnthedialcounter-clo-
ckwise, to decrement the time.
3- Thetimesettingisashing.
Press toconrm.
am
Tu
C
C
PROGRAMMING
SET DAY AND CLOCK
PAIRING PROCEDURE
The thermostat and the receiver are not bonded together at the facto-
ry.
Tobondthetransmitterandthereceivertogether,proceedasbelow:
2- Within1minute,pressandhold
for 5 seconds the RF test button
on the thermostat. Pairing icon
isashing.
1- Pressandholdfor5 seconds
the RF test button on the
receiver.RFtestgreenlightis
blinking.
am
Tu
C
C
5 sec
Override RF Test
Override RF Test
5 sec
Note:thereceiverisusuallylocatednearyourboiler.
Ifyouwanttocheck thesignalstren-
gth, move the mode slider to po-
sitionand then press andrelease the
RF test button. RF icon blinks for 10
secondsthensignalstrengthappears.
10isthebestsignalstrength.
4- Thermostat RF icon and re-
ceivergreenlightwillbesolid
whenpairingiscomplete.
3- Thermostat RF icon and recei-
vergreenlightareblinking.
Override RF Test Override RF Test
5- Movetheprogrammodeslidertothe positiontoconrmand
nishallprevioussettings.
4- Turnthedialtosetthetempe-
raturebetween5°Cand30°C,
in increments of 0.5°C.
 MovetheProgramslidertothe
nextpositiontoconrm/nish
this setting.
NOTE: This is the temperature
thattheunitwillworktooutside
of your comfort periods.
4- Turnthedialtosetthetime.
MovetheProgramslidertothe
nextpositiontoconrm/nish
this setting.
3- TosettherstComfortend
time, move the Programming
slidertoposition .
 Thedefaulttimeis8:30am.
MANUAL: A TEMPORARY CHANGE
MANUAL: Indicates when the
temperature has been moved
fromsetpoint.Thistemperaturewill
operateuntilthenextswitching
time.Thisisonlyactivewhenthe
controllerisinAUTOorCOMFORT
mode.
Note:theProgrammingslidermustbeinthe position.
BOOSTiscancelledbyanypressofbutton,movementofdialorslider.
WhenBOOSTisrunningthetimeanddaydisappear.Theminutearraywill
countdownfrom60–0toindicatetimeleftinBOOSTmode.
BOOST
BOOST: Boost mode is a temporary
modewhichallowsyoutoope-
rate at the comfort temperature
for 1 hour. At the end of 1 hour the
devicewillreverttoitspriorsetting.
BOOSTwillworkfromanyrunningmode.
BOOST is entered by pressing /button.
am
Tu
C
C
3
OPERATING
MODE SELECTION AND DESCRIPTION
Mode sliders sequences:
Auto mode Comfort mode Economy mode Standby.
STANDBY: Permanent standby
mode with frost protection. The
unitiscontrollingcontinuously
at the frost protection tempera-
ture factory set. i.e 8°C.
ECO: Permanent eco mode.
Theunitiscontrollingconti-
nuouslytotheecotemperature
setpoint.Thedefaulttempe-
rature setting is 10°C (50°F).
Refer to section temperatures
settingtochangethevalue
page 2.
AUTO: Automatic mode. The
unitiscontrollingtothetime
and temperature program
thathavebeenselected(re-
fer to "programming" section
page 2).
COMFORT: Permanent comfort
mode.Theunitiscontrolling
continuouslytothecomfort
temperature setpoint. The
defaulttemperaturesettingis
20°C(68°F).Refertosection
temperatures setting to
changethevalue page 2.
5- Repeat for the second comfort period , and for the third comfort
period .
TEMPERATURES SETTING
Two temperatures can be set: Comfort temperature and Economy
temperature.
2- Turnthedialtosetthetempe-
raturebetween5°Cand30°C,
in increments of 0.5°C.
 MovetheProgramslidertothe
nextpositiontoconrm/nish
this setting.
1- To set the Comfort tempera-
ture, move the Programming
slidertoposition .
 Thedefaulttemperatureis20°C
(68°F).
3- To set the Economy tempera-
ture, move the Programming
slidertoposition .
 Thedefaulttemperatureis10°C
(50°F).
Comfort period Default times
Comfort period 2 Start at 12:00 pm End at 02:00 pm
Comfort period 3 Start at 05:00 pm End at 10:00 pm
Note: if you wish not to use a period then this can be done by Coinciding
the End time with Start time.
4
Registered trademarks - All rights reserved
NEOMITIS
®
LIMITED - 4th Floor, Lincoln House, 300 High Holborn, London WC1V 7JH
Registered in England and Wales No: 9543404
Tel: +44 (0) 2071 250 236 - Fax: +44 (0) 2071 250 267 - E-mail: [email protected]
Creating innovative solutions for ambient comfort
www.neomitis.com
The boiler is not heating:
-CheckthattheThermostatiscallingforheatifyesthenthethermostatwould
appeartobeworkingcheckthattheboilerhasnotswitcheditselfoff.
If no increase set temperature.
-Checkthepositionofthebatteries.Removethemfor30secondsand
reinsertthem.Iftheproblempersists,replacethe2batteries.
Nothing in the display:
-Checkthepositionofthebatteries.Removethemfor30secondsand
reinsertthem.Iftheproblempersists,replacethe2batteries.
The room temperature is not high enough, the boiler is not providing
enough heat:
- Check the active operating mode (seepage3) - the room thermostat
maybeinanEco,StandbyorAutoModeentailingatemperaturedrop.
- Check the active desired temperature and increase it if need be (see
page 2).
The temperature in the room is lower than the setpoint temperature:
-Checktheprogramming.ThethermostatcouldbeinascheduledEco
period.
-Ensurethatthetimedisplayedisthesameasthecurrenttime.
You made a mistake while setting:
-You just need to restore factory settings, as explained in the “Factory
settings” section (seepage3).Thiswillreverseanychangesyoumight
have made.
The system is not heating but is on:
- If andindicatorlightisonbutthesystemremainscold,thenyoushould
contactyourinstaller.
If the problem persists, then contact your installer.
TROUBLESHOOTING
...anexplanationforhouseholders
A room thermostat simply switches
the heating system on and off as
necessary. It works by sensing the
air temperature, switching on the
heating when the air temperature
falls below the thermostat setting,
and switching it off once this set
temperature has been reached.
Turning a room thermostat to a hi-
ghersettingwillnotmaketheroom
heatupanyfaster.Howquicklythe
room heats up depends on the design of the heating system, for exa-
mple,thesizeofboilerandradiators.Neitherdoesthesettingaffecthow
quicklytheroomcoolsdown.
Turningaroomthermostattoalowersettingwillresultintheroombeing
controlledatalowertemperature,andsavesenergy.
Theheatingsystemwillnotworkifatimeswitchorprogrammerhasswit-
ched it off. The way to set and use your room thermostat is to nd the
lowesttemperaturesettingthatyouarecomfortablewith,andthenleave
italonetodoitsjob.Thebestwaytodothisistosettheroomthermostat
toalowtemperature–say18ºC–andthenturnitupbyonedegreeeach
dayuntilyouarecomfortablewiththetemperature.Youwon’thaveto
adjustthethermostatfurther.Anyadjustmentabovethissettingwillwaste
energy and cost you more money.
Ifyourheatingsystemisaboilerwithradiators,therewillusuallybeonly
oneroomthermostattocontrolthewholehouse.Butyoucanhavediffe-
rent temperatures in individual rooms by installing thermostatic radiator
valves(TRVs) onindividualradiators.If youdon’thaveTRVs, youshould
chooseatemperaturethatisreasonableforthewholehouse.Ifyoudo
have TRVs, you can choose a slightly higher setting to make sure that
eventhecoldestroomiscomfortable,thenpreventanyoverheatingin
other rooms by adjusting the TRVs.
Roomthermostats need a freeow of airto sense thetemperature, so
they must not be covered by curtains or blocked by furniture. Nearby
electricres,televisions,wallortablelampsmaypreventthethermostat
fromworkingproperly.
WHAT IS A ROOM THERMOSTAT
Pleaserefertotheinstallinginstructionsforanyinformationsaboutbatte-
rieslife,standardsandproductenvironment.
TECHNICAL SPECIFICATIONS
FACTORY SETTINGS
AllLCDdisplaywillbeturnedONfor2secondsandthefactorysettings
willberestored.
Note:Torestorefactorysettings,pressandholddownthispartformore
than3secondsusingthetipofapen.
am
Tu
C
C
Settings Factory settings
Comfort temperature 20°C
Eco temperature 10°C
Comfort period 1 Startat06:30am Endat08:30am
Comfort period 2 Start at 12:00 pm End at 02:00 pm
Comfort period 3 Start at 05:00 pm End at 10:00 pm

Other Neomitis Thermostat manuals

Neomitis RTEORFA User manual

Neomitis

Neomitis RTEORFA User manual

Neomitis RTE7D User manual

Neomitis

Neomitis RTE7D User manual

Neomitis TMR7RFa User manual

Neomitis

Neomitis TMR7RFa User manual

Neomitis RT0 RF User manual

Neomitis

Neomitis RT0 RF User manual

Neomitis RTE7A User manual

Neomitis

Neomitis RTE7A User manual

Neomitis RTE1RFD User manual

Neomitis

Neomitis RTE1RFD User manual

Neomitis RTMA User manual

Neomitis

Neomitis RTMA User manual

Neomitis RTE0A User manual

Neomitis

Neomitis RTE0A User manual

Neomitis RTE7RFD User manual

Neomitis

Neomitis RTE7RFD User manual

Neomitis RTE0B User manual

Neomitis

Neomitis RTE0B User manual

Neomitis RTE0RFA User manual

Neomitis

Neomitis RTE0RFA User manual

Neomitis RTE7SD User manual

Neomitis

Neomitis RTE7SD User manual

Neomitis RT7 User manual

Neomitis

Neomitis RT7 User manual

Neomitis RTE1D User manual

Neomitis

Neomitis RTE1D User manual

Neomitis TMR7 User manual

Neomitis

Neomitis TMR7 User manual

Neomitis RTANEOA User manual

Neomitis

Neomitis RTANEOA User manual

Neomitis RT1 RF User manual

Neomitis

Neomitis RT1 RF User manual

Neomitis RTE7C User manual

Neomitis

Neomitis RTE7C User manual

Neomitis RTE7D User manual

Neomitis

Neomitis RTE7D User manual

Popular Thermostat manuals by other brands

Honeywell EConnect TL9160AR operating manual

Honeywell

Honeywell EConnect TL9160AR operating manual

MS Electronics E810/M2S Product guide

MS Electronics

MS Electronics E810/M2S Product guide

Aube Technologies TH232-AF-230 installation instructions

Aube Technologies

Aube Technologies TH232-AF-230 installation instructions

jablotron TP-60 manual

jablotron

jablotron TP-60 manual

HOTOWELL HTW-31-H12 quick start guide

HOTOWELL

HOTOWELL HTW-31-H12 quick start guide

ENDA EDT3423A quick start guide

ENDA

ENDA EDT3423A quick start guide

Honeywell TH4210U2002 installation instructions

Honeywell

Honeywell TH4210U2002 installation instructions

Vimar 02907 Installer manual

Vimar

Vimar 02907 Installer manual

Tempro TP500 operating instructions

Tempro

Tempro TP500 operating instructions

VDH ALFA 23 DP user manual

VDH

VDH ALFA 23 DP user manual

wattio THERMIC manual

wattio

wattio THERMIC manual

RDZ User Display Installation sheet

RDZ

RDZ User Display Installation sheet

Honeywell Home T10 Pro Getting started

Honeywell

Honeywell Home T10 Pro Getting started

Honeywell Chronotherm III user guide
Honeywell

Honeywell Chronotherm III user guide

Honeywell RTH2510 Series Quick installation guide

Honeywell

Honeywell RTH2510 Series Quick installation guide

S&P WCT manual

S&P

S&P WCT manual

HOTOWELL HTW-31-WKT13-WF manual

HOTOWELL

HOTOWELL HTW-31-WKT13-WF manual

Horstmann HRT4-A User and installation instructions

Horstmann

Horstmann HRT4-A User and installation instructions

manuals.online logo
manuals.online logoBrands
  • About & Mission
  • Contact us
  • Privacy Policy
  • Terms and Conditions

Copyright 2025 Manuals.Online. All Rights Reserved.