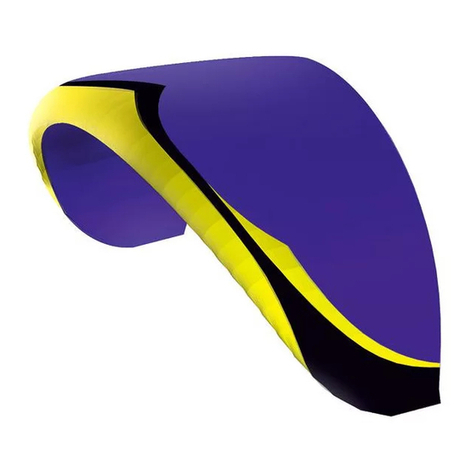
Nervures ALTEA 25 User manual

1
-ALTEA-
N°de Série/Sérial Number :
...................................................
1

2
L'équipe Nervures vous remercie de la confiance que vous lui
témoignez en faisant l'acquisition d'une voile Altea. Nous souhaitons que ce
parapente vous procure un plaisir de vol maintes fois renouvelé. Pour ce faire,
nous vous invitons à prendre connaissance de ce manuel qui constitue
également le document d'identification, de contrôle et de suivi historique de
votre parapente. Il vous appartient de vérifier que ce parapente a été testé en
vol par votre vendeur et que les résultats de cet essai ont été portés sur les
fiches d'essai. Nous vous prions de nous retourner l'exemplaire détachable
(condition de notre garantie contractuelle d'un an). Ce retour nous permettra, le
cas échéant, de vous contacter sans délai, au cas bien improbable où un
problème apparaîtrait sur le modèle ou l'un de ses constituants.
Nous vous encourageons vivement à tenir à jour ce manuel et à le remettre à
votre acheteur en cas de revente.
MISE EN GARDE
Conçue et fabriquée avec un souci permanent de la sécurité, l'Altea, de
par ses performances, donne accès à un vaste domaine de vol. Comme tout
aéronef, ce matériel exige de la part de son pilote, maturité, capacité d'analyse
des conditions de vol, compétence et soin constant de l'état d'entretien du
matériel.
En conséquence ce manuel ne saurait se substituer à une formation adéquate
à la pratique du parapente et à la nécessaire mise en main que vous êtes en
droit d'attendre de la part de votre vendeur.
L'emport d'un parachute de secours est indispensable à une pratique sereine
de l'activité.
PROGRAMME
L' Altea constitue l'aboutissement actuel de notre recherche visant à
concilier des objectifs aussi contradictoires que performance et simplicité.
légèreté et robustesse, stabilité et maniabilité. Cette voile, homologuée en
classe standard, se singularise par la grande variété de régimes de virage
qu'elle offre. Elle s'adresse à des pilotes formés et saura séduire également par
son côté ludique et son efficacité les pilotes confirmés.
ENTRETIEN
Surveillez ou faites surveiller par votre distributeur, à l'aide d'un
anémomètre la vitesse de votre aile en configuration de vol "bras hauts". Un
résultat inférieur de 3 km/h à la valeur basse de la fourchette des performances
annoncées, nécessite un contrôle approfondi.
Si nécessaire lavez votre voile à l'eau froide et au savon de Marseille.
Ne pas stocker la voile humide ou sale. En cas de stockage prolongé
prévisible, évitez un pliage trop compact.
Pour préserver les qualités de gonflage, évitez de plier les renforts en Mylar
raidissant les nervures au droit des entrés d'air.
Tout parapente est sujet au vieillissement et doit faire l'objet d’un contrôle
régulier (environ toutes les 100 heures de vol et tous les ans). Au moment de
la revente, un contrôle préalable dégagera votre responsabilité vis à vis de

3
votre acheteur. Nous vous recommandons vivement de faire effectuer ces
contrôles dans nos ateliers : nous sommes les mieux placés, à tous points de
vue, pour garantir la navigabilité et l'entretien des matériels de notre
conception.
Nous vous engageons à être extrêmement vigilant sur tout défaut, blessure ou
rupture constatés au niveau du suspentage ou de la voilure et à y faire porter
rapidement remède.
Une attention toute particulière devra être portée, à chaque visite pré-vol, sur le
serrage des maillons rapides qui relient les suspentes aux élévateurs et les
élévateurs à la sellette.
En cas de retour en atelier soyez aimable de nous expédier la voile complète
(élévateurs et sac d’origine, sans sellette) accompagnée du présent manuel
pour qu’y soient portées les interventions effectuées par nos soins. Joindre
également un mot décrivant vos coordonnées, le motif du retour et la
localisation d'éventuelles réparations à effectuer (scotch de couleur repérant le
lieu de l'anomalie). En effet, une partie importante du temps de réparation est
inutilement perdue en atelier en recherche des défauts. Prière de faire ce retour
voile pliée en accordéon.
GONFLAGE ET DECOLLAGE
La disposition en éventail est la plus adaptée, elle permet un
remplissage homogène de la voilure, en commençant par le centre.
Il est indispensable de s'assurer que chaque nappe du suspentage ne présente
aucun risque d'emmèlage et qu'aucune suspente ne risque de faire le tour du
saumon. En effet, toute altération de la voilure, dans la phase de décollage
peut avoir des effets imprévisibles sur la trajectoire.
La course de gonflage, bien axée (direction du vent-centre de la voile) sera
entamée suspentes tendues et devra s'effectuer sans élan, en fournissant avec
le buste un effort progressif et soutenu. L'action des mains sur les élévateurs
avant se limitera à une conduite accompagnant la montée, avec une légère
traction. Une traction trop forte aurait pour conséquence de masquer
partiellement les ouvertures de bord d'attaque.
Par vent modéré (à partir de 15 Km/h), pour éviter un décollage trop brutal, il
est conseillé de se faire assister par une tierce personne, connaissant la
pratique du parapente et capable de maintenir le pilote au sol pendant les
phases de montée et de contrôle, avant la course d'envol.
Le décollage pour un pilote non rompu aux techniques de gonflage face à la
voile est proscrit au delà de 25 Km/h de vent.
RECHERCHE DU TAUX DE CHUTE MAXI -
TECHNIQUES DE DESCENTE RAPIDE
Au cours de 360° enchaînés, des taux de chute de l'ordre de 5 à 6 mls
sont atteints. Cette manœuvre peut être déroutante pour le pilote (perte des
repères et accélération trés forte). On veillera à en aborder la pratique
progressivement. On évitera en particulier l'erreur qui consiste à revenir en
position symétrique à mi-freins pour provoquer la sortie. Celle ci s'obtient en
relevant doucement les mains.

4
La réalisation des B est possible moyennant une traction progressive et
mesurée. Elle permet d'accéder aprés un léger balancement à une vitesse ver-
ticale d'environ 8m/s. La remise en vol s'effectue avec une abattée modérée à
contrôler aux commandes. On évitera un relacher brutal. Si la traction est trop
ample, trop brusque ou trop prolongée, la voilure se met dans une configuration
de crevette avant. La sortie de cette configuration s'obtient en cessant l'action
sur les élévateurs B et en contrôlant l'abattée qui accompagne la sortie avec
les freins.
La réalisation des oreilles est obtenue par traction sur la première sus-
pente du rang A, en partant de l'extérieur. La traction devra être suffisamment
progressive pour éviter une fermeture de trop grande importance.
Une fois les oreilles installées, le pilote peut augmenter progressive-
ment leur dimension en embarquant de plus en plus de longueur sur la
suspente concernée. On veillera à conserver déployée au moins la moitié
centrale de l'envergure. La réouverture des oreilles n'est pas spontanée sur
l'Altea. Elle s'obtient par un bref pompage sur les commandes.
Pour ces 3 manœuvres et d'ailleurs pour toutes les autres phases du
vol, nous conseillons très vivement de conserver les commandes en main
passées en "dragonne". Cela permet de revenir instantanément à une reprise
de contrôle conventionnelle.
Les manœuvres de secours ne sont à utiliser qu'en cas de nécessité.
Elles fragilisent à la longue les suspentes, les nervures et les points d'ancrage
des suspentes sur la voilure.
L'attention de l'utilisateur est attirée sur le risque que constitue la
pratique des 360° engagés avec les "grandes oreilles". Cette pratique peut
augmenter considérablement la charge sur les suspentes avant du centre de
l'aile et en affaiblir prématurément la résistance : à n'utiliser donc qu'en cas
d'extrême nécessité et faire ensuite contrôler les résistances dans notre atelier.
VIRAGE ET EVITEMENT
La mise en virage la plus efficace est obtenue par un transfert de poids
sur la sellette, côté intérieur au virage, conjugué à l'action sur la commande.
Une fois le virage installé, le cadencement est facilement géré par la
commande extérieure.
En vol thermique, l'allure du virage se corrige essentiellement par la sellette :
- report de poids vers l'extérieur et diminution du différentiel de
commande : virage à plat, à faible taux de chute.
- report vers l'intérieur et augmentation du différentiel de commande :
virage incliné s'accélérant.
L'évitement est obtenu par une action progressive sur la commande côté
intérieur au virage.

5
ATTERISSAGE ET AFFALAGE PAR VENT FORT
Nous vous invitons à prendre l'habitude de vous redresser dans votre
sellette, au cours de votre approche, d'autant plus tôt que les conditions sont
turbulentes. Vous serez dans une position bien meilleure, en cas de posé
difficile.
Il est vivement déconseillé de terminer une approche de terrain d'atterrissage
en restant dans la configuration "oreilles". La présence de gradient est
susceptible dans ce cas de faciliter l'apparition d'une phase parachutale dont la
sortie peut être difficile à gérer à proximité du sol.
Par vent fort, au moment du posé, le pilote, après avoir assuré un contrôle sta-
tique de la voilure, lachera les commandes et tractionnera symétriquement les
élévateurs du rang C.
VOL
EN
TURBULENCE
ET
INCIDENTS
DE
VOL
Le vol en conditions turbulentes est à éviter à tout prix. Se reporter aux
manuels d'aérologie qui permettent de prévoir ces conditions (vent fort,
turbulences d'obstacle ou de sillage, rotors, thermiques sous le vent d'un relief,
effet de Foëhn, nuage développé etc...)
Si néanmoins il vous arrive d'être surpris en turbulence, une seule attitude .
réduire votre vitesse (30 à 50% de freinage).
- l'incidence sera augmentée (risque de fermeture par passage du bord
d'attaque en incidence négative diminué),
- les effets pendulaires seront amortis dans les transitions,
- l'aile, en cas de dégonflage, sera en situation de regonflage immédiat.
PHASE PARACHUTALE
Bien que n'ayant pas été détecté au cours des tests, si ce phénomène
survient, il convient pour remettre la voile en ligne de vol d'engager un virage
modéré et de contrôler l'abattée qui s'ensuit en maintenant une tension
adéquate sur les commandes.
L'apparition de ce phénomène serait un signe de vieillissement et justifierait un
contrôle en atelier.
En cas de phase parachutale à proximité du sol, préférer un atterrissage bras
hauts dans cette configuration à toute manœuvre de sortie.
FERMETURES
La réouverture, sur ce modèle, est très généralement spontanée et
immédiate, surtout si le pilote prend soin de voler avec un peu de frein dès que
les conditions laissent prévoir un incident de ce type.
Bien que cette éventualité n'ait pas été mise en évidence au cours des tests, il
n' est pas à exclure que puisse survenir une fermeture massive entraînant un
départ en virage, susceptible, si rien n'est fait, de dégénérer en autorotation.
La correction d'un tel incident consiste à effectuer d'un transfert de poids côté
gonflé et une action sur la commande extérieure au virage.

6
Une fois la rotation enrayée, si la réouverture n'a pas eu lieu, agir
simultanément et brièvement sur les deux freins afin de l'obtenir, sans trop
ralentir l'aile pour éviter le décrochage.
UN DEGONFLAGE, MEME PARTIEL NE PEUT EN AUCUN CAS ETRE
CONSIDERE COMME ACCEPTABLE ET DOIT AMENER A PRUDEMMENT
ABREGER LE VOL
MANŒUVRES ACROBATIQUES
On évitera les manœuvres extrêmes qui ont été effectuées au cours de
nombreux vols d'essai, mais qui ne font pas partie du domaine de vol normal
d'un parapente :
- inversions de virage avec un pendulaire en roulis de plus de 45°de
part et d'autre de la verticale,
- ralentissement et relâchement des commandes provoquant des pendu-
laires en tangage de plus de 30°de part et d'autre de la verticale,
- manoeuvres de décrochage,
- virages francs à trop basse vitesse, susceptibles de dégénérer en vrille à
plat ou décrochage asymétrique, manœuvres de fermeture provoquées à l'aide
des élévateurs.
La pratique du vol acrobatique au delà des limites fixées ci dessus ne saurait
engager la responsabilité du constructeur.
SELLETTE
L' Altea a été homologuée en catégorie "STANDARD" munie d'une
sellette Sup'Air type ABS (hauteur ancrages 42 cm, ventrale sérrée à 50%,
entraxe maillons 38 à 42 cm).
L'effet stabilisateur d'une sellette munie d'un dispositif d'amortissement en rou-
lis, dépend essentiellement d'un réglage correct de l'ensemble formé par les
sangles ventrales et dorsales mais également des sangles d'épaules.
Au cours de la période de familiarisation avec le modèle et, par la suite, si l'on
souhaite privilégier les caractéristiques de regonflage spontané, on veillera à ce
que cet ensemble de sanglerie soit très ajusté, de façon à ce que les maillons
de connexion sellette-élévateurs soient aussi proches que possible du buste,
en restant suffisamment écartés :
- Barrette de poitrine serrée à 50%.
- Sangles dorsales réglées de façon à voler le buste aussi vertical que
possible sans nuire au confort.

7
ELEVATEURS
L' Altea est livrée avec des élévateurs 3 branches 450 mm, avec
accélérateur. L'accélérateur embarque progressivement par mouflage 8 cm
sur A et 4 cm sur B puis 6 cm sur A et B simultanément.
On évitera d'utiliser l'accélérateur à fond en conditions turbulentes.
SUSPENTAGE
voir pages suivantes
.

8
ALTEA 25
258 255 253 247 248 245
238
238
56
371
376
380
258
55
371
368
259 253
49
368
375
253 248
235
41 235
232
235
368
222
220
217
200
200
196
362
230
230
230 165+25
Superficie 25
All 4.3
Env 10.4
Nb cellules 42
Version 15/04/01
Modifiée 04/09/01
Superaram 2.14
Superaram 1.7
Dyneema 1.1
372
D
D
Les suspentes non cotées sont à la côte
marquée en tête de nervures
255
2345678910 11 12 13 1414 15 16
17
18
253 252
312 298 290
282 273 269
264
256
248
368
Superaram 1.2

9
ALTEA 28
258
253 255 253 247 248 245
238
238
57
450
449
456
461
55
450
448
258 252
49
448
453
252 248
235
41 238
234
232
448
222
220
214
196
196
196
445
327 250
250
250 210+30
Superficie 28.4
All 4.7
Env 11.6
Nb cellules 46
Version 15/0/4/01
Modifiée 20/08/01
Superaram 2.14
Superaram 1.7
Dyneema 1.1
452
Les suspentes non cotées sont à la côte
marquée en tête de nervures
57
B
01 2 345678910 11 12 13 1414 15 16
17
18
455
455
310 298 291 282 273 269
264 256 248
260 255
257
253 248
250
Superaram 1.2 mm

10
ALTEA 31
273
268 270 268 262 263 260
252
252
60
478
477
484
486
58
478
475
483
483
273 267
52
475
480
267 262
249
43 252
248
247
473
235
233
227
208
208
208
471
347 329 316 308
299 289 285
271
263
265
265
265 225+30
Superficie 31
All 4.6
Env 12
Nb cellules 46
Version 15/04/01
Modifiée 30/08/01
Superaram 2.14
Superaram 1.7 Superaram 1.2
Dyneema 1.1
480
D
D
Les suspentes non cotées sont à la côte
marquée en tête de nervures
60
01 2 345678910 11 12 13 1414 15 16
17
18
280
273 268
270
275 270 272
265263
268

11
The Nervures team thanks you for the confidence you have shown in us
by purchasing an ALTEA wing. We hope that this paraglider will give you a
great deal of flying pleasure for many years to come. We recommend that you
study this manual which is also the identification and inspection document as
well as the logbook of your paraglider.
It is your duty to check that your retailer has tested your paraglider in flight and
that the results of this test have been entered on the test forms. We ask you to
return to us the detachable copy (a condition of our 12 months contractual
guarantee). This enables us to contact you immediately in the unlikely case of
a problem arising with the model or one of its parts.
We strongly recommend you to keep this manual up to date and to hand it to
the next owner if you resell your wing.

12
WARNING
Designed and manufactured with safety in mind, the Altea, with it’s
performances, gives access to a huge range of flying. As with all aircraft, this
equipment demands of its pilot, maturity, ability to analyse flying conditions,
competence, good maintenance and care of the equipment.
Therefore, this manual cannot replace an appropriate education of paragliding
and the indispensable familiarisation to this model that you can ask from your
seller.
DESIGN
The ALTEA has been developed with the view of conciliating as
contradictory goals as performance and simplicity of use, light weight and
solidity, stability and manoeuvrability.
This canopy, homologated in Standard Class, is intended for licensed pilots
and will also attract advanced pilots because of its fun ability and efficiency.
MAINTENANCE
Check or have checked by your retailer, using an anemometer, the
speed of your wing flying hands high. A result of 1,9 mph less than the lower
end of the announced performance bracket requires a thorough inspection.
If necessary, wash your wing with cold water and soap.
Do not stock your wing in humid or dirty conditions. In case of long storage, do
not fold the wind too tight.
To keep as long as possible the ease of inflation qualities, avoid folding mylar
reinforcements at the ribs nose.
Every paraglider is prone to aging and must therefore be inspected regularly
(about every 100 hours of flying time and at least once a year). Before
reselling, a control will discharge your responsibility towards your buyer. We
strongly recommend getting this control from our workshop or from an
approved retailer.
We urge you to be extremely alert to all defects, damage or rupture discovered
to the suspension lines or the sail and to repair the damage as soon as
possible.
In every pre-flight check pay attention to the tightening of the maillons rapids/
carabiners, especially which link the lines to the risers and the risers to the
harness.
If you return the wing to our work shop, please send the complete wing (risers
and original bag, without harness) accompanied by the present manual. So we
can fill in the interventions carried out by us.
Please attach also a note giving your name and adress, the reason for
returning the wing and the areas to be repaired (by marking the area with
coloured tape). As a matter of fact, an important part of the repair time is
wasted by having to search for the damage. Please return the wing folded like
an accordion.

13
INFLATION AND TAKE-OFF
The most suitable way of laying out a wing is in an arc, which enables
the paraglider to fill up evenly, starting from the centre.
It is essential to assure that every row of suspension lines is free of tangles
and knots and that no line goes around the wing tip. In fact, any defect in the
sail during the phase of take-off can have unpredictable effects on the trajec-
tory.
The direction of the take-off, from the wing centre should be into the wind
starting with taut lines and no jerk, leaning forwards for a progressive pull.
Limit the movements of your hands to simply accompanying the rising wing
with front risers applying light traction. Too strong a traction can partly close
the leading edge intakes.
In moderate winds (from 10 mph), in order to avoid a brutal take-off, it is re-
commended to ask assistance of another paragliding pilot who is able to hold
you on the ground during the inflation and the inspection phase before starting
the take-off run.
Pilots not used to back to wind techniques should not take off in winds of more
than 15 mph.
RAPID DESCENT TECHNIQUES
In a 360° spiral, a sink rate of 5 - 6 m/s (116 - 20 ft/s) is attained. This
manoeuvre can disorientate the pilot (loss of reference point and strong
acceleration). One should learn this technique progressively. In particular one
should avoid the symmetrical mid braking position for coming out of the spiral.
This is best obtained by raising both hands progressively.
The "B"- line stall is possible by pulling slowly the B Branch of the risers. After
a slight swinging, this will produce a vertical descent rate of about 8 mls. There
is a risk of entering a front horseshoe configuration. To get out of it the pilot will
slowly release the B branch and pull symmetrically and briefly the brakes. The
return to flight will cause a moderate surge which should be controlled on the
brakes. Avoid a sudden release of the B risers.
Big ears are obtained by pulling on first A line near from the wingtip. Pulling on
this line must be done progressively to avoid too big a closure. Once the big
ears are in, the pilot can increase progressively their size by pulling more and
more length on the appropriate line.
One should make sure that the central half of the wing is kept open.
To re-open big ears The pilot will pull symmetrically and briefly on the brakes.
For these 3 manoeuvres and for all other phases of flight, we strongly
recommend keeping the toggles in the hands which enables an instant return
to conventional piloting.
The emergency manoeuvres should only be used when necessary.
After a while they weaken the lines, the ribs and the attachment points.
Attention is drawn to the risk involved when spiralling with a lot of big
ears pulled on. This can increase the load considerably on the front lines to
the centre of the wing and weaken them prematurely: therefore only use this
technique when really necessary and have the strength tested subsequently in

14
TURNING AND AVOIDING ACTION
The most efficient turns are obtained by a transfer of weight in the
harness towards the inside of the turn accompanied by action on the control.
Once in the turn the adjustment is easily managed using the outside control.
In thermal flight, the turns are corrected mainly from the harness :
- tipping weight to the outside: to flatten the turn and improve sink rate
- tipping weight to the inside: to incline and accelerate the turn.
An avoiding action is taken by smoothly applying the control on the inside of
the turn.
LANDING AND COLLAPSING
THE WING IN CASE OF STRONG WIND
We advise the pilot to get into the habit of standing up during the
approach sooner as more gusty are the flying conditions. His position will be
better in case of hard landing.
We do not advise to end the approach in a "big ears" configuration which
could be difficult to recover from in case of deep stall because of gradient
situation.
At the moment of landing in a strong wind, as soon as the wing is stable, the
pilot should release the brakes and grab the "C" risers to pull down the wing
symmetrically.
FLYING TURBULENCE
AND FLYING INCIDENTS
Flying in turbulence should be avoided at all cost. Study the books on
aerology to learn to predict turbulent conditions (strong winds, turbulence due
to obstacles, wake turbulence, rotors, leeside thermals, foehn effect, over
developed clouds, etc...).
If however you do get caught in turbulence, there is only one thing to do:
reduce your speed (30 to 50% brakes).
. incidence is increased (less risk of the leading edge going into
negative incidence )
. the pendular effect will be damped in the transition,
. the wing, in the case of a deflation, will reinflate immediately
PARACHUTAL PHASE (DEEP STALL)
Even though it has never happened during the tests, should the
phenomenon arise, to put the wing back into normal flight one should engage
a moderate turn and then control the surge which follows by applying adequate
braking.
If this phenomenon does occur it is a sign of ageing and requires a wing
inspection. In the case of a deep stall close to the ground, it is better to land
with the hands high than to try to get out of the deep stall.

15
CLOSURES
The reopening, on this model, is very generally spontaneous and
immediate, especially if the pilot takes care and flies with some braking when
the conditions are likely to cause closures.
Even though the likelihood of this has not been shown during the tests, it
cannot be excluded that after a massive closure which causes a turn, if nothing
is done, it could degenerate into auto-rotation .
To correct for this the pilot should transfer his weight to the inflated side and
brake on the outside of the turn. Once the rotation has been stopped, if the
wing has not already reopened, pull on both controls briefly and simultaneously
to open it, without slowing the wing excessively to avoid a stall.
A DEFLATION, EVEN PARTIAL, CAN NEVER BE CONSIDERED
ACCEPTABLE AND THE FLIGHT SHOULD CAREFULLY BE SHORTENED.
RADICAL MANOEUVRES
Radical manoeuvres should be avoided. They have been done during
the numerous test flights but are not within the normal flying limits of a
paraglider.
- wingovers with more roll than 45°either side of the vertical,
- slowing and then releasing the controls producing pitching movement
Greater than 30°either side of the vertical,
- Stalling manoeuvres,
- sudden turns at very low speed, susceptible of degenerating into flat
spin or asymmetric stalls,
- closing manoeuvres using the risers.
HARNESS
The ALTEA was tested in flight equipped with a Standard" ABS" SUP'
AIR harness. (Attachment height of 42 cm. Front strap tightened 50%, distance
between the carabiners 38 - 42 cm).The stabilising effect of this harness with a
roll damping system, depends mainly on a correct adjustment of the whole
harness including the front strap, the dorsal straps and the shoulder straps.
During the period of familiarisation with the wing, and afterwards, if one hopes
to favour the spontaneous re-inflation characteristics, one should make sure
that all the straps are precisely adjusted, so that the carabiners connecting the
harness to the risers are as close as possible to the chest whilst remaining
sufficiently apart :
- front strap tightened 50%.
- dorsal straps adjusted to produce a vertical upper body without being
uncomfortable.
- The shoulder straps are adjusted from take-off .

16
RISERS - TRIMS
The Altea is delivered with a 3 branches risers system of 450 mm
length and a speed bar system.
The accelerator progressively pulls 8 cm on A and 4 cm on B and then 6 cm
simultaneously on A and B. T.
LINES - SCHEMES
see pages 8, 9 & 10

17
ESSAI EN VOL (à retourner)
FLIGHT TEST (copy to return)
———————
vitesse bras hauts vitesse accélérée Speed
“hand high”........................... acc.speed.......................
Vitesse mini - min speed.................. 360°g et d - r and l...........
Desc.aux B - Bline stall.................... Oreilles - “big ears”.............
observations:
Date essai - test date: .......................... Pilote - pilot : ...................
Distributeur - distributor :
ESSAI EN VOL (à conserver)
FLIGHT TEST (copy to keep)
———————
vitesse bras hauts vitesse accélérée Speed
“hand high”........................... acc.speed.......................
Vitesse mini - min speed.................. 360°g et d - r and l...........
Desc.aux B - Bline stall.................... Oreilles - “big ears”.............
observations:
Date essai - test date: .......................... Pilote - pilot : ...................
Distributeur - distributor :

18
Fiche Essai Vol
Flight test
MODELE :.................................................................................
N°de Série - Serial N°...............................................................
Date de Fab. Date of manufacture................................................
Nom et adresse propriétaire - Owner’s name and adress:
........................................................................................................
........................................................................................................
............................................................................................
Exemplaire valant bon de garantie à retourner à :
This copy to be returned to validate the guarantee :
NERVURES
Z.I. Point Sud
65260 SOULOM
FRANCE
PROPRIETAIRES SUCCESSIFS
SUCCESSIVE OWNERS
nom - name Adresse - téléphone
date transaction

19
Date nbre de vols / durée estimée
Number of flights / Estimated flying time
Intervention
Intervention
cachet du réparateur
stamp of repairer
CARNET D’ENTRETIEN - AFTER SALE SERVICES

20
Caractéristiques Techniques et Performances
Technical features and performance
ALTEA
* mesures effectuées vers 1500m d’altitude
measurements have been taken at an altitude of 1500m / 4900ft
Modèle 25 28 31
Surface / Area (à plat, en m²) 24,2 27,2 30,6
Envergure / Span : (m) 10,2 11,3 12
Allongement / aspect ratio 4,3 4,7 4,7
Corde maximale / root cord : (m) 3,08 3,10 3,28
Poids total en vol / all up weight : (kg) 60-75 75-98 95-120
Poids pilote optimal / optimal loading : (kg) 55 70 85
Performances *
Vitesse max. accéléré / max. speed : (+/- 2 km/h) 45 45 45
configuration lisse / neutral position : (+/- 2 km/h) 38 38 38
Vitesse min. (décrochage) / min. speed : (+/- 2 km/h) 22 22 22
Finesse max. / max. glide : (+/-0,2) 7,3 7,6 7,6
Taux de chute min. / min. sink rate : (+/-0,1 m/s) 1,2 1,1 1,1
Poids / weight (voile + élévateurs en kg) 4,8 5,2 5,5
This manual suits for next models
2
Table of contents
Languages:
Other Nervures Aircraft manuals
Nervures
Nervures FAIAL User manual
Nervures
Nervures LOL 16 User manual

Nervures
Nervures KENYA 22 User manual
Nervures
Nervures VALLUNA II 25 Owner's manual

Nervures
Nervures Estive 22 User manual
Nervures
Nervures ALPAMAYO II 43 User manual
Nervures
Nervures TOUBKAL 41 User manual

Nervures
Nervures ALPAMAYO 43 User manual
Nervures
Nervures DIAMIR for two User manual
Nervures
Nervures KIDO User manual
