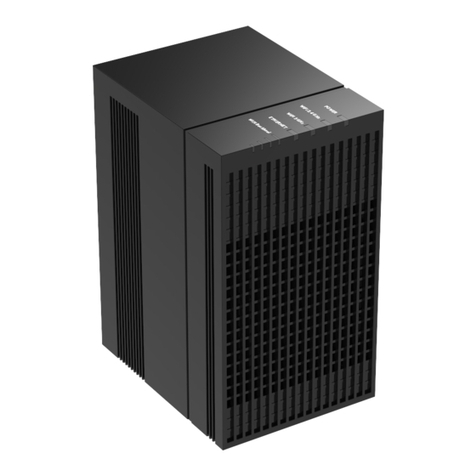
Ness 104-460 Auto-IP NVS User manual

1|Page
WeknowyouareexcitedtogetyourhandsonourAutoIPNVS(asyoushouldbe)butpleasereadthis
quickstartguidebeforepoweringup.
1. MakesureyourIPcamerasareNOTconnectedtothecustomer’scomputernetworkandNOT
connectedviaanetworkswitch.
IPcamerasmustbeconnectdirectlyintotheNessAutoIPNVS.
2. MakesuretocheckoutallourtrainingvideosonourYouTubechannel
(www.youtube.com/nesscorporation)astheremightbefeaturestheNVScandothatyou
didn’tknowabout.
3. Ensureyouhavereadandunderstandthefollowingpages.
Premium Network Video Recorder
104-460 Auto-IP NVS
QUICK START GUIDE
www.ness.com.au

2|Page
104‐460‐AutoIPNVSQuick‐StartGuide
INCLUDEDINTHEBOX
1xNessAutoIPNVS
1xPowerlead
1xUserManual
1xAutoIPNVSQuick‐StartGuide(thisguide)
WELCOMETONESSCORPORATION
Thankyouforyourpurchase!IfyouarenewtoNessthereareafewstepsyouwillwanttotaketoget
familiarwiththeproductandprogrammingprocess.
Followingthesestepswillmakeyourfirstinstallgomoresmoothlysavingyoutimeandmoney.
1. WatchtheTutorialVideosonourYouTubechannel(www.youtube.com/nesscorporation)
2. Poweritupatyourpremisestogetfamiliarwiththesystembeforegoingtothejobsite,
3. Followthestepsbelow(InstallingtheNVSforthefirsttime)
INSTALLINGTHENVSFORTHEFIRSTTIME
BeforepoweringtheNessAutoIPNVSupforthefirsttime,pleasecheckandmakesureyouhave
donethefollowing:
Ensureyouhaveinstalledatleastoneharddriveandlockedthedrivebays.
Ensureyouhavenotconnectedanyofthecamerasintothecustomer’snetworkorintoa
networkswitch.
EnsureyouhaveconnectedaLANcablefromthe‘uplink’ontheNVStoacomputerornetwork
switch.
OnceyouhaveconfirmedtheabovethenyouaresafetoturntheNessAutoIPNVSonforthefirst
time.

3|Page
OncetheNessAutoIPNVSisturnedonforthefirsttime:
AllowtheharddrivestoautomaticallyformatandinstallontheNVS.Thiswilltakeapprox5‐10
minutesdependingontheHDDsize.Pleasewaitforthistobecompletedbefore
proceedingfurther.
ItisrecommendedthataStaticIPaddressbeusedwherepossible.Thefollowingwillstepyou
throughsettingaStaticIPaddressintheNVS.
TheStaticIPshouldbeobtainedfromtheclient’sITadministrator.
ActionDisplay
1. PresstheEnterbuttontoaccesstheOSDmenu, “SystemInfo”
2. Thenpressthe“DownArrow”tomovetothenextoption,
whichis‘SystemSet‐Up’
“SystemSet‐Up”
3. Pressthe“rightarrow”toenterintoSystemset‐up“NetworkSet‐up”
4. Pressthe‘rightarrow”toenterintoUplinkNetworksettings“Ethernet1”
5. Pressthe‘Enter”buttontochangethe‘ConnectionType’“[1]ConnectionType
DHCP’
6. Pressthe‘Enter”buttontoentertheeditmodeof‘Connection
Type’
[1]ConnectionType
DHCP
7. Thenpressthe“DownArrow”,toSelect“Static”[1]ConnectionType
Static
8. Thenpressthe“Enterbutton”tosavethe‘StaticSetting’[1]ConnectionType
Static
9. ThesystemwillthenRestarttheNetwork[1]ConnectionType
Static
10. Thenpressthe“DownArrow”tomovetothesettingoptionof
theStaticIPAddress.
000.000.000.000
11. Pressthe‘Enter”buttontoedittheStaticIPAddress
UsetheUpandDownarrowstoselecttheIPNumberrequired.
UsetheRightarrowtomovetothenextsetofdigitsandagain
usetheUpanddownArrowstoselecttherequireddigits.
000.000.000.000
12. OncethefullIPAddressisset,Pressthe‘Enter”buttonxxx.xxx.xxx.xxx
13. Thenpressthe“DownArrow”,tomovetotheSubnetmask
setting.PressEntertochangeit,
[1]Netmask
255.255.255.000
14. OnceyouhavesettheSubNetmask,thenpressthe“Down
Arrow”tomovetoGatewaysetting.
[1]Gateway
000.000.000.000
15. TosettheGateway,Pressthe‘Enter”buttontoenteredit
modeUsetheUpandDownarrowstoselecttheIPNumber
required.
UsetheRightarrowtomovetothenextsetofdigitsandagain
usetheUpanddownArrowstoselecttherequireddigits.
[1]Gateway
000.000.000.000
16. OncethefullGatewayIPAddressisset,Pressthe‘Enter”
button
[1]Gateway
xxx.xxx.xxx.xxx
17. NowpresstheESCkeyfourtimestoreturntothenormal
screen(TheIPaddressisnowset)
(ForfulldetailsonNetworkConfigurationpleaserefertosection3.3onpage11oftheNVSUsers
Manual.)

4|Page
Ensureyourcomputerisonthesamenetworkandthesamenetworkrangeasthe‘uplink’onthe
NVS,thenconnecttotheNVSusingInternetExplorer(IE)usingtheIPaddresssetinstep11
above.
PlugyourcamerasintothebackoftheNVSoneatatime.(Waitapprox5secondsbeforeplugging
inthenextcamera.)
Whenthecamerasareaddeditmaytake1‐5minutesforthemtoappear.Thisisnormalasthe
NVSneedstoconfigurethecamerasbeforetheyaredisplayed.
Faultfinding.
(Ifafter5minutesthecamerasdonotappearontheIEbrowserwindow,bringthecameratothe
NVSandplugintoaportusingaknowngoodnetworkcable.Oncepluggedinwaitforapprox1‐5
minutestoconfirmiftheimageappears.Ifitdoesn’tthenproceedcheckyourcamerasettingsin
theNVS.Donotmakeanyotherprogrammingchangesatthistime.
CameraSettings;
1. EnsuretheIPCamerayouareconnectingisaNessNIPSeriesCamera,
2. Clickon“Menu”oftheNVSandcheckthecamerasetting‘AdvancePnPSetting’issetto;
UsedefaultPnPSetting=Yes
EnablePnP=On
EnablePortForwarding=On
EnablePoEWatchdog=On
PortonewillrepresentCamera1,Port
2=Camera2etc.

5|Page
3. Ensure‘Activated’issettoYes.
Other manuals for 104-460 Auto-IP NVS
1
This manual suits for next models
1
Table of contents
Other Ness Network Hardware manuals
Popular Network Hardware manuals by other brands

Allied Telesis
Allied Telesis AT-TRAY1 Specifications

Globe Wireless
Globe Wireless SafeDial Wireless GL45-3G quick start guide
SHARX SECURITY
SHARX SECURITY HTNR4560 Reference manual
Gooxi
Gooxi RMC3116-670-HS user manual
Infoblox
Infoblox 4005 Series installation guide

Gigamon
Gigamon GigaVUE-TA100-CXP installation guide

