NeuroTek EyeScan 2000S User manual
Liability Disclaimer
The EyeScanTM 2000S is a tool designed to assist the clinician in the
administrationofEMDR.Thepurchaser/clinicianagreestoacceptfull
responsibility for any harmful results and/or undesirable consequences
obtained from the use of this machine.
The manufacturer of this machine shall not be held liable for adverse affects
caused to clients resulting from the administration of EMDR or any other
form of therapy using this machine.
Any unexpected reactions, results, or behavior noted as a result of the
administrationof EMDR, either using the EyeScanTM 2000S or by other
methods, should be immediately reported to the EMDR Institute.
The EMDR Clinician's Assistant
Please read all instructions
completely before operating.
Warning
This instrument should not be used with
any person who has a history of seizures.
NeuroTek Corp.
..............TM
EyeScan 2000S
TM
LimitedWarranty
The manufacturer warrants this equipment to the original purchaser against
defective material or workmanship during the warranty period from the date
of purchase. The manufacturer’s responsibility under this warranty is
limited to the repair or replacement of defective parts.
Thewarrantyperiod:
90 days on components that connect with wires. This includes cables,
wired pulsers, headphones and AC Adapters. One year on all other parts
and components. The manufacturer reserves the right to determine whether
the part or parts failed because of defective material, workmanship or other
causes. Failure caused by accident, normal wear, alteration, misuse,
tampering, negligence or improper packaging of returned units is not
covered by this warranty. Thiswarranty is void when productis used by
multipletherapistsina shared environment.Please be advised that if a
product is returned for warranty service and no defects are found or the
problem is due to a weak/dead battery or operator error a shop charge and
return shipping costs may be charged.All warranty repairs must be done
by NeuroTek or a representative designated by NeuroTek. Any repair to the
equipment other than by these authorized facilities voids this warranty. The
rights under this warranty are limited to the original purchaser and may not
be transferred to subsequent owners. To receive warranty service, you
mustfirstcontactNeuroTekforareturnauthorizationnumber.This
number will be used for tracking your return. Send the complete unit,
postage paid, to NeuroTek. Include a description of the problem you are
having and a daytime phone number.
303420-8680Voice
303422-9440 FAX
12100W.52ndAve.#116
WheatRidgeCO80033
www.neurotekcorp.com
TM
NeuroTek
Corporation
EyeScan 2000S Operating Instructions
Getting Started:
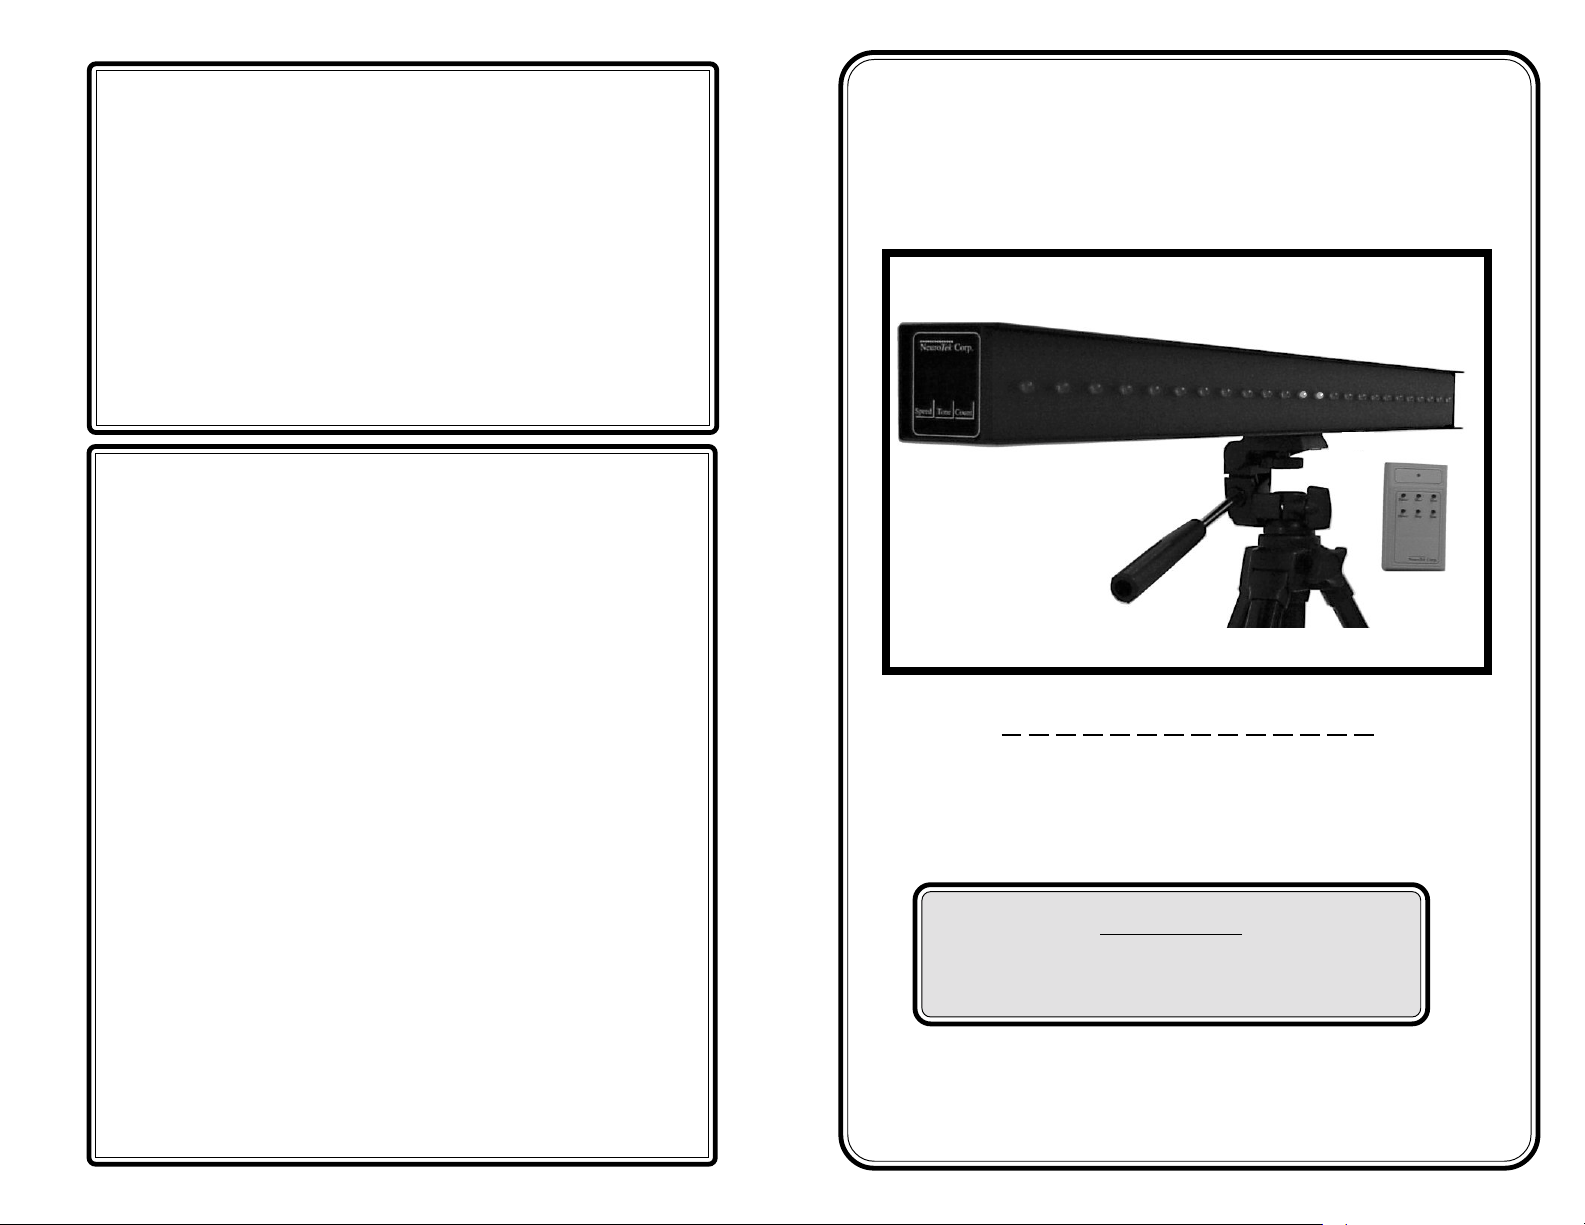
The EyeScan 2000 comes with 5 main components, the light bar, the remote
control, a tripod, headphones, and the AC adapter. The light bar is designed to mount
directly to the tripod. First, connect the tripod to the light bar. If you mountthelight bar
on the tripod with the handle positioned parallel to the light bar, you will be able
to adjust the horizontal/vertical axis. If the handle is positioned out the back, you
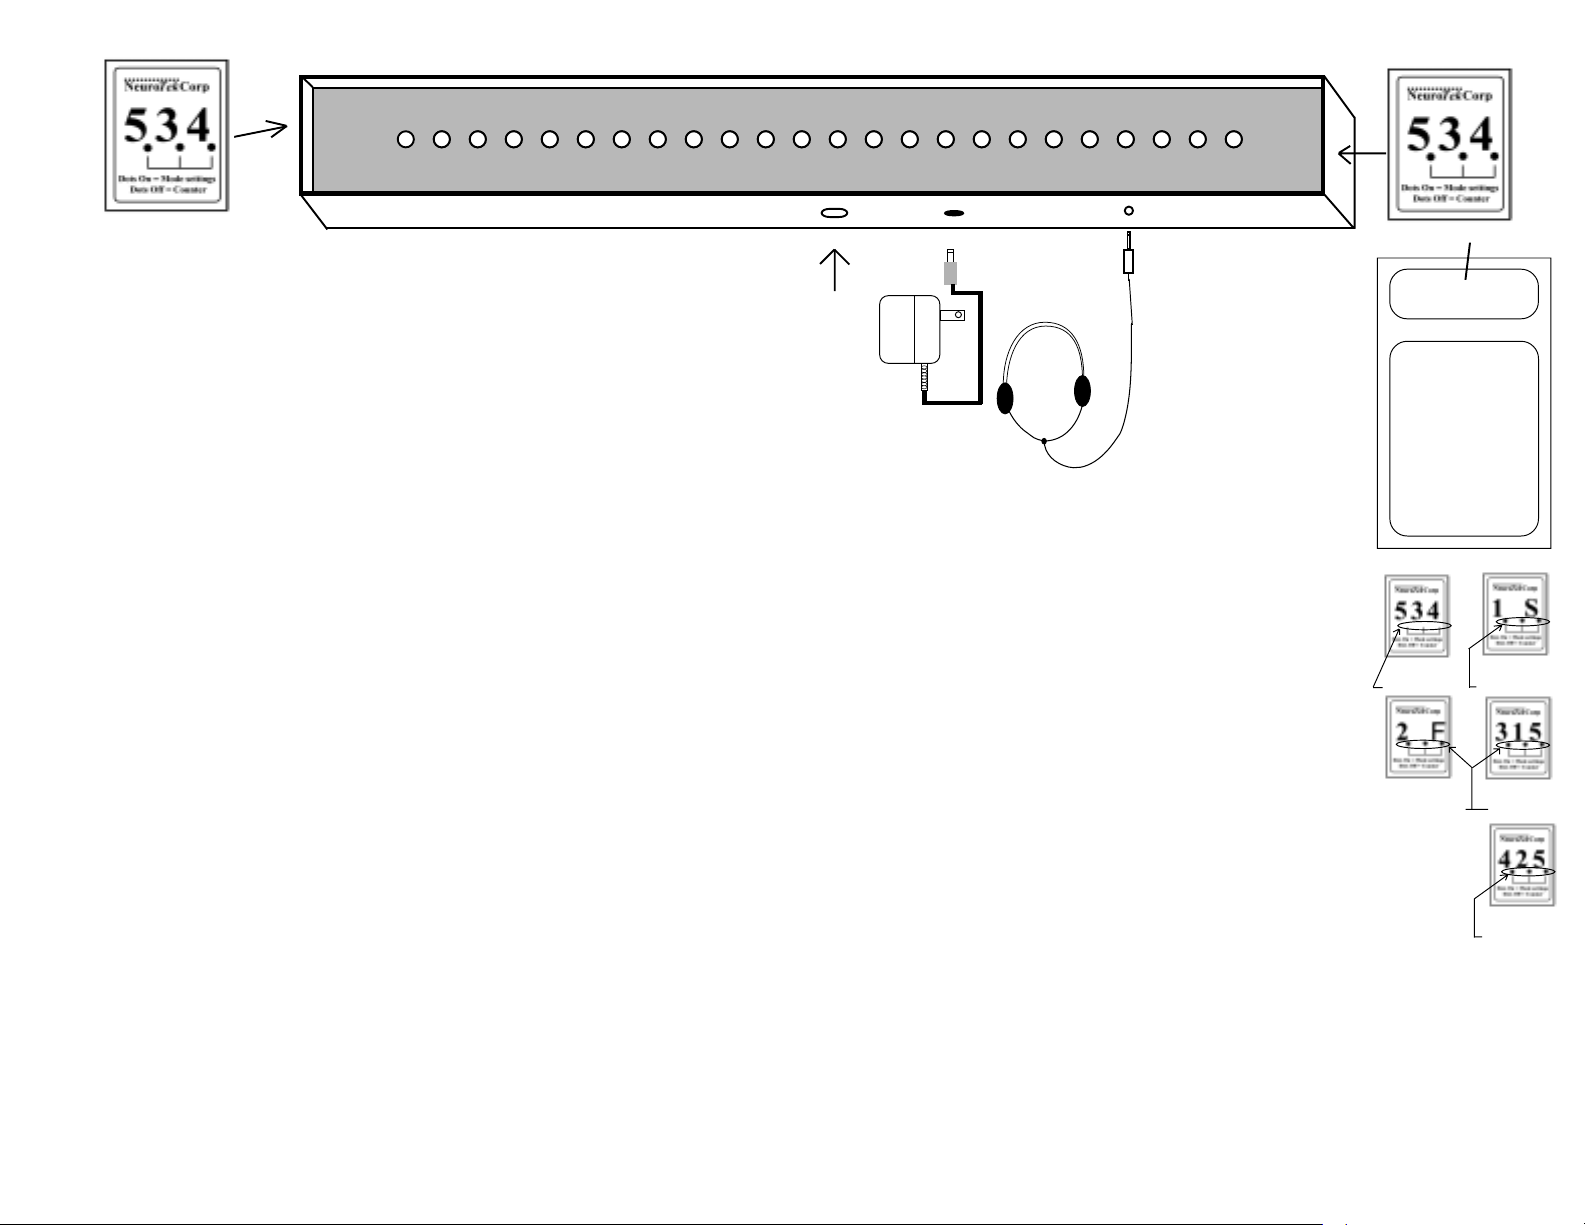
will not be able to adjust the angle. Next, connect the headphones to the light-bar as
shown. Finally, connect theAC adapter to the light bar and plug theAC adapter to a wall
outlet power source.
Turning on the Power: The on/off switch is located on the back of the light-bar.
When you are ready to start an EMDR session, turn the power switch to the on
position. The lights will make one complete scan and then stop in the center of the light
bar. After finishing your session, turn the power switch off.
The Remote Control: The remote control sensors are located on each end of the light-
bar in the display windows. Reduced sensitivity to the remote control may be
realized if remote control is pointed directly in front of, or in back of the light-bar.
All button functions on the Remote Control are illustrated in the diagram to the right. The
green indicator on the remote control will flash when any button is pushed. If the light fails
to flash, replace the 2AA batteries in the remote.
To begin scanning press the “Start” button. To stop scanning press the “Stop”
button.The lights will always stop in the center of the light-bar.All modes and settings
may be changed whether scanning or stopped.
The Numeric Display: The EyeScan 2000 has two numeric displays, one conveniently
locatedon eachend ofthe light-bar. Each 3-digit displaywill indicate5 differentinforma-
tion modes: counter, visual mode, audio, volume and speed.To select the between the
different display modes, press the "Mode /\" or the "Mode \/" buttons repeatedly until
the desired display mode is reached. See display mode diagrams to the right.
Count Display Mode: This is the default display mode when the EyeScan 2000 is first
turned on. To select the count display mode, push the "Mode /\" or the "Mode \/"
buttons until the 3 dots at the bottom of the display window are off. When count
display mode is selected, the completed number of repetitions for the current set are
displayed. The counter will count up to 999 before starting over. When the EyeScan is
stopped between sets, the counter will continue to display the most recent count. When
the next set is started, the counter will reset to zero. The EyeScan always keeps track
of the current count even if the Count display mode is not selected on the display.
Pressing the "/\" or "\/" buttons in count mode will adjust the speed.
Headphones
Tripod
Connects
Here
Visual Display Mode: To select the "visual display mode", press
the press the "Mode /\" or the "Mode \/" buttons repeatedly until
all three red dots are on and the left digit displays a "1". When
"visual display mode" is selected, the right digit will display a "S"
for scan mode or "E" for ends only mode. Press the "/\" or "\/"
buttons to switch between "Scan" or "Ends only" modes.
Tone on/off:To select the "tone mode", press the "Mode /\" or
the "Mode \/" buttons repeatedly until all three red dots are on and
the left digit displays a "2". Press the "/\" or "\/"buttons to turn tone
on or off. When tone is turned on a "O" is displayed in the right
most digit. When tone is turned off a "F" is displayed.
Volume Display Mode: To select the "volume display mode",
press the "Mode /\" or the "Mode \/" buttons repeatedly until all
three red dots are on and the left digit displays a "3". When
AC Adapter
RemoteControl
Green Indicator
.
..
..
.
.Start
Stop
Mode /\
Mode \/
/\
\/
NeuroTek Corp
............
Display in
count mode
(dots are off)
Display shows
audio off mode
(dots are on)
Displaymodes
"volume display mode" is selected, a volume number between 1 & 15 is
displayed. Press the "/\" or "\/" buttons to increase or decrease the volume.
Speed Display Mode: To select the "speed display mode", press the "Mode /
\" or the "Mode \/" buttons repeatedly until all three red dots are on and the left
digit displays a "4". When "speed display mode" is selected, a speed reference number
between 1 & 40 is displayed. Press the "/\" or "\/" buttons to increase or decrease the speed
ofalternations.
Battery: The EyeScan 2000 will operate from the integrated 9 volt battery or by
plugging into a wall outlet. The battery door is located on the back side of the light-bar.
When theAC adapter is plugged into the light-bar, the battery is internally disconnected.
Display shows
speed at 25
(dots are on)
1=Scan Mode
2=Tone 3=Volume
4=Speed
Display shows
scan selected
(dots are on)
Display shows
volume at 15
(dots are on)
Other NeuroTek Measuring Instrument manuals


Popular Measuring Instrument manuals by other brands


Desco
Desco 19492 Operation and maintenance

WIKA
WIKA CPH6200 operating instructions

HACH LANGE
HACH LANGE Filtrax user manual

Oz electronics
Oz electronics MT-901A user manual

Tempo Communications
Tempo Communications TV220E instruction manual

Agilent Technologies
Agilent Technologies E444 AU Series installation guide