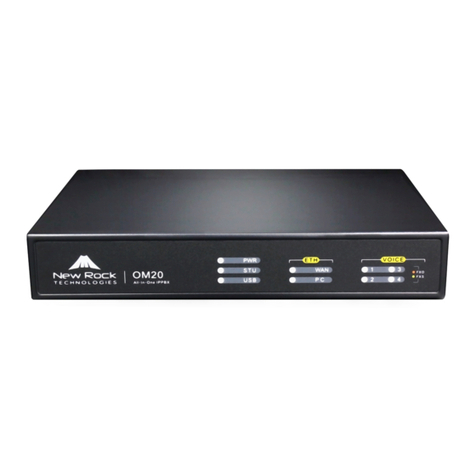
New Rock Technologies OM50 Operator's manual

New Rock Technologies, Inc.
OM20/OM50 Installation and
Configuration Guide
http://www.newrocktech.com
Document Version: 201708

www.newrocktech.com 2
Amendment Records
Copyright © 2017 New Rock Technologies, Inc. All Rights Reserved.
All or part of this document may not be excerpted, reproduced and transmitted in any form or by any
means without prior written permission from the company.

www.newrocktech.com 3
Guide Description
This all-in-one guide intends to help the VAR, SI and Service Providers to correctly install and manage
the New Rock OM20 and OM50 IP telephony systems.
The manual guides administrators in setting OM parameters on Web interfaces. Some parameters can
be set by using a telephone.
Contents
Amendment Records......................................................................................................................................................2
Guide Description........................................................................................................................................................... 3
1 Installation and Configuration Process Overview.............................................................................................. 7
1.1 Preparation...............................................................................................................................................................................7
1.2 Connecting the Components.................................................................................................................................................7
1.3 Configuring Basic Voice Services........................................................................................................................................ 7
1.4 Configuring Advanced Features........................................................................................................................................... 7
1.5 Localizing the System............................................................................................................................................................ 8
2 Preparation.................................................................................................................................................................... 8
2.1 Site Survey...............................................................................................................................................................................8
2.1.1 ITSP and PSTN Connectivity............................................................................................................................ 8
2.1.2 Local Network Connectivity.............................................................................................................................. 9
2.1.3 Customer Phone Requirements........................................................................................................................9
2.2 Deployment Considerations.................................................................................................................................................. 9
2.2.1 Codec and Network bandwidth.......................................................................................................................9
2.2.2 Factors which will effect voice quality........................................................................................................ 10
2.2.3 Static or Dynamic IP address for devices................................................................................................. 11
2.2.4 Fax and POS machine....................................................................................................................................... 11
2.3 Updating the Firmware.........................................................................................................................................................11
3 Connecting the Components..................................................................................................................................12
3.1 Connecting the Administration Computer......................................................................................................................... 12

www.newrocktech.com 4
3.1.1 Connecting the Computer to the LAN....................................................................................................... 12
3.1.2 Download Finder software.............................................................................................................................. 12
3.2 Installing the OM20...............................................................................................................................................................13
3.2.1 Connecting the OM20 to the LAN...............................................................................................................13
3.2.2 Finding the IP address of the OM20...........................................................................................................13
3.2.3 Logon to the OM20............................................................................................................................................14
3.2.4 Verifying the Firmware Version.................................................................................................................... 15
3.3 Installing the NRP IP Phones............................................................................................................................................. 15
3.3.1 Connecting the Phones to the LAN..............................................................................................................15
3.3.2 Activating the Phones using PIN...................................................................................................................16
3.4 Installing the ATA..................................................................................................................................................................17
3.4.1 Connecting the ATA to the LAN...................................................................................................................17
3.4.2 Finding the IP address of the ATA...............................................................................................................17
3.4.3 Logon to the ATA................................................................................................................................................18
3.4.4 Verifying the Firmware Version.................................................................................................................... 19
4 Configuring the Basic Voice Services................................................................................................................. 19
4.1 Configuring the OM20..........................................................................................................................................................19
4.1.1 Configuring the General Settings on the OM20.....................................................................................19
4.1.1 Configuring the OM20 for ITSP Connectivity......................................................................................... 20
4.1.2 Configuring the OM20 for PSTN Connectivity....................................................................................... 22
4.1.3 Configuring the Inbound Handling – Auto Attendant........................................................................ 23
4.1.4 Configuring the Inbound Handling – DID................................................................................................. 24
4.1.5 Configuring the Inbound Handling – Key System.................................................................................25
4.1.6 Configuring the Outbound Handling........................................................................................................... 26
4.2 Configuring the ATA............................................................................................................................................................. 29
4.2.1 Configuring the ATA General Settings....................................................................................................... 29
4.2.2 Configuring the ATA to Register to OM20.............................................................................................. 30
4.3 Configuring the IP Phones.................................................................................................................................................. 33

www.newrocktech.com 5
5 Configuring the Advance Features....................................................................................................................... 34
5.1 Customizing a Simple Auto Attendant...............................................................................................................................34
5.1.1 Customizing the Greeting.................................................................................................................................34
5.1.2 Assigning the Attendant Extensions............................................................................................................37
5.2 Making an Auto Attendant with Multi-Level IVR...............................................................................................................39
5.3 Making an Auto Attendant with Scheduled Routing Rules.............................................................................................40
5.4 Customizing the Music for Call Hold..................................................................................................................................41
5.5 Selecting a Preferred Audio Codec................................................................................................................................... 42
5.6 Making change to the Extension Numbers.......................................................................................................................42
5.6.1 Analog extensions....................................................................................................................................................42
5.6.2 IP Extensions............................................................................................................................................................44
5.7 Activating the Voice Mail..................................................................................................................................................... 45
6 Localizing the System.............................................................................................................................................. 48
6.1 Setting the System Time..................................................................................................................................................... 48
6.2 Selecting the Caller ID Detection Mode to PSTN............................................................................................................48
6.3 Making Changes to the Digit Map......................................................................................................................................49
6.4 Selecting the impedance of FXO ports............................................................................................................................. 50
6.5 Selecting the Call progress tone plan................................................................................................................................51
7 Security.........................................................................................................................................................................51
7.1 Making Change to the Ports............................................................................................................................................... 52
7.2 Making Change to the web GUI Password.......................................................................................................................52
8 Multi-Sites Deployment............................................................................................................................................ 53
8.1 Registering Remote IP Phones to the OM20................................................................................................................... 55
8.2 Registering the Remote ATA to the OM20....................................................................................................................... 57
9 Installation Guide and User Training....................................................................................................................59
9.1 Installation Guide.................................................................................................................................................................. 59
10 Troubleshooting.......................................................................................................................................................62
10.1 Troubleshooting Process...................................................................................................................................................62
10.1.1 Collecting Information........................................................................................................................................... 63
10.1.2 Troubleshooting the Fault.....................................................................................................................................63

www.newrocktech.com 6
10.1.3 Resolving the Fault................................................................................................................................................63
10.2 Troubleshooting Cases......................................................................................................................................................63
10.2.1 IP terminals and ATA are unable to register successfully with the OM20/50.............................................. 63
10.2.2 Incoming call on FXO gateway is always disconnected..................................................................................64
10.3 Frequently Ask Questions................................................................................................................................................. 65
10.4 Assistance in Fault Analysis............................................................................................................................................. 69

www.newrocktech.com 1-7
1Installation and Configuration Process Overview
This chapter provides an overview of the installation and configuration process.
1.1 Preparation
In Chapter 3, “Preparation,” you will learn about the components and service requirements, codec and
network bandwidth requirements, call capacity, and related topics, to ensure that the system is well planned
to meet the needs of the customer. This chapter also describes basic procedures such as updating the
firmware, which should be completed before you begin installing the equipment.
1.2 Connecting the Components
In this stage, you physically connect the OM20/50 IP Telephony System equipment to the LAN. Chapter 4,
“Connecting the Components” explains how to connect the OM20/50, which provides the PBX service
for the phones, and the ATA, which provides voice mail service and PSTN access. You also learn how to
install the IP phones and any accessories. Furthermore, you also verify the latest upgrade firmware that you
have updated during the Preparation phase.
1.3 Configuring Basic Voice Services
After you connect the components, you need to configure voice features such as ITSP service and PSTN
access. Chapter 5, “Configuring Basic Voice Services”guides you through these steps. You also set up call
routing for both outbound and inbound calls.
1.4 Configuring Advanced Features
Now you are ready to begin configuring advanced features, depending on the deployment scenarios. In
Chapter 6, “Configuring Advanced Features,” you will learn how to configure Music On Hold, to set up

www.newrocktech.com 2-8
the Auto Attendant with Multilevel IVR, to activate voice mail and to route calls with hunt groups and shared
line appearances.
1.5 Localizing the System
For customers outside China, you need to localize the system. Chapter 7, “Localizing the System,” guides
you through the steps.
2Preparation
This chapter is important reading before you begin installing the equipment or configuring the system. To
ensure that the installation process goes smoothly, verify that you have the required services, components,
and information.
2.1 Site Survey
The site surveys consists of gathering relevant information about the customer, the existing infrastructure, the
network, the telephone equipment, and the available services. This survey helps you to prepare for the
installation of the OM20/50 IP Telephony System and to anticipate the design considerations. The site survey
can be conducted on the customer premises or remotely over the phone and email. Various site survey
templates can be used. Chapter 10, “Installation Guide and User Training,” contains a site survey
template example that you can use to record the customer.
2.1.1 ITSP and PSTN Connectivity
ITSP and PSTN lines: Ensure that the lines are operative and that any features, such as caller identification,
operate properly before starting the installation. Ensure that the cables are available in the location where you
are installing the New Rock Devices.

www.newrocktech.com 2-9
2.1.2 Local Network Connectivity
The Local Area Network (LAN) is the communication platform used by the OM20/50 IP Telephony System
for allowing communications among the telephone users and between the telephone users and the external
VoIP and PSTN services. This LAN is composed of the data wiring (UTP cabling), networking equipment
(switches and routers/access device) and the telecommunication (PSTN) lines.
The Local Area Network (LAN) may be already installed or it can be installed and configured at the time of
installing the OM20/50 IP Telephony System Below are the general recommendations to ensure proper
operation of the OM20/50 IP Telephony System.
Ethernet cabling: Ensure there is an Ethernet cabling system and that there is an outlet for each NewRock
VoIP device. It is recommended that Ethernet cables are UTP CAT 5e or better.
2.1.3 Customer Phone Requirements
The IP phones require access to power outlets or can receive power from a Power over Ethernet (PoE)
switch and are not supplied with power supplies. If you are not using the recommended PoE switch, you
need to purchase a suitable power supply.
2.2 Deployment Considerations
When installing and configuring the OM20/50 IP Telephony System, it is necessary to analyze and meet
some design considerations to ensure the best quality and user experience. The design considerations cover
available bandwidth and quality of service.
2.2.1 Codec and Network bandwidth
The available connection bandwidth determines the maximum number of simultaneous calls that the system
can support with the appropriate audio quality. Before installing and configuring the OM 20/50 IP Telephony
System, use this information to determine the maximum number of simultaneous VoIP connections that the
system can support. In general it is a best practice to use no more than 75% of the total available bandwidth
for calls. This provides space for data traffic and helps ensure good voice quality.
NOTE: Some ITSP SIP trunk services limit the maximum number of simultaneous calls. Please check with
your Service Provider to understand the maximum number of simultaneous calls each SIP trunk supports.
The following table provides the approximate bandwidth allocation for different codecs.
Codec
Approximate bandwidth allocation for
each side of conversation (kbit/s)
2 calls
(kbit/s)
10 calls
(kbit/s)
G.729A
55
110
550
G.711U/G.711A
110
220
1100

www.newrocktech.com 2-10
2.2.2 Factors which will effect voice quality
Quality and reliability were the two darkest spots on VoIP's reputation for the past years. Here are the
main things that affect voice quality in VoIP and what can be done to maximize quality.
Bandwidth
Your Internet connection always tops the list of factors affecting voice quality in VoIP conversations. The
bandwidth you have for VoIP is the key for voice quality. For instance, if you have dial-up connection,
don’t expect great quality. A broadband connection will work right, as long as it is not spotty, and not
shared with too many other communication applications.
Equipment
The VoIP hardware equipment you use can greatly impact on your quality. Poor quality equipment are
normally the cheapest ones (but not always!). It is therefore always good to have as much information as
possible on an ATA, router or IP phone before investing on it and starting to use it.
NAT Mapping
If an IP extension registered to OM (OM puts behind router) via internet or if multi-site networking is used,
some form of NAT (Network Address Translation) traversal is required. NAT is a function that allows
multiple devices to share the same public, routable, IP address to establish connections over the Internet.
NAT is present in many broadband access devices to translate public and private IP addresses.
Some ITSPs provide NAT traversal, but some do not. If your ITSP does not provide NAT traversal, you
have several options. Use NAT mapping with SIP-ALG (Application Layer Gateway) in the router.
It is necessary to configure remote-address information and configure port mapping on the Internet ingress
router or used the P2P traversal feature on OM. This enables devices on external networks to traverse
NAT (Network Address Translation) to get access to the OM.
Weather Conditions
The voice is terribly distorted by something called static, which is a small static electricity generated on
broadband lines due to thunderstorms, heavy rain, strong gusts, electrical impulses etc. This static is not
very much noticeable when you surf the net or download files, which is why we don’t complain about it
when we use the Internet for data despite it be here; but when you are listening to voice, it becomes
disturbing. It is easy to get rid of static: unplug your hardware (OM20/50, ATA, router or phone) and plug
it back again. The static will be brought to naught.
The effect of weather conditions on your connection is not something you can change. You can have some
short-term relief in some cases, but most of the time, it is up to your service provider to do something. At

www.newrocktech.com 2-11
times, properly grounding the device, modifying some parameter values on device and changing the cables
solves the problem completely.
Location of your hardware
Interference is another factor for voice quality during voice communication. Often, VoIP equipment
interfere with each other thus producing noise and other problems. For example, if OM20/50 and ATA are
too close to your broadband router or any appliances, you might experience voice quality problems. This is
caused by electrical feedback. Try moving them away from each other to get rid of the garbled calls,
echoes, dropped calls etc.
2.2.3 Static or Dynamic IP address for devices
The OM20/50 becomes a DHCP client of any server on the network. The recommended setting is to use a
static IP address. This configuration provides ease of installation and prevents connectivity issues that would
occur if the IP address of the OM20/50 changed.
When the extension needs to register with the OM20/50 from an external network, New Rock recommends
mapping an external (public) Static IP address or dynamic domain name on the OM20/50.
2.2.4 Fax and POS machine
OM20 supports two fax modes: T.38 and G.711 transparent transmission. It is highly recommended to check
if the facsimile and POS machine can be connected to the FXS port of OM20.When fax messages are
received or sent through an analog trunk, the G.711 transparent transmission mode is required. When fax
messages are received or sent through an IP trunk, a T.38 or a G.711 transparent transmission mode needs to
be selected according to an actual requirement and the mode supported by the IP phone operation platform.
If both T.38 and G.711 transparent transmission modes are supported, T.38 is recommended because it is
more stable.
2.3 Updating the Firmware
It is highly recommended that you check for recent updates before you install your equipment. Later
instructions in this guide will help you to install the firmware that you download in this preparation phase.
To find the latest firmware for a device, go to http://en.newrocktech.com/software/

www.newrocktech.com 3-12
3Connecting the Components
3.1 Connecting the Administration Computer
3.1.1 Connecting the Computer to the LAN
A user could fail to log in with the default IP address if the IP address of user’s computer and the default OM
IP address are not at the same network segment. Set the IP address of user's computer to be identical with the
same network segment of the device. For example, if the OM IP address is 192.168.2.218, set the computer’s
IP address to any address at the network segment of 192.168.2.XXX.
3.1.2 Download Finder software
Finder is a PC-based software for obtaining the IP address of New Rock products, especially FXO devices,
in a LAN environment.
Link to download Finder software installation package: http://en.newrocktech.com/softwares/700.html

www.newrocktech.com 3-13
3.2 Installing the OM20
3.2.1 Connecting the OM20 to the LAN
Step 1 Connect the WAN port of the OM20 to the LAN switch.
Step 2 Connect the FXO port of the OM20 to the telephone line provided by a telecom operator or an
extension line from another PBX.
Step 3 Connect the FXS port of the OM20 to an analog phone or a fax machine.
Step 4 Connect the grounding cable: connect the end with a smaller diameter to the OM20, and connect
the other end to a ground bar.
Step 5 Connect the PWR port to the power adapter supplied with the OM20 and then connect the power
adapter to an electrical outlet. The PWR LED turns blinking green to indicate that the device is
starting and will be in steady green to indicate that the device is running normally.
3.2.2 Finding the IP address of the OM20
By default, the IP address of OM20 is automatically assigned by the DHCP server. The IP address can be
found by using these methods:
Method 1: If OM20 has FXS port: dial “##” to obtain device IP address by an analog telephone
connected to the FXS port after the equipment is powered on.
Method 2: Obtain device IP address via New Rock’s Finder software as follows:
Step 1 Double click and allow to run this application on your PC.
Step 2 Click Refresh, and the MAC address and IP address of target models will be listed.
Note: Please connect your PC directly to the device via Ethernet cable if no devices are
found.

www.newrocktech.com 3-14
3.2.3 Logon to the OM20
Step 1 Make sure that the PC and the device are on the same network segment.
Step 2 Enter the device IP address in the browser address bar (e.g. 192.168.2.218).
The Web GUI can be accessed using browsers such as Internet Explorer 8 to 11, Firefox,
and Google Chrome.
The device is only allowed to access using HTTPS. Since the factory default certificate is
used, a prompt like "There is a problem with this website's security certificate" may occur.
Click Continue to this website to access the login page.
Step 3 Enter the login interface for OM20 configuration by selecting your role as admin and entering the
password, which by default is admin.
Item
Description
Role
The Web utility provides two authority levels:
An administrator is allowed to make changes to any configuration. After login,
“Welcome Admin” is displayed on the upper left corner.
An operator is allowed to navigate configuration pages and make limited changes to
configurations. After login, “Operator” is displayed on the upper left corner.
The device allows multiple admin users to log in, in which case the first user can
modify, while others can only browse. After login, “Welcome User” is displayed on
the upper left corner.
Note: In the “Welcome user” mode, the operation only can browse certain pages. The

www.newrocktech.com 3-15
Item
Description
pages that cannot be browsed include: Advanced >Security,System tool >Change
password,System tool >Software upgrade,System tool >Import data,System
tool >Export data.
3.2.4 Verifying the Firmware Version
Step 1 Click Info and you can view the software version of OM20
3.3 Installing the NRP IP Phones
Note:
:
The plug and play procedure described below is only applicable to New Rock NRP series
IP Phones. For installation of IP phones of other brands please refer to the installation manual
supplied by the phone manufacturer.
3.3.1 Connecting the Phones to the LAN
Step 1 Make sure that the NRP IP phone and the OM20 are on the same network segment

www.newrocktech.com 3-16
Step 1 Connect the WAN port of the IP Phone to the LAN switch.
Step 2 Connect the PC port of the IP Phone to a PC if there is one.
Step 3 Connect the PWR port of the IP Phone to the power adapter supplied with the IP phone and then
connect the power adapter to an electrical outlet. You can view the system progress and the
INITIALIZING prompt on the screen.
3.3.2 Activating the Phones using PIN
Step 1 After connection and powered on, the screen will display “Please Input PIN “
Step 2 Input PIN for the extension and click OK. (e.g. 447669)
Step 3 When “The PIN is right!” prompts, click OK to reboot to make the configuration effective.
Step 4 The extension number will display at the upper left corner after a reboot

www.newrocktech.com 3-17
3.4 Installing the ATA
3.4.1 Connecting the ATA to the LAN
Step 1 Connect the WAN port of the ATA to the LAN switch.
Step 2 Connect the FXO port of the ATA to the telephone line provided by a telecom operator or an
extension line from another PBX.
Step 3 Connect the FXS port of the ATA to an analog phone or a fax machine.
Step 4 Connect the PWR port of the ATA to the power adapter supplied with the ATA and then connect the
power adapter to an electrical outlet. The PWR LED turns blinking green to indicate that the ATA is
starting and will be in steady green to indicate that the device is running normally.
3.4.2 Finding the IP address of the ATA
By default, the IP address of ATA is automatically obtained by DHCP. The IP address can be obtained by
using these methods:
Method 1: If ATA has FXS port: dial “##” to obtain device IP address by an analog telephone
connected to the FXS port after the equipment is powered on.
Method 2: If ATA without FXS port: obtain device IP address via New Rock’s Finder software.
How to obtain device IP address via Finder:
Step 1 Double click and allow to run this application on your PC.
Step 2 Click Refresh, and the MAC address and IP address of target models will be listed.
Note: Please connect your PC to the device via Ethernet cable if no devices are found.

www.newrocktech.com 3-18
3.4.3 Logon to the ATA
Step 1 Make sure that the PC and the ATA are on the same network segment.
Step 2 Enter the ATA IP address in the browser address bar (e.g. 192.168.2.218)
The Web GUI can be accessed using browsers such as Internet Explorer 8 to 11, Firefox,
and Google Chrome.
The device is only allowed to access using HTTPS. Since the factory default certificate is
used, a prompt like "There is a problem with this website's security certificate" may occur.
Click Continue to this website to access the login page.
Step 3 You can enter the login interface for ATA configuration by selecting your role and entering a
password on the login interface. The default administrator password is admin.
Item
Description
Role
The Web utility provides two authority levels:
An administrator is allowed to make changes to any configuration, such as login
passwords. After login, “Welcome Admin” is displayed on the upper left corner.
An operator is allowed to navigate configuration pages and make limited changes to
configurations. After login, “Operator” is displayed on the upper left side of the
interface.
The device allows multiple users to log in, in which case the first user can modify,
while others can only browse. After login, “Welcome User” is displayed on the upper
left side of the interface.
Note: In the “Welcome user” mode, the operation only can browse certain pages. The
pages that cannot be browsed include: Advanced >Security,System tool >Change
password,System tool >Software upgrade,System tool >Import data,System
tool >Export data.

www.newrocktech.com 4-19
3.4.4 Verifying the Firmware Version
Step 1 Click Info and you can view the firmware version of ATA
4Configuring the Basic Voice Services
This chapter guides you through the basic tasks that are required to get your voice system running. After you
complete these procedures, users will be able to place and receive calls from the ITSP and from the PSTN.
4.1 Configuring the OM20
4.1.1 Configuring the General Settings on the OM20
There are several settings that are recommended to ensure good performance on your voice network.
Complete this procedure before performing any other configuration tasks.
Step 1 You need to localize the system configuration by modifying some parameters according to your
regional preference, including time zone, country and area code, Caller ID detection mode, call
progress tones and digit map. Refer on Chapter 7, “Localizing the System,”
Step 2 It is recommended to assign a static IP address for your OM, especially if there are IP phones and or
ATAs which are registered to the OM.
Method 1: On OM20 interface, go to Basic > Network page to setup Static IP address on WAN
port and configure the network parameters.

www.newrocktech.com 4-20
Method 2: On Analog phone , dial * 90 and configure your network parameters as the following
example:
Configuration will only take effect after a reboot.
4.1.1 Configuring the OM20 for ITSP Connectivity
The OM supports standard SIP specifications and Skype Connect. Before setting the IP trunk, you need to
obtain an account from your ITSP.
Step 1 Log in to OM20 as Admin account
Step 2 Go to Trunk >IP trunk.
Step 3 Click Add and enter the account information for your ITSP account:
To register trunks to different SIP servers, go to Trunk >IP trunk >Register OPTIONS and
enable Permit to use multiple ITSPs first.
This manual suits for next models
1
Table of contents
Other New Rock Technologies Telephone System manuals
Popular Telephone System manuals by other brands

Yealink
Yealink T48S Skype For Business Edition Startup guide

Siemens
Siemens Gigaset S45 manual

Alcatel
Alcatel OmniPCX Enterprise 4038 user manual

Lucent Technologies
Lucent Technologies MERLIN 820 Service and maintenance manual

Visonic
Visonic AMBER SELECT quick start guide

Panasonic
Panasonic KX-TD816 installation manual