manuals.online logo
Brands
  1. Home
  2. •
  3. Brands
  4. •
  5. newform
  6. •
  7. Bathroom Fixture
  8. •
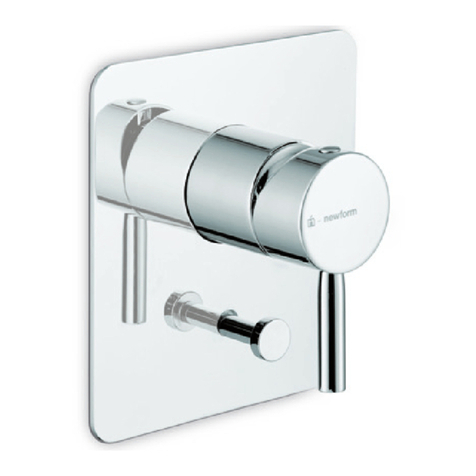
  9. newform MINIMAL 494 User manual

newform MINIMAL 494 User manual

istruzioni
instructions
instructions de montage
Bedienungsanleitung
instrucciones
MINIMAL
495
494
2
•Il presente manuale è parte integrante del prodotto.
•E’ necessario conservarlo in buono stato e per tutto il ciclo di vita del prodotto.
•Vi consigliamo di leggere attentamente il presente manuale e tutte le disposizioni ivi contenute prima di utilizzare e installare il prodotto.
•L’installazione dovrà essere effettuata da personale qualicato, conformemente ai regolamenti in vigore.
•Il costruttore declina ogni responsabilità in caso di utilizzazione del prodotto con nalità diverse da quelle previste.
•Non disperdere resti di imballaggio nell’ambiente.
•Non creare ostacoli al passaggio dell’acqua.
•Evitare, in ogni caso, l’utilizzo di spugne metalliche o abrasive o di detergenti o prodotti abrasivi che potrebbero danneggiare
le superci.
•Soprattutto nel caso di nuove installazioni, onde evitare che impurità o detriti possano giungere all’interno della rubinetteria
dando origine a problemi di funzionamento, spurgare l’impianto prima di mettere in esercizio i prodotti.
•Pulire esclusivamente con acqua e sapone. Risciacquare abbondantemente e asciugare con un panno morbido.
•Si consiglia, per una più lunga durata del miscelatore e della cartuccia, l’installazione di rubinetti ltro a monte del miscelatore.
AVVERTENZE PER L’ USO E LA MANUTENZIONE
I
•Das vorliegende Handbuch ist Bestandteil des Produktes.
•Es soll im Handbereich und in perfektem Zustand während des ganzen Lebenszyklus des Produktes aufbewahrt werden.
•Es ist empfehlenswert, das vorliegende Handbuch und alle darin enthaltenen Informationen sorgfältig zu lesen, bevor das
Produkt zu montieren und anzuwenden.
•Die Montage soll von Fachpersonal unter Beachtung der gültigen Vorschriften durchgeführt werden.
•Der Hersteller lehnt jegliche Verantwortung für die unsachgemässe Verwendung des produktes ab.
•Keine Rückstände der Verpackung im haushaltsbereich unbewacht lassen.
•Die Wasserdurchgänge nicht verstopfen.
•Keine Metall- bzw. Abrasive schwammen, Reinigungsmittel und Schleifmittel verwenden, um zu vermeiden, dass die
Oberäche beschädigt wird.
•Vorallem, wenn es sich um neue Installationen handelt sollte man, bevor man die neuen Produkte in Betrieb nimmt, die
Anlage reinigen, um zu verhindern, dass Verunreinigungen und Ablagerungen in die Armaturen gelangen, welche
Funktionsstörungen verursachen könnten.
•Nur mit Wasser und Seife reinigen, sorgfältig ausspülen und mit einem weichen Tuch austrocknen.
•Zu einer längeren Dauer des Mischers und der Kartusche, wird es empfohlen, Untertisch-Filterhähne zu installieren.
HINWEISE FÜR DIE VERWENDUNG UND REINIGUNG
D
•This manual is an integral part of the product.
•Keep it in good conditions and at hand throughout product’s life.
•We recommend reading carefully this manual and all the instructions contained before using and installing the product.
•The installation should be made by qualied staff in compliance with regulations in force.
•The manufacturer is not liable in case of use of the product with purposes other than those provided for.
•Do not leave the residues of the packaging in the home environment.
•Do not hinder the water ow.
•Totally avoid using metallic or abrasive sponges and detergents or abrasive products in order not to damage the surfaces.
•Especially with new installations, in order to prevent impurities or debris penetrating into the tap and causing working
problems, purge the system before activating the mixer.
•Clean only with water and soap. Carefully rinse and dry with a soft cloth.
•In order to maintain the mixer and its cartridge in the best and long-lasting conditions, we suggest to t under-top valves with lter.
WARNINGS FOR THE USE AND MAINTENANCE
GB
•El presente manual es parte integrante del producto.
•Es necesario guardar el manual en buen estado y durante todo el ciclo de vida del producto.
•Les aconsejamos que lean con cuidado el presente manual y todas las disposiciones contenidas antes de utilizar e instalar
el producto.
•La instalación tendrá que ser efectuada por personal calicado conformemente a los reglamentos en vigor.
•El constructor declina todo tipo de responsabilidad en caso de utilización del producto con nalidades diferentes de
aquellas previstas.
•No tiren los restos de los embalajes al medio ambiente. No creen obstáculos de ninguna forma el pasaje de agua.
•Eviten, de todas formas, la utilización de esponjas metálicas o abrasivas o detergentes o productos abrasivos que podrían
perjudicar las supercies.
•Sobre todo en caso de nuevas instalaciones, para evitar que impurezas o residuos puedan alcanzar el interior del grifo
causando problemas de funcionamiento, purgar la instalación antes de poner en funcionamiento el producto.
•Limpien exclusivamente con agua y jabón. Enjuaguen abundantemente y sequen con un trapo limpio.
•Se recomienda, para una mayor duración del mezclador y su cartucho, la instalación de ltros agua arriba del mezclador.
ADVERTENCIAS PARA EL USO Y MANUTENCIÓN
E
•Ce manuel est une partie intégrante du produit.
•Il faut le conserver en bon état et à portée pendant tout le cycle de vie du produit.
•Nous conseillons de lire attentivement ce manuel et toutes les consignes qui s’y trouvent avant d’utiliser et d’installer le
produit.
•L’installation devra être effectuée par du personnel qualié et conformément aux réglementations en vigueur.
•Le constructeur décline toute responsabilité en cas d’utilisation du produit dans des buts différents de ceux prévus.
•Ne pas abandonner les résidus de l’emballage dans l’environnement domestique.
•Ne pas faire obstacle au passage de l’eau.
•Éviter absolument d’utiliser des éponges métalliques ou abrasives et des détergents ou produits abrasifs an de ne pas
abîmer les surfaces.
•Surtout en cas de nouvelles installations, et an d’éviter que des impuretés ou des débris arrivent à l’intérieur du robinet et
causer des problèmes de fonctionnement, purger le système avant d’activer les produits.
•Nettoyer uniquement à l’eau et au savon. Rincer soigneusement et sécher avec un chiffon doux.
•On conseille, pour une plus longue durée du mitigeur et de la cartouche, l’installation de robinets ltre sur les exibles/tuyaux
de raccordement.
AVERTISSEMENTS POUR L’UTILISATION ET ENTRETIEN
F
3
DATI DI RIFERIMENTO_ REFERENCES_ DONNÉES DE RÉFÉRENCE_REFERENZANGABEN
DATOS DE REFERENCIA
MINIMAL
FILO DEL RIVESTIMENTO ESTERNO
LINE OF THE EXTERNAL FACING
FIL DU REVETEMENT EXTÉRIEURE
AUSSENVERKLEIDUNGSDRAHT
BORDE DE REVESTIMIENTO EXTERNO
LIVELLA
LEVEL
NIVEAU
WAAGE
NIVEL
SCHEMA DEVIATORE_ DIVERTER DIAGRAM_ SCHEMA DU DEVIATEUR_SCHEMA DES UMSCHALTERS
ESQUEMA DESVIADOR
494 - 495
4
DATI DI RIFERIMENTO INCASSO_ REFERENCES FOR CONCEALED PART_ DONNÉES DE RÉFÉRENCE
PARTIE ENCASTREÉ_UP-TEILREFERENZANGABEN_ DATOS DE REFERENCIA ENCASTRE
MINIMAL
494
495
*I - Per il mercato Americano e Canadese la lettatura è NPT .
GB - For the American and Canadian market the thread is NPT.
F - Pour le marché Américan et Canadien le letage est NPT.
D - Die Gewinde ist NPT für den amerikanischen und kanadischen Markt.
E - Para el mercado Americano y Canadiense el letado es NPT.
5
DATI DI RIFERIMENTO_ REFERENCES_ DONNÉES DE RÉFÉRENCE_REFERENZANGABEN
DATOS DE REFERENCIA
MINIMAL
CONSIGLI PER UNA CORRETTA INSTALLAZIONE
ADVICES FOR PROPER INSTALLATION
CONSEILS POUR UNE BONNE INSTALLATION
TIPPS FÜR DIE ORDNUNGSGEMÄSSE INSTALLATION
CONSEJOS PARA UNA INSTALACIÓN CORRECTA
6
PROCEDURE DI INSTALLAZIONE_ INSTALLATION PROCEDURE_ PROCÉDURES D’INSTALLATION_
INSTALLATIONSANWEISUNGEN_ INSTRUCCIONES DE MONTAJE
MINIMAL
ATTENZIONE! Assicurarsi che la parete sia perfettamente liscia e rettilinea per evitare difcoltà durante l’installazione.
WARNING! Make sure that the wall is perfectly smooth and straight to avoid problems during installation.
ALERTE! Assurez-vous que le mur soit parfaitement lisse et droite pour éviter des problèmes pendant l’installation.
ACHTUNG! Stellen Sie sicher, dass die Wand vollkommen glatt und gerade, um Probleme bei der
Installation zu vermeiden.
ATENCIÓN! Asegúrarse de que la pared es perfectamente lisa y recta para evitar problemas durante la instalación.
Dopo aver rimosso la parte frontale delle protezioni in plastica
avvitare le prolunghe lettate (A),posizionare il supporto (C) e
ssare con le viti (1).Tracciare a matita la posizione dei tasselli (B),
svitare le viti (1) e rimuovere il supporto, forare e inserire i tasselli.
Installare denitivamente il supporto tramite le viti (1-2)
After removing the front of the protection, screw the threaded
extension (A), place the support (C) and x it with screws (1). Draw
with a pencil the position of the sleeve anchors (B), unscrew the
screws (1) and remove the support, bore and insert the sleeve
anchors.Finalize the installation of the support with the screws (1-2)
Après avoir enlevé la partie frontale des protections en plastique
visser les rallonges letées (A), placer le support (C) et le xer avec
les vis (1).Tracer au crayon la position de les chevilles (B),desserrer
les vis (1) et enlever le support, percer et insérer les chevilles.
Installer le support dénitivement par les vis (1-2)
Nachdem Sie die Vorderseite der Kunststoffabdeckungen entfernt
haben, die Gewindestange (A) anschrauben, den Träger (C)
positionieren und mit Schrauben befestigen (1). Zeichnen Sie mit
Bleistift die Position der Dübel (B),die Schrauben (1) abschrauben
und den Träger entfernen, bohren und stecken Sie die Dübel.Den
Träger mit den Schrauben (1-2) denitiv installieren.
Después de quitar la parte frontal de la protección en plastico,
atornillar los prolongadores roscados (A), poner el soporte (C)
y jar con los tornillos (1).Marcar con un lápiz la posición de los
tacos (B),destornillar los tornillos (1) y quitar el soporte,perforar y
insertar los tacos. Instalar el soporte con los tornillos (1-2)
I
GB
F
D
E
7
PROCEDURE DI INSTALLAZIONE_ INSTALLATION PROCEDURE_ PROCÉDURES D’INSTALLATION_
INSTALLATIONSANWEISUNGEN_ INSTRUCCIONES DE MONTAJE
MINIMAL
Innestare a fondo i tubi in rilsan (3) rispettando le
indicazioni delle etichette. Posizionare il decoro
facendolo scorrere verso il basso no ad agganciarlo.
Engage throughly the supply rilsan pipes (3) according
to the instructions of the labels. Place the decor plate
sliding down until it encaging it.
Engager à fond les tuyaux d’alimentation en rilsan (3)
conformément aux instructions de l’étiquette. Placer la
plaque mural faisant la glisser vers le bas au point d’à
l’accrocher.
Stecken Sie die beiden rilsan Versorgungsleitungen (3)
gemäß den Anweisungen der Etiketten. Die Dekorplatte
legen, indem man diese abwärts laufen läßt,bis sie sich
hakt.
Instalar a fondo los tubos en rilsan de alimentación (3)
de acuerdo con las instrucciones de las etiquetas. Poner
el embellecedor, deslizándo hacia abajo hasta que
encaje.
I
GB
F
D
E
8
PROCEDURE DI INSTALLAZIONE_ INSTALLATION PROCEDURE_ PROCÉDURES D’INSTALLATION_
INSTALLATIONSANWEISUNGEN_ INSTRUCCIONES DE MONTAJE
MINIMAL
TARATURA DELLA CARTUCCIA
Assicurarsi che l’estremità della cartuccia termostatica sia in posizione corretta (normalmente verso il basso, con il segno
(X) che corrisponde con il piano (Y) come in Fig.A). Nel caso in cui la temperatura dell’acqua fosse maggiore o minore
di 38°, posizionare un termometro sotto l’acqua corrente per tenere sotto controllo la temperatura e ruotare la manopola
(J) no al raggiungimento dei 38°, fare attenzione poi ad inserire il limitatore di temperatura (3) come mostrato in Fig.B.
CALIBRATION OF THE CARTRIDGE
Make sure that the end of the thermostatic cartridge in the correct position (usually downward, with the sign (X) that
corresponds with the plane (Y) as in Fig.A). If the water temperature is warmer or cooler than 38°C,place a thermometer
under running water in order to keep an eye on the temperature and rotate the knob (J) until reaching 38°,make sure to
insert the temperature limit control (3) as shown in Fig. B.
RÉGLAGE DE LA CARTOUCHE
S’assurer que l’extrémité de la cartouche thermostatique soit en position correcte (normalement vers le bas,avec le signe
(X) qu’il correspond avec le plan (Y) comme en Fig.A). Dans le cas où la température de l’eau est supérieure ou inférieure
à 38°,placer un thermomètre sous l’eau courante pour tenir sous contrôle la température et tourner la poignée (J) jusqu’à
atteindre 38°, faire attention à placer le limiteur de température (3) comme indiqué à la Fig. B.
EINSTELLUNG DER KARTUSCHE
Vergewissern Sie sich, dass der Endteil der thermostatischen Kartusche in der richtigen Stellung ist (normalerweise nach
unten,mit dem Zeichen (X),der dem Planen (Y) gemäß Bild A entspricht).Wenn die Wassertemperatur höher oder weniger
als 38° beträgt, ein Thermometer unter laufendem Wasser positionieren um die Temperatur unter Kontrolle zu halten und
den Drehknopf (J) drehen bis die 38° erreicht werden,mit Beachtung das derTemperatur-Begrenzer (3) eingelegt wird,wie
es in Fig. B dargestellt ist.
CALIBRACIÓN DE LOS CARTUCHO
Averiguar que la parte nal del cartucho termostatico esta en la posición correcta (abajo, con el signo (X) en
correspondencia con el plan (Y) como en la Fig.A). Si la temperatura del agua fuese menor o mayor a 38 °C, colocar
un termòmetro en el ujo de agua para controlar la temperatura y girar la manilla (J) hasta lograr los 38°C, luego es
fundamental que se inserte el limitador detemperatura (3) como se muestra en la Fig.B.
I
GB
F
D
E
FIG.A FIG. B
Assemblare i particolari come nell’ordine
indicato.
Assemble the parts as following in the order
mentioned above.
Assembler les pièces dans l’ordre indiqué.
Montieren Sie die Teile wie in der gezeigten
Reihenfolge.
Montar las piezas según el orden indicado.
I
GB
F
D
E
9
PROCEDURE DI INSTALLAZIONE_ INSTALLATION PROCEDURE_ PROCÉDURES D’INSTALLATION_
INSTALLATIONSANWEISUNGEN_ INSTRUCCIONES DE MONTAJE
MINIMAL
Posizionare il sofone, tracciare a matita
la posizione dei tasselli (14), forare e
inserire i tasselli.Installare denitivamente
il sofone tramite le viti (15).Far passare il
essibile (17) attraverso il coperchio (16)
ed avvitarlo al sofone. Inserire a fondo
gli innesti (18) rispettando le indicazioni
delle etichette. Regolare l’inclinazione
del sofone con le due viti da M6 (19).
Fissare il coperchio (20) con le quattro
viti (21).
Place the shower, draw with a pencil the
position of the sleeve anchors (14), bore
and insert the sleeve anchors.Finalize the
installation of the shower xing with the
screws (15).Pass the exible (17) through
the cover (16) and screw ensuring it at
the shower. Fully insert the connectors
(18) according to the instructions of the
labels. Adjust the tilt of the shower with
two M6 screws (19). Fix the cover (20)
with the four screws (21).
Placer le tête de douche, tracer au
crayon la position de les chevilles (14),
percer et insérer les chevilles. Installer le
tête de douche dénitivement par les vis
(15). Faire passer le exible (17) à travers
de la couverture (16) et visser le exible à
la tête de douche.Insérer complètement
les deux raccords (18) conformément
aux instructions de l’étiquette. Régler la
position de la tête de douche avec deux
vis M6 (19). Fixer le couverture (20) avec
les quatre vis (21).
Positionieren Sie die Kopfbrause und
markieren Sie mit Bleistift die Position
der Dübel (14), bohren und stecken
Sie die Dübel. Schließlich installieren
Sie die Kopfbrause mit Schrauben (15).
Führen Sie den Schlauch (17) durch den
Deckel (16) und der Schlauch an der
Kopfbrause anschrauben. Führen Sie
die beiden Anschlüsse (18) ein gemäß
den Anweisungen der Etiketten. Stellen
Sie die Neigung der Kopfbrause mit zwei
M6-Schrauben ein (19). Sichern Sie den
Deckel (20) mit den vier Schrauben (21).
Posicionar el rociador y marcar con
un lápiz la posición de los tacos (14),
perforar y insertar los tacos. Instalar el
rociador con los tornillos (15). Pasar
el exible (17) a través de la tapa que
cubre (16) y atornillar el exible al
rociador. Insertar completamente los
dos conectores (18) de acuerdo con las
instrucciones de las etiquetas. Ajustar la
inclinación del rociador con dos tornillos
M6 (19). Fijar la tapa (20) con los cuatro
tornillos (21).
I
GB
F
D
E
10
SOSTITUZIONE CARTUCCIA/VITONE_ REPLACEMENT THE CARTRIDGE/VALVE_REMPLACEMENT
DE LA CARTOUCHE/TÊTE CÈRAMIQUE_ AUSTAUSCH DER KARTUSCHE/VENTIL_ REMPLAZO DEL CARTUCHO/VÁLVULA
MINIMAL
SOSTITUZIONE DELLA CARTUCCIA
Prima di iniziare le operazioni di sostituzione assicurarsi che l’acqua dell’impianto principale sia chiusa.Rimuovere
le parti esterne eseguendo in senso inverso le operazioni di montaggio descritte nel capitolo ‘PROCEDURE DI
INSTALLAZIONE’. Svitare la ghiera di ssaggio (1), estrarre la cartuccia (2). Riassemblare in senso opposto.
REPLACEMENT THE CARTRIDGE
Before beginning the substitution, make sure the main water system has been closed.Remove the external parts starting
by the end the assembly operations described in ‘INSTALLATION PROCEDURE’. Unscrew the ring nuts (1),remove the
cartridge (2). Reassemble in reverse.
REMPLACEMENT DE LA CARTOUCHE
Avant de commencer les opérations de remplacement, s’assurer que l’eau de l’installation principale soit fermé. Enlever
les parties extérieures faire en sens contraire les opérations de montage décrites dans‘PROCÉDURES D’INSTALLATION’.
Dévisser la serre cartouche (1), extraire la cartouche (2).Remonter en sens contraire.
AUSTAUSCH DER KARTUSCHE
Vor dem Austausch der Kartusche sicherstellen,dass, die Wasserhauptanlage geschlossen ist. Entfernen Sie die
äußeren Teile in umgekehrter Reihenfolge wie es im Kapitel ‘INSTALLATIONSANWEISUNGEN’ beschrieben ist. Die Nutmutter
abschrauben (1), die Kartusche herausziehen (2). Die Wiederzusammensetzung erfolgt in umgekehrter Reihenfolge.
REMPLAZO DEL CARTUCHO
Antes de comenzar las operaciones de remplazo, asegurarse de que la llave de paso del agua de la instalaciòn
principal estè cerrada. Quitar las partes externas haciendo la inversa las operaciones de montaje descritas en el
capítulo ‘INSTRUCCIONES DE MONTAJE’. Destornillar el embellecedor de los cartuchos (1), y llevar el cartucho (2).Volver
a montar a la inversa.
I
GB
F
D
E
11
RICAMBI_ SPARE PARTS_ PIECES DETACHEES_ ERSATZTEILE_ PIEZAS DE REPUESTO
MINIMAL
1 11584
2 13350
3 10698
4 15652
5 11671
6 11672
7 15985
8 23184
9 23185
10 10870
11 10899
12 15711
13 25901
14 504
15 15144
16 22290
494
495
12
PORTATE_ FLOW RATES_ DÉBITS_ WASSERSTRÖMUNGEN_ CAUDALES
MINIMAL
0
7,09
9,78
11,20
11,22
11,30
l/min
bar
l/min
0
2,5
5
7,5
10
12,5
15
0123 4 5
0
7,08
9,71
11,15
11,19
11,26
l/min
bar
l/min
0
2,5
5
7,5
10
12,5
15
0123 4 5
0
3,66
5,35
6,74
7,85
8,85
l/min
bar
l/min
0
2,5
5
7,5
10
12,5
15
0123 4 5
494
494
494
SOFFIONE_HEADSHOWER_ TÊTE DE DOUCHE_KOPFBRAUSE_REGADERA
DOCCETTA_SHOWER_DOUCHE_DUSCHE_DUCHA
pressione
pressure
pression
Druck
presión
(bar)
pressione
pressure
pression
Druck
presión
(bar)
pressione
pressure
pression
Druck
presión
(bar)
portata
ow rate
débit
Wasserströmung
caudal
(l/min)
portata
ow rate
débit
Wasserströmung
caudal
(l/min)
portata
ow rate
débit
Wasserströmung
caudal
(l/min)
CASCATA_WATERFALL_CASCADE_WASSERFALL_CASCADA
I - utilizzato limitatore di portata max 12 l/min
GB - ow rate limiter used max 12 l/min
F - utilisé limiteur de débit max 12 l/min
D - Der Strömungsminderer mit max.12 L/Min Strömung wurde eingesetzt
E - utilizado limitador de caudal, máx. 12 l/min
I - utilizzato limitatore di portata max 12 l/min
GB - ow rate limiter used max 12 l/min
F - utilisé limiteur de débit max 12 l/min
D - Der Strömungsminderer mit max.12 L/Min Strömung wurde eingesetzt
E - utilizado limitador de caudal, máx. 12 l/min
13
PORTATE_ FLOW RATES_ DÉBITS_ WASSERSTRÖMUNGEN_ CAUDALES
MINIMAL
0
7,09
9,78
11,20
11,22
11,30
l/min
bar
l/min
0
7,08
9,71
11,15
11,19
11,26
l/min
bar
l/min
0
3,66
5,35
6,74
7,85
8,85
l/min
bar
l/min
0
2,5
5
7,5
10
12,5
15
0123 4 5
0
2,5
5
7,5
10
12,5
15
0123 4 5
0
2,5
5
7,5
10
12,5
15
0123 4 5
495
495
495
SOFFIONE_HEADSHOWER_ TÊTE DE DOUCHE_KOPFBRAUSE_REGADERA
DOCCETTA_SHOWER_DOUCHE_DUSCHE_DUCHA
pressione
pressure
pression
Druck
presión
(bar)
pressione
pressure
pression
Druck
presión
(bar)
pressione
pressure
pression
Druck
presión
(bar)
portata
ow rate
débit
Wasserströmung
caudal
(l/min)
portata
ow rate
débit
Wasserströmung
caudal
(l/min)
portata
ow rate
débit
Wasserströmung
caudal
(l/min)
CASCATA_WATERFALL_CASCADE_WASSERFALL_CASCADA
I - utilizzato limitatore di portata max 12 l/min
GB - ow rate limiter used max 12 l/min
F - utilisé limiteur de débit max 12 l/min
D - Der Strömungsminderer mit max.12 L/Min Strömung wurde eingesetzt
E - utilizado limitador de caudal, máx. 12 l/min
I - utilizzato limitatore di portata max 12 l/min
GB - ow rate limiter used max 12 l/min
F - utilisé limiteur de débit max 12 l/min
D - Der Strömungsminderer mit max.12 L/Min Strömung wurde eingesetzt
E - utilizado limitador de caudal, máx. 12 l/min
14
Gli imballaggi dei nostri prodotti non contengono materiali inquinanti: tutte le materie utilizzate rispettano
l’ambiente e sono riciclabili.Vi preghiamo di collaborare con noi e di smaltire correttamente l’imballaggio.
Non disperdere gli imballaggi, o parte di essi, nell’ambiente. I sacchetti di plastica, in particolare, possono
essere fonte d’asssia per i bambini. Separare i diversi materiali dell’imballaggio e conferirli al centro di smal-
timento più vicino.
Uno smaltimento corretto permette un riciclo intelligente dei materiali preziosi.
Si certica che tutte le parti e i componenti contenuti in questo prodotto (L.166/2009),sono stati accuratamen-
te controllati e collaudati nei nostri stabilimenti.
SMALTIMENTO DELL’IMBALLAGGIO
I
Die Verpackungen unserer Produkte werden völlig aus umweltfreundlichen und wieder verwertbaren Materia-
len hergestellt.Bitte entsorgen Sie die Verpackungen ordnungsgemäß.Lassen Sie nicht dieVerpackung bzw.ei-
nige Bestandteile davon unbewacht.Das Verlassen eines solchen Hinweises könnte zur Gefahr von bei Kindern
Erstickung führen, insbesondere wegen des Vorhandenseins von Plastiktüten. Die Ausschussmaterialien aus
der Verpackung aussondern und sie ins nahesten Zentrum für Mülltrennung bringen.Eine korrekte Entsorgung
ermöglicht die intelligente Wiederverwertung von wertvollen Materialien.
ENTSORGUNG DER VERPACKUNG
D
The packaging of our products does not contain polluting material,the materials used are environmental-frien-
dly and recyclable. Please be helpful and properly dispose of the packaging.
Do not leave it,or parts of it, in the environment. In fact it could, particularly concerning the plastic bags, con-
stitute a danger of asphyxiation for children.
Sort out the materials of the packaging and deliver them to the nearest waste separate collection centres.
Proper disposal allows the recycling of precious materials.
PACKAGING DISPOSAL
GB
Los embalajes de nuestros productos no contienen materiales contaminantes: todos los materiales utilizados
respetan el medio ambiente y pueden ser reciclados.Les rogamos que colaboren con nosotros para la elimi-
nación correcta del embalaje. No tiren los embalajes o parte de ellos al medio ambiente. Las bolsas de plás-
ticos, particularmente, pueden ser causa de asxia para los niños. Separen los diferentes tipos de materiales
de embalaje y llévenlos al centro de recolección más cercano.Una eliminación correcta permite un reciclado
correcto de los materiales preciosos.
ELIMINACIÓN DEL EMBALAJE
E
Les emballages de nos produits ne contiennent pas de matériaux polluants, les matériaux utilisés respectent
l’environnement et sont recyclables.
Nous vous prions de collaborer et d’éliminer correctement l’emballage. Ne pas abandonner l’emballage ou
des parties de celui-ci dans l’environement.
Celles-ci, notamment les sachets en plastique, peuvent constituer un danger d’asphyxie pour les enfants.
Séparer les différents matériaux de l’emballage et les déposer auprès du centre de tri le plus proche. Une
élimination correcte permet une récupération intelligente de matériaux précieux.
ÉLIMINATION DE L’EMBALLAGE
F
15
NOTE
L 931/3
NEWFORM S.p.A.
via Marconi, 25/A – Frazione Vintebbio – 13037 Serravalle Sesia – (VC) Italy
Tel. +39/0163452011 (r.a.) Fax Amministrativo +39/0163458983 – Fax Commerciale +39/0163459745
www.newform.it newform@newform.it

Other manuals for MINIMAL 494

1

This manual suits for next models

1

Other newform Bathroom Fixture manuals

newform DBS Series User manual

newform

newform DBS Series User manual

newform 70017 User manual

newform

newform 70017 User manual

newform PARK Limited Edition 69772 User manual

newform

newform PARK Limited Edition 69772 User manual

newform BLINK 70869E User manual

newform

newform BLINK 70869E User manual

newform Nio 68910 User manual

newform

newform Nio 68910 User manual

newform 67628E User manual

newform

newform 67628E User manual

newform HAKA 72018E User manual

newform

newform HAKA 72018E User manual

newform 70015 User manual

newform

newform 70015 User manual

newform 29391X User manual

newform

newform 29391X User manual

newform HAKA 72069E User manual

newform

newform HAKA 72069E User manual

newform 61157 User manual

newform

newform 61157 User manual

newform LINFA 67049 Product information sheet

newform

newform LINFA 67049 Product information sheet

newform X-STEEL 316 69671EX User manual

newform

newform X-STEEL 316 69671EX User manual

newform AQUALITE 69236E User manual

newform

newform AQUALITE 69236E User manual

newform ERGO-Q 66472E User manual

newform

newform ERGO-Q 66472E User manual

newform X-SENSE 62570E User manual

newform

newform X-SENSE 62570E User manual

newform 27747 User manual

newform

newform 27747 User manual

newform 27027 User manual

newform

newform 27027 User manual

newform libera 480 User manual

newform

newform libera 480 User manual

newform X-STEEL 316 69646EX User manual

newform

newform X-STEEL 316 69646EX User manual

newform THERMO EASY 70400E User manual

newform

newform THERMO EASY 70400E User manual

newform 67616E User manual

newform

newform 67616E User manual

newform 61165 User manual

newform

newform 61165 User manual

newform AQUALITE 69230E User manual

newform

newform AQUALITE 69230E User manual

Popular Bathroom Fixture manuals by other brands

Hans Grohe Unica'A 27820 Series manual

Hans Grohe

Hans Grohe Unica'A 27820 Series manual

Hewi 802 Series operating instructions

Hewi

Hewi 802 Series operating instructions

Schulte DuschMaster Rain II D9638 Assembly instructions

Schulte

Schulte DuschMaster Rain II D9638 Assembly instructions

KEUCO Axess 35001 0500 Series Mounting instruction

KEUCO

KEUCO Axess 35001 0500 Series Mounting instruction

Aurlane CAB188 Assembly instructions

Aurlane

Aurlane CAB188 Assembly instructions

Sunshower DELUXE installation guide

Sunshower

Sunshower DELUXE installation guide

Symmons Naru 412HS Operation & maintenance manual

Symmons

Symmons Naru 412HS Operation & maintenance manual

BELLOSTA Edward Lever 0801/6/L Installation instruction

BELLOSTA

BELLOSTA Edward Lever 0801/6/L Installation instruction

Moen T3291 installation guide

Moen

Moen T3291 installation guide

Arbonia CICSA Zeta Series user guide

Arbonia

Arbonia CICSA Zeta Series user guide

Fantini Rubinetti ACQUADOLCE 8091B instructions

Fantini Rubinetti

Fantini Rubinetti ACQUADOLCE 8091B instructions

Suntherm DRIER 200 instruction manual

Suntherm

Suntherm DRIER 200 instruction manual

Pulse Shower Spas AquaPower 1054-CH owner's manual

Pulse Shower Spas

Pulse Shower Spas AquaPower 1054-CH owner's manual

Pulse Shower Spas Hana 1012 instructions

Pulse Shower Spas

Pulse Shower Spas Hana 1012 instructions

HAFRO COLONNA G-STEAM GER-4GSA3N4 Assembly instructions

HAFRO

HAFRO COLONNA G-STEAM GER-4GSA3N4 Assembly instructions

ROGERSELLER Tectonic installation instructions

ROGERSELLER

ROGERSELLER Tectonic installation instructions

kelda BubbleSpa 95005000 manual

kelda

kelda BubbleSpa 95005000 manual

Brizo Sotria T65851LF Series manual

Brizo

Brizo Sotria T65851LF Series manual

manuals.online logo
manuals.online logoBrands
  • About & Mission
  • Contact us
  • Privacy Policy
  • Terms and Conditions

Copyright 2025 Manuals.Online. All Rights Reserved.