Newgy Robo-Pong 3050XL User manual
1
www.newgy.com
OWNER’S MANUAL

2
TABLE OF CONTENTS
Welcome .......................................................................................................................... Page 3
Quick Start of Your Robo-Pong 3050XL .......................................................... Page 4
Operating Your Robot ................................................................................................ Page 8
Drill Descriptions .......................................................................................................... Page 19
Quick Take-Down, Storage & Transport ............................................................ Page 25
Robot Adjustments ................................................................................................... Page 27
Care and Maintenance ................................................................................................ Page 28
Parts List ........................................................................................................................ Page 29
Glossary of Table Tennis Terms ............................................................................. Page 32
Warranty .................................................................................................................... Back Cover

3
WELCOME!
Congratulations on Purchasing a Newgy Robo-Pong 3050XL!
Thank you for choosing Newgy! Newgy Industries, Inc. takes pride in developing high quality, smartly engineered
table tennis products that are easy to use, while also being challenging and exciting.
The Robo-Pong 3050XL table tennis robot was developed
to create the most human-like playing and training
experience for you. The life-like features enable you to
perfectly simulate any opponent - from recreational
beginner player to Olympic Gold Medalist, and everything
in between. With the simple touch of a button, you can
decide to have a basic playing session, advanced training
session, design your own training session, or a full-body
aerobic workout session.
The easy-to-use App and Bluetooth® technology allows
you to navigate easily from drill to drill. The Robo-Pong
3050XL really is the table tennis tool for everyone – easy
enough for a beginner yet challenging enough for a pro!
“For the last 21 years, I have traveled to Europe, Asia and throughout North America training and competing
against the world’s best table tennis players. I know exactly what an Olympic-level training session should be.
With the development of the Robo-Pong 3050XL, robot training has “come to life” for me. With human-like
combinations of different spins, deceptive serves, powerful smashes, no-spin balls, spinny loops and excellent
variations, I can now get an Olympic training session from the convenience of my own home.
The best aspect of the robot is that it is designed
for everyone. With the simple touch of a button, my
wife, my five year-old daughter and I can all use the
same robot to fit our different playing levels and
training needs in the same session. Just select the
drill and press play! I’m overjoyed by the simplicity
– no adjustments necessary! I look forward to
continuing to improve my table tennis skills with the
Robo-Pong 3050XL as I train for the Olympics, and
as I train my five year-old daughter to be a future
Olympic champion!”
-Samson Dubina, U.S. National Team Member
Mr. Joseph E. Newgarden, Jr.
Founder / Inventor

4
Attach the Robot to the Table
Pick up the robot by the center base
and secure it to the table by angling
it downward and against the table.
The support legs should be as wide as
possible before they go underneath the
table and the front support triangle sits
on top of the table.
Preparing the Mounting Bracket
Place the robot on the table with the
open front side facing you. Gently lift
the robot’s head and pull the mounting
bracket towards you. Using the rubber
tip packet - select and install the correct
rubber tips for the thickness of your table
so the trays stay level.
Lift the Back Net Tubes
Turn the robot around 180° so the net
support tubes are now facing you. Grasp
the second tube from your right and pull
up, removing it from its storage hole.
Place the bottom of this tube into the top
of the first tube on your right as shown.
Repeat on the left side.
Lower the Ball Trays
Grasp one of the ball return trays and lift
straight up to unlock it. Now grasp the
adjacent net support tube, and slowly
lower it into position. Be careful not to
let the tray or support tube slam down.
Repeat on the other side.
14
3
25
QUICK START
Verify All Parts
First, unpack your robot and all parts
from the box and verify that everything
is present. If a part is missing, please
contact Newgy immediately
(see back page for contact info).
• Robot
• Balls (U.S. Only)
• Rubber Tips
• Plastic Clips
• Transformer
• Device Holder
• Pong-Pal (U.S. Only)
• Tell-A-Friend/Warranty
Flyer (U.S. Only)
• Quick Start Guide

5
Attach the Side Nets
Attach the side nets to your table tennis
table net by slipping the red flexible band
over your table net support base and
looping it over the table net clamp screw.
Adjust each side nets tension to “lock”
the trays firmly against the table, which
reduces vibration and increases accuracy.
Attach the Device Holder to Table
The included Personal Device Holder is for your
convenience to safely hold your smart phone or
tablet while playing and be within easy reach
to adjust settings in the App. It is optional to
use. To install, use the holder knob to attach
the bracket to the Device Holder. Then slide the
bracket under the table and adjust the bracket
knob until it secures tightly to the table. This will
function vertically or horizontally.
Pour in the Balls
Make sure that you use only recommended
balls for the Newgy Robo-Pong 3050XL –
Newgy Robo-Ball 2-Star 40+mm, or any
ITTF-approved 2 or 3 star 40+mm balls.
Do not mix 40+mm balls with other size
balls. Extra Robo-Balls can be purchased
at www.newgy.com.
6
9
7
Plug-In the Robot
Plug the black power cable into the
back of your robot.
8
10
11
Download the Newgy App
Using your own personal electronic device (ie:
tablet, smartphone or laptop), download and
install the Newgy App from your device’s App
Store. For the Windows App visit https://www.
newgy.com/pages/downloads
Connecting your Robo-Pong 3050XL
to the Newgy App
Android Users
1) Go to your Settings to turn on your Bluetooth®
feature on your device.
2) Within your Bluetooth® settings, under
Available Devices, select your robot (ie:
NWGYC441).
3) Launch the Newgy App.
4) Press the “Play” button
5) There will be an automatic calibration
process that your 3050XL will automatically
execute (LED lights on the robot head
will blink—it is also normal if the lights
do not blink, top and bottom motors will run
in turn).This will take approximately 30
seconds while connecting to your 3050XL.
6) You will be notified that your connection is
successful.
iOS Users
1) Go to your Settings to turn on your Bluetooth®
feature on your device.
2) Launch the Newgy App.
3) Press the “Play” button
4) Select your robot (ie: NWGYC441).
5) Press “Pair” in pop-up window.
(This step is only neccessary on
initial set-up.)
6) There will be an automatic calibration
process that your 3050XL will automatically
execute (LED lights on the robot head
will blink—it is also normal if the lights
do not blink, top and bottom motors will
run in turn).This will take approximately 30
seconds while connecting to your 3050XL
7) You will be notified that your connection is
successful.
Windows Users
To download the Newgy Windows App, go
to https://www.newgy.com/pages/downloads.
Note: the Windows App may or may not have
all the features of the Android and iOS Apps.
QUICK START

6
1.
To start the calibration process, press the gray SET-UP ROBOT
button on the upper left of your screen (see image 1 above).
2. Adjust your robots head angle. The LED lights on your robot should be as close to verticle as possible
(see image 2 below). Once you are finished with this step, press done.
12
1
Set-Up Robot
Your robot’s head
should be in an
upright position.
If it isn’t, rotate
the robot head by
touching the red
arrows.
DONE
2
IMPORTANT - Calibrate Your Robot
The calibration step is
required
to make sure your robot functions properly. This step will ensure all
drills perform correctly.
QUICK START
0.0.0 / 000 / 0
SETUP ROBOT OWNER’S MANUAL HELP
Control Mode Drill Mode
STANDARD
PRECISION
RIGHT HANDED
INTRODUCTORY
BEGINNER
INTERMEDIATE
ADVANCED
BONUS
MY DRILL LIBRARY

7
3. This step is important to make sure all robot functions including drills run correctly. Place your robot’s ball dam at
the center edge of player’s side of the table (see image 3A below). Use the arrows on the App to adjust placement
of the ball (see image 3 above). Adjust the throw until the ball lands in a roughly 6” area in front of the ball dam (see
image 3A below). Once you have the ball set it is helpful to throw a couple more balls to make sure of placement.
Once this step is complete press done on your App to return to the home screen.
DONE
3
6”
6”
Ball
Dam
3A
12 IMPORTANT - Calibrate Your Robot (continued)
The calibration step is
required
to make sure your robot functions properly. This step will ensure all
drills perform correctly.
Ball should
land centered
on table.
THROW TEST BALL
Set-Up Robot
Place your Ball
Dam on the table
vertically from the
edge of the table.
It is about 9 inches
tall. Your ball should
land at the tip of the
Ball Dam and in the
center of the table.
If it doesn’t, adjust
its location using the
red arrows.
You are now ready to begin using your Newgy Robo-Pong 3050XL robot!
QUICK START
Once Set Up is complete, the settings are saved and this step will not need to be completed the next time the 3050XL is
operated. If you are experiencing position or height issues during play, the Set Up command can be used to re-calibrate
your robot and correct ball placement issues.
8
OPERATING YOUR ROBOT
All robot functions are controlled by the Newgy App. This App will be periodically updated,
so please check for new versions to experience the latest features. The contents in the “Operating Your Robot”
section of this manual may vary in the future due to App updates.
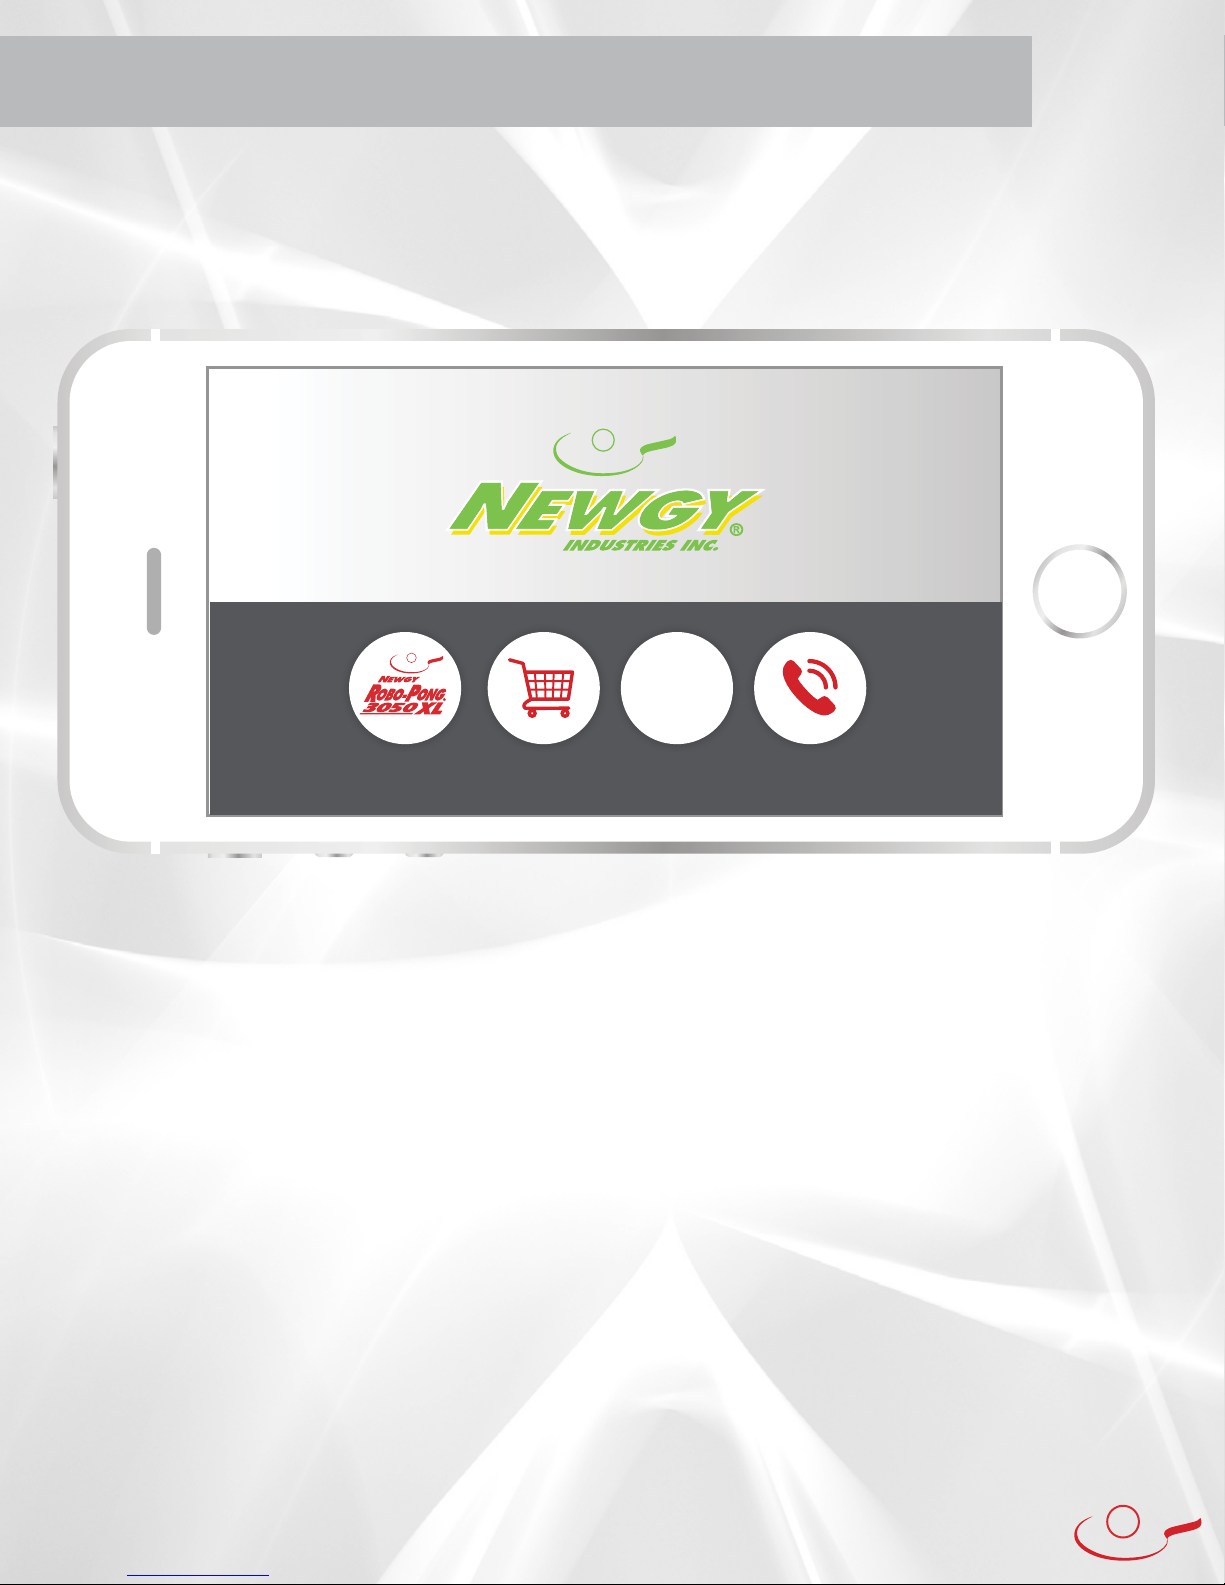
PLAY: Press this button to launch the Newgy Robo-Pong 3050XL experience.
SHOP: Press this button to navigate to www.newgy.com with a large inventory of table tennis equipment.
SUPPORT: Press this button to navigate to a wide-range of support information.
CONTACT: Press this button to navigate to Newgy’s contact information.
Home Screen
SUPPORT
?
PLAY SHOP CONTACT
0.0.0
9
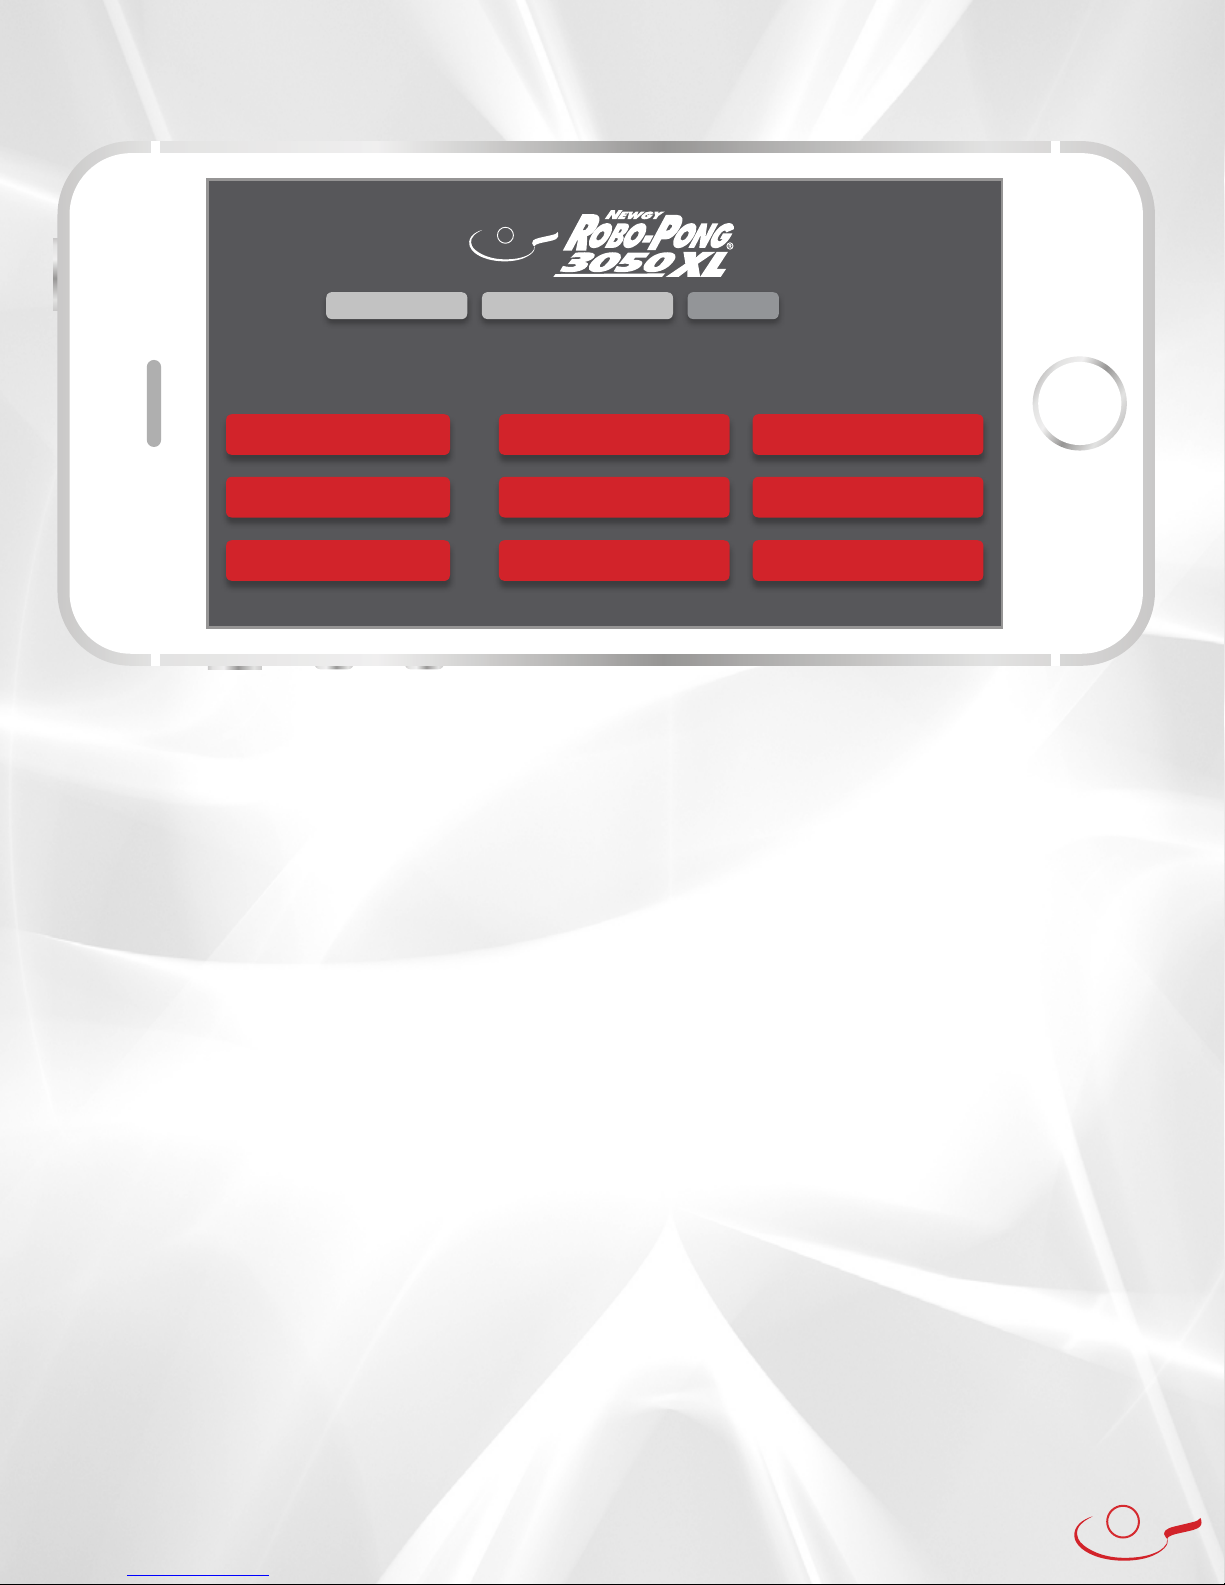
Main Interface Overview
Control Mode
Standard: Press this button to launch a mode of play with basic ball control options.
Precision: Press this button to launch a mode of play with a wide-range of ball control options.
Hand Setting: The App default is for Right Handed players. If you are left handed, change this setting to
‘Left Handed’ and all drills and settings will reverse to be applicable to a left handed player.
Drill Mode
Introductory: Press this button to launch a mode of play with introductory-level drills.
Beginner: Press this button to launch a mode of play with beginner-level drills.
Intermediate: Press this button to launch a mode of play with intermediate-level drills.
Advanced: Press this button to launch a mode of play with advanced-level drills.
Bonus: Press this button to launch a mode of play with bonus drills.
My Drill Library: Press this button to launch your library of your custom saved and favorited drills. You can
also Export and Import drills in My Drill Library.
Set-Up Robot: Press this button to launch your robot’s set-up process. This can also be used if your robot
needs re-calibration (see page 7 for further explanation).
Owner’s Manual: Press this button for the Newgy Robo-Pong 3050XL Owner’s Manual for more detailed
information on your 3050XL.
Help: Press this button to launch help for your 3050XL, if needed.
App Version Number: This number indicates the version of your Newgy App if needed for reference.
(example in the above picture would be 0.0.0 / 000 / 0)
0.0.0 / 000 / 0
SETUP ROBOT OWNER’S MANUAL HELP
Control Mode Drill Mode
STANDARD
PRECISION
RIGHT HANDED
INTRODUCTORY
BEGINNER
INTERMEDIATE
ADVANCED
BONUS
MY DRILL LIBRARY

10
Control Mode: Standard
In the Standard Mode, the user interface allows you to indicate where and what types of ball(s) the robot
should throw. You select the landing position and properties of each ball and the 3050XL robot calculates the
settings needed to deliver the ball(s) to each position.
You can specify 1 to 10 different balls in any Standard Mode drill. You can also specify the number of balls
thrown before the drill stops (Count). Examples: a drill with 5 balls and a Count of 4 will stop the drill after
4 balls even though the drill is unfinished. A drill with 5 balls and a Count of 50 will run the drill 10 times and
stop after the 50th ball. You can also specify the Balls Per Minute to adjust the frequency of ball delivery. For
example 30 Balls Per Minute is one ball every 2 seconds and 90 Balls Per Minute is one ball every 3/4 seconds.
The main interface depicts your side of the table and 3 options for setting up a drill. These options are;
the number of balls you set on the table, “Count” and “Balls Per Minute”.
When you “Touch here To Start”, a screen will open allowing you to touch and scroll through the settings
to select the characteristics you want on the ball:
Ball Type 5 options Top Spin or Top Spin Serve - Back Spin or Back Spin Serve - and No Spin
Spin Speed 7 options Select from Lowest to Highest
Side Spin 3 options None, Left, Right
Angle 7 options 0°, 15°, 30°, 45°, 60°, 75°, and 90°
Count: The total number of balls thrown before the drill stops.
Balls Per Minute: This is the frequency of ball delivery. The range is 1 to 120.
Start: Press this button to play your drill.
Save: Press this button to save your drill in My Drill Library with a custom name for future use.
Load: Press this button to load any of your favorited or saved drills that have been previously saved.
Back: Press this button to go back to the previous screen.
Clear: Press this button to clear all settings and ball placement.
1
+
-
Count
50
+
-
Balls Per Minute
45
START
SAVE
BACK
LOAD
CLEAR
Control Mode: Standard

11
Control Mode: Standard
Ball Type:
Spin Speed:
Side Spin:
Angle:
Top Spin
Lowest
None
0º
Set Cancel
Once you select the characteristics you want, press SET and the ball will appear on the table.
Each ball on the table is “draggable”, which means you can touch it and move it to a new location. You can also
double touch it to change its characteristics. When the ball icon is moved, if color of the ball changes to red, the
robot is judging that the ball that has been set cannot be delivered, and the robot will intelligently move it to a
position where it can be delivered.
Notice that the Ball icon has a visual indicator of the spin. Top Spin balls have Top on the upper part of the Ball icon
to indicate it is a top spin ball. Back spin balls will have Back on the bottom of the Ball icon. The words Top and
Back will be angled to the left or right if you have added left or right sidespin to a ball. The location of the words
Top or Back reflect the amount of sidespin angle selected.
Pressing the “Start” button will prepare the robot for the drill. There will be a delay of 3 seconds before the drill
begins. To stop the drill at any time, press STOP on the device screen.
Once you have created a drill you like, you can save it as a custom drill to use at a later date. The robot also comes
with several pre-programmed drills you can choose from in Drill Mode. If you wish you can share the drill using the
Export feature in My Drill Library. You can also receive drills from other 3050XL owners and coaches by using the
Import feature in My Drill Library.
4
3
2
1
+
-
Count
8
+
-
Balls Per Minute
90
START
SAVE
BACK
LOAD
CLEAR
Control Mode: Standard
Top
Top
Back
Back
Example of a 4 ball drill
12
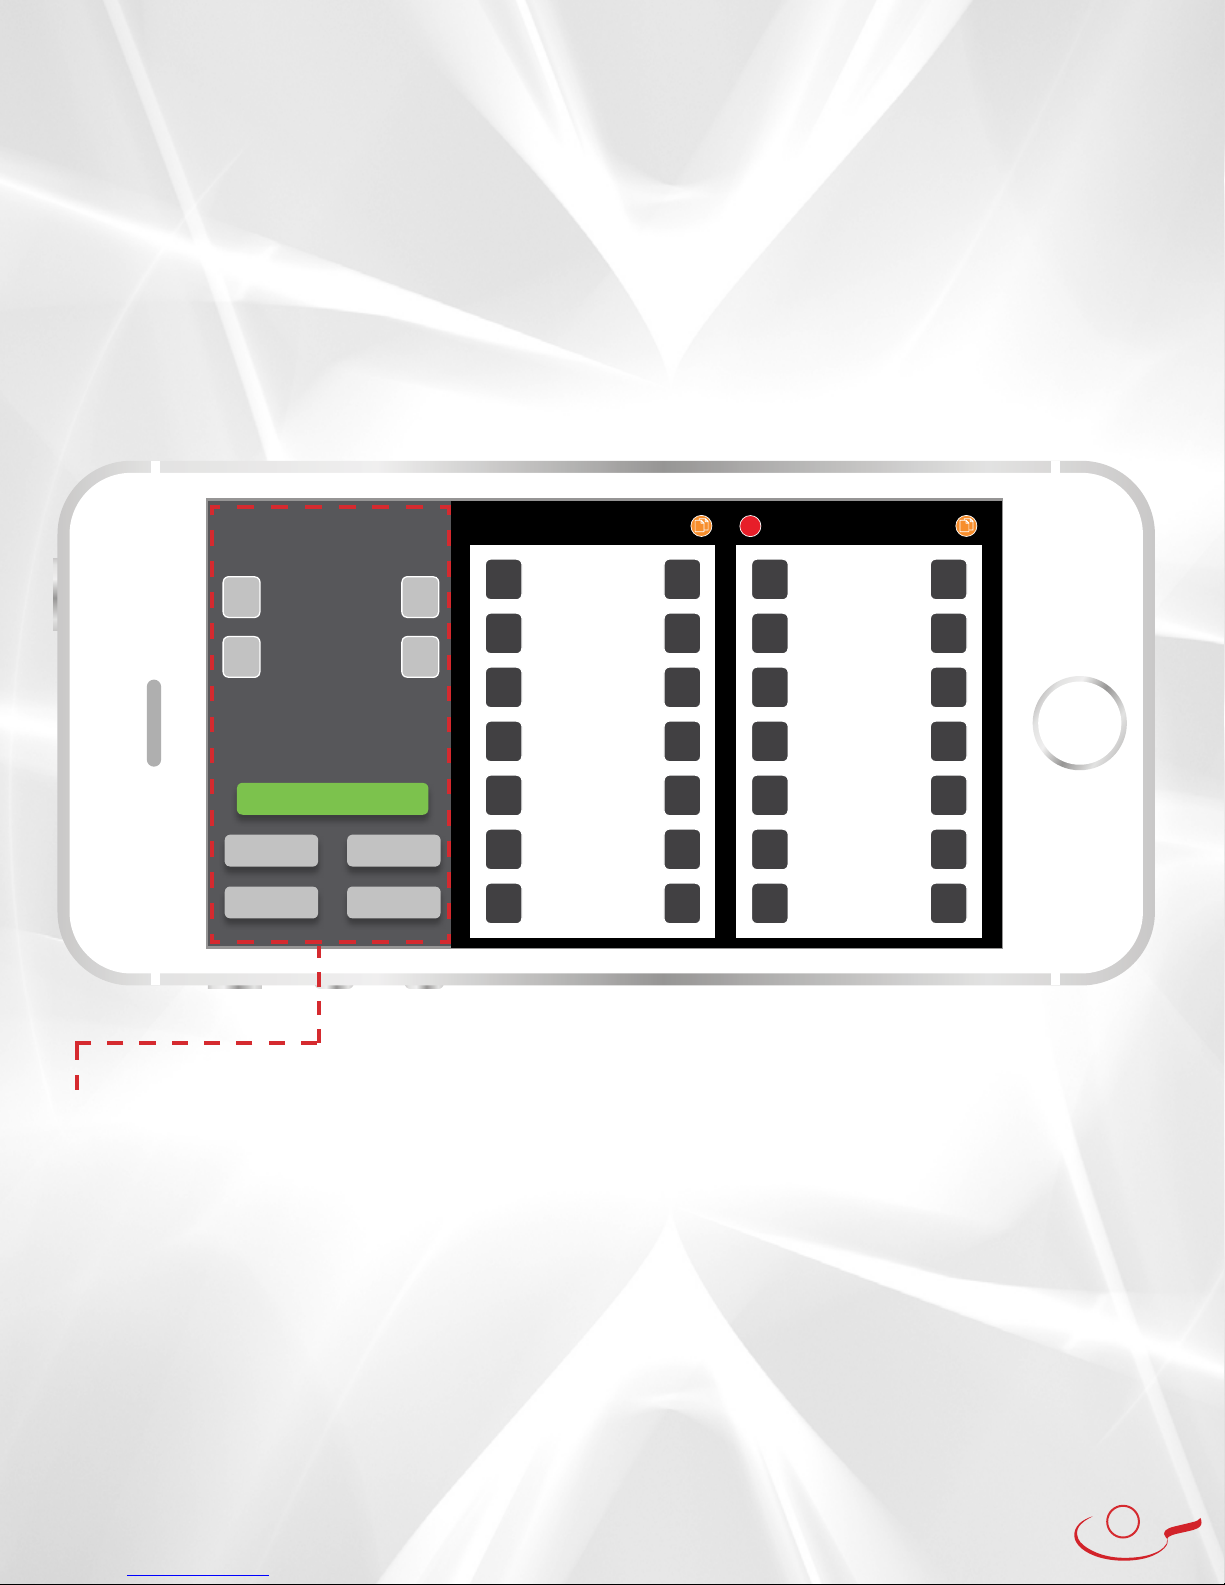
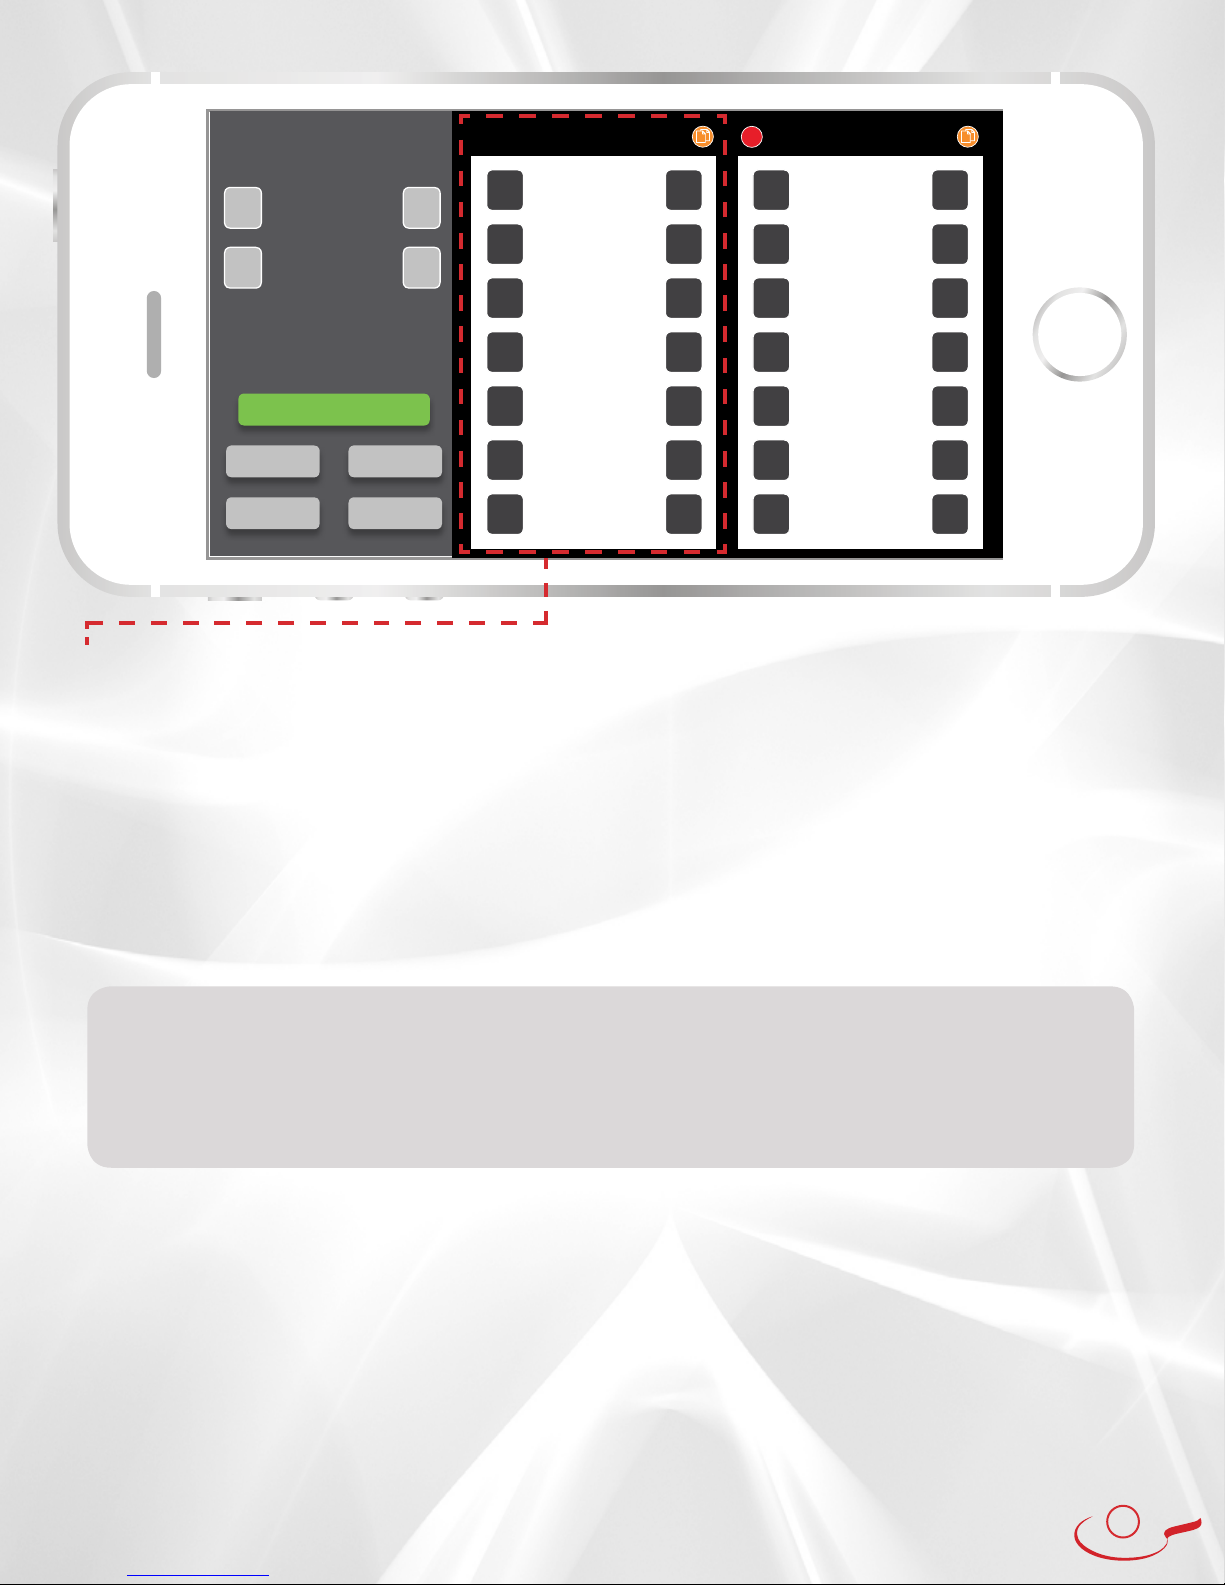
Control Mode: Precision
Count: The total number of balls thrown before the drill stops.
Delay (Seconds): This is the duration of time, in seconds, before the drills starts over. (Example: In the image
above, the delay time after Position #2 has completed will be 20 seconds before Position #1 runs again.)
Start: Press this button to play your drill.
Save: Press this button to save your drill in My Drill Library with a custom name for future use.
Load: Press this button to load any of your favorited or saved drills that have been previously saved.
Back: Press this button to go back to the previous screen.
Clear: Press this button to clear all settings and positions
+
-
Count
50
+
-
Delay (Seconds)
20
Control Mode: Precision Position #1 Position #2
START
SAVE
BACK
LOAD
CLEAR
X
X
X
+
-
# Balls
1+
-
# Balls
1
+
-
Wait Time
1000 +
-
Wait Time
1000
+
-
Top Motor
75 +
-
Top Motor
75
+
-
Bottom Motor
0+
-
Bottom Motor
0
+
-
Oscillation
50 +
-
Oscillation
50
+
-
Height
50 +
-
Height
50
+
-
Rotation
0+
-
Rotation
0
In the Precision Mode, the interface uses a “Position” to define where the ball(s) will be delivered. In this
mode it is the user (not the 3050XL) that controls and calculates the 7 attributes which are applied to
all balls in each Position. You can specify the number of balls from 1 to 10 that are sent to that Position,
Once you create a Position, you can duplicate it, add another Position or delete a Position if needed. You
can also make adjustments to any Position as you create drills.
You can also specify the number of balls thrown before the drill stops (Count). Examples: a drill with 5 Positions
of 1 ball each and a Count of 4 will stop the drill after 4 balls even though the drill is unfinished. A drill with 5
positions of 1 ball each and a Count of 50 will run the drill 10 times and stop after the 50th ball.
When you are satisfied with a Precision Mode drill, you can save it as a custom drill in My Drill Library. If
you wish you can share the drill using the Export feature in My Drill Library. You can also receive drills
from other 3050XL owners and coaches by using the Import feature in My Drill Library.
13
Control Mode: Precision
Each position in the interface gives you 7 attributes to control each ball:
Number of Balls: This is the number of balls you want in each ball Position.
Wait Time: This is the time between balls in each Position. Note that the Wait Time also affects the time
between the last ball in a Position and the first ball in the next Position. (Example: In the image above,
when transitioning between Position #1 to Position #2, the Wait Time between these two Positions will be 1
second, because Position #2’s Wait Time is 1 second. In the example above a wait time of 1000 = 1 second.)
Top Motor (Wheel): This is the speed of the top motor. Positive numbers to 100 (1 to 100) will turn the wheel
forward and increase the amount of top spin. Negative numbers to 100 (-1 to -100) will turn the wheel backwards,
adding more spin to the back spin effect. At number 0, the wheel does not spin.
Bottom Motor (Wheel): This is the speed of the bottom motor. Positive numbers to 100 (1 to 100) will turn
the wheel forward and increase the amount of back spin. Negative numbers to 100 (-1 to -100) will turn the
wheel backwards, adding more spin to the top spin effect. At number 0, the wheel does not spin.
Oscillation: This controls the robot from left to right. Numbers 0 to 49 will turn the robot head to the
player’s left, and numbers 51 to 100 will turn the robot head to the player’s right, with the centerline of
the table being 50.
Height: This controls the robot head tilting up and down. This value ranges from 0 to 100. At number 50,
the robot head stays at a level position.
Rotation: This controls the rotation of the robot head that creates your desired side spin. Range is -90 to
+90, with 0 being a vertical robot head. Negative numbers (-1 to -90) rotate it to the players left, positive
numbers (1 to 90) rotate it to the players right.
Pressing the green “+” button allows you to add a Position to your drill. Pressing the red “x“ button
removes the Position from your drill. Pressing the yellow “copy” button copies the Position to your drill.
Once you have chosen the 7 attributes for each of the Positions, press the Start button to activate your
Precision Mode drill.
Motor (Wheel) Notes: One of the main benefits to having two motors is you can now achieve more spin without
having to increase the speed at the same time.
For even more spin on your ball, use both the top and bottom motors and set them to counter each other.
Example: Set your top motor at -50 and your bottom at 50.
If you desire no spin on your ball, set both the top and bottom motors to the same speed. Example: Set your top
motor at 50 and your bottom motor at 50.
+
-
Count
50
+
-
Delay (Seconds)
20
Control Mode: Precision Position #1 Position #2
START
SAVE
BACK
LOAD
CLEAR
X
X
X
+
-
# Balls
1+
-
# Balls
1
+
-
Wait Time
1000 +
-
Wait Time
1000
+
-
Top Motor
75 +
-
Top Motor
75
+
-
Bottom Motor
0+
-
Bottom Motor
0
+
-
Oscillation
50 +
-
Oscillation
50
+
-
Height
50 +
-
Height
50
+
-
Rotation
0+
-
Rotation
0
14
Your Robo-Pong 3050XL comes pre-programmed with several table tennis drills. These drills are divided
up in to skill levels (including Introductory, Beginner, Intermediate and Advanced - plus Bonus Drills), giving
you the flexibility to choose your training based off your experience, skill level and goals. Please refer to the
Newgy App to access the pre-programmed drills.
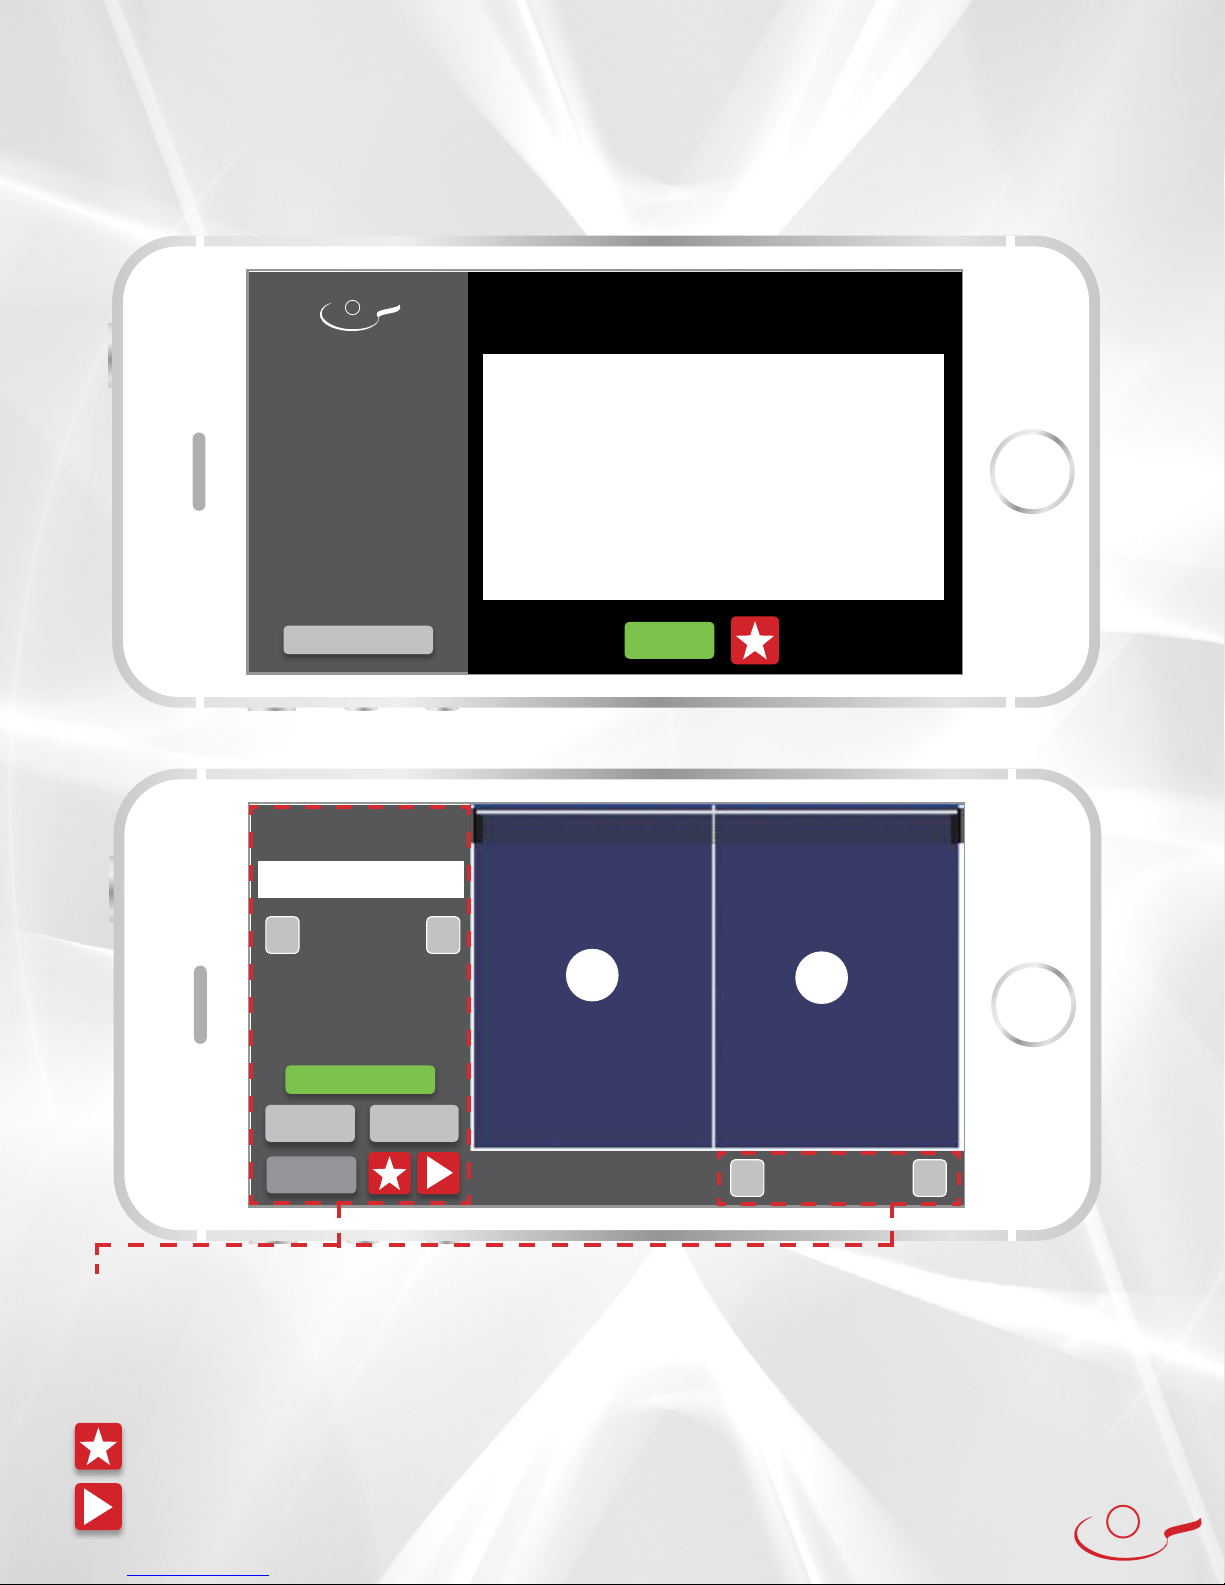
In Drill Mode you can select a skill level (Beginner, Introductory, etc.). Then press and highlight any drill.
Press Load to prepare the drill for playing.
Once loaded, the Drill Mode skill Level is displayed along with the drill name selected. Other settings are:
Drill Mode
LOAD
BACK
Drill Mode:
Beginner
Select a Beginner Drill
Beginner Forehand Warmup
Beginner Backhand Warmup
Forehand Backhand Footwork
Beginner Forehand Random
Beginner Backhand Random
Beginner Full Table Random
Example of the Beginner Drill selection screen.
START
Drill Mode:
Beginner
Beginner Forehand Warmup
Beginner Backhand Warmup
Forehand Backhand Footwork
Beginner Forehand Random
Beginner Backhand Random
Beginner Full Table Random
Top
2
Forehand Backhand Footwork
+
-
Count
50
PREVIOUS DRILL NEXT DRILL
Top
1
BACK +
-
Drill Speed (Percent)
50
Count: Sets the number of balls thrown before the drill stops.
Start: Starts the selected drill.
Previous Drill / Next Drill: moves through the list of drills in the selected skill level.
Drill Speed (Percent): Allows you to slow a drill down as you learn, and then increase the drill speed as you
become more proficient. Range is 50% to 125%.
Marks a drill as one of your favorites and lists the drill in ‘My Drill Library’.
Plays a sample video* of the drill (* May not be available in all countries or regions).

15
Creating and saving a Newgy Robo-Pong 3050XL Drill - Android
Using an Android device with a Newgy 3050XL robot and the Newgy App, users can create
custom drills in the Newgy 3050XL Android App in either the Standard Mode or Precision Mode.
Once a drill is created, press SAVE to save the drill to My Drill Library.
Enter a name for the drill in the Drill Name text field, and optionally enter details about the drill in the
Description text field.
Select Save and note that the drill is now saved in My Drill Library under My Custom Drills. Newgy Drills
are saved as .XML files.
Exporting Drills
In My Drill Library under My Custom Drills, highlight the drill to Export and tap the EXPORT button.
The drill file will be exported and saved onto your Android device under File Manager>Newgy3050Export.
The location of your File Manager/File Explorer may vary by device.
The drill can then be sent as an email attachment to another 3050XL owner for download and import
into their Newgy 3050XL App.
Importing Drills
In email, select and download the attached drill to your Android device. The drill will be saved to the
device in the default location for downloads.
Connect the Android device to a Newgy 3050XL robot, power on the robot, open the Newgy App
and connect to the 3050XL robot.
Go to My Drill Library, select IMPORT. Go to Downloads and select one file at a time to be imported. Press
open for each drill to be saved into the App.
The drill will be saved in My Drills Library under My Custom Drills. The drill can now be played on a
Newgy 3050XL robot.
My Drill Library
Easily save, store, import, export and access your Favorite and My Custom Drills here.
IMPORT
EXPORT
START REMOVE START DELETE
BACK
+
-
Count
50
My Drill Library My Favorite Drills: My Custom Drills
Backhand Random
Forehand, Backhand, Random
In-And-Out Footwork
Random Smashing
Short Backhand, Deep Forehand
My Custom Drill #1
My Custom Drill #2
My Custom Drill #3
My Custom Drill #4

16
My Drill Library (Continued)
Creating and saving a Newgy Robo-Pong 3050XL Drill - Apple iOS
Using an Apple iOS device with a Newgy 3050XL robot and the Newgy App, users can create
custom drills in the Newgy 3050XL Apple iOS App in either the Standard Mode or Precision Mode.
Once a drill is created, press SAVE to save the drill to My Drill Library.
Enter a name for the drill in the Drill Name text field, and optionally enter details about the drill in the
Description text field.
Select Save and note that the drill is now saved in My Drill Library under My Custom Drills. Newgy Drills
are saved as .XML files.
Exporting Drills
In My Drill Library under My Custom Drills, highlight the drill to Export and tap the EXPORT button.
The drill file will be exported and saved onto your iCloud Drive>RoboPong Folder.
The drill can then be sent as an email attachment to another 3050XL owner for download and import into
their Newgy 3050XL App.
Importing Drills
In email, select and download the attached drill to your Apple iOS device. Save the drill to your iCloud
Drive>RoboPong Folder.
Connect the Apple iOS device to a Newgy 3050XL robot, power on the robot, open the Newgy App
and connect to the 3050XL robot.
Go to My Drill Library, select IMPORT. Go to iCloud Drive>RoboPong (or the location you chose) select the
file to be imported and it will show up in your My Custom Drills list. The drill can now be played on a
Newgy 3050XL robot.
Creating and saving a Newgy Robo-Pong 3050XL Drill - Windows 10
Using a Windows 10 device with a Newgy 3050XL robot and Newgy Windows App, users can create
custom drills in the Newgy 3050XL Windows App in either the Standard Mode or Precision Mode.
Once a drill is created, press SAVE to save the drill to My Drill Library.
Enter a name for the drill in the Drill Name text field, and optionally enter details about the drill in the
Description text field.
Select Save and note that the drill is now saved in My Drill Library under My Custom Drills. Newgy Drills
are saved as .XML files.
Exporting Drills
In My Drill Library under My Custom Drills, highlight the drill(s) to Export and click on the EXPORT button.
The drill file(s) will be exported and saved into your Windows device under
Documents>Newgy3050>Drills.
The drill(s) can then be sent as an email attachment to another 3050XL owner for download and import
into their Newgy 3050XL App. (also see USB Drive Transfer below)
Importing Drills
In email, select and download the attached drill(s) to a Windows 10 device. The drill(s) will be saved to the
device in the default location for downloads. Newgy suggests to save drills to ThisPC>Downloads>drill
name.

17
Connect the Windows 10 device to a Newgy 3050XL robot, power on the robot, open the Newgy App
and connect to the 3050XL robot.
Go to My Drill Library, select IMPORT and My Documents will open on the Windows device.
Go to Downloads and select one file at a time to be imported. Press open for each drill to be saved into
the App. The drill(s) will be saved in My Drills Library under My Custom Drills. The drill(s) can now be
played on a Newgy 3050XL robot.
USB Drive Transfer
Drills may also be Exported from the Newgy App to a Windows 10 device and then transferred to a USB
drive, as well as downloaded from a USB drive and imported to the Newgy App. However, Newgy does
not currently support Export and Import sharing other than through Email transfer as noted above.
My Drill Library Continued

18
The Newgy Robo-Pong 3050XL has excellent spin variation in the rallies, just like playing against a real
opponent in a tournament! The green and red indicator lights will let you know the exact spin on the ball
so that you can choose the correct stroke to use.
1 green light = light topspin
2 green lights = medium topspin
3 green lights = heavy topspin
4 green lights = very heavy topspin
No lights = no spin
1 red light = light backspin
2 red lights = medium backspin
3 red lights = heavy backspin
4 red lights = very heavy backspin
As in a real match, there are also sidespin variations as well. The robot’s head will turn clockwise or
counterclockwise before throwing a sidespin ball. The direction of the lights is the direction of the
sidespin. For example, if you see the indicator lights pointing to the left, that signifies that the opponent’s
racket went to the left (similar to a backhand sidespin serve). If the indicator lights point to the left
and down, that signifies that the opponent’s racket went to the left and down (similar to a backhand
backspin/sidespin serve).
In order to return the spin, touch the same side of the ball as the lights are indicating. If you see lights on
the bottom of the robot’s head, touch the bottom of the ball. If you see lights on the right, touch right.
If you see lights on the top-right, then touch top right. Using the 3050XL to return the various spins is
really the best way to learn how to counter the spin and impart your own spin!
In the event that your Bluetooth® connection is lost or the robot unpairs from your device, follow these
steps to begin a new connection:
1) Exit and restart the Newgy App
2) Turn your device’s Bluetooth® capability off and then back on again
3) Reconnect your Robo-Pong 3050XL to your device using the Newgy App
Indicator Lights
Notice:

19
DRILL DESCRIPTIONS
INTRODUCTORY DRILLS
Forehand Warmup
This drill gives you a steady no-spin ball, slowly to
your forehand.
Backhand Warmup
This drill gives you a steady no-spin ball, slowly to
the backhand.
Forehand 2-Step Footwork
2 Positions: to the middle and forehand, move your feet.
Backhand 2-Step Footwork
2 Positions: middle and backhand, move your feet.
Forehand Push
Light underspin to learn spin control.
Backhand Push
Steady light underspin to backhand to learn spin control.
Forehand Push With Footwork
This drill gives you a very light backspin ball, one to
the middle and one to the forehand.
Backhand Push With Footwork
This drill gives you a very light backspin ball, one to
the middle and one to the backhand.
Forehand Topspin
Direct light topspin to your forehand.
Backhand topspin
Direct light topspin to your backhand.
Forehand Topspin With Footwork
Light topspin to the middle and forehand, move your
feet.
Backhand Topspin With Footwork
Light topspin to the middle and backhand, move your
feet.
Forehand Backspin
This drill gives you a very light backspin ball directly
to your forehand.
Backhand Backspin
This drill gives you a very light backspin ball directly
to your backhand.
Forehand Backspin With Footwork
Light backspin to middle and forehand, move your feet.
Backhand backspin With Footwork
Light backspin to middle and backhand, move your
feet.
Three Balls
Topspin, underspin & no spin to test your spin ready
skills.
No Spin Forehand
Deep with no spin, so return with maximum spin!
No Spin Backhand
Deep with no spin, so choose which spin you want to
return.
BEGINNER DRILLS
Beginner Forehand Warmup
Warm-up your basic forehand stroke by keeping
your angle set at 90 degrees and stroking forward
on the ball.
Beginner Backhand Warmup
Warm-up your backhand stroke by controlling the
ball to different locations – sometimes hitting to
the forehand, sometimes middle, and sometimes
backhand.
Forehand Backhand Footwork
Link the strokes together by hitting one forehand
and one backhand! Use a mini-step to move from
one ball to the next.
Beginner Forehand Random
This drill is a bit more challenging. The robot will
move the ball around in the forehand zone; watch
the robot’s head and look for the subtle variations!
Beginner Backhand Random
This drill will give you balls in the backhand zone.
Keep your racket in front, move into position, and
control the ball sometimes hitting a bit harder,
sometimes giving a slow variation!
Beginner Full Table Random
Now this feels more like a game! Just like playing
a real opponent, the balls will go anywhere on
the table. Work on adjusting to the ball, while still
maintaining good ball placement on all of your
shots.
Serve Then Two Random
This drill gives you a serve then two balls anywhere,
then a break, just like a game.

20
In-And-Out Footwork
Move in for the short forehand, then move back
for the deep forehand. Next, move in for the short
backhand, then move back a bit for the deep
backhand. Stay on your toes, leaning forward, and
contact the ball in-front of your body.
Three Middle, One to Either Corner
Pay Attention! The first three balls go to your middle,
then suddenly the fourth ball goes surprisingly to
either corner. Watch the robot’s head and be ready
to make the adjustment!
Forehand Random
Within the forehand side of the table, you will get
medium speed balls. Move quickly, get in position,
and turn your shoulders as you make contact with
the ball!
Backhand Random
Within the backhand side of the table, you will get
medium speed balls. Lean forward, creating space
for your backspin, and brush the ball forward using
your wrist and forearm to generate spin on your
backhand stroke.
Fast Random
Be ready to quickly adjust, these balls will be coming
anywhere on the table. Keep your racket in front
and be ready to make fast transitions from middle
to forehand to backhand!
Short Forehand, Deep Backhand
The first ball will be short to your forehand, then the
follow-up ball will be deep to your backhand. If you
are right handed, step forward with your right foot
to get you closer to the ball.
Short Backhand, Deep Forehand
Attack the first ball with your backhand, then
quickly get back for the deep forehand.
Backhand Rally, Surprise Forehand
This is just like a game. It starts with a serve, then
gives a backhand rally of one to five balls, then
suddenly it surprises you to the forehand. After the
sequence, it gives a short break for you to physically
and mentally recover for the next ball.
No-Spin Serves
This drill gives you no-spin serves. You can choose
whether to chop or attack each of these balls.
Whichever you choose, make sure that you keep a
relaxed grip and brush the ball to impart maximum
spin.
Serve, Two Speed Balls
After returning the serve, get ready for two fast
balls. Just meet the ball and focus on keeping it low!
Serve, High Forehand, High Backhand
After returning the serve, you will get a high ball
to your forehand then a high ball to the backhand.
Get in position and smash both high balls with your
powerful forehand!
Serve, Then Speed
After returning the serve, be ready for three fast
balls – one to the forehand, one to the middle, then
one to the backhand.
Forehand Game Situation
First, you will get a backspin serve to the forehand,
push it. Next you will get a deep backspin ball to the
forehand, get down low and loop it up and over the
net. Finally, you will get a deep topspin ball to the
forehand, start your hand high and drive through
the ball forward.
Backhand Game Situation
First, you will get a backspin serve to the backhand,
push it. Next you will get a deep backspin ball to the
backhand, get down low and loop it up and over the
net. Finally, you will get a deep topspin ball to the
backhand, start your hand high and drive through
the ball forward.
Short Serve Then 10 Balls
You will get a short serve, step forward and push
or flip this ball. Next, you will have a marathon rally
of 10 topspin balls anywhere on the table. You will
then have a short rest before the next rally.
No Spin, Topspin
Watch out for the tricky spin variations. The robot
will alternate between no-spin serves and topspin
serves! Pay attention and adjust your swing slightly
for each ball!
Left Sidespin Serve Return
Regardless if you choose to hit with your forehand
or backhand, touch the right side of the ball to
control it onto the table.
Right Sidespin Serve Return
If you contact the back of the ball, it will fly off your
racket far to the left. In order to counter the spin,
touch the left side of the ball.
No-Spin Serve Return
Against these serves, float the ball controlled over
the net with a steady chop.
Topspin Serve Return
Using a controlled stroke, contact the ball with a
relaxed grip and a 60 degree racket angle.
Lefty Sidespin Serve Anywhere
Be ready to adjust in-and-out as well as side-to-side
for these very spinny left sidespin serves.
Other manuals for Robo-Pong 3050XL
1
Table of contents
Other Newgy Robotics manuals


Popular Robotics manuals by other brands


adept technology
adept technology Cobra 03352-000 Installation procedures

Norland Research
Norland Research S.A.M Version 3.0 Assembly instructions

Stensat
Stensat Sten-Bot Robot Kit manual

Vex Robotics
Vex Robotics PRO VersaPlanetary quick start guide

Interbotix
Interbotix X Series quick start guide

Wifibot
Wifibot U-TROOPER quick start guide


