10 | Laundry Collection by Newtech www.newtech.co.nz
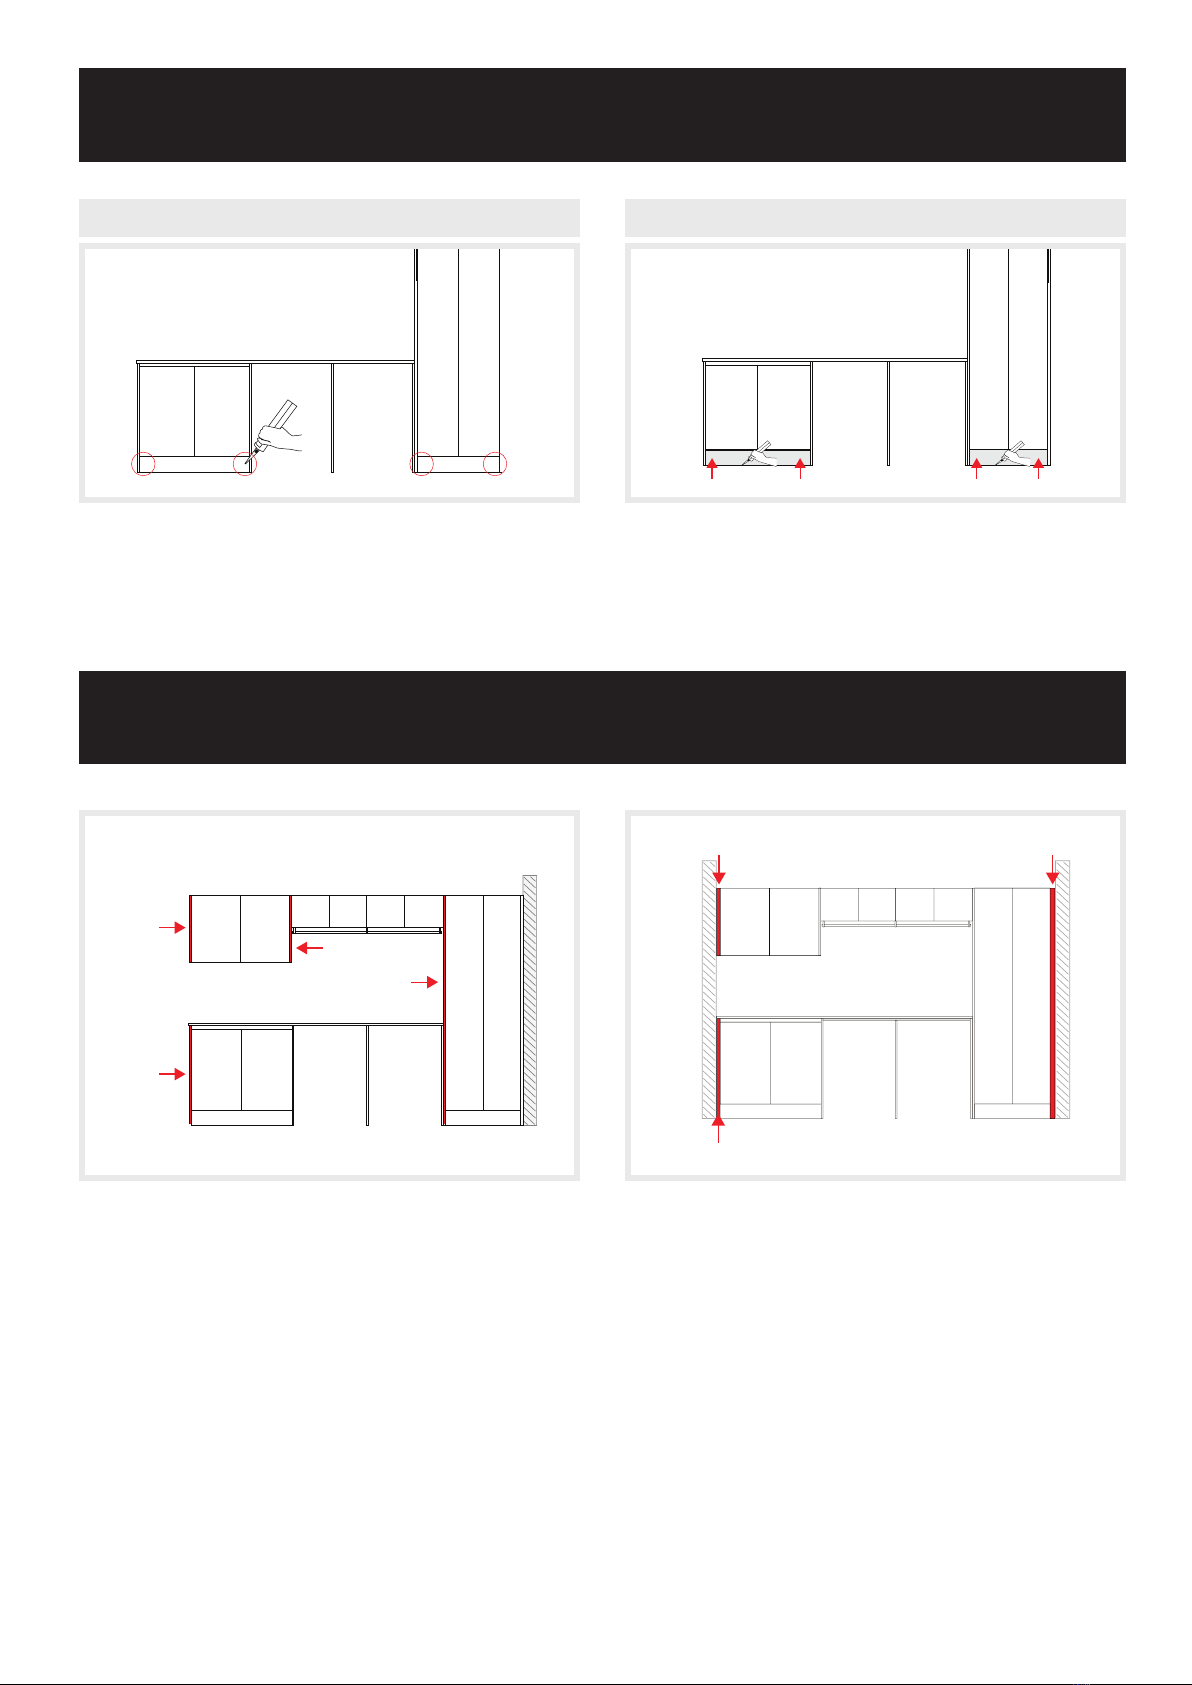
Preparation
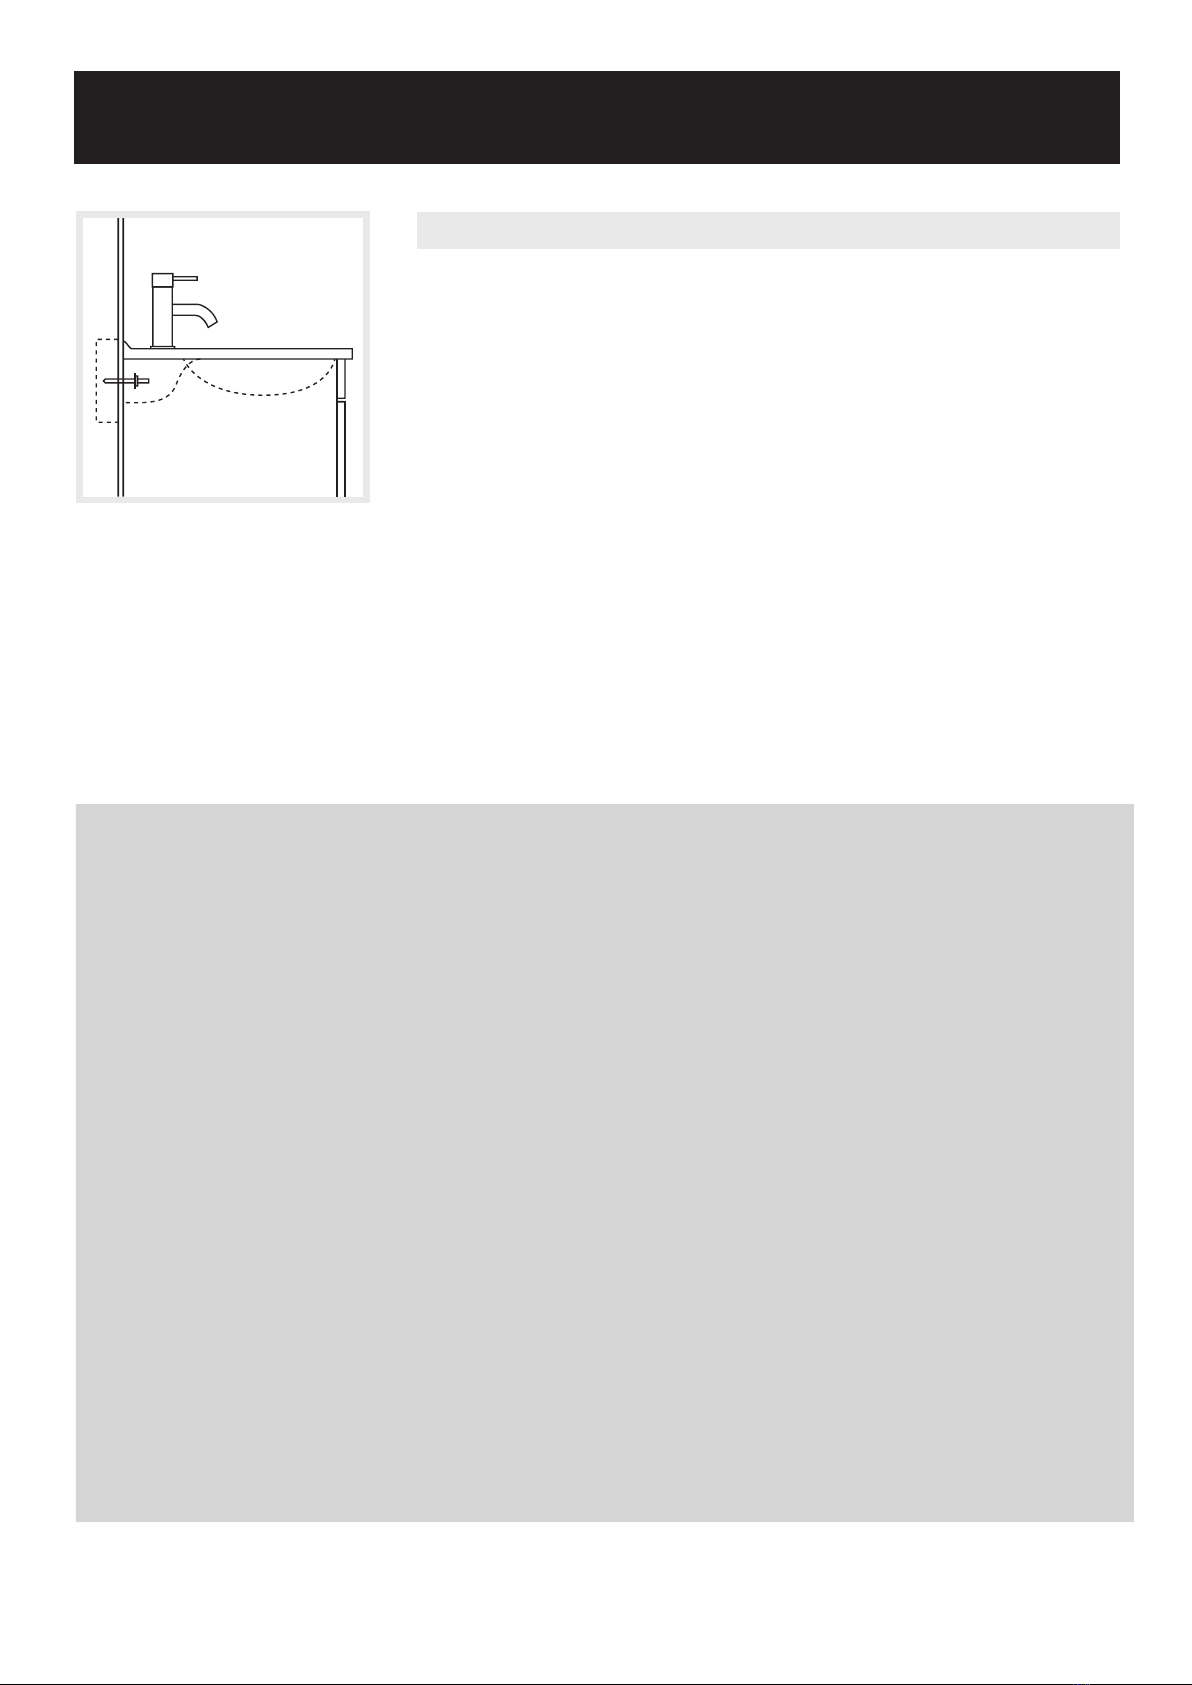
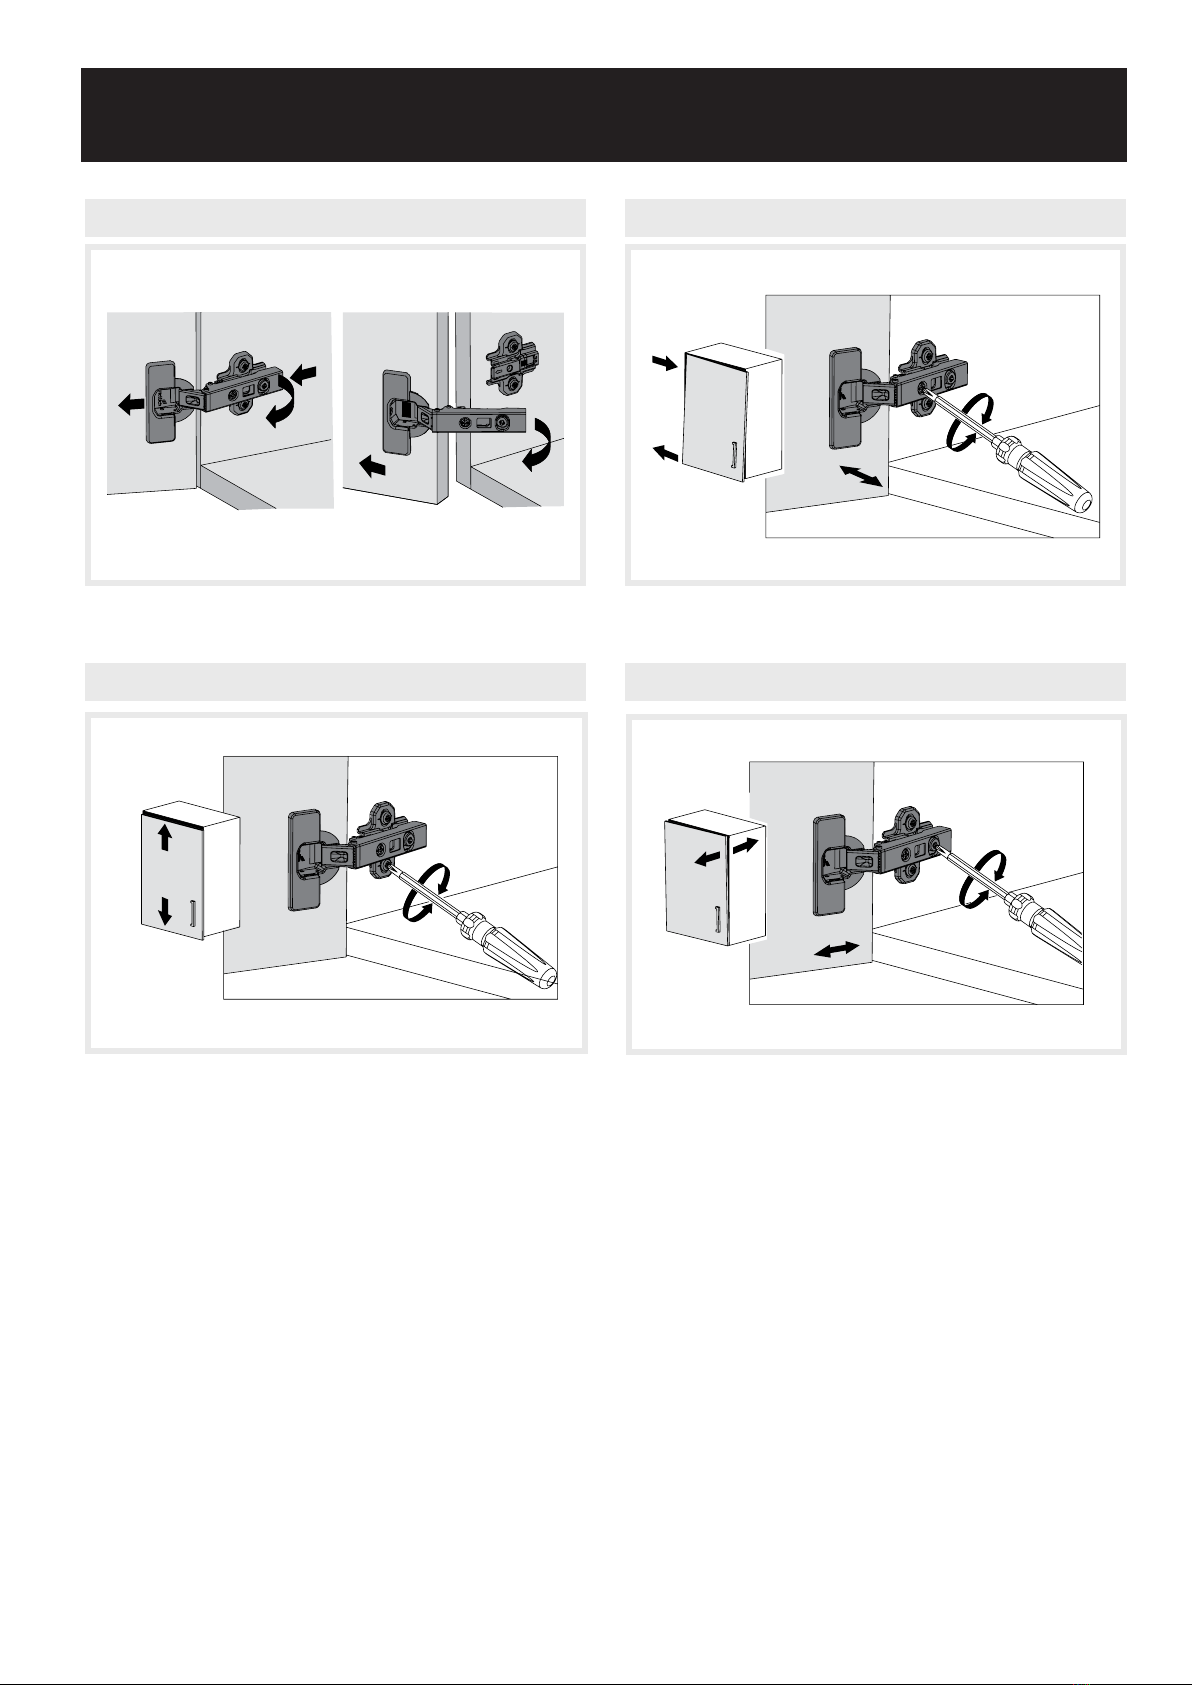
Drawer Runner Adjustments
155
Technik für Möbel
Removing railing
1.
2.
InnoTech Atira double walled drawer system
Installation, adjustment, removal
Removing front panel
1.
2.
3.
Drawer
Pot-and-pan drawer
Internal drawer 100
Internal pot-and-
pan drawer 100
Installing side stabiliser
ø 2,5
22,5
40
EB 9,5 = 14,6
EB 10,5 = 14,6
EB 12,5 = 12,6
ø 3,5 x 16
EB 9,5 / 10,5 = LB - 2 x EB - 37
EB 12,5 = LB - 2 x EB - 33
12,6
11_Atira_HAU_Montage_148_167.indd 155 13.04.16 17:14
154 www.hettich.com
Installing Quadro drawer runner
ø 4 x 16 ø 6,3 x 14
≥16
Installing drawer
Adjusting front panel, drawer
± 1,5
± 2
Adjusting front panel, pot-and-pan drawer with railing
± 1,5
± 2
2. 1.
InnoTech Atira double walled drawer system
Installation, adjustment, removal
Installing cover cap Removing drawer
11_Atira_HAU_Montage_148_167.indd 154 13.04.16 17:14
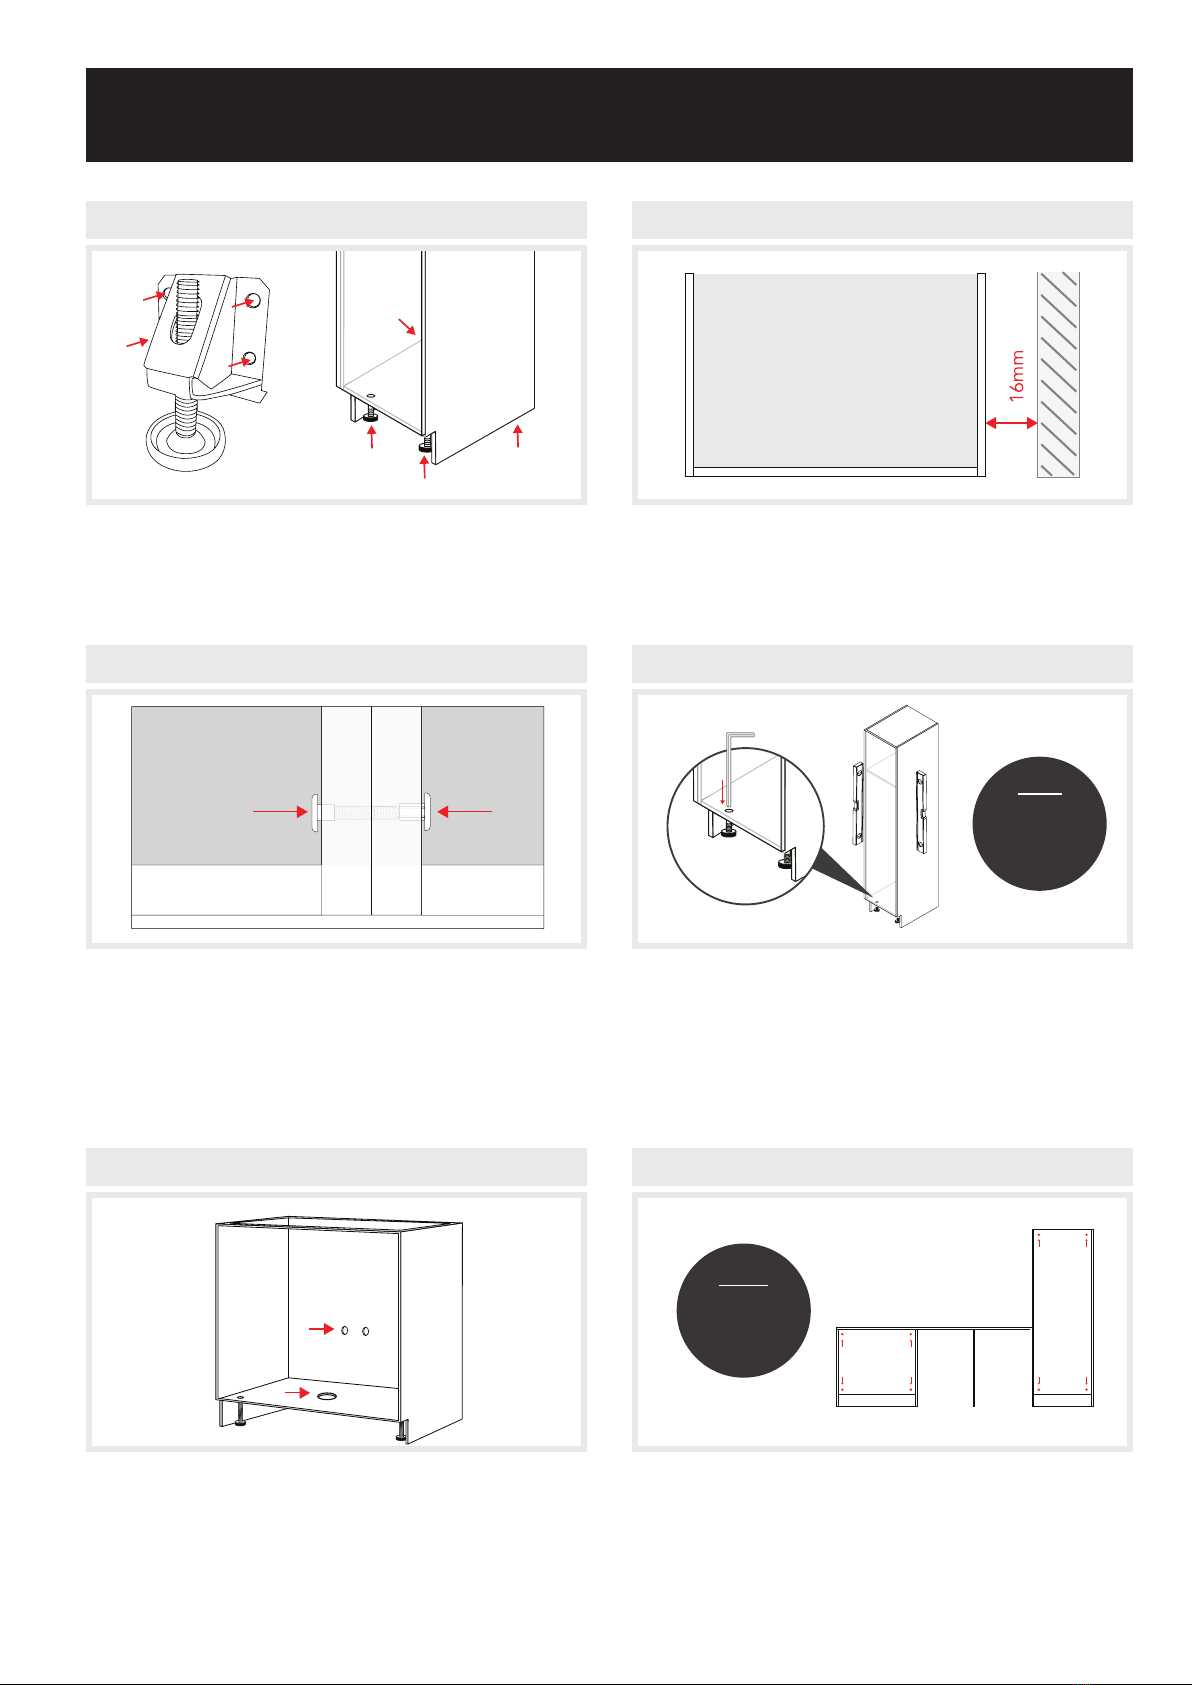
Open the drawer fully. Press the grey levers inwards located under the drawer and
pull the drawer forward with both hands place either side of the drawer.
With the drawer runners fully retracted, place the drawer back onto the runners, push
closed and listen for a double click and push closed.
155
Technik für Möbel
Removing railing
1.
2.
InnoTech Atira double walled drawer system
Installation, adjustment, removal
Removing front panel
1.
2.
3.
Drawer
Pot-and-pan drawer
Internal drawer 100
Internal pot-and-
pan drawer 100
Installing side stabiliser
ø 2,5
22,5
40
EB 9,5 = 14,6
EB 10,5 = 14,6
EB 12,5 = 12,6
ø 3,5 x 16
EB 9,5 / 10,5 = LB - 2 x EB - 37
EB 12,5 = LB - 2 x EB - 33
12,6
11_Atira_HAU_Montage_148_167.indd 155 13.04.16 17:14
154 www.hettich.com
Installing Quadro drawer runner
ø 4 x 16 ø 6,3 x 14
≥16
Installing drawer
Adjusting front panel, drawer
± 1,5
± 2
Adjusting front panel, pot-and-pan drawer with railing
± 1,5
± 2
2. 1.
InnoTech Atira double walled drawer system
Installation, adjustment, removal
Installing cover cap Removing drawer
11_Atira_HAU_Montage_148_167.indd 154 13.04.16 17:14
Technik für Möbel 161
155
Technik für Möbel
Removing railing
1.
2.
InnoTech Atira double walled drawer system
Installation, adjustment, removal
Removing front panel
1.
2.
3.
Drawer
Pot-and-pan drawer
Internal drawer 100
Internal pot-and-
pan drawer 100
Installing side stabiliser
ø 2,5
22,5
40
EB 9,5 = 14,6
EB 10,5 = 14,6
EB 12,5 = 12,6
ø 3,5 x 16
EB 9,5 / 10,5 = LB - 2 x EB - 37
EB 12,5 = LB - 2 x EB - 33
12,6
11_Atira_HAU_Montage_148_167.indd 155 13.04.16 17:14
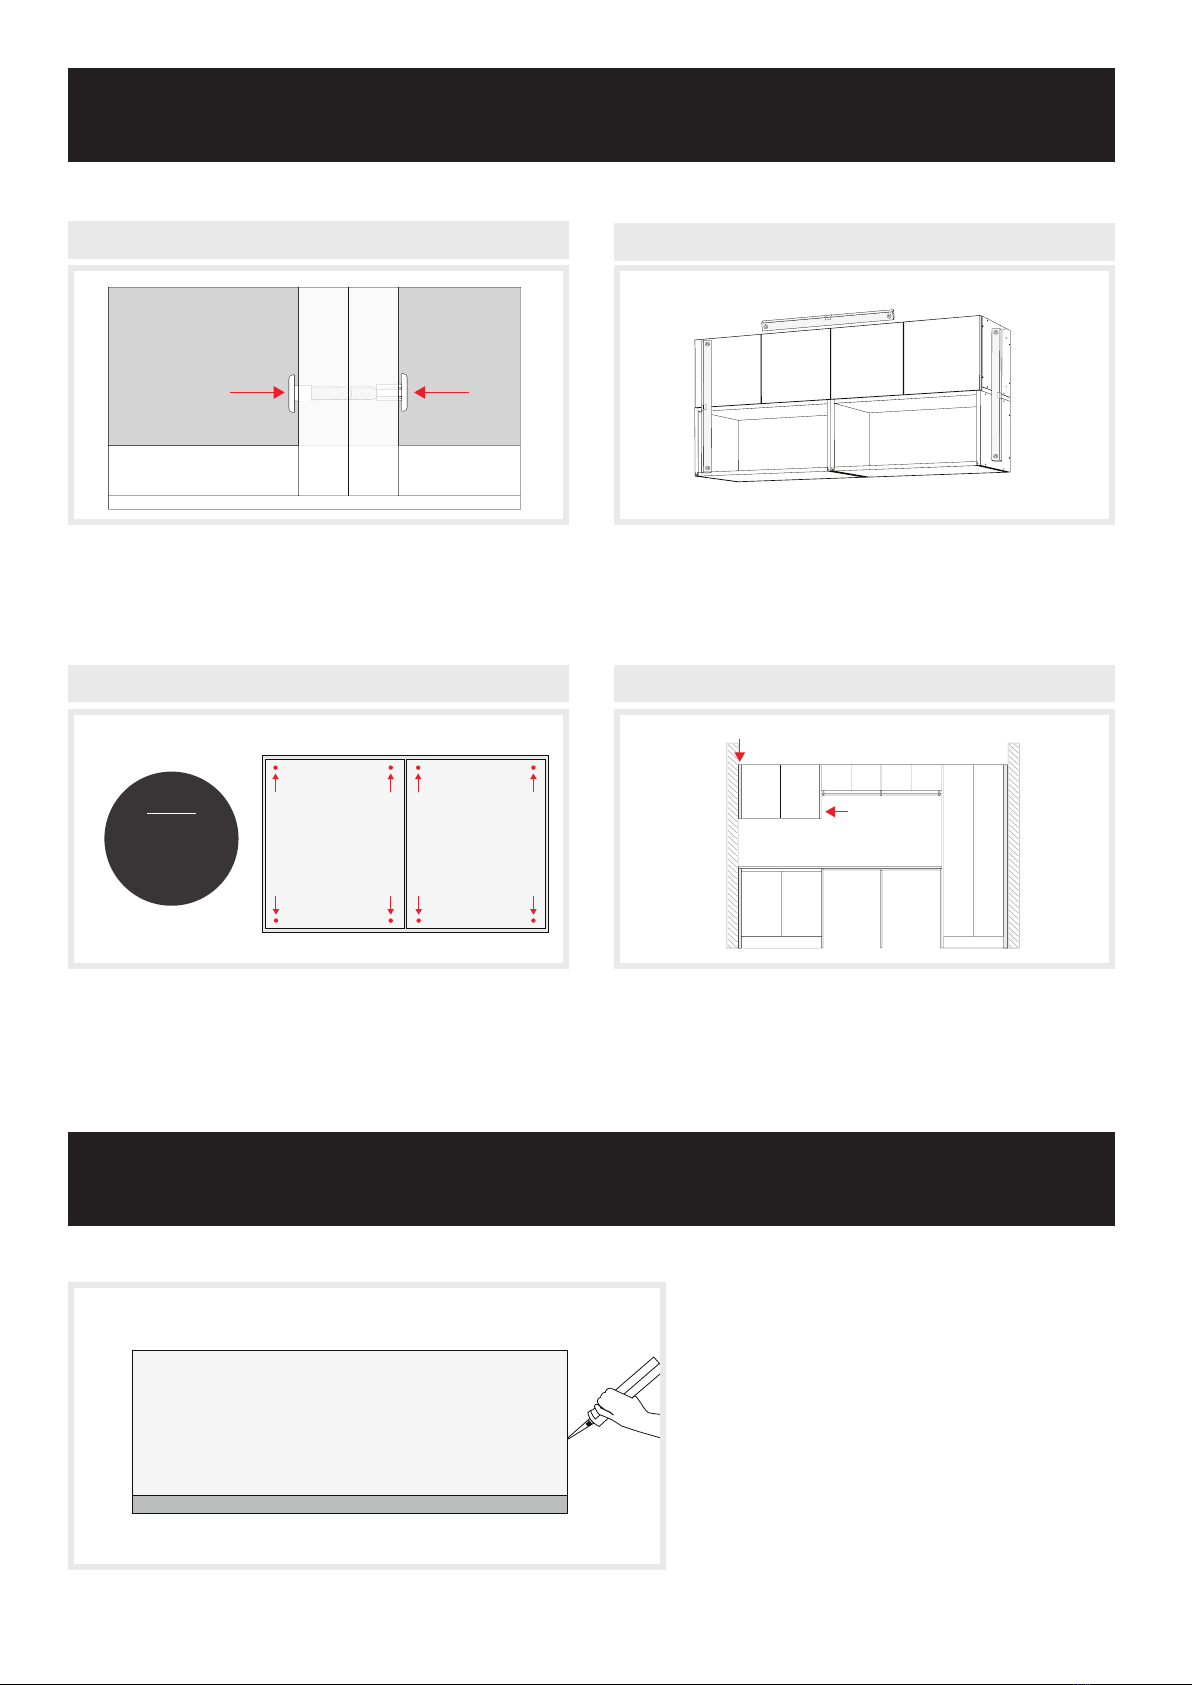
Extend the drawer out and either pull the cap o or push back on. To remove the gallery rails, slide the white tabs (1) towards the back of the drawer, the
gallery rail will lift out of front connector.
Technik für Möbel
161
155
Technik für Möbel
Removing railing
1.
2.
InnoTech Atira double walled drawer system
Installation, adjustment, removal
Removing front panel
1.
2.
3.
Drawer
Pot-and-pan drawer
Internal drawer 100
Internal pot-and-
pan drawer 100
Installing side stabiliser
ø 2,5
22,5
40
EB 9,5 = 14,6
EB 10,5 = 14,6
EB 12,5 = 12,6
ø 3,5 x 16
EB 9,5 / 10,5 = LB - 2 x EB - 37
EB 12,5 = LB - 2 x EB - 33
12,6
11_Atira_HAU_Montage_148_167.indd 155 13.04.16 17:14
To remove the front panel extend the drawer and remove the cover cap. Disconnect the gallery rails and remove the pin located underneath the drawer front. The pin is removed by
pressing lightly on the base of the drawer. Once removed, push the blue button, then the drawer front can be released and lifted out.
Main drawer
and internal
cosmetic drawer
NOTE: The drawer runner adjustments apply to all cabinetry drawers excluding the Hamper Drawer.
Pin located
underneath
drawer front
DRAWER REMOVAL INSERTING DRAWERS
INSTALLING & REMOVING COVER CAP REMOVING GALLERY RAILS
REMOVING DRAWER FRONT