manuals.online logo
Brands
  1. Home
  2. •
  3. Brands
  4. •
  5. Next
  6. •
  7. Indoor Furnishing
  8. •
  9. Next LINCOLN 876258 User manual

Next LINCOLN 876258 User manual

Other Next Indoor Furnishing manuals

Next 413470 User manual

Next

Next 413470 User manual

Next CHILTERN 840013 User manual

Next

Next CHILTERN 840013 User manual

Next JEFFERSON 252313 User manual

Next

Next JEFFERSON 252313 User manual

Next 783983 User manual

Next

Next 783983 User manual

Next VITTORIA T55758 User manual

Next

Next VITTORIA T55758 User manual

Next NEWBURY SPINDLE 690446 User manual

Next

Next NEWBURY SPINDLE 690446 User manual

Next 792359 User manual

Next

Next 792359 User manual

Next 684319 User manual

Next

Next 684319 User manual

Next ELLA 897911 User manual

Next

Next ELLA 897911 User manual

Next ASHINGTON User manual

Next

Next ASHINGTON User manual

Next 125109 User manual

Next

Next 125109 User manual

Next BRONX 308876 User manual

Next

Next BRONX 308876 User manual

Next 427044 User manual

Next

Next 427044 User manual

Next MADSEN SUPER WIDE TV UNIT User manual

Next

Next MADSEN SUPER WIDE TV UNIT User manual

Next HARTFORD LT 860134 User manual

Next

Next HARTFORD LT 860134 User manual

Next A44771 User manual

Next

Next A44771 User manual

Next HUDSON 152147 User manual

Next

Next HUDSON 152147 User manual

Next 904273 User manual

Next

Next 904273 User manual

Next LOGAN 138749 User manual

Next

Next LOGAN 138749 User manual

Next A77419 User manual

Next

Next A77419 User manual

Next BRONX FIXED A18914 User manual

Next

Next BRONX FIXED A18914 User manual

Next 127001 User manual

Next

Next 127001 User manual

Next 891715 User manual

Next

Next 891715 User manual

Next 409288 User manual

Next

Next 409288 User manual

Popular Indoor Furnishing manuals by other brands

Regency LWMS3015 Assembly instructions

Regency

Regency LWMS3015 Assembly instructions

Furniture of America CM7751C Assembly instructions

Furniture of America

Furniture of America CM7751C Assembly instructions

Safavieh Furniture Estella CNS5731 manual

Safavieh Furniture

Safavieh Furniture Estella CNS5731 manual

PLACES OF STYLE Ovalfuss Assembly instruction

PLACES OF STYLE

PLACES OF STYLE Ovalfuss Assembly instruction

Trasman 1138 Bo1 Assembly manual

Trasman

Trasman 1138 Bo1 Assembly manual

Costway JV10856 manual

Costway

Costway JV10856 manual

moss DESIGN Caisson Credenza Assembly instructions

moss DESIGN

moss DESIGN Caisson Credenza Assembly instructions

Aquaglide FULL DECK 15.0 owner's manual

Aquaglide

Aquaglide FULL DECK 15.0 owner's manual

AREBOS AR-HE-SW30 user manual

AREBOS

AREBOS AR-HE-SW30 user manual

Till-Hilft Fulda 87005.330 Assembly instructions

Till-Hilft

Till-Hilft Fulda 87005.330 Assembly instructions

Twoey Outside 2010 quick start guide

Twoey Outside

Twoey Outside 2010 quick start guide

Hettich Easys 200 operating instructions

Hettich

Hettich Easys 200 operating instructions

The bedboss RELAX 404 Series owner's manual

The bedboss

The bedboss RELAX 404 Series owner's manual

Oeseder Möbelindustrie Bern 991 720 Assembly instructions

Oeseder Möbelindustrie

Oeseder Möbelindustrie Bern 991 720 Assembly instructions

Costway HW68469 user manual

Costway

Costway HW68469 user manual

BROSA Hans Assembly guide

BROSA

BROSA Hans Assembly guide

Prodigg MINIKA PBA015T-FUR installation manual

Prodigg

Prodigg MINIKA PBA015T-FUR installation manual

Whittier Wood Furniture McKenzie 3504AFGACa quick start guide

Whittier Wood Furniture

Whittier Wood Furniture McKenzie 3504AFGACa quick start guide

manuals.online logo
manuals.online logoBrands
  • About & Mission
  • Contact us
  • Privacy Policy
  • Terms and Conditions

Copyright 2025 Manuals.Online. All Rights Reserved.

ASSEMBLY INSTRUCTIONS.
IMPORTANT - RETAIN FOR FUTURE REFERENCE - READ CAREFULLY.
876258 LINCOLN CONSOLE
IMPORTANT
• We suggest you spend a short time reading through this leaflet and then follow the simple
step by step instructions.
• Carefully check that you have all parts before beginning assembly.
• Keep fittings out of children's reach and keep children well away from the construction area.
• We recommend that the packaging is used to protect the surfaces during assembly.
• A minimum of 2 persons is required to assemble this product.
• We recommend the use of the wall attachment bracket for safety reasons.
Helpline
If you have any problems with this
product or require any replacement
fittings please contact Customer
Services Tel: 0844 844 8999
Regrettably self assembly items cannot be returned once assembly is part or fully completed
unless the item is found to be faulty. Should you need to return the unassembled product,
please repack in the original packaging.
• For general cleaning, periodically dust with a soft cloth.
• Do not rub or scrub the surface when cleaning.
• Always use a non-silicone based furniture polish. Silicone in furniture polishes can break down
the lacquer finish.
• Any spills should be removed immediately with a soft clean damp cloth and dried immediately.
Avoid keeping furniturein direct sunlight or closeto any heat sources as this can cause cracking,
discolouration or warping.
• Never drag pieces of furniture across the floor as this will cause damage to the joints.
All assembly fixings should always be tightened properly and periodically check all fixings and
tighten if necessary.
• The finish will mellow and change colour over time.
CARE INSTRUCTIONS
PRODUCT INFORMATION
Tools Needed
Made in Poland.
GLASS INFORMATION
This item contains glass. Please handle with extreme care.
Batch No: MM-42 , Date of Manufacture: May 2013
This unit contains safety film backed mirrored glass door panels of a nominal thickness of 3 mm
which are not required to be classified to BS 6206.
If a glass component is chipped or broken replace with glass of the type described on this label.
Consult the manufacturer, retailer or agent with regard to obtaining a manufacturing specification
and shape for replacement glass quoting the model number, and batch number or date of
manufacture.
1 of 15 P9--LI90
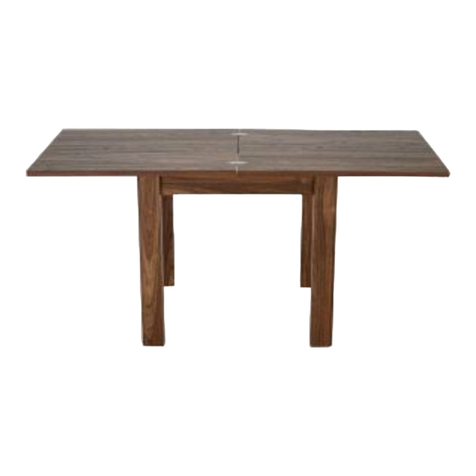
2 PERSON ASSEMBLY
ASSEMBLED DIMENSIONS
APPROXIMATE ASSEMBLY TIME
REQUIRED ASSEMBLY TOOLS
REQUIRED ASSEMBLY SPACE
FLOOR AREA
2 M x 2 M
1.0 hrs
Assembly
Instruction
876258 LINCOLN CONSOLE
DESCRIPTION:
2
1180 mm
420 mm
801 mm
of 15 P9--LI90
PARTS LIST
DESCRIPTION:
Assembly
Instruction
876258 LINCOLN CONSOLE
3
NO PART LIST QTY
.
(1) DRAWER SIDE L
(2) DRAWER SIDE R
(3) DRAWER BACK
(4) DRAWER FRONT
(5) DRAWER BOTTOM
(6) RAIL LEG
(7) BOTTOM RAIL
(8) TOP PANEL
(9) BACK PANEL
(10) BOTTOM PANEL
(11)
(12) SIDE L
(13) SIDE R
VERTICAL DIVIDER
2
2
2
2
2
1
1
1
1
1
1
1
1
1
2
5
3
4
6
7
8
9
10
11
12 13
14
of 15 P9--LI90
HARDWARE LIST DO NOT MIX CONTENT OF HARDWARE BOXES
DESCRIPTION:
10 20 30 40 50 60 70 80 90 100 mm
Assembly
Instruction
876258 LINCOLN CONSOLE
4
5x39
CAM BOLT
H
x26
8x28
DOWEL
F
x24
G
x24
15x12
CAM LOCK
J
x4
NYLON FEET
E
x8
SCREW
3,5x13
+
B
x4
12x10
CAM LOCK
MINI
A
x4
CAM BOLT
MINI
5x32
C
x4
4x30
SCREW
4x35
L
x4
SCREW
2x Left / 2x Right
L=300mm
ATTACH TO DRAWER
ATTACH TO CARCASS
D
I
x8
6x8
+
N
x2
M
x2
wpm4x25
SCREW
SCREW
K
x2
O
x8
PLASTIC
SUPPORT
Bag 4
Bag 4 Bag 4
Bag 3
Bag 3
Bag 1 Bag 1 Bag 1 Bag 3 Bag 1
Bag 1
Bag 1
Bag 2
Bag 2
Bag 1
of 15 P9--LI90
DESCRIPTION:
Assembly
Instruction
876258 LINCOLN CONSOLE
Top Tips before you start!
1. Please check that all parts are present before you start the assembly of your furniture,
as once assembed, the furniture is exempt from our home approval policy.
2. For ease and speed of assembly, we recommend that before you commence each step
of the assembly, that you identify all the parts required for that step.
3. For larger items, please ensure that you have sufficient space and people (as indicated
on page1) to assemble your product safely.
4. We recommend that, where possible, all items are assembled near to the area in which
they will be placed in use, to avoid moving the product unnecessarily once assembled.
5. For the protection of your furniture, particularly items of high gloss finish, we recommend
that the product is placed on a protected surface during assembly to prevent any damage.
6. During assembly please take care not to over-tighten any fittings, as this may damage
the product ..
Care and Maintenance of your Furniture
Please periodically check all fittings and re-tighten as necessary.
Please do not jump on your furniture.
To clean your item, please use a damp cloth and wipe clean.
Never allow any kind of liquid to remain on your furniture.
Absorption can cause wood to warp or
finishes to de-laminate.
5 of 15 P9--LI90
SCREW IN CAM SCREWS
ONLY D O W N TO F I R S T R I N G .
FLUSH
WITH
PANEL
1
PRESS PANELS TOGETHER ALIGNING
DOWEL WITH H O L E S , C A M S C R E W S W I T H L O C K S .
3
TO SECURE PA N E L S ,
TURN CAM LOCKS 1/2 TURN CLOCKWISE.
4
CAM SH OW N IN
LO CK ED P OS IT IO N.
+
+
PRESS IN CAM LOCKS. A R R O W O N C A M
LOCK MUST FA C E H O L E I N PA N E L EDGE.
DO N OT IN SE R T DO WEL S
IN C AM SC RE W / L OC K HOL ES .
2
+
+
DESCRIPTION:
Assembly
Instruction
876258 LINCOLN CONSOLE
6 of 15 P9--LI90
DESCRIPTION:
Assembly
Instruction
1
876258 LINCOLN CONSOLE
7
12
3
6
9
0,5h
+
+
+
1 / 2 T U R N
C L O C K W I S E .
+
A
x4 B
x4 C
x4
B
B
C
C
C
+
A
A
4
4
1
2
3
5
3
1
2
2
1
3
5
DO THIS STEP TWICE (2x)
H
x4
H
H
of 15 P9--LI90
DESCRIPTION:
Assembly
Instruction
2
876258 LINCOLN CONSOLE
8
3
+
+
E
x8
D
x2R
x2L
+
F
x4 G
x2
+
H
x2
6
7
DO THIS STEP TWICE (2x)
D
E
F
G
H
H
O
O
x8
of 15 P9--LI90
DESCRIPTION:
Assembly
Instruction
4
876258 LINCOLN CONSOLE
9
+
+
+
+
+
+
F
x10 G
x4
+
H
x8
8
9
F
F
H
H
H
H
H
G
G
G
G
F
F
F
of 15 P9--LI90
DESCRIPTION:
Assembly
Instruction
5
876258 LINCOLN CONSOLE
10
+
+
+
+
+
+
+
+
+
+
G
x14
+
H
x4
D
x1R
x1L
I
x4
front
10
11
11
G
G
G
G
G
G
H
H
D
I
D
D
of 15 P9--LI90