manuals.online logo
Brands
  1. Home
  2. •
  3. Brands
  4. •
  5. Next
  6. •
  7. Indoor Furnishing
  8. •
  9. Next STANTON LARGE CONSOLE User manual

Next STANTON LARGE CONSOLE User manual

Tools Needed
Helpline
If you have any problems with this product or require any
replacement fittings please contact Customer Services Tel:
0333 777 8999
•We recommend that the packaging is used to protect the surfaces during assembly.
•Keep ttings out of children's reach and keep children well away from the construction area.
ASSEMBLY INSTRUCTIONS.
Regrettably self assembly items cannot be returned once assembly is part or fully completed unless the item is found to be
faulty. Should you need to return the unassembled product, please repack in the original packaging.
IMPORTANT
•Carefully check that you have all parts before beginning assembly.
•We suggest you spend a short time reading through this leaet and then follow the simple step-by-step
instructions.
IMPORTANT - RETAIN FOR FUTURE REFERENCE - READ CAREFULLY.
•A minimum of two persons is required to assemble this product.
•Made from partical board & MDF with a wood eect nish.
CARE INSTRUCTIONS
PRODUCT INFORMATION
•Made in China.
•Avoid keeping furniture in direct sunlight or close to any heat sources as this can cause cracking, discolouration or warping.
•Any spills should be removed immediately with a soft clean damp cloth and dried immediately.
•Do not put hot dishes directly on the surfaces of the item.
•Ensure the product is protected with mats and coasters when items are placed on the surfaces, to prevent scratching or
damage.
•Do not use furniture polish.
•For general cleaning, periodically dust with a soft cloth.
•Do not rub or scrub the surface when cleaning.
•Never drag pieces of furniture across the oor as this will cause damage to the joints.
FITTINGS
•All assembly xings should always be tightened properly and periodically check all xings and tighten if necessary.
S T ANT O N L AR G E C O NS O L E
Page 1 of 14
1.Attach panels 12, & 13 to panel 14 with 4 x screws
(H) and tighten with a screwdriver.
1.Slide panel 15 into the grooves of drawer frame.
2.Repeat step one & two to assemble the other drawers
frame.
STEP ONE
PARTS
STEP TWO
Page 2 of 14
1.Insert 2 x camblots (E) into panel 16 and tighten
with a screwdriver.
2.Glue and insert 2 x wooden dowels (B) into panels
12 & 13.
3.Attach panel 16 to the assembled drawer frame.
4.Insert 2 x camlocks (D) into panels 12 & 13
and tighten with a screwdriver.
Ensuring the arrow indicator is pointing towards the
panel edge before tightening with a screwdriver.
5. Attach 1x handles (J) to the panel 16 with 1x screws (J)
with a screwdriver.
1.Insert 2 x camblots (E) into panel 17 and
tighten with a screwdriver.
2.Glue and insert 2 x wooden dowels (B) into panels
12 & 13.
3.Attach panel 17 to the assembled drawer frame.
4.Insert 2 x camlocks (D) into panels 12 & 13
and tighten with a screwdriver.
Ensuring the arrow indicator is pointing towards the
panel edge before tightening with a screwdriver.
5. Attach 1x handles (J) to the panel 17 with 1x screws (J)
with a screwdriver.
1.Insert 6 x cambolts (E) into panels 7(×2) and tighten with
a screwdriver.
2.Insert 12 x cambolts (E) into panels 9 & 10 and tighten
with a screwdriver.
STEP FOUR
STEP FIVE
STEP THREE
Page 3 of 14
1.Glue and insert 4 x wooden dowels (B) into panel 6
2.Attach panels 7(×2) to panel 6
3.Insert 6 x camlocks (D) into panel 6 and tighten with a
screwdriver.
Ensuring the arrow indicator is pointing towards the
panel edge before tightening with a screwdriver.
1.Glue and insert 12 x wooden dowels (B) into panels
2,3,6,&7(×2).
2.Attach panels 9 & 10 to panels 2,3,6,&7(×2).
3.Insert 12x camlocks (D) into panels 2,3,6,&7(×2) and
tighten with a screwdriver.
Ensuring the arrow indicator is pointing towards the
panel edge before tightening with a screwdriver.
1.Carefully lift the unit upright.
1.Slide panel 5 into the grooves of panels 9,10 & 2.
STEP EIGHT
STEP SEVEN
STEP SIX
Page 4 of 14
1.Insert 6 x cambolts (E) into panel 1 and tighten with a
screwdriver.
1.Glue and insert 1 x wooden dowel (B) into panel 1
2.Attach panel 11 to panel 1.
3.Insert 2 x camlocks (D) into panel 11 and tighten with a
screwdriver.
Ensuring the arrow indicator is pointing towards the
panel edge before tightening with a screwdriver.
4.Attach panel 4 to panel 1 with 3 x screws (H) and
tighten with a screwdriver.
1.Glue and insert 4 x wooden dowels (B) into panel 1
2.Attach panel 1 to panels 9 & 10 .
3.Insert 4x camlocks (D) into panels 9 & 10 and tighten with
a screwdriver.
Ensuring the arrow indicator is pointing towards the
panel edge before tightening with a screwdriver.
1.Tighten panels 2 & 3 to panel 11 with 2 ×screws (F) by
using an Allen key.
using an Allen key.
STEP TEN
STEP NINE
STEP ELEVEN
STEP TWELVE
Page 5 of 14
1.Insert 4 x fittings (I) into the required position .
2.Insert panel 8 onto the fittings (I) .
1. Insert the drawers 16 & 17 to the assembled unit as
shown in diagram.
Note: If you want to disassembled the unit,please
follow the steps as the right
brief to push the drawer out.
STEP FIFTEEN
1.Secure 6×plastic fasteners (A) with 6×screws
into the backboard grooves to secure the unit.
STEP FOURTEEN
STEP THIRTEEN
Page 6 of 14
Next Retail Ltd, Desford Road, Leicester, LE19 4AT
Page 7 of 14
Page 8 of 14
Page 9 of 14
Page 10 of 14
Page 11 of 14
Page 12 of 14
Page 13 of 14
Page 14 of 14

Other Next Indoor Furnishing manuals

Next MADRID SIDE TABLE 683478 User manual

Next

Next MADRID SIDE TABLE 683478 User manual

Next CORSICA 655523 User manual

Next

Next CORSICA 655523 User manual

Next 237749 User manual

Next

Next 237749 User manual

Next VALENCIA 898200 User manual

Next

Next VALENCIA 898200 User manual

Next 251262 User manual

Next

Next 251262 User manual

Next SEVILLE 141851 User manual

Next

Next SEVILLE 141851 User manual

Next 651721 User manual

Next

Next 651721 User manual

Next HANLEY SUPERWIDE 606455 User manual

Next

Next HANLEY SUPERWIDE 606455 User manual

Next 878917 User manual

Next

Next 878917 User manual

Next OXFORD 381155 User manual

Next

Next OXFORD 381155 User manual
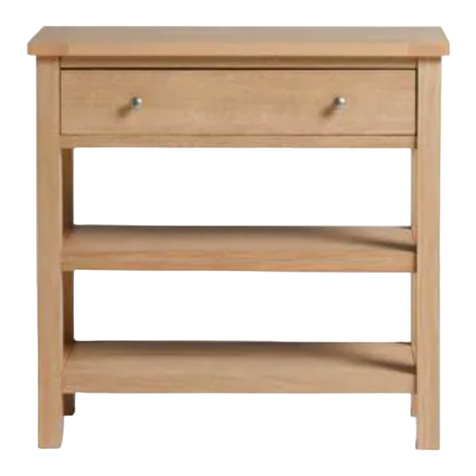
Next ELISE 307429 User manual

Next

Next ELISE 307429 User manual

Next BRONX A59185 User manual

Next

Next BRONX A59185 User manual

Next 844423 User manual

Next

Next 844423 User manual

Next 323106 User manual

Next

Next 323106 User manual

Next PARKER 421877 User manual

Next

Next PARKER 421877 User manual

Next 227884 User manual

Next

Next 227884 User manual

Next IDAHO 677753 User manual

Next

Next IDAHO 677753 User manual

Next C29826 User manual

Next

Next C29826 User manual

Next SLOANE 145906 User manual

Next

Next SLOANE 145906 User manual

Next CHILTERN SMALL SIDEBOARD User manual

Next

Next CHILTERN SMALL SIDEBOARD User manual

Next BROOKLYN  665484 User manual

Next

Next BROOKLYN 665484 User manual

Next AMELIA BOOKCASE User manual

Next

Next AMELIA BOOKCASE User manual

Next FLORENCE 317096 User manual

Next

Next FLORENCE 317096 User manual

Next MALVERN 273442 User manual

Next

Next MALVERN 273442 User manual

Popular Indoor Furnishing manuals by other brands

BuckMaster Blue Ridge Bent Back Rocker FF-BRRO instruction manual

BuckMaster

BuckMaster Blue Ridge Bent Back Rocker FF-BRRO instruction manual

jokey 12 42111 quick start guide

jokey

jokey 12 42111 quick start guide

Twin-Star International 36BV34004 manual

Twin-Star International

Twin-Star International 36BV34004 manual

Target Windham WNBKCASEWH Assembly instructions

Target

Target Windham WNBKCASEWH Assembly instructions

Furniture of America YNJ-1462 quick start guide

Furniture of America

Furniture of America YNJ-1462 quick start guide

EverDesk+ Lite Frame Assembly manual

EverDesk+

EverDesk+ Lite Frame Assembly manual

siena GARDEN L18934 Assembly instruction

siena GARDEN

siena GARDEN L18934 Assembly instruction

Whalen Greenwich Computer Desk with Hutch instruction manual

Whalen

Whalen Greenwich Computer Desk with Hutch instruction manual

Allen + Roth OPHELIA 60AL installation manual

Allen + Roth

Allen + Roth OPHELIA 60AL installation manual

Okamura Alt Piazza Series Instructions for use

Okamura

Okamura Alt Piazza Series Instructions for use

PADIMAT Chic M1.50H Technical file

PADIMAT

PADIMAT Chic M1.50H Technical file

Big Save Furniture NOBILITY-ST 4856 Assembly instructions

Big Save Furniture

Big Save Furniture NOBILITY-ST 4856 Assembly instructions

RIAB Lectern instruction manual

RIAB

RIAB Lectern instruction manual

Forward Industries HM-ST010-001 Assembly instructions

Forward Industries

Forward Industries HM-ST010-001 Assembly instructions

Project Source 999-LUT18WHT manual

Project Source

Project Source 999-LUT18WHT manual

Bestway SummerStylez manual

Bestway

Bestway SummerStylez manual

Wilhelm Schildmeyer 558310 Assembly instructions

Wilhelm Schildmeyer

Wilhelm Schildmeyer 558310 Assembly instructions

Floyd Dresser System manual

Floyd

Floyd Dresser System manual

manuals.online logo
manuals.online logoBrands
  • About & Mission
  • Contact us
  • Privacy Policy
  • Terms and Conditions

Copyright 2025 Manuals.Online. All Rights Reserved.