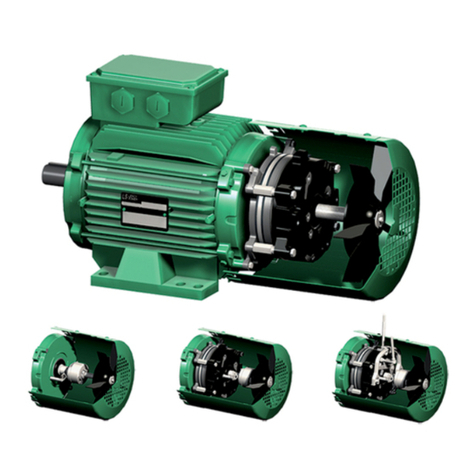
Nidec Leroy-Somer LSHRM Guide

LSHRM - FLSHRM - PLSHRM
Reference: 5411 en - 2019.04 / b
Installation, commissioning
and maintenance
Dyneo
+
: magnet
assisted reluctance
motors

2
LSHRM - FLSHRM - PLSHRM - Permanent Magnet Assisted Reluctance motors
5411 en - 2019.04 / b
These symbols appear in this document whenever it is important to take special precautions
during installation, operation, maintenance or servicing of the motors.
It is essential that electric motors are installed by experienced, qualied and authorized personnel.
In accordance with the main requirements of EC Directives, the safety of people, animals and property should
be ensured when tting the motors into machines.
Particular attention should be paid to equipotential bonding ground or earthing connections.
The following precautions must be taken before working on any stationary device:
• AC voltage disconnected and no residual voltage present
• Careful examination of the causes of the stoppage (jammed transmission - loss of phase
- cut-out due to thermal protection - lack of lubrication, etc.)
Even when not supplied with power, there is voltage at the terminals of a rotating magnet-assisted
reluctance motor.
Accordingly, before carrying out any work, check carefully that the motor is not rotating.
When dismantling the motor only
The rotor must not be assembled or maintained by people with pacemakers or any other implanted
medical electronic device.
The motor rotor contains a magnetic eld. If the rotor is separated from the motor, its eld can affect
pacemakers or disturb digital devices such as watches, mobile phones, etc. No magnetized dust must
be present in the working environment, which must be kept clean.
GENERAL WARNING

3
LSHRM - FLSHRM - PLSHRM - Permanent Magnet Assisted Reluctance motors
5411 en - 2019.04 / b
Dear Customer,
You have just acquired a Leroy-Somer motor.
This motor benets from the experience of one of the largest manufacturers in the world, using
state-of-the-art technologies – automation, specially selected materials and rigorous quality con-
trol. As a result, the regulatory authorities have awarded our motor factories ISO 9001, Edi-
tion 2015 international certication from the DNV. Similarly our environmental approach has
enabled us to obtain ISO 14001: 2015 certication.
Products for particular applications or those designed to operate in specic environments are also
approved or certied by the following organizations: CETIM, LCIE, DNV, ISSEP, INERIS, CTICM,
UL, BSRIA, TUV, CCC, EAC, which check their technical performance against the various
standards or recommendations.
We thank you for making this choice, and would ask you to read the contents of this manual.
By observing a few essential rules, you will ensure problem-free operation for many years.
Moteurs Leroy-Somer
CE conformity
The motors comply with the Low Voltage Directive 2014/35/EU, the Electromagnetic Compatibility Directive
2014/30/EU, the ROHS II Directive 2011/65/EU and the ErP Directive 2009/125/EC, and standards referring
thereto.
Our products can be incorporated in machines subject to the Machinery Directive 2006/42/EC.
Note:
Leroy-Somer reserves the right to modify the characteristics of its products at any time in order to incorporate
the latest technological developments. The information contained in this document is therefore liable to be
changed without notice.
Copyright 2019: Moteurs Leroy-Somer
This document is the property of Leroy-Somer. It may not be reproduced in any form without prior authoriza-
tion. All brands and models have been registered and patents applied for.
FOREWORD

4
LSHRM - FLSHRM - PLSHRM - Permanent Magnet Assisted Reluctance motors
5411 en - 2019.04 / b
CONTENTS
1 - RECEIPT ............................................................................................................... 6
1.1 - Identication................................................................................................................. 6
1.2 - Storage ........................................................................................................................ 7
2 - POSITION OF LIFTING RINGS ............................................................................ 7
3 - ASSEMBLY AND COMMISSIONING RECOMMENDATIONS .............................. 9
3.1 - Checking the insulation ................................................................................................ 9
3.2 - Location - ventilation .................................................................................................... 9
3.2.1 - Enclosed motors..................................................................................................9
3.2.2 - Drip-proof motors...............................................................................................10
3.2.3 - Installation .........................................................................................................10
3.3 - Coupling..................................................................................................................... 10
3.4 - Motor protection ......................................................................................................... 13
3.4.1 - Recommendations for variable speed systems .................................................13
3.4.2 - Thermal protection ............................................................................................13
3.4.3 - Protection against condensation: optional space heaters .................................14
3.4.4 - Winding protection system.................................................................................15
3.4.5 - Rotation mechanism protection system.............................................................15
3.5 - Connections ............................................................................................................... 16
3.5.1 - Good wiring practices ........................................................................................16
3.5.1.1 - General..................................................................................................... 16
3.5.1.2 - Equipotential bonding and earthing........................................................... 16
3.5.1.3 - Drive power supply cables ........................................................................ 16
3.5.1.4 - Motor cables ............................................................................................. 16
3.5.1.5 - Sizing of power cables .............................................................................. 17
3.5.1.6 - Connecting the control system.................................................................. 18
3.5.1.7 - Typical connection of the motor and drive package................................... 18
3.5.2 - Terminal box and cable gland position ...............................................................18
3.5.3 - Motor connections .............................................................................................19
3.5.3.1 - (F)LSHRM and PLSHRM motors .............................................................. 19
3.5.3.2 - Earth terminal ........................................................................................... 19
3.5.3.3 - Connecting the power supply cables to the terminal block ........................ 19
3.5.4 - Power supply cable cross-sections....................................................................21
3.5.5 - Forced ventilation option....................................................................................21
3.5.6 - Connecting protection devices in the terminal box.............................................21
3.5.7 - Connecting PTC sensors to the Powerdrive MD2 .............................................21
3.5.8 - Wiring a resolver ...............................................................................................22

5
LSHRM - FLSHRM - PLSHRM - Permanent Magnet Assisted Reluctance motors
5411 en - 2019.04 / b
CONTENTS
4 - COMMISSIONING THE MOTOR-DRIVE ............................................................ 23
5 - ROUTINE MAINTENANCE ................................................................................. 23
5.1 - Checking .................................................................................................................... 23
5.2 - Bearings and greasing ............................................................................................... 24
5.2.1 - Type of grease ..................................................................................................24
5.2.2 - Permanently greased bearings .........................................................................24
5.2.3 - Bearings with grease nipples ............................................................................24
5.3 - Bearing maintenance ................................................................................................. 24
6 - PREVENTIVE MAINTENANCE........................................................................... 25
7 - TROUBLESHOOTING GUIDE............................................................................ 26
8 - SPARE PARTS.................................................................................................... 27

6
RECEIPT
LSHRM - FLSHRM - PLSHRM - Permanent Magnet Assisted Reluctance motors
5411 en - 2019.04 / b
1 - RECEIPT
Check that your motor has not been damaged in transit upon receipt.
If there are obvious signs of damage, contact the carrier (you may able to claim on their insurance) and after a visual
check, run the motor to detect any malfunctions.
1.1 - Identication
As soon as you receive the motor, check that the
nameplate on the machine conforms to your order.
Denition of symbols used on nameplates:
Legal mark indicating the conformity of
equipment with the requirements of Euro-
pean Directives.
3 ~: three-phase AC motor
4P: number of poles
LSHRM: series
315: frame size
MP: housing designation and manufacturer code
TC: impregnation index
IE5: performance as per 60034-30-2 corresponding to the top row in the table of motor data
Motor
686251: motor batch number
C: month of production
19: year of production
001: serial number
IP55 IK08: protection index
kg: weight
Ta 50°C: contractual ambient
operating temperature
Ins. cl. F: insulation class F
S9: service
1000 m : maximum altitude without derating
DE: Drive End - Drive-end bearing
NDE : Non Drive End - Bearings opposite the drive-end
IB: Insulated Bearing
SGR: Shaft Grounding Ring
RIS: Reinforced Insulation System
POLYREX EM 103: type of grease
48 g: quantity of grease at each regreasing
6200 h: regreasing interval (in hours) for the ambient
temperature (Ta)
A
H
: vibration level
A
H: balancing mode
Characteristics
V: motor voltage rating
Hz: supply frequency
min-1: revolutions per minute (rpm)
kW : power rating
cos φ:power factor
A: current rating
eff% : efciency
Inv. supply: drive supply voltage
Nmax (min-1): maximum speed
min.Fsw (kHz): minimum switching frequency
BEMF (V / kmin-1): electromotive force
DBC (A) : design current
Lq@0A (mH): unsaturated quadratic inductance at 0
amperes
Lq@DBC (mH): saturated quadratic inductance at design
current
Ld@DBC (mH): saturated direct inductance at design
current
α@DBC (°): load angle at design current
α@DBC/2 (°): load angle at 50% of design current

7
POSITION OF LIFTING RINGS
LSHRM - FLSHRM - PLSHRM - Permanent Magnet Assisted Reluctance motors
5411 en - 2019.04 / b
1.2 - Storage
Prior to commissioning, motors should be stored:
- away from humidity: at relative humidity levels above
90%, the machine insulation can drop very quickly and
become virtually non-existent at around 100%. The
state of the anti-rust protection on unpainted parts
should be monitored.
For prolonged storage longer than 3 months, place the
machine in a sealed waterproof covering (for example
heat-shrunk plastic) containing sachets of desiccant
corresponding to the volume and relative humidity of the
location:
- away from frequent signicant variations in tempera-
ture to avoid the risk of condensation. During storage
the drain plugs must be removed to allow condensa-
tion water to escape (located at the lowest point
depending on the operating position).
This location must be dry and protected from harsh
weather conditions, cold (temperature between -40°C and
+80°C), free from vibration, dust and corrosive gases.
- if the surrounding area vibrates, try to reduce the effect
of these vibrations by placing the motor on a damping
support (rubber plate or similar).
Rotate the rotor a fraction of a turn once a fortnight to
prevent the bearing rings from becoming marked.
- do not remove the rotor locking device (if there are
roller bearings).
Even if the motor has been stored in the correct condi-
tions, certain checks must be carried out before it is
started up:
• Greasing
Non-regreasable bearings
Maximum storage: 3 years. After this time, replace the
bearings.
Regreasable bearings
Storage period
less than
1 year The motor can be commissioned
without regreasing.
more than
1 year,
less than
2 years
Regrease before commissioning, as
described in section 5.2
more than
2 years
less than
5 years
Dismantle the bearing
- Clean it
- Replace the grease completely
more than
5 years Change the bearing
- Regrease it completely
Greases used by Leroy-Somer: see nameplate
2 - POSITION OF LIFTING RINGS
Position of the lifting rings for lifting
the motor only (not connected to the machine).
Labour regulations stipulate that all loads over 25 kg
must be tted with lifting devices to facilitate handling.
The positions of the lifting rings and the minimum dimen-
sions of the loading bars are given below in order to help
with preparation for handling the motors. If these pre-
cautions are not followed, some items of equipment,
such as the terminal box, protective cover or drip cover,
could be warped or crushed.
Motors intended for use in the vertical position
are sometimes delivered in the horizontal
position on a pallet. When the motor is pivoted,
the shaft must under no circumstances be allowed to
touchthe ground,asthe bearingscould beirreparably
damaged. Moreover, additional special precautions
must be taken, as the integral motor lifting rings are
not designed for pivoting the motor.

8
POSITION OF LIFTING RINGS
LSHRM - FLSHRM - PLSHRM - Permanent Magnet Assisted Reluctance motors
5411 en - 2019.04 / b
• Horizontal position
Type Horizontal position (mm)
Amin. th min. h Øt
LSHRM 132 M1 / MU1 /
MU3 / SM1 200 180 150 14
LSHRM 160 LR1 / LR3 /
MR1 200 180 150 14
LSHRM 180 L1 / L1M /
M1 200 260 150 14
LSHRM 200 LR1 / LQ1 200 260 150 14
LSHRM 225 MY1 / SZ1 200 260 150 14
LSHRM 225 MG / MG1M
/ SG1 360 380 200 30
LSHRM 250 ME / MF1 /
SF1 / SF1S 360 380 200 30
LSHRM 280 MC / MD /
SC / SD 360 380 200 30
LSHRM 280 MU / MUS 400 400 500 30
LSHRM 315 MN1 / SN1 360 380 200 30
LSHRM 315 MP / MR /
MRS 400 400 500 30
FLSHRM 280 MA / MD /
SA / SB 360 380 200 30
FLSHRM 315 LTA/ LTB /
MT / STA / STB 360 380 200 30
FLSHRM 315 LA / LB / M 400 400 500 30
FLSHRM 355 LTA / LTB /
LTC 400 400 500 30
PLSHRM 315 LD 400 400 500 30
• Vertical position
e
h
n x ØS
D
E
C
Type
Vertical position (mm)
C E D n** ØS e
min. * h
min.
LSHRM 132 M1 / MU1 /
MU3 / SM1
LSHRM 160 LR1 / LR3
/ MR1
LSHRM 180 L1 / L1M /
M1 390 265 290 2 14 390 320
LSHRM 200 LR1 /LQ1 410 300 295 2 14 410 450
LSHRM 225 MY1 / SZ1 410 300 295 2 14 410 450
LSHRM 225 MG /
MG1M / SG1 480 360 405 4 30 500 500
LSHRM 250 ME /MF1 /
SF1 / SF1S 480 360 405 4 30 500 550
LSHRM 280 MC / MD /
SC / SD 480 360 405 4 30 500 500
LSHRM 280 MU / MUS 630 - 570 2 30 630 550
LSHRM 315 MN1 / SN1 480 360 405 4 30 500 500
LSHRM 315 MP / MR /
MRS 630 - 570 2 30 630 550
FLSHRM 280 MA / MD /
SA / SB 480 360 405 4 30 500 500
FLSHRM 315 LTA/ LTB
/ MT / STA / STB 480 360 405 4 30 500 500
FLSHRM 315 LA / LB /
M630 - 570 2 30 630 550
FLSHRM 355 LTA /
LTB / LTC 630 - 570 2 30 630 550
PLSHRM 315 LD 630 - 570 2 30 630 550
* If the motor is tted with a drip cover, allow an additional
50 to 100 mm to avoid damaging it when the load is
swung.
** If n = 2, the lifting rings form an angle of 90° with re-
spect to the terminal box axis. If n = 4, this angle be-
comes 45°.
e
A
h
2 x Øt

9
ASSEMBLY AND COMMISSIONING RECOMMENDATIONS
LSHRM - FLSHRM - PLSHRM - Permanent Magnet Assisted Reluctance motors
5411 en - 2019.04 / b
3 - ASSEMBLY AND COMMISSIONING
RECOMMENDATIONS
In all cases, compatibility of the motor and its
environment must be guaranteed before its
installation and also throughout its life.
Electric motors are industrial products.
They must therefore be installed by
qualied, experienced and authorised personnel.
The safety of people, animals and property must be
ensured when tting the motors into machines
(please refer to current standards).
3.1 - Checking the insulation
This check is essential if the motor has been stored for
longer than 6 months or if it has been kept in a damp
atmosphere.
This measurement must be carried out using a meg-
ohmmeter at 500 volts DC (do not use a magnetoelectric
system). It is better to carry out an initial test at 30 or 50
volts and if the insulation is greater than 1 megohm,
carry out a second test at 500 volts DC for 60 seconds,
between the winding and ground (on U then V then W).
The insulation value must be at least 10 megohms in
cold state.
If this value cannot be achieved, or routinely if the motor
might have been splashed with water or salt spray, or
kept for a long period in a very humid place, or if it is
covered with condensation, the motor should be dried
using the optional space heaters if the motor has them
(see section 3.4.3).
Do not apply the megohmmeter to the terminals
of the temperature sensors as this can damage
them.
For any insulation or high voltage test, it is
advisable to connect the temperature sensors and/
or accessories to ground.
M
Caution: If the high voltage test, carried out
at the factory before dispatch, needs to be
repeated, this should be performed at half
the standard voltage, i.e.:
1/2 (2 U + 1000 V). Check that the capacitive
effect resulting from the high voltage test
is eliminated before connecting the
terminals to ground.
3.2 - Location - ventilation
The motor must be installed in a ventilated place, with
clearance for the air inlet and outlet.
Obstruction (clogging) – even accidental – of the venti-
lation circuit has an adverse effect on motor operation.
With drip-proof motors, do not obstruct the air inlet with
a coupling guard, provide a perforated plate.
It is also necessary to check that the hot air is not being
recycled. If it is, pipes must be provided for the intake of
cold air and expulsion of hot air, in order to prevent an
abnormal increase in motor temperature.
In this case, if the air is not circulated by an auxiliary fan,
the dimensions of the pipes must be such that the pres-
sure losses are negligible compared to those of the
motor.
3.2.1 - Enclosed motors
Our motors are cooled in accordance with method
IC 411 (standard IEC 60034-6) i.e. “machine cooled by
its surface, using the ambient uid (air) owing along the
machine”.
The fan at the non-drive end cools the motor. Air is
sucked in through the grille of a fan cover (which pro-
vides protection against the risk of direct contact with the
fan in accordance with standard IEC 60034-5) and
blown along the housing ns to ensure the thermal equi-
librium of the motor in any direction of rotation.
Before starting the motor, it is advisable to
check the insulation between the phases and
earth, and between phases.
1/4 H min
H

10
ASSEMBLY AND COMMISSIONING RECOMMENDATIONS
LSHRM - FLSHRM - PLSHRM - Permanent Magnet Assisted Reluctance motors
5411 en - 2019.04 / b
3.2.2 - Drip-proof motors
Our motors are cooled in accordance with method IC 01
(standard IEC 60034-6) i.e. “machine cooled by means
of the ambient uid (air) circulating inside the machine”.
A fan at the non-drive end cools the motor. Air is sucked
in at the motor drive end and blown along the fan cover
to ensure the thermal equilibrium of the motor in any
direction of rotation.
H
Ø H
max
Air intake
3.2.3 - Installation
The motor must be mounted in the position specied
on the order, on a base which is rigid enough to pre-
vent distortion and vibration.
If the motor feet have six xing holes, it is preferable to
use those which correspond to the standard dimensions
for the motor power rating (refer to the motors technical
catalogue) or, should this not be the case, to those
shown at B2.
Provide easy access to the terminal box, the condensa-
tion drain plugs and, if appropriate, to the grease nip-
ples.
Use lifting equipment which is compatible with the
weight of the motor (indicated on the nameplate).
When the motor is tted with lifting rings,
they are for lifting the motor on its own and
must not be used to lift the whole machine
after the motor has been tted to it.
Note 1: When installing a suspended motor, it is
essential to provide protection in case the xing
breaks.
Note 2: Never stand on the motor.
3.3 - Coupling
• Preparation
Rotate the motor before coupling to detect any possible
fault due to handling.
Remove any protection from the shaft extension.
Note: the rotor magnets can resist rotation slightly.
Drain off any condensation water that has formed inside
the motor by removing the plugs from the drain holes
and retting these plugs to guarantee the IP rating.
• Rotor locking device
For made-to-order motors with roller bearings, remove
the rotor locking device.
In exceptional circumstances when the motor has to be
moved after the coupling device has been tted, the
rotor must be re-immobilized.
Balancing
Rotating machines are balanced in accordance with
standard ISO 8821:
- half-key when the shaft extension is marked H
- no key when the shaft extension is marked N
- full key when the shaft extension is marked F
any coupling element (pulley, coupling sleeve, slip-ring,
etc.) must therefore be balanced accordingly. Check the
motor nameplate for balancing information.
B
2
B
1

11
ASSEMBLY AND COMMISSIONING RECOMMENDATIONS
LSHRM - FLSHRM - PLSHRM - Permanent Magnet Assisted Reluctance motors
5411 en - 2019.04 / b
The motors are balanced with a half-key as standard
unless otherwise indicated. The coupling balancing will
therefore need to be adapted to motor balancing, and
the coupling will need to be adapted to the length of the
shaft key; alternatively any visible parts protruding from
the key can be machined off.Asuitable key can be used.
Failure to follow these recommendations
could lead to premature wear of the
bearings and invalidate the warranty.
Coupling adjusted
to the length of the key
Machining of the visible,
projecting parts of the key
CORRECT ASSEMBLY
INCORRECT ASSEMBLY
Protruding, non-machined key
Coupling not adjusted to the length of the key
Part to be machined
If a motor is started up without a coupling
device having been tted, carefully
immobilize the key in its
housing.
Beware of backdriving when the motor is switched off.
Appropriate precautions must be taken:
- for pumps, install a non-return valve.
- for mechanical devices, install a backstop or a holding
brake.
- etc.
• Tolerances and adjustments
The standard tolerances are applicable to the mecha-
nical characteristics given in our catalogues. They com-
ply fully with the requirements of IEC standard 72-1.
-Adhere strictly to the instructions provided by the trans-
mission device supplier.
- Avoid impacts which could damage the bearings.
Use a wrench and grease the tapped hole of the shaft
extension with a special lubricant (e.g. molykote grease)
to make it easier to t the coupling.
The hub of the transmission device must be:
- fully in contact with the shoulder of the shaft or, if this is
missing, hard up against the metal stop ring (do not
crush the seal);
- longer than the shaft extension (by 2 to 3 mm) so that
it can be tightened using a screw and washer. If it is not
longer, a spacer ring must be inserted without cutting
the key (if this ring is large, it must be balanced).
Bearing against
the shaft shoulder
Bearing against
the stop ring
Inertia ywheels must not be mounted directly onto the
shaft extension, but installed between end shields and
connected by a coupling sleeve.
• Mounting a face mounted motor
Mounting face mounted motors IM B14 (IM 3601) and
IM B34 (IM 2101).
Max. screw insertion length when mounting face
mounted motors IM B34 and IM B14.
Max. insertion
(mm)
LSHRM 132 FT165 11
LSHRM 160 FT215 15
• Direct connection to the machine
When the rotating device (pump or fan turbine) is
mounted directly on the motor shaft end, check that this
device is perfectly balanced and that the radial force and
the axial thrust are within the limits indicated in the
catalogue for bearing strength.
• Direct connection using a coupling sleeve
The coupling sleeve must be selected based on the
torque rating to be transmitted and the safety factor
depending on the starting conditions for the electric
motor.

12
ASSEMBLY AND COMMISSIONING RECOMMENDATIONS
LSHRM - FLSHRM - PLSHRM - Permanent Magnet Assisted Reluctance motors
5411 en - 2019.04 / b
The machines must be carefully aligned, so that any
lack of concentricity and parallelism in the two coupling
halves is compatible with the coupling sleeve manufac-
turer’s recommendations.
The two parts of the coupling sleeve should be provi-
sionally assembled to make it easier to alter their rela-
tive position.
Adjust the parallel plane of both shafts using a gauge.
Measure the distance between the two coupling sur-
faces at one point on the circumference. Rotate them
90°, 180° and 270° in relation to this initial position,
and measure each time. The difference between the two
extreme values of dimension “x” must not exceed
0.05 mm for standard couplings.
x
To perfect this adjustment and at the same time check
the concentricity of the two shafts, t 2 gauges as shown
in the diagram and slowly turn both shafts.
The deviations registered for either shaft will indicate
the need for axial or radial adjustment if deviation
exceeds 0.05 mm.
• Direct connection using a rigid coupling
The two shafts must be aligned to adhere to the coupling
sleeve manufacturer’s tolerance intervals.
Maintain the minimum distance between the shaft
extensions to allow the motor shaft and the load shaft to
expand.
• Transmission via belt pulleys
The user chooses the diameter of the pulleys.
Cast iron pulleys with a diameter over 315 are not
recommended for rotation speeds of 3,000 rpm.
Flat belts cannot be used for rotation speeds of
3,000 rpm or more.
Comply with the supplier’s recommendations.
• Positioning belts
Allow for a possible approx. 3% adjustment with respect
to the calculated distance E to ensure that the belts can
be correctly positioned.
Force must never be used when tting the belts.
For notched belts, position the notches in the pulley
grooves.
• Aligning pulleys
Check that the motor shaft is completely parallel with
that of the receiving pulley.
• Adjusting belt tension
Belt tension must be adjusted very carefully in accor-
dance with the recommendations of the belt supplier
and product design calculations.
Reminder:
- excessive tension = unnecessary force on the end
shields which could lead to premature wear of the
rotation mechanism (end shield-bearings) and
eventually break the shaft.
inadequate tension = vibration (wear to the rotation
mechanism).
• Fixed distance between centres:
Place a belt tensioning pulley on the slack side of the belts:
- smooth pulley on the outside of the belt
- grooved pulley on the inside of the belts when using
V-belts.
• Adjustable distance between centres:
The motor is usually mounted on slide rails, which
ensures that pulley alignment and belt tension can be
adjusted in the most optimum manner.
Place the slide rails on a perfectly horizontal baseplate.
The lengthways position of the slide rails is determined
by the length of the belt, and the crossways position by
the pulley of the machine driven.
A
Ø
Ø (mm) A (mm)
min.
28 to 55 1
60-65 1.5
75 to 95 2
E
Protect all rotating devices before power-up.

13
ASSEMBLY AND COMMISSIONING RECOMMENDATIONS
LSHRM - FLSHRM - PLSHRM - Permanent Magnet Assisted Reluctance motors
5411 en - 2019.04 / b
Mount the slide rails using the tensioner screws in the
direction shown in the diagram (with the slide rail screw
on the belt side between the motor and the machine
driven).
Fix the slide rails to the baseplate and adjust the belt
tension as before.
Tensioning
screw
Tensioning
screw
3.4 - Motor protection
3.4.1 - Recommendations for variable
speed systems
Special precautions must be taken when using synchro-
nous motors powered via a variable speed drive:
during prolonged operation at low speed, cooling ef-
ciency is greatly diminished. It is therefore advisable
to install a forced ventilation unit that will produce a
constant ow of air at any motor speed.
3.4.2 - Thermal protection
The motors are protected by the variable speed drive,
placed between the isolating switch and the motor.
• Built-in thermal protection devices as standard
The motors are tted with PTC and PT1000 sensors as
standard.
PTC sensors (inserted in the windings) are dedicated to
the thermal protection of the motor.
The PT1000 sensor (inserted in the windings) is exclu-
sively used to monitor motor temperature (alarm man-
agement or temperature tracking).
For information on how to connect sensors and drive
settings, refer to section 3.5.6.
Motor PTC sensors must be connected in
order to maintain optimum protection.
• Other built-in indirect thermal protection devices
As an option, specic sensors (see table below) can be
tted on the motor to monitor temperature changes at
“hot spots”:
- overload detection
- cooling check
- monitoring strategic points for the purposes of system
maintenance.
It must be emphasized that under no
circumstances can these sensors be used
to control the motor operating cycles
directly.
• Bearing protection
Dyneo+ motors can be tted with PTC sensors in the
end shields to cut-off the power in the event that the
bearings heat up abnormally.
These sensors can (optionally) be mounted on all
motors in the range or replaced with PT1000 sensors for
continuous monitoring.
Caution: make sure you comply with the
drive supply voltages specied on the motor
rating plate (± 10%). Outside this tolerance
range, there is a risk of overheating

14
ASSEMBLY AND COMMISSIONING RECOMMENDATIONS
LSHRM - FLSHRM - PLSHRM - Permanent Magnet Assisted Reluctance motors
5411 en - 2019.04 / b
Type Operating
principle
Operating
curve
Breaker
rating (A)
Protection
provided
Mounting
Number of devices*
Normally open
thermal protection
PTO
Bimetallic strip,
indirectly heated,
with normally
open (NO) contact
I
O TNF
T
2.5 A at 250 V
with cos φ 0.4
general surveillance
for non-transient
overloads
Mounted in control
circuit
2 or 3 in series
Normally closed
thermal protection
PTF
Bimetallic strip,
indirectly heated,
with normally
closed (Nc) contact
I
F TNF
T
2.5 A at 250 V
with cos φ 0.4
general surveillance
for non-transient
overloads
Mounted in control
circuit
2 or 3 in parallel
Positive
temperature
coefcient
thermistor
PTC
Non-linear variable
resistor, indirectly
heated
R
TNF
T
0
general surveillance
for transient
overloads
Mounted with associated
relay in control circuit
3 in series
Thermocouples
T(T< 150°C)
Constantan Copper
K(T< 1000 °C)
Copper-nickel
Peltier effect
V
T
0
high accuracy
of hot spots at
regular intervals
Mounted in control
boards with associated
reading equipment
(or recorder)
1 per hot spot
Platinum
temperature sensor
PT 100
Non-linear variable
resistor, indirectly
heated
R
T
0
high accuracy
continuous
surveillance
of key hot spots
Mounted in control
boards with associated
reading equipment
(or recorder)
1 per hot spot
Temperature
sensor
PT 1000
Resistance
depending on the
winding
temperature
R
T
0
high accuracy
continuous
surveillance
of key hot spots
Mounted in control
boards with associated
reading equipment
(or recorder)
1 per hot spot
- NRT: nominal running temperature
- NRTs are chosen according to the position of the sen-
sor in the motor and the temperature increase class.
* The number of devices relates to the winding
protection.
• Alarm and early warning
All thermal protection devices can be backed up by
another type of protection (with different NRTs). The rst
device will then act as an early warning (light or sound
signals given without shutting down the power circuits),
and the second device will be an alarm (which shuts
down the power circuits).
3.4.3 - Protection against condensation:
optional space heaters
Marking: 1 red label
A bre glass exible resistor is xed on 1 or 2 coil end
turns. This resistor heats the machines when stopped
and thus prevents condensation inside the machines.
Power supply: 230 V single-phase unless otherwise
specied by the customer.
When the motor is running, the space heater power
supply must be switched off.
If the drain plugs at the bottom of the motor were not
removed at the time of installation, they must be opened
approximately every 6 months.
Caution: the motor may still be live despite
having stopped. Ensure that theAC supply is
disconnected before any work is carried out
in the terminal box or in the cabinet.
Caution: Check that the space heaters are
powered down before any work is carried
out in the terminal box or in the cabinet.

15
ASSEMBLY AND COMMISSIONING RECOMMENDATIONS
LSHRM - FLSHRM - PLSHRM - Permanent Magnet Assisted Reluctance motors
5411 en - 2019.04 / b
3.4.4 - Winding protection system
Leroy-Somer can provide 2 levels of motor insulation:
- Standard motor winding insulation system with
ÛLL < 1500 Vpk and ÛLE < 1100 Vpk.
- Reinforced motor winding insulation system (RIS)
with ÛLL < 1800 Vpk and ÛLE < 1300 Vpk.
NOTE
- ÛLL: Peak voltage between phases (Vpk)
- ÛLE: Peak voltage between phase and earth (Vpk)
- For values of ÛLL or ÛLE higher than those mentioned
above, please consult Leroy-Somer.
- The term "standard insulation" includes the standard
built-in protection devices for certain motor ranges,
for which no optional protection is necessary.
The table below denes the level of protection required
for each application and the installation conditions.
There are two levels of applications:
• A1 applications: All applications that do not meet the
criteria listed under "A2 applications".
For example, centrifugal pumps, fans, extruders and
compressors, etc.
• A2 applications: All applications that meet one of the
following criteria:
- the drive has an active rectier ("Low harmonic",
"Regen"),
- the drive has a braking transistor whose cumulative
braking time is greater than 5% of total operating time.
For example, materials handling, cranes, power gener-
ation, etc.
Mains voltage ≤510Vac
510 to 750Vac
Application
Motor
cable length
A1 A2
10 m
Standard insulation
20 m
RIS
and/or
optional filter(1)
~ 100 m
(2)
(1) Reinforced insulation system RIS
(2) Beyond 100 m, limitations not related to winding pro-
tection must be taken into account.
These limitations depend mainly on the power of the
motor-drive.
Refer to the good practice guide ref. 5626.
Conditions of table validity:
- Maximum dV/dt < 4000 V/µs at the terminals of the drive
- Minimum time between 2 PWM pulses of the drive:
5 μs
3.4.5 - Rotation mechanism protection
system
Leroy-Somer provides several levels of protection
of its motor bearings:
- Standard rotation mechanism (for B1 applications)
- Reinforced protection systems for the rotation
mechanism to prevent common mode currents: insu-
lated bearings and shaft grounding ring (for B2
applications or voltage greater than 510 V)
• B1 applications: All applications that do not
meet the criteria listed under “B2 applications”.
For example, the centrifugal pumps, the fans, the com-
pressors, etc.
• B2 applications: All applications that meet one or
more of the following criteria:
- the drive has an active rectier ("Low harmonic",
"Regen"),
- the drive has a braking transistor whose cumulative
braking time is greater than 5% of the total operating
time.
- the low speed limit is less than 500 rpm (example:
extruders).
For example, materials handling, cranes, extrusion,
power generation, etc.
The term "Standard mechanism of rotation" includes the
standard built-in protection devices for certain types of
motor, for which no optional protection is necessary.
The standard rotation mechanism of the range is as fol-
lows:
- The LSHRM/FLSHRM motors in the interchangeable
range with a power ≥ 90kW at 1500 rpm and ≥ 160kW
at 3000 rpm have an insulated non-drive end (NDE)
bearing as well as a drive-end grounding ring.
- The LSHRM motors in the compact range with frame
size ≥ 250 have an insulated non-drive end (NDE)
bearing and a drive-end grounding ring
- The PLSHRM motors have insulated drive-end (DE)
and non-drive end (NDE) bearings as well as a drive-
end grounding ring.
The other motors in the range are not tted with any
specic protection devices.

16
ASSEMBLY AND COMMISSIONING RECOMMENDATIONS
LSHRM - FLSHRM - PLSHRM - Permanent Magnet Assisted Reluctance motors
5411 en - 2019.04 / b
The "reinforced rotation mechanism protection" system
is required for B2 type applications or for supply voltages
greater than 510 V.
This type of protection includes the following devices:
- The LSHRM/FLSHRM motors in the interchangeable
range with a power ≥ 45kW at 1500 rpm and ≥ 55 kW
at 3000 rpm have an insulated non-drive end (NDE)
bearing as well as a drive-end grounding ring.
- The LSHRM motors in the compact range with frame
size ≥ 225 have an insulated non-drive end (NDE)
bearing and a drive-end grounding ring.
NOTE
• The reinforced protection solution includes the use of
an insulated speed or position sensor (absolute
encoders, resolvers, etc.) when equipped with bearings
in contact with the motor shaft. For more information,
refer to the technical guide on speed and position
sensors; ref. 5664.
3.5 - Connections
3.5.1 - Good wiring practices
3.5.1.1 - General
The user and/or the installer are responsible for con-
necting the motor and drive system in accordance with
current legislation and regulations in the country of use.
This is particularly important as concerns cable size and
the connection of earthing and grounding components.
The following information should never be used as a
substitute for current standards, nor does it relieve the
installation company of their liabilities.
3.5.1.2 - Equipotential bonding and earthing
The primary reason for grounding components and
equipment in an industrial installation is to protect
people and minimize the risk of damage in the event of
a major fault on the power supply or following a lightning
strike.
The second objective of earthing is to create an equipo-
tential voltage reference with low impedance, common
to all equipments that reduces:
- the risk of interference between equipment in instal-
lations which include sensitive interconnected elec-
tronic and electrical systems
- the risk of breaking equipment in the event of fault
currents
- the risk of current owing in the bearings of electrical
machines supplied by frequency inverters
- the level of conducted or radiated electromagnetic
emissions
It is essential that the earth network is designed and
implemented by the installation supervisor so that its
impedance is as low as possible, so as to distribute the
fault currents and high-frequency currents without them
passing through electrical equipment. The underlying
philosophy of any earthing installation is to maximize
mesh bonding of ground connections between metal
parts (machine frame, building structures, pipework,
etc.) and connect this mesh bonding to earth at multiple
points. Metal grounds must be mechanically connected
to each other with the largest possible electrical contact
area or with grounding strips.
The motor housing must be connected to the equipment
frame with high-frequency at braids. For more informa-
tion, see the guide to good practices for motor drive sys-
tems ref. 5626 (www.leroy-somer.com).
Under no circumstances can earth connections
designed to protect people, by grounding metal parts via
a cable, serve as a substitute for equipotential bonding
(see IEC 61000-5-2).
In particular, the motor earth terminal (PE Protective
Earth) must be connected directly to the drive earth ter-
minal. One or more separate PE protective conductor(s)
is(are) mandatory if the conductivity of the cable shield-
ing is less than 50% of the conductivity of the phase
conductor.
3.5.1.3 - Drive power supply cables
These cables do not necessarily need shielding. Refer
to the drive documentation.
3.5.1.4 - Motor cables
Shielding the power conductors is the preferred method
to ensure that common mode currents can return to their
point of origin without dispersing into other possible
paths (equipotential conductors, piping, building struc-
ture, etc.). This approach signicantly reduces the
levels of electromagnetic emissions, both conducted
and radiated.
For this reason, shielded cables must be used between
the drive and motor to ensure compliance with EMC
emission standards (IEC 61800-3, etc.). Shielded
cables are also used to limit shaft voltage and the risk of
damage to the bearings.
• Shielded motor cables
Shielded cables must always be symmetrical multi-con-
ductor cables with low stray capacity. Cables with a
single equipotential bonding conductor can be used up
to cross-sections of around 10 mm2.

17
ASSEMBLY AND COMMISSIONING RECOMMENDATIONS
LSHRM - FLSHRM - PLSHRM - Permanent Magnet Assisted Reluctance motors
5411 en - 2019.04 / b
For larger cross-sections, always use cables with 3
equipotential bonding conductors. The shielding must
be connected at both ends: drive end and motor end
over 360°. The unshielded part of the cable must be as
short as possible, and use metal cable glands (clamped
onto the cable shield) on the motor end. Refer to the
drive installation manuals for information on connecting
the shielding at the drive end.
U
V
W
PE
Shielding
Sheath
Cable cross-section ≤ 10 mm2
U
VW
PE PE
PE
Shielding
Sheath
Cable cross-section > 10 mm2
Armoured or shielded single-conductor
cables are not to be used
PE
W
V
U
Shielding
Sheath
For applications that so require, the shielded cables can
be replaced by cables with an external PE protection
concentric conductor.
• Unshielded motor cables
In the second industrial environment (according to the
EN 61800-3 standard, an environment including all
establishments other than those directly connected to a
low voltage power supply network that powers buildings
used for residential purposes), if the power supply cable
of the motor is short (<10 m), the shielded cable can be
replaced by a cable with 3 phase conductors combined
in cloverleaf pattern + 1 earth conductor.
All conductors must be placed in a metal conduit with
360° closure (e.g. a metal cable duct). This metal
conduitmust be mechanicallyconnectedto the electrical
cabinet and the structure supporting the motor.
If the conduit consists of several pieces, these should be
interconnected by braids to ensure ground continuity
(bonding). The cables must be positioned and held in a
cloverleaf formation in the conduit.
U
V
W
PE
PE
PE
U
V
W
PE
PE
PE
U
V
W
PE
Sheath EMC braid
Unshielded cables in a metal conduit
U
W
V
PE
U
W
V
PE
EMC
braid
Clamp
Unshielded cables in a conduit with several pieces.
U
V
W
U
V
W
PE
PE
Conguration of unshielded cables not to be used.
3.5.1.5 - Sizing of power cables
The drive and motor power supply cables must be sized
according to the applicable standard, and depending on
the design current, stated in the drive documentation.
The following factors must be taken into account:
- The installation method: in a conduit, a cable tray,
suspended, etc.
- The type of conductor: copper or aluminium
Once the cable cross-section has been determined,
check the voltage drop at the motor terminals. A signicant
voltage drop will lead to increased current and additional
losses in the motor (temperature rise).

18
ASSEMBLY AND COMMISSIONING RECOMMENDATIONS
LSHRM - FLSHRM - PLSHRM - Permanent Magnet Assisted Reluctance motors
5411 en - 2019.04 / b
3.5.1.6 - Connecting the control system
Refer to the manual for the relevant drive. Also see
section 3.5.7 on connecting a resolver.
3.5.1.7 - Typical connection of the motor and
drive package
The following information is given for guidance only, and
should never be used as a substitute for current
standards, nor does it relieve the installation company of
their liabilities.
The motor must be earthed in accordance
with the applicable regulations (protection
of workers).
CAUTION:
Installation of a sine lter or dv/dt lter at the drive
output is not compatible with the control of LSHRM,
FLSHRM or PLSHRM motors.
Equipotential bonding between the frame, motor,
drive, transformer and ground carried out in
accordance with good practices will signicantly
help reduce the voltage on the shaft and the motor
casing, will reduce the passage of high-frequency
currents via the shaft and, as a result, will prevent the
risk of premature failure of the bearings or encoders.
For more information, see the guide to good practices for
motor drive systems ref. 5626 (www.leroy-somer.com).
DRIVE
HF flat braid
U V W
PE
3.5.2 - Terminal box and cable gland
position
The terminal box is placed as standard on the top of
the motor near the drive end, for forms IM B3 and B5,
and has IP55 protection.
Positions B and D are not allowed for FLSHRM &
PLSHRM motors.
Standard
position
Standard
position
24
1
3
A
BD
Cable gland position 1 2* 3 4
LSHRM •♦ ♦ ♦
PLSHRM •-∇ ∇
* not recommended (impossible on ange mounted
motors with smooth hole anges)
•standard
♦possible by simply turning round the terminal box
∇by arrangement (not allowed in certain cases)
CAUTION:
The position of the terminal box cannot easily be
changed, even with anged motors, as the conden-
sation drain holes must be at the bottom.
Using a cable gland
(NFC 68 311 and 312 standards)
If the position of the cable gland has not been correctly
specied on the order, or is no longer suitable, the sym-
metrical construction of Dyneo+ motors terminal box
allows it to be turned round to different positions.
A cable gland must never open upwards.
Check that the incoming cable bend radius prevents
water entering via the cable gland.
Position
standard
Position
standard
24
1
3
A
BD

19
ASSEMBLY AND COMMISSIONING RECOMMENDATIONS
LSHRM - FLSHRM - PLSHRM - Permanent Magnet Assisted Reluctance motors
5411 en - 2019.04 / b
Ø min.
Ø max.
Motors are supplied as standard with terminal
boxes pre-drilled and threaded without cable glands
or removable undrilled mounting plate depending
on the types of motor.
Cable sizes for cable glands
(NFC 68 311 and 312 standards)
• Type and cable sizes for cable glands
Type
of cable
gland
Cable size
Min. cable
Ø (mm)
Max. cable
Ø (mm)
ISO 16 611
ISO 20 8.5 13
ISO 25 13.5 18
ISO 32 17.5 25
ISO 40 24.5 33.5
ISO 50 33 43
ISO 63 42.5 55
To guarantee the protection of the installation in
accordance with EMC directive 2014/30/EC, ground
continuity (bonding) must be ensured between the
cable and the motor ground. A cable gland option,
anchored to a armoured cable, is therefore available.
3.5.3 - Motor connections
3.5.3.1 - (F)LSHRM and PLSHRM motors
All motors are supplied with a wiring diagram in the ter-
minal box.
The connector links required for coupling can be found
inside the terminal box.
The motors are tted with a block of 6 terminals
complying with standard NFC 51 120, with terminal
markings complying with IEC 60034 -8 (or NFC 51 118).
Particular attention must be paid to the infor-
mation on the nameplate in order to choose
the correct type of connection for the supply
voltage.
• 400 V Y connection
PEU V W
To drive
W2 U2 V2
U1 V1 W1
• 400 V ∆ connection
PEU V W
To drive
W2 U2 V2
U1 V1 W1
3.5.3.2 - Earth terminal
The earth terminal is located on a connector inside the
terminal box; in some cases, the earth terminal can be
situated on one of the feet or on one of the cooling ns
(round motors). The earth terminal is indicated by the
symbol:
The motor housing must be connected to the frame
ground via a high-frequency at braid.
3.5.3.3 - Connecting the power supply cables to
the terminal block
The cables must be tted with connectors suitable for
the cable cross-section and the terminal diameter.
They must be crimped in accordance with the connector
supplier’s instructions.
They must be connected with connector resting on con-
nector:
Adapt the cable gland and its
reducer, if tted, to the diameter
of the cable
being used.
In order to maintain the
motor’s original
protection, it is essential
to ensure the cable gland
provides a total seal by tightening it correctly
(so that it cannot be unscrewed by hand).
When there are several cable glands and some are
not being used, ensure that they are always closed
and tighten them so that they too cannot be
unscrewed by hand.
It is compulsory to earth the motor in accor-
dance with current regulations (protection of
workers).

20
ASSEMBLY AND COMMISSIONING RECOMMENDATIONS
LSHRM - FLSHRM - PLSHRM - Permanent Magnet Assisted Reluctance motors
5411 en - 2019.04 / b
• Tightening torque (N m) for the terminal block nuts
Terminal M6 M8 M10 M12 M14 M16
Steel 5 10 20 35 50 65
When closing the box, ensure that the seal is correctly
positioned.
As a general rule, check that no nut, washer
or other foreign body has fallen into the
motor housing.
25±1
38,5±1
7±1 15±1
15±1 15±1 22±1 15±1 15±1
15±122±1 15±1
38,5±1
15±1
35±1 40±1 55±1 40±1 35±1
20±1
30±1
8±1 13 x M6
16±1
77,5
Dimensions in mm
4 x Ø13 Attachment
Attachment
97,5
54
Upper
connector
Intermediate
connector
Lower
connector
Earthing
connector
• PLSHRM motor terminal boxes
Holes (smooth holes) are drilled in the multi-level power connection bars, which are supplied without screws or nuts
to allow the user to adapt the connection to the connector cross-section.
U
W
VEarthing
connector
This manual suits for next models
2
Table of contents
Other Nidec Engine manuals

Nidec
Nidec LEROY-SOMER FFB User manual

Nidec
Nidec Leroy-Somer PLSES Series Maintenance and service guide

Nidec
Nidec Leroy-Somer FLSN Series Operating manual

Nidec
Nidec LEROY-SOMER FFB Series Operating manual

Nidec
Nidec Leroy-Somer IMfinity LC Series User manual

Nidec
Nidec LEROY-SOMER LSPX Series Operating manual

Nidec
Nidec LA16G324B50MC User manual

Nidec
Nidec LEROY-SOMER Commander ID300 User manual

Nidec
Nidec RESCUE EcoTech Programming manual

Nidec
Nidec GreenDrive Dynamo User manual