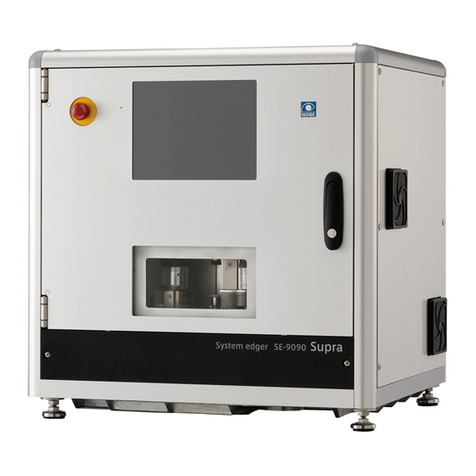
Nidek Medical SE-9090 Express User manual

NIDEK
SYSTEM EDGER
SE-9090 Express
INSTALLATION MANUAL
This manual is packed with the system for convenience when service persons install the
system.
The contents are unnecessary for customers to use the system, so be sure not to perform
the operations in this manual. The system may not work properly if settings are changed
carelessly.

NIDEK CO., LTD. : 34-14, Maehama, Hiroishi-cho, Gamagori, Aichi 443-0038, Japan
(Manufacturer) Telephone: (0533) 67-6611
Facsimile: (0533) 67-6610
NIDEK CO., LTD : 6th Floor, Takahashi Bldg., No.2, 3-chome, Kanda-jinboucho
(Tokyo Office) Chiyoda-ku, Tokyo 101-0051, Japan
Telephone: (03) 3288-0571
Facsimile: (03) 3288-0570
Telex: 2226647 NIDEK J
NIDEK INCORPORATED : 47651 Westinghouse Drive, Fremont, California 94539, U. S. A.
(United States Agent) Telephone: (510) 226-5700
Facsimile: (510) 226-5750
NIDEK SOCIETE ANONYME : Europarc 13, rue Auguste Perret, 94042 CRETEIL, France
(Authorized Representative) Telephone: (01) 49 80 97 97
Facsimile: (01) 49 80 32 08
2004. 8
40273-P932B
Printed in JAPAN

I
For safe installation
Safety precautions
BEFORE INSTALLATION, READ THIS MANUAL.
This manual provides precautions, procedures, and adjusting methods for installing the
NIDEK SYSTEM EDGER Model SE-9090 Express.
Before installation, read and understand this manual and the operator’s manual
thoroughly.
In this manual, Signal Words are used to designate a degree or level of safety alerting. The definitions
are as follows:
WARNING •Indicates a potentially hazardous situation which, if not avoided, could result in death
or serious injury.
CAUTION •Indicates a potentially hazardous situation which may result in bodily injury or damage
to equipment.
Even situations indicated by CAUTION may result in serious injury under certain conditions.
Safety precautions must be strictly followed at all times.

II
Installation precautions
WARNING •Never touch the grinding wheel when it is turning.
You may be injured.
•If abnormal conditions such as cracks are found on the grinding wheel,
stop using the system immediately.
The wheels may break and broken pieces may injure personnel if used with such
flaws.
•To transport the system, lift it with 4 or more persons, and put it on a cart.
You may hurt your back or may fall down if you do it alone.
CAUTION •Installation must be performed only by personnel who know this system
well.
•Handle the system carefully during transportation to avoid shock.
•Use the specified packing materials when moving or transporting the
system.
•Unpack the package in an area with ample space, checking the safety of the
environment.
•Keep the packing materials to move or transport the system.
•Do not install the system in a place exposed to direct sunlight or hot and
humid places.
•Do not install the system in a place which has a tilted floor or vibration.
•Install the system at the distance of 10 cm or more from the wall.
If the fan is blocked, the temperature of the inside of the system will rise and it may
cause a malfunction.
•Be sure to install the system where the power source and power voltage as
indicated on the label are connect.
•Be sure to use a power outlet equipped with a grounding terminal.
An electric shock or a fire may occur in the event of an system malfunction or power
leakage.
•Select the correct lens material with .
Incorrect selection may reduce the lifetime of the grinding wheel.
•Be careful not to lose the removed screws.

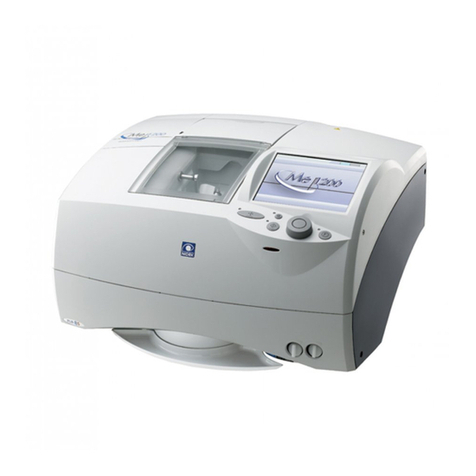
Table of Contents
III
1. REQUIREMENTS . . . . . . . . . . . . . . . . . . . . . . . . . . . . . . . . 1
1.1 Requirements . . . . . . . . . . . . . . . . . . . . . . . . . . . . . . . . . . . . . . . . . . . . . . . . . . . . . . . . . .1
2. INSTALLATION PROCEDURE. . . . . . . . . . . . . . . . . . . . . . 3
2.1 Unpacking . . . . . . . . . . . . . . . . . . . . . . . . . . . . . . . . . . . . . . . . . . . . . . . . . . . . . . . . . . . . .3
2.2 Pipe Arrangement . . . . . . . . . . . . . . . . . . . . . . . . . . . . . . . . . . . . . . . . . . . . . . . . . . . . . .6
3. CHECK/ADJUSTMENT PROCEDURE. . . . . . . . . . . . . . . . 9
3.1 Outline of Check/Adjustment Procedure . . . . . . . . . . . . . . . . . . . . . . . . . . . . . . . . .9
3.2 Size Adjustment . . . . . . . . . . . . . . . . . . . . . . . . . . . . . . . . . . . . . . . . . . . . . . . . . . . . . . . .9
3.3 Adjusting Bevel Position . . . . . . . . . . . . . . . . . . . . . . . . . . . . . . . . . . . . . . . . . . . . . . .11
3.4 Final Check . . . . . . . . . . . . . . . . . . . . . . . . . . . . . . . . . . . . . . . . . . . . . . . . . . . . . . . . . . .13
4. CHECK LIST . . . . . . . . . . . . . . . . . . . . . . . . . . . . . . . . . . . 15
4.1 SE-9090 Express Installation Work Check List . . . . . . . . . . . . . . . . . . . . . . . . . .15
5. ADJUSTMENT DISPLAY . . . . . . . . . . . . . . . . . . . . . . . . . 17

:
IV

1
1
1.
REQUIREMENTS
1.1 Requirements
• Hexagonal wrench (accessory) for installation
• Wrench (size 16 mm) for installation
• Phillips screwdriver (No.0) for installation
• Flatblade screwdriver (blade width 6 mm) for installation
• Centering device for adjustment
• Test lens for adjustment
CR39 SPH: -3.00 to -5.00D 6 pieces
CR39 SPH: approx. -1.00D 2 pieces
Polycarbonate 4 pieces
Glass 6 pieces (Type GLS only)
* The number of test lenses above is necessary for check. Prepare extra lenses for adjustment.

2
REQUIREMENTS: Requirements

3
2
2.
INSTALLATION PROCEDURE
2.1 Unpacking
1 Remove the cloth belt (n = 2) that fixes the outer case.
Remove the packing tape that holds the
cloth belt and pull the end of the cloth belt
on which a label is attached to the direction
as shown on the right.
2Remove the outer case upward.
3Take out accessories.
Duct (2 pcs.)
Drain tube
Operator’s manual
Power cord
Barcode scanner holder
Accessory box
Coupler (2 pcs.)
Hose band (2 pcs.)
Duct adapter (2 pcs.)
Monkey wrench
Hexagonal wrench (2 mm)
Hexagonal wrench (2.5 mm)
Hexagonal wrench (5 mm)
Hexagonal wrench (6 mm)
Calibration jig
Dressing stick for roughing wheel (WA80) 1 pc. (Type GLS only)
Dressing stick for finishing wheel (WA320) 1 pc.
Dressing stick for polishing wheel (WA4000) 1 pc. (except for Type GLS)
Cloth belt
Power cord, Barcoder scanner holder, Accessory box
Duct (n = 2), Drain tube, Operator’s manual

4
INSTALLATION PROCEDURE: Unpacking
4Remove the plastic bag from the main body.
5Remove the brackets (n = 4) that hold the
adjuster feet (n = 4).
1) Loosen the upper nut of the adjuster foot
from the bracket.
2) Remove the bolts (n = 2) and washers (n
= 2) to remove the bracket.
6Put the main body on a place to install.
WARNING• To transport the system, lift it with four or more persons, and put it on a cart.
You may hurt your back or may fall down if you do it alone. The main body weights
approx. 120 kg.
CAUTION • Leave a space of 10 cm or more behind the system.
If the cooling fan is blocked, the temperature inside the system will rise and it may
cause malfunction.
• Install the system on the special table (option) or a table that is adequately strong
for the weight (approx. 120 kg).
Vibrations and noises may be produced, and normal grinding may not be performed.
7Remove the tape that holds the grinding
chamber cover.
8Open the grindng chamber cover, and
remove the cushion from the grinding
chamber.
9Remove the cardboard from the space at
the lower right of the front.
Upper nut
Bracket
Bolt, Washer
Cushion
Tap e Cardboard

5
INSTALLATION PROCEDURE: Unpacking
2
10Open the tank box and remove the contents.
[Contents of the tank box]
Drain pipe
Feedwater hose (2 pcs.)
Pump (2 pcs.)
Stocking filter (20 pcs.)
Tank
Accessories
Hose band-S (2 pcs.)
Hose band-L (2 pcs.)
Cord band (2 pcs.)
11Open the pump box, and remove the pumps
(n = 2) and the extension cords (n = 2).
Tan k
Drain pipe
Feedwater hoses (n = 2)
Pump boxes
(n = 2)
Stocking filter
Accessories

6
INSTALLATION PROCEDURE: Pipe Arrangement
2.2 Pipe Arrangement
Connect the pump and the tank to the main body.
The following describes one pump as “PUMP 1” and the other pump as “PUMP 2”.
1 Connect the couplers to the ends of the feedwater hoses (n = 2).
1) Pass the hose band-S to the end of the feedwater hose on which there is no connector.
2) Place the coupler in the end of the feedwater hose on which there is no connector as far
as it goes.
3) Tighten the hose band-S to fix the coupler.
2Connect the power cord and feedwater hose of PUMP 1 to the main body.
1) Connect the power cord of PUMP 1 to
the extension cord.
2) Connect the extension cord to the
COOLING outlet at the rear side of the
main body.
3) Connect the coupler of the feedwater
hose to the COOLING inlet at the rear
side of the main body.
4) Connect the other end of the feedewa-
ter hose to PUMP 1.
3Connect the power cord and feedwater
hose of PUMP 2 to the main body.
1) Connect the power cord of PUMP 2 to
the extension cord.
2) Connect the other end of the extension
cord to the CLEANING outlet at the rear
side of the main body.
3) Connect the coupler of the feedwater
hose to the CLEANING inlet at the rear
side of the main body.
Push it until the coupler clicks in.
4) Connect the other end of the feedwater hose to PUMP 2.
4Fill up the tank 80% with water, and close the cover.
5Attach the drain cover (part of ) to the outlet in the grinding chamber.
RS232C
BAR CODE
FEEDER
LAN
AC INLET
COOLING 2A
CLEANING 2A
VACUUM 2A
COOLING
CLEANING
COOLING outlet
CLEANING outlet
COOLING inlet
CLEANING inlet
Drain pipe

7
INSTALLATION PROCEDURE: Pipe Arrangement
2
6Screw the drain pipe into the cuff.
7Insert PUMP 1 and PUMP 2 into the two
openings on the tank cover.
8Connect the drain pipe to the outlet at the underside of the main body.
1) Pass the hose band-L to the drain pipe.
2) Screw in the end on which there is no cuff of the drain pipe to the outlet at the underside
of the main body.
3) TIghten the hose band-L to fix the drain pipe.
9Attach the stocking filter to the drain pipe connector for the tank.
10Place the cuff attached to the drain pipe in the drain pipe connector
for the tank.
If the drain pipe is bent due to its length, cut it to the adequate
length.
11Connect the drain tube.
The drain tube is 1.5 m long. If the drain tube is too long, cut it to the
adequate length.
1) Connect the drain tube to the drain pipe at the lower rear side of the main body.
2) Put the other end of the drain tube on the cover of the tank.
12Connect the power cord to the power connector (AC INLET ~) at the rear side of the
main body.
13Plug the power cord in a wall outlet.
Drain pipe
Cuff
Put the end of the drain tube around here (step 11).
Stocking filter

8
INSTALLATION PROCEDURE: Pipe Arrangement
14Connect the duct (only when the vacuum system is connected).
1) Attach the duct adapter (1 pc.) to the air inlet/outlet at the rear side of the main body.
2) Connect the duct to the duct adapter, and fix the hose band.
3) Connect the other end of the duct to the vacuum system.
15Put the system into the dressing mode. Check the connections of PUMP 1 and PUMP 2.
1) Turn ON (|) the power switch.
2) Press the [MENU] button to recall the MENU screen.
3) Press the [Dressing] button to run the cooling
water.
4) Press the [START] key to check if the water
around the wheel turns on and off.
If the water around the wheel does not stop even
when the [START] key has been pressed, PUMP 1
and PUMP 2 are reversely connected. After turning
the power OFF (|), connect the extension cord in
the COOLING outlet to the CLEANING outlet, and
connect the extension cord in the CLEANING outlet
to the COOLING outlet.
5) Check that the water (cleaning water) coming from the top does not splash on the
adapter or its surroundings with the water off.
6) Press the [EXIT] button to recall the Layout screen.
WARNING• In the dressing mode, the wheel turns while the grinding chamber cover is open.
Keep your hand off the wheel.
You may be injured.
16Attach the optional barcode scanner if available.
1) Remove the two screws from the right side of the main body, and attach the barcode
scanner holder with the removed screws.

2) Connect the cable of the barcode scanner to the BAR CODE connector at the rear side.
3) Put the barcode scanner on the barcode scanner holder.
•In rare cases, the cleaning water may splash on the lens due to the displaced pipe. Correct
grinding cannot be performed if water splashes on a polycarbonate lens during grinding. In
such a case, place the pipe (see the above) to the correct position so that the cleaning
water will not splash on the lens.
Water comes from this pipe.
Water around the wheel is not running.

9
3
3.
CHECK/ADJUSTMENT PROCEDURE
3.1 Outline of Check/Adjustment Procedure
1. Size adjustment
2. Bevel position adjustment
3. Final check
3.2 Size Adjustment
1 Process CR39 lenses in the beveling mode and flat edging mode, and then check their
sizes.
1) Recall the ∅45 built-in data, set SIZE
at 0.00, and then process a lens in the
beveling mode.
To recall the 45 built-in data, press the
[∅45] button on the MENU screen.
2) Replace with a new lens, recall the
∅45 built-in data, set SIZE at 0.00, and
then process a lens in the flat edging
mode.
3) Measure the outer diameter of the finished lens.
When the finished lens is in the range of 45.00±0.03, size adjustment is not necessary. When not in
the range above, check and adjust the size with a polycarbonate lens following step 2 and later.
•Processing conditions may vary with the transport/setting conditions of the system. Check
and adjust the processing conditions, and complete the check list (copy of Sec. 4).
FP
D
P
D
SIZE
#
%WTXG
2QUKVKQP
㪙㪼㫍㪼㫃㩷㪪㫀㫄㫌㫃㪸㫋㫀㫆㫅
#761
/GVCN
%4 ޓ ޓ #EVKXG
M
E
NU
4KIJV
.GHV
5VCPFD[
.
4
J
O
B
N
o
#PING
%WTXG
(2&
+
Ǿ
+
Ǿ
Outer Outer
diameter diameter

10
CHECK/ADJUSTMENT PROCEDURE: Size Adjustment
2Recall the ∅45 built-in data and process a polycarbonate lens in the beveling mode and
flat edging mode, and then check the sizes.
3Adjust the size.
1) Recall the MENU screen.
Press the [MENU] button on the Layout
screen.
2) Recall the Size adjustment screen.
Press the [Size Adjustment] button.
3) Press the numeric button of a
parameter item to be changed.
The numeric button turns red and the
numeric keypad appears.
When the size of a plastic lens finished in the beveling mode is not correct: Size Constant PLA, BVL
When the size of a plastic lens finished in the flat edging mode is not correct: Size Constant PLA, FLT
When the size of a PC lens finished in the beveling mode is not correct: Size Constant PC, BVL
When the size of a PC lens finished in the flat edging mode is not correct: Size Constant PC, FLT
4) Change the parameter value only by difference between 45.00 mm and outer diameter.
After inputting values using the displayed numeric keypad, press the [ENT] button.
e.g.) For the diameter of ∅45.10, decrease the parameter value by 0.10.
4Go back to the MENU screen.
Press [Exit] button.
5Go back to the Layout screen.
Press [Exit] button.
6Repeat steps 1 - 5 until the size is in the range of 45.00±0.03 mm.
/GCUWTG2QU#FLWUVOGPV
9JGGN2QU#FLWUVOGPV
5($5GVVKPI
5($#FLWUVOGPV
+FNG4QVCVKQP
&KHHGTGPVKCN
#:+5#FLWUVOGPV
$GXGN2QU#FLWUVOGPV
5K\G#FLWUVOGPV
/CKPVGPCPEG
0GVYQTM5GVVKPI
غ㧠㧡
Ǿ㧠㧡
&TGUUKPI
2TQEGUU%QWPVGT
2TQEGUU5RGGF
2CTCOGVGT5GVVKPI
㪤㪜㪥㪬 ':+6
2QNKUJ5K\G 2%(.6
2QNKUJ5K\G 2%$8.
5K\G%QPVCPV 2%(.6
5K\G%QPVCPV 2%$8.
2QNKUJ5K\G *+(.6
2QNKUJ5K\G *+$8.
2QNKUJ5K\G 2.#(.6
2QNKUJ5K\G 2.#$8.
5K\G%QPVCPV 2.#(.6
5K\G%QPVCPV 2.#$8.
':+6
5K\G#FLWUVOGPV

11
CHECK/ADJUSTMENT PROCEDURE: Adjusting Bevel Position
3
3.3 Adjusting Bevel Position
When the bevel of a lens is shifted from the designated position, adjust the bevel position by changing
the parameter value.
1 Check the bevel position.
1) Recall the ∅45 built-in data, and process a
lens of SPH: approx. 1.0D in the auto bev-
eling mode.
2) Check if the bevel is produced in the
middle (5 : 5) of the edge.
If the bevel is leaning to either side, adjust it by
the following procedure.
2Adjust the bevel position.
1) Recall the MENU screen.
Press the [MENU] button on the Layout
screen.
2) Recall the Bevel Pos. Adjustment
screen.
Press the [Bevel Pos. Adjustment] button.
3) Press the numeric button on the right of
[Bevel Position].
The numeric button turns red and the
numeric keypad appears.
/GCUWTG2QU#FLWUVOGPV
9JGGN2QU#FLWUVOGPV
5($5GVVKPI
5($#FLWUVOGPV
+FNG4QVCVKQP
&KHHGTGPVKCN
#:+5#FLWUVOGPV
$GXGN2QU#FLWUVOGPV
5K\G#FLWUVOGPV
/CKPVGPCPEG
0GVYQTM5GVVKPI
غ㧠㧡
Ǿ㧠㧡
&TGUUKPI
2TQEGUU%QWPVGT
2TQEGUU5RGGF
2CTCOGVGT5GVVKPI
㪤㪜㪥㪬 ':+6
2QNKUJ$GXGN2QUKVKQP
$GXGN2QUKVKQP
':+6
$GXGN2QU#FLWUVOGPV

12
CHECK/ADJUSTMENT PROCEDURE: Adjusting Bevel Position
4) Change the parameter value.
After inputting values using the displayed numeric
keypad, press the [ENT] button.
Increase the value ⇒The bevel is shifted to the
front surface of the lens.
Decrease the value ⇒The bevel is shifted to the
rear surface of the lens.
e.g.) If the bevel is shifted 0.5 mm to the rear surface, increase the value by 0.5 mm.
3Go back to the MENU screen.
Press the [EXIT] button.
4Go back to the Layout screen.
Press the [EXIT] button.
5Repeat steps 1 to 4 until the bevel is made at the correct position.
Decrease the value.
Increase the value.

13
CHECK/ADJUSTMENT PROCEDURE: Final Check
3
3.4 Final Check
○Safety bevel check
Perform chamfering and have the user check the chamfered amount.
Depending on the user’s needs, change the setting on the SFB Setting screen.
See “Setting Parameters” of the operator’s manual for details.
○Polish check (Type PLB only)
Polish a lens using the ∅45 built-in data. If part of an edge remains unpolished, increase the setting
on the Differential screen. See “If part of an edge is not polished” of the operator’s manual for details.
Polish a lens using the F45 built-in data. If the whole edge is polished using the ∅45 built-in data but
part of an edge remains unpolished using the F45 built-in data, the axis may be shifted in the polish-
ing process. In such a case, input the compensation value to the corresponding parameter setting
from “AXIS Constant PLA, BVL” to “AXIS Constant PC, FLT” on the AXIS Adjustment screen.
Have the user check the polished condition again. If the user indicates or questions something about
the polish, explain it is due to system performance.

14
CHECK/ADJUSTMENT PROCEDURE: Final Check
Table of contents
Other Nidek Medical Edger manuals

Nidek Medical
Nidek Medical LE-9000SX User manual

Nidek Medical
Nidek Medical LE-9000EX Express User manual

Nidek Medical
Nidek Medical ME-1000 User manual

Nidek Medical
Nidek Medical ME 1200 Service manual

Nidek Medical
Nidek Medical LE-700 User manual

Nidek Medical
Nidek Medical Lex 1000 User manual

Nidek Medical
Nidek Medical LE-700 Instruction sheet

Nidek Medical
Nidek Medical SE-9090 Supra User manual

Nidek Medical
Nidek Medical LE-700 User manual

Nidek Medical
Nidek Medical Le 1000 User manual