Nilfisk-Advance 56206980 User manual

FORM NO. 56041170 / BATTERY CHARGER SERVICE MANUAL / PARTS LIST - 45
Revi ed 8/00 Form Number 56041170
Battery Chargers
SERVICE MANUAL / PARTS LIST
AUTOMATIC Advance MODELS 56206980, 56206981, 56372947, 56388109,
56395101, 56388502, 56388120, 56409494, 56411058, 56411643, 56409788,
56205983, 56412272, 56206973, 56372203, 56372190, 56388119
Les er MODELS 56031407, 56632342, 56638431, 56638436, 56638439,
56638440, 56632293, 56031403, 56031405, 56031408
MANUAL MODELS (obsole e) 56206975, 56372945, 56372955
For new, refurbished and used cleaning equipment and supplies visit www.southeasternequipment.net

FORM NO. 56041170 / BATTERY CHARGER SERVICE MANUAL / PARTS LIST - 1
_______________________________________________________________________________________
TABLE OF CONTENTS
Safety ......................................................................................................................... 2
General Information.................................................................................................... 3
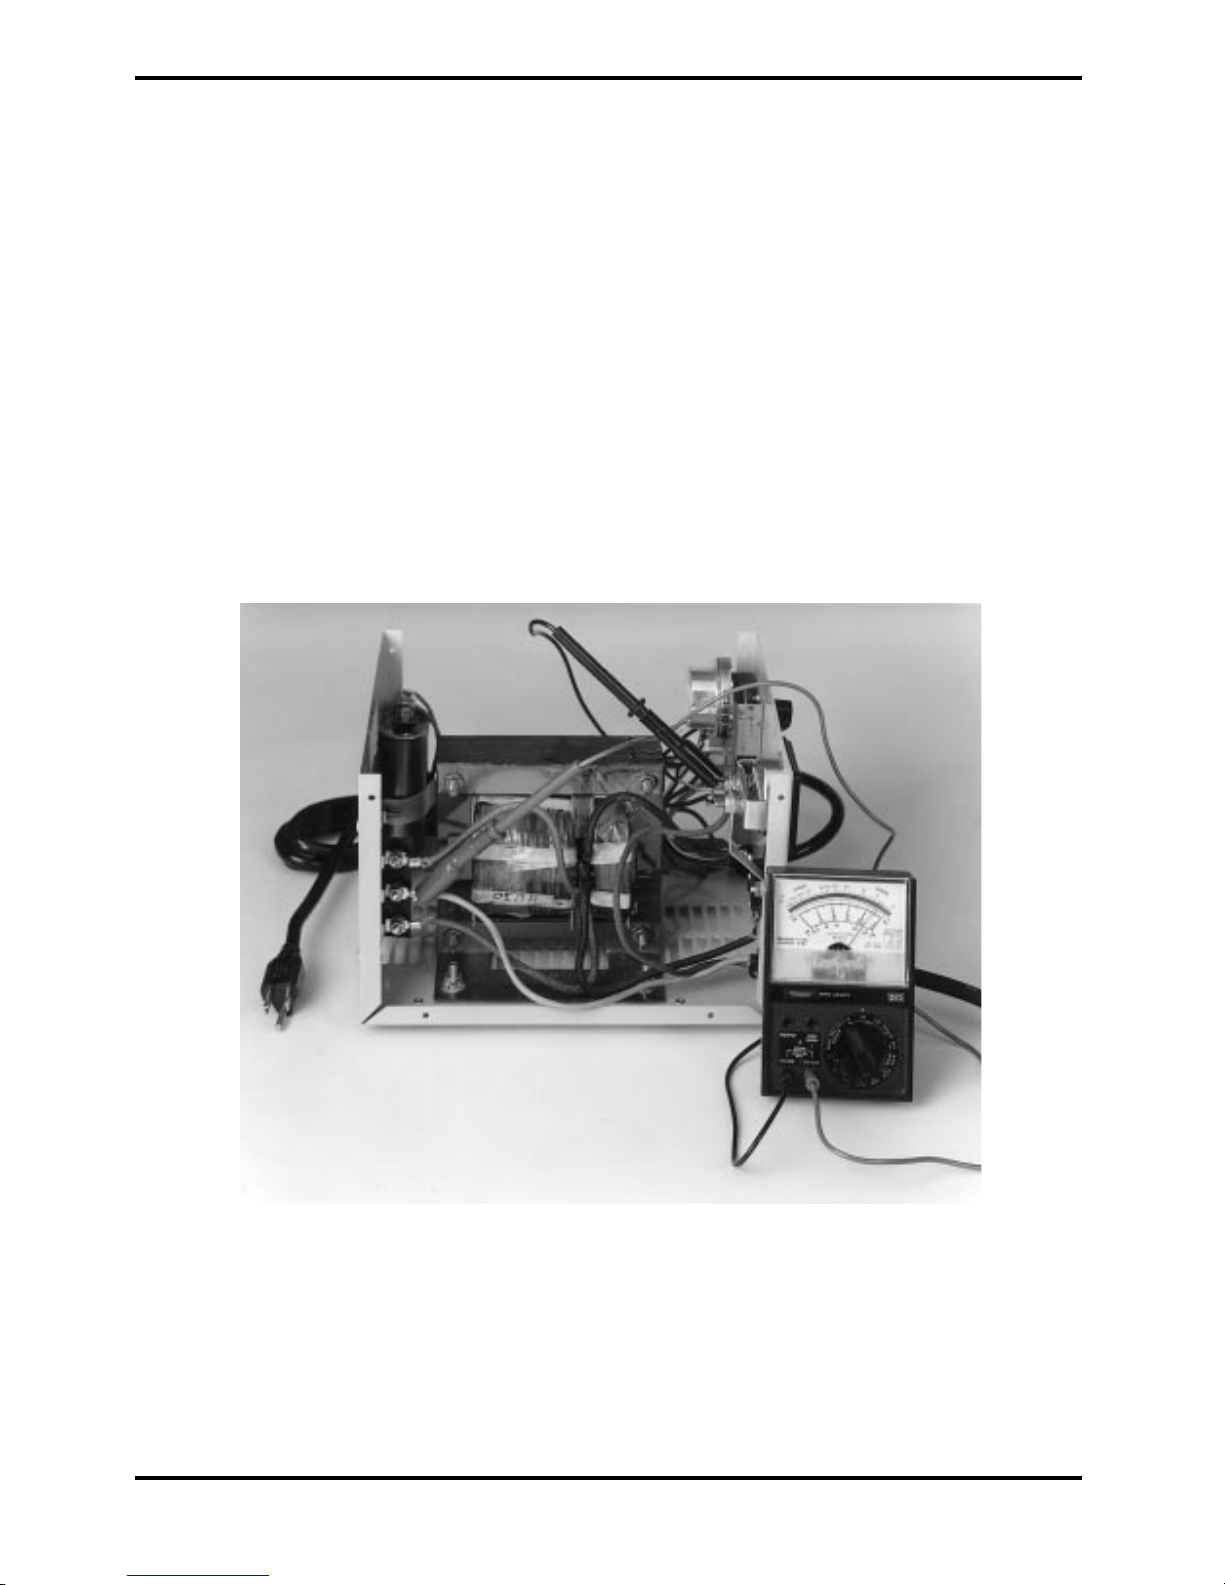
Tran former / Rectifier or Power Section.................................................................... 3
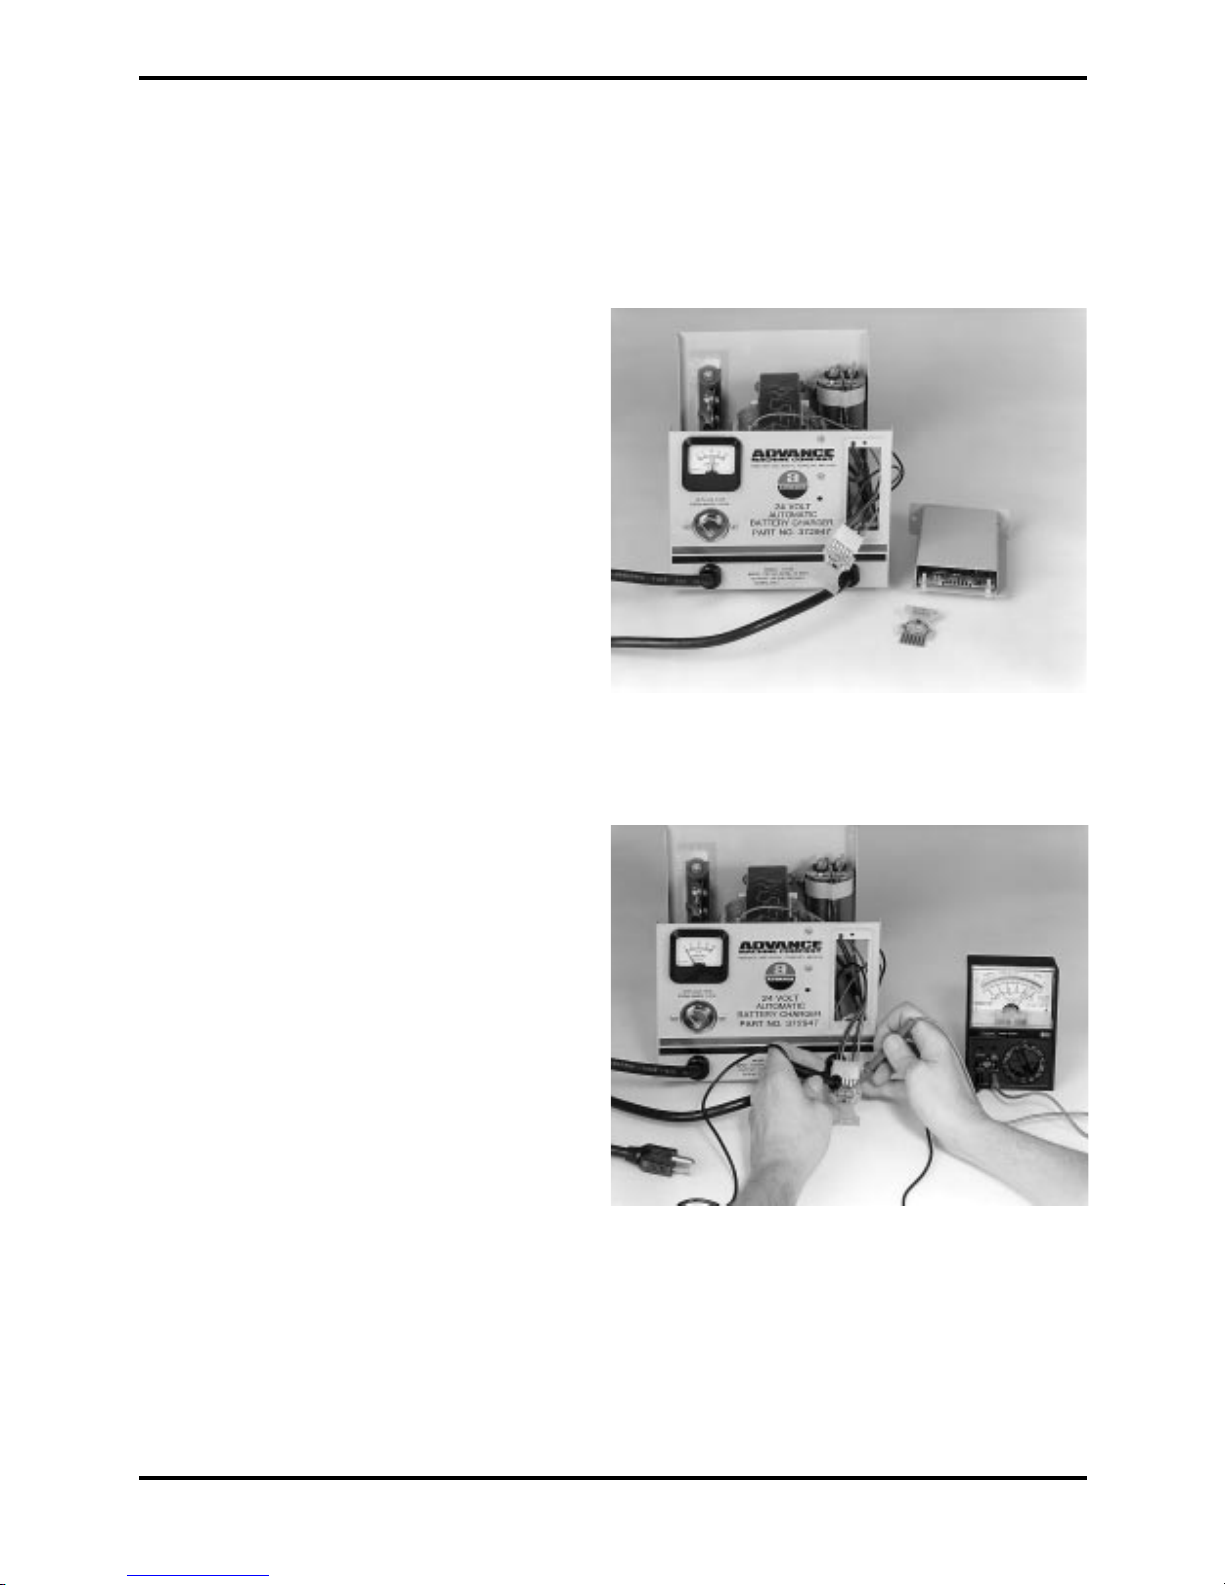
On / Off Control Section ............................................................................................. 4
Automatic and Manual Timer Battery Charger Trouble hooting................................. 5
Manual Charger PN 56206975................................................................................. 16
Automatic Charger PN 56206980........................................................................... 17
Manual Charger PN 56372945................................................................................. 18
Automatic Charger PN 56372947............................................................................. 19
Automatic Charger PN 56388109............................................................................. 20
Manual Charger PN 56372955................................................................................. 21
Automatic Charger PN 56395101 (replace PN’ 56372947 & 56395347).............. 22
Automatic Charger PN 56388502............................................................................. 23
Automatic Charger PN 56388120............................................................................. 24
Automatic Charger PN 56409494............................................................................. 25
Automatic Charger PN 56411058............................................................................. 26
Automatic Charger PN 56411643............................................................................. 27
Automatic Charger PN 56409788............................................................................. 28
Automatic Charger PN 56205983 (replace PN 56206981)..................................... 29
Automatic Charger PN 56412272............................................................................. 30
Automatic Charger PN 56206973............................................................................. 31
Automatic Charger PN 56372203............................................................................. 32
Automatic Charger PN 56372190............................................................................. 33
Automatic Charger PN 56388119............................................................................. 34
Automatic Charger PN 56031407............................................................................. 35
Automatic Charger PN 56632342............................................................................. 36
Automatic Charger PN 56638431............................................................................. 37
Automatic Charger PN 56638436............................................................................. 38
Automatic Charger PN 56638439............................................................................. 39
Automatic Charger PN 56638440............................................................................. 40
Automatic Charger PN 56632293............................................................................. 41
Automatic Charger PN 56031403............................................................................. 42
Automatic Charger PN 56031405............................................................................. 43
Automatic Charger PN 56031408............................................................................. 44
BATTERY CHARGER SERVICE MANUAL / PARTS LIST
revi ed 8/00
For new, refurbished and used cleaning equipment and supplies visit www.southeasternequipment.net

2 - FORM NO. 56041170 / BATTERY CHARGER SERVICE MANUAL / PARTS LIST
________________________________________________________________________________________________________________________________________________________________________________________________________________________________________________________________________
SYMBOLS
Nilfi k-Advance u e the ymbol below to ignal potentially dangerou condition . Alway read thi informa-
tion carefully and take the nece ary tep to protect per onnel and property.
DANGER!
I u ed to warn of immediate hazard that will cau e evere per onal injury or death.
WARNING!
I u ed to call attention to a ituation that could cau e evere per onal injury.
CAUTION!
I u ed to call attention to a ituation that could cau e minor per onal injury or damage to the machine or other
property.
________________________________________________________________________________________________________________________________________________________________________________________________________________________________________________________________________
GENERAL SAFETY INSTRUCTIONS
DANGER!
HIGH VOLTAGE! Wi h he charger on, he in ernal charger capaci or vol age is approxima ely 650
vol s.
WARNING!
Do no opera e he charger if i is malfunc ioning. Personal injury or proper y damage could resul .
Remove all jewelry when working near elec rical componen s.
CAUTION!
To be able o use he roubleshoo ing guide safely and effec ively i is impor an o read his manual
comple ely before beginning any es s.
Incorrec assembly may resul in a risk of elec ric shock or fire.
Always unplug he elec rical cords, firs from he AC ou le and hen from he charger recep acle
before a emp ing any repairs or service o he charger.
REPAIRS BY QUALIFIED PERSONNEL ONLY. NOTE: Modifying his charger for use o her han ha
for which i was in ended, repairs by persons no qualified, or no using original equipmen replace-
men par s will void he manufac urer’s warran y and liabili y.
BATTERY CHARGER SERVICE MANUAL
For new, refurbished and used cleaning equipment and supplies visit www.southeasternequipment.net

FORM NO. 56041170 / BATTERY CHARGER SERVICE MANUAL / PARTS LIST - 3
________________________________________________________________________________________________________________________________________________________________________________________________________________________________________________________________________
GENERAL INFORMATION
The Nilfi k-Advance Battery Charger are de igned to recharge deep-cycling lead acid batterie . A
ferrore onant tran former i u ed to provide a highly reliable, line compen ating unit with a minimum of
moving part , de igned for long trouble-free ervice. The charger are con tructed o that all part can be
te ted and replaced with ba ic hand tool . In addition, an analog multimeter of 10,000 ohm per volt en itivity
or better i required.
The Nilfi k-Advance battery charger i compri ed of two ba ic ection ; the tran former/rectifier or power
ection, and the on/off control ection.
________________________________________________________________________________________________________________________________________________________________________________________________________________________________________________________________________
TRANSFORMER / RECTIFIER OR POWER SECTION
The power or charging ection con i t of a tran former with it pecified part number and rating capacitor and
rectifying diode attached to a heat ink. The ammeter di play charging current and the fu ing provide
electrical protection.
The tran former con i t of primary coil or coil eparated from the capacitor and econdary coil by a tack
of tran former grade teel piece called a hunt pack. The tran former coil are wound with high temperature
double in ulated magnet wire. The lead are covered with tan or black leeving and all termination connector
are crimped and oldered. The tran former mu t be properly connected in accordance with the correct wiring
diagram for each pecific part number charger.
The capacitor function in combination with the pecific tran former to provide the correct charger output with
variation in AC line voltage. The correct part number and rating capacitor a li ted on the part li t mu t be
u ed with the correct part number tran former and charger.
CAUTION!
Use only he correc par number and ra ing capaci or. Use of a differen capaci or may resul in
improper charging, capaci or failure, ransformer burnou and / or ba ery damage.
The rectifier diode are attached to a heat ink plate or bracket that i fa tened to, but electrically i olated from,
the charger cha i . Connection point are provided on the heat ink a embly with diode . One connection
point i to the heat ink plate it elf or a tab attached to it, the remaining connection are to individual diode tab
or lead . More than one lead can be attached to each connection point and the heat ink a embly with diode
mu t be the right part number and connected in accordance with the correct wiring diagram for the pecific
part number charger.
The ammeter needle deflect in re pon e to current flow indicating charge current. Connection to the
ammeter terminal are either pu h on or with jam nut . When tightening the jam nut , in ure the threaded tud
doe not turn, or damage to the ammeter can occur. U e only the correct ammeter a pecified in the appro-
priate wiring diagram and part li t.
BATTERY CHARGER SERVICE MANUAL
For new, refurbished and used cleaning equipment and supplies visit www.southeasternequipment.net

4 - FORM NO. 56041170 / BATTERY CHARGER SERVICE MANUAL / PARTS LIST
The fu ing con i t of a fu e link in erie with each diode and provide overcurrent protection hould one or
both diode fail in the horted mode. When both fu e or fu e link blow, thi i u ually due to a rever e
polarity connection to the batterie . Either two individual fu eholder with fu e or a ingle dual element fu e
a embly provide thi protection. The fu e a embly con i t of a double ended fu e wire vi able through a
tran parent bubble mounted on the front panel. Each half of the fu e wire erve a an individual fu e ele-
ment. After correcting the rea on for the fu e blowing, replace the fu e or fu e a embly only with the correct
rating and part number in accordance with the correct wiring diagram and part li t for the pecific part number
charger.
________________________________________________________________________________________________________________________________________________________________________________________________________________________________________________________________________
ON/OFF CONTROL SECTION
The ON/OFF control i provided by either a manually et hour of charge timer or the fully automatic battery
condition en ing electronic timer kit.
The fully automatic timer ection ha three main component .
The, “Electronic Timer Kit”, con i t of tate of the art electronic circuitry on a printed circuit board contained in
a protective heet metal hou ing.
The “Control Cable A embly”, ha a polarized edge connector that mate with the circuit board pad on the
rear of the electronic timer kit. The wire attached to the edge connector are the correct length, po ition and
color to be connected in accordance with the proper wiring diagram for each pecific part number charger.
The “On/Off Control Relay”, re pond to ignal from the electronic timer kit to either turn the AC power on or
off to the tran former of the power ection. The relay terminal nomenclature i printed on each relay ca e and
hould be connected according to the correct wiring diagram for each pecific part number charger.
The manually et hour of charge timer i a imple electric clock motor operated on/off witch that turn off
after the pre et number of hour ha elap ed. The pu h on connection are numbered and mu t be con-
nected according to the correct wiring diagram for each pecific part number charger.
________________________________________________________________________________________________________________________________________________________________________________________________________________________________________________________________________
TRANSFORMER / RECTIFIER OR POWER SECTION (con inued)
BATTERY CHARGER SERVICE MANUAL
For new, refurbished and used cleaning equipment and supplies visit www.southeasternequipment.net

FORM NO. 56041170 / BATTERY CHARGER SERVICE MANUAL / PARTS LIST - 5
________________________________________________________________________________________________________________________________________________________________________________________________________________________________________________________________________
AUTOMATIC TIMER BATTERY CHARGER TROUBLESHOOTING
Proper functioning of the Automatic Battery Charger i indicated by the following equence of event . Three to
five econd after the DC plug i connected to the charger receptacle the control relay “click ” on, the tran -
former hum and the ammeter regi ter proper charge.
Proper diagno ing and repair require identifying the malfunction from the following li t, performing the indi-
cated te t and repairing or replacing the malfunctioning item .
Malfunc ion Descrip1ion Tes Procedures / Sec ion Number
Relay doe not “click” on when DC plug i Te t for complete electrical connection to
connected to the charger receptacle. batterie / 1.
Te t for proper functioning of automatic timer
component / 2.
Relay “click ” on, but tran former doe not Te t AC power circuit / 3.
hum.
Tran former hum but no ammeter indication. Te t Charger DC Circuit / 7.
Te t Fu e and Diode / 6.
Te t Capacitor / 4.
Te t Tran former / 5.
Tran former hum but charger output i low. Te t Fu e and Diode / 6.
Te t Tran former / 5.
Fu e blow a oon a DC plug i connected Te t Charger DC Circuit / 7.
to the charger receptacle. Te t Fu e and Diode / 6.
Ammeter remain pegged at maximum Check Battery Sy tem Voltage / 8.
charge for more than 30 minute .
Charger doe not turn off. Te t Automatic Timer Section for “Doe Not
Turn Off” / 9.
WARNING!
Do no ouch he ba ery erminals or con ac s on he charging plug. An elec rical shock could resul .
BATTERY CHARGER SERVICE MANUAL
For new, refurbished and used cleaning equipment and supplies visit www.southeasternequipment.net

6 - FORM NO. 56041170 / BATTERY CHARGER SERVICE MANUAL / PARTS LIST
________________________________________________________________________________________________________________________________________________________________________________________________________________________________________________________________________
MANUAL TIMER BATTERY CHARGER TROUBLESHOOTING
Proper functioning of the charger i indicated by the following equence of event . When the timer knob i
turned to “ON”, the tran former hum and the ammeter regi ter proper charge.
Proper diagno ing and repair require identifying the malfunction from the following li t, performing the indi-
cated te t and repairing or replacing the malfunctioning item .
Malfunc ion Descrip ion Tes Procedures / Sec ion Number
Tran former doe not hum when the timer i Te t AC Power Circuit / 3.
turned to “ON”.
Tran former hum but no ammeter indication. Te t for complete electrical connection
to battery y tem / 1.
Te t Charger DC Circuit / 7.
Te t Fu e and Diode / 6.
Te t Capacitor / 4.
Te t Tran former / 5.
Tran former hum but charger output i low. Te t Fu e and Diode / 6.
Te t Tran former / 5.
Fu e blow a oon a the charger i Te t Fu e and Diode / 6.
connected to the batterie .
Ammeter remain pegged at maximum charge Check Battery Sy tem Voltage / 8.
for more than 30 minute .
Charger doe not turn off. Replace Manual Timer.
WARNING!
Do no ouch he ba ery erminals or con ac s on he charging plug. An elec rical shock could resul .
BATTERY CHARGER SERVICE MANUAL
For new, refurbished and used cleaning equipment and supplies visit www.southeasternequipment.net

FORM NO. 56041170 / BATTERY CHARGER SERVICE MANUAL / PARTS LIST - 7
________________________________________________________________________________________________________________________________________________________________________________________________________________________________________________________________________
1-CHECKING FOR COMPLETE ELECTRICAL CONNECTION TO THE BATTERIES
AMea ure and record battery y tem voltage at the battery po t of the machine. Connect the po itive (+)
voltmeter lead to the po itive (+) battery y tem po t and the negative (-) voltmeter lead to the negative
(-) battery y tem po t.
BMea ure and record battery voltage at the charger receptacle. If no voltage i mea ured or the voltage
mea ured i lower than the voltage mea ured in tep A, repair or replace connection to batterie in
machine.
CSee Figure 1. With both the AC cord and the charging plug di connected, remove the cover from the
charger. Connect the po itive voltmeter lead to the ame point in ide the charger where the white (+) DC
cord lead connect . Connect the negative voltmeter lead to the ame point in ide the charger where the
black (-) DC cord lead connect .
DConnect the DC Output cord to the charger receptacle and record the voltage mea ured. It hould be the
ame voltage a mea ured in tep A.
EIf no voltage i mea ured or the voltage mea ured i lower than the voltage mea ured in tep A, repair or
replace the receptacle, charger plug and / or the cord et and re-te t.
FIGURE 1. Tes ing for comple e elec rical connec ion o he ba ery sys em.
BATTERY CHARGER SERVICE MANUAL
For new, refurbished and used cleaning equipment and supplies visit www.southeasternequipment.net

8 - FORM NO. 56041170 / BATTERY CHARGER SERVICE MANUAL / PARTS LIST
________________________________________________________________________________________________________________________________________________________________________________________________________________________________________________________________________
2-TEST FOR PROPER FUNCTIONING OF AUTOMATIC TIMER COMPONENTS
AWith both the AC cord and the charging plug di connected, remove the cover from the charger. Verify
that the charger i wired correctly according to appropriate wiring diagram for the pecific part number
charger.
BRemove the retaining crew and lide the
automatic timer kit out the front of the
charger. Di connect the edge connector
from the automatic timer kit and in ert the
te t kit (Fig. 2). Connect the DC plug to the
charging receptacle and li ten for the relay
to “click” on. If the relay now “click ” on,
in tall a new automatic timer kit and re-te t.
If the relay doe not “click” on, continue with
the next te t.
CMea ure DC voltage acro the pad on the
te t kit that the red (Po itive) and black
(Negative) wire contact (Fig. 3). The meter
hould read the ame battery voltage a
recorded in 1-C. If no voltage i mea ured
or the voltage mea ured i lower, repair or
replace the control cable a embly and
rete t.
DMea ure DC voltage acro the pad on the
te t kit that the black (Negative) and brown
(Po itive) wire contact. It hould read the
ame battery voltage a recorded in 2-C. If
no voltage i mea ured in tall a new control
relay and rete t.
FIGURE 2. Inser he es ki .
FIGURE 3. Measure ba ery sys em vol age
a he es ki pads.
BATTERY CHARGER SERVICE MANUAL
For new, refurbished and used cleaning equipment and supplies visit www.southeasternequipment.net

FORM NO. 56041170 / BATTERY CHARGER SERVICE MANUAL / PARTS LIST - 9
________________________________________________________________________________________________________________________________________________________________________________________________________________________________________________________________________
3-TEST AC POWER CIRCUIT
AMea ure AC line voltage at the outlet to be ure the correct AC voltage for the pecific part number
charger i pre ent (115 VAC, or 230 VAC). If the correct AC power i pre ent, di connect the AC plug
and the charging plug.
BAdju t the multimeter to the low re i tance cale (R X 1) or u e a low voltage continuity te ter. Connect
the te ter lead to the flat prong on the AC plug.
• MANUAL TIMER CHARGER
Turn the timer knob to “ON” and note the re pon e. The circuit hould be complete when the timer knob
i turned to “ON”, (Fig. 4) and open when the timer knob i turned to “OFF”.
• AUTOMATIC TIMER CHARGER
Connect the charging plug to the charging receptacle and li ten for the control relay to “click” on, 2 to 5
econd after connection.
• The circuit hould be open before the relay “click ” on and the circuit hould be complete after the relay
“click ” on.
CIf the circuit doe not te t a de cribed, individually check the AC cord, manual timer contact , control
relay contact , primary tran former coil( ) and all connection .
DANGER!
HIGH VOLTAGE! Wi h he charger on, he charger capaci or vol age is approxima ely 650 vol s AC.
Use ex reme cau ion when working near he capaci or erminals.
FIGURE 4. Tes AC circui for con inui y.
BATTERY CHARGER SERVICE MANUAL
For new, refurbished and used cleaning equipment and supplies visit www.southeasternequipment.net

10 - FORM NO. 56041170 / BATTERY CHARGER SERVICE MANUAL / PARTS LIST
________________________________________________________________________________________________________________________________________________________________________________________________________________________________________________________________________
4-TEST THE CAPACITOR
WARNING!
I is possible for he capaci or o no be fully discharged. To es for his, adjus your me er o he
highes DC vol age scale and ouch he es leads o he capaci or erminals and no e he reading. If
he me er needle deflec s in he wrong direc ion reverse he es leads and repea . If he capaci or was
no fully discharged a vol me er reading will indica e his. Con inue holding he vol me er leads on he
capaci or erminals un il he vol age reading drops o zero.
AU ing the analog ohmmeter adju t the cale to R X 10,000 (1 Ok) Ohm . Loo en the capacitor clamp
and carefully remove both tran former lead from the capacitor terminal o the wire do not break.
Touch the ohmmeter lead to the capacitor terminal and note the re ult . Rever e the te t lead , repeat
the te t and compare to the following:
• GOOD CAPACITOR: When the ohmmeter lead are connected to the capacitor terminal the meter
needle bump up to mid cale and quickly coa t back to high re i tance (∞).
• OPEN CAPACITOR: When the ohmmeter lead are connected to the capacitor the meter needle doe
not move and tay at high re i tance (∞). A bulge in the top of the capacitor may be vi able if the
capacitor ha failed “OPEN”.
• SHORTED CAPACITOR: When the ohmmeter lead are connected to the capacitor terminal , the meter
needle jump to full cale, zero ohm and remain there.
BIf the capacitor i “Open” or “Shorted” it mu t be replaced.
CAUTION!
Use only he correc par number and ra ing capaci or as specified on he correc par s lis for he
specific par number charger. The use of a differen par number or ra ing capaci or may resul in
improper charging, capaci or failure, ransformer burnou , and / or ba ery damage.
BATTERY CHARGER SERVICE MANUAL
For new, refurbished and used cleaning equipment and supplies visit www.southeasternequipment.net

FORM NO. 56041170 / BATTERY CHARGER SERVICE MANUAL / PARTS LIST - 11
________________________________________________________________________________________________________________________________________________________________________________________________________________________________________________________________________
5-TRANSFORMER TESTING
Te ting the tran former con i t of mea uring the AC voltage acro the tran former econdary lead that
connect to the diode . Thi voltage i mea ured fir t with the capacitor di connected and compared to the
voltage mea ured with a capacitor connected that ha been te ted and found good.
DANGER!
HIGH VOLTAGE! Wi h he charger opera ing, he charger capaci or vol age is approxima ely 650 vol s
AC. Use ex reme cau ion when working near capaci or erminals.
ADi connect the tran former econdary coil lead #1 and #4 (TAN SLEEVING) from the diode terminal .
Loo en the capacitor trap and carefully di connect the tran former capacitor coil lead from the capaci-
tor terminal .
BRefer to the tran former te t voltage diagram on the wiring diagram and part li t page for the pecific
part number charger and adju t the voltmeter to an appropriate AC voltage range. Attach the meter te t
lead to the identified tran former coil lead .
CChecking to be ure for per onal afety, and that no lead have been accidentally allowed to hort, follow
the in truction below to energize the tran former primary.
• MANUAL TIMER CHARGER
Turn the timer knob to “ON” and connect the power upply cord to an outlet while recording the voltage
reading and unplug a oon a the reading i noted.
• AUTOMATIC TIMER CHARGER
Connect the DC plug to the charger receptacle and li ten for the relay to “click” on 2 to 5 econd after
the connection. Connect the AC power upply cord to an outlet while recording the voltage reading and
unplug a oon a the reading i noted.
BATTERY CHARGER SERVICE MANUAL
For new, refurbished and used cleaning equipment and supplies visit www.southeasternequipment.net

12 - FORM NO. 56041170 / BATTERY CHARGER SERVICE MANUAL / PARTS LIST
________________________________________________________________________________________________________________________________________________________________________________________________________________________________________________________________________
5-TRANSFORMER TESTING (con inued)
• ALTERNATELY
The relay contact can be bypa ed to enable tran former te ting when the battery y tem i not
pre ent. Make up jumper lead (1 for 115 VAC, 2 for 230 VAC) with 3/16" (4.56 mm) wide flat blade
pu h in connector on both end of a piece of 14 gauge flexible wire (Fig. 5). Carefully di connect the
AC cord lead and tran former primary lead (1 each 115 VAC, 2 each 230 VAC) from the relay terminal .
Connect the jumper lead (1 for 115 VAC, 2 for 230 VAC) according to the tran former te t diagram on the
wiring diagram and part li t for the pecific part number charger. Connect the AC power upply cord to
an outlet while recording the voltage reading and unplug a oon a the reading i noted (Fig. 5).
DIf the AC line fu e or circuit breaker blow , the tran former i horted internally and mu t be replaced.
ECheck the tran former econdary coil and capacitor coil voltage and compare to voltage on the tran -
former te t diagram for the pecific part number charger. If the voltage are ub tantially lower than
tho e hown, the tran former i horted internally and mu t be replaced.
FIf the econdary coil voltage and capacitor coil voltage check good, re-te t the econdary coil voltage with
the correct capacitor connected. If the econdary coil voltage i the ame mea ured with the capacitor
di connected, the capacitor may be open, or the capacitor coil terminal may not be making proper
contact.
FIGURE 5. Transformer es .
BATTERY CHARGER SERVICE MANUAL
Jumper Leads
Capaci or
Leads
Disconnec ed
Jumper
Lead
Connec ed
For new, refurbished and used cleaning equipment and supplies visit www.southeasternequipment.net

FORM NO. 56041170 / BATTERY CHARGER SERVICE MANUAL / PARTS LIST - 13
________________________________________________________________________________________________________________________________________________________________________________________________________________________________________________________________________
6-TEST FUSES AND DIODES
Di connect the AC power cord and the charging cord.
ASet the multimeter to the low re i tance cale (R X 1 ) or u e a low voltage continuity te t light.
BExce ive heat due to a loo e, corroded or di tre ed connection can cau e one or both fu e a embly
link to melt and open. Fu eholder that are worn, corroded, bent or broken can re ult in an open circuit
even when a good fu e i in talled. I olate the fu eholder a embly electrically and te t for continuity
with a good fu e in talled.
CElectrically te t and vi ually check the fu e and fu e a embly for continuity. A ingle blown fu e or
fu e link i normally cau ed by a hort circuit failure of a ingle diode. When both fu e or fu e link are
blown, thi i u ually due to a rever e polarity connection to the batterie . Te t the diode and correct
the problem before replacing the fu e.
DANGER!
Replace he fuse or fuse assembly only wi h he correc fuse or fuse assembly. FIRE, PROPERTY
DAMAGE AND PERSONAL INJURY CAN RESULT IF THE CHARGER IS USED WITH AN INCORRECT
FUSE INSTALLED.
DTo te t the diode , di connect one tran former econdary coil lead (TAN SLEEVING) from the diode
terminal. U ing the multimeter or a low voltage continuity te ter, connect one lead to the diode heat ink
plate or terminal, and the other lead to a diode terminal (Fig. 6). Note the re pon e and then rever e the
te ter lead and check each diode again.
• GOOD DIODE: When the diode how
continuity in one direction but not the other.
• SHORTED DIODE: When the diode how
continuity in both direction .
• OPEN DIODE: When the diode doe not
how continuity in either direction.
EIf the diode( ) i OPEN or SHORTED the
complete heat ink a embly with diode( )
mu t be replaced.
FIGURE 6. Tes diodes.
BATTERY CHARGER SERVICE MANUAL
For new, refurbished and used cleaning equipment and supplies visit www.southeasternequipment.net

14 - FORM NO. 56041170 / BATTERY CHARGER SERVICE MANUAL / PARTS LIST
________________________________________________________________________________________________________________________________________________________________________________________________________________________________________________________________________
7-CHARGER DC CIRCUIT TEST
Di connect the AC power cord and the DC charger plug.
ASet multimeter to low re i tance cale (R X 1) or u e a low voltage continuity te ter.
BConnect one lead of the ohmmeter or continuity te ter to one of the DC charging plug contact , and the
other to the remaining DC plug contact and note the re pon e. Rever e the te t lead and note the
re pon e again. The circuit hould be complete in one direction only (Fig. 7 & 8).
No e: When u ing a very en itive ohmmeter, di connect the control cable a embly edge connector from the
electronic timer kit.
CIf the circuit doe not conduct in either direction and the fu e or fu e a embly te t good, individually
check the continuity of the DC output cord, ammeter, diode and all connection .
DIf the circuit conduct in both direction , a “ hort” exi t in the charger DC circuit. Fir t check the DC
output cord for a “ hort” between the two wire . Second, check if one or more of the diode ha failed in
the horted mode.
FIGURE 7. Tes charger DC circui . The
circui conduc s in one direc ion. FIGURE 8. Tes charger DC circui . The
circui does no conduc in reverse
direc ion.
BATTERY CHARGER SERVICE MANUAL
For new, refurbished and used cleaning equipment and supplies visit www.southeasternequipment.net

FORM NO. 56041170 / BATTERY CHARGER SERVICE MANUAL / PARTS LIST - 15
________________________________________________________________________________________________________________________________________________________________________________________________________________________________________________________________________
8-AMMETER REMAINS AT MAXIMUM CHARGE FOR MORE THAN 30 MINUTES
Thi condition normally re ult if the charger i connected to a battery pack which i of lower y tem voltage
than pecified in the operater manual and / or the charger ca e.
CAUTION!
Do no connec he charger o, or a emp o use he charger on ba ery packs of differen DC vol age
han specified on he fron of he charger. Overhea ing and ransformer burn-ou will resul .
________________________________________________________________________________________________________________________________________________________________________________________________________________________________________________________________________
9-TEST AUTOMATIC TIMER SECTION FOR “DOES NOT TURN OFF”
ADi connect the AC power upply cord and the DC charging plug. Remove the cover and verify that the
control cable a embly lead are ecurely connected in accordance with the correct wiring diagram for
the pecific part number charger.
BU ing the te t kit, check continuity of the green en e lead between the pad on the te t kit in line with the
green wire and where the en e lead connect to the diode terminal. If the circuit i “open”, replace the
control cable a embly.
CConnect the charger DC plug to the charging receptacle and then the AC power cord to turn the charger
on. Remove the automatic timer kit retaining crew and carefully lide the kit out the front of the
charger. Di connect the edge connector from the circuit board and note if the tran former hum cea e
and the ammeter drop to zero. Doe the charger now turn off?
• CHARGER DOES NOT TURN OFF: The control relay ha frozen “ON”. Replace the relay with the
correct part number a pecified on the correct part li t for the pecific part number charger.
• CHARGER TURNS OFF: The automatic timer kit i malfunctioning. Replace the automatic timer kit with
the correct part number a pecified on the correct part li t for the pecific part number charger.
BATTERY CHARGER SERVICE MANUAL
For new, refurbished and used cleaning equipment and supplies visit www.southeasternequipment.net

16 - FORM NO. 56041170 / BATTERY CHARGER SERVICE MANUAL / PARTS LIST
PARTS LIST FOR APA BATTERY CHARGER
PART NUMBER 56206975 24 VOLT 10 AMP MANUAL
120 VAC 60 HZ
TRANSFORMER TEST DIAGRAM
Te t Capacitor Capacitor
Po ition Di connected Connected
Secondary Approx. Approx.
Coil 36 to 44 VAC 54 to 66 VAC
Capacitor Approx.
Coil 395 VAC
A.C. Input - 120 VAC / 60HZ
BATTERY CHARGER PARTS LIST
I em Par No. Q y Descrip ion
* 56206904 1 Heat ink A embly, With Diode
1 56206905 1 Ammeter
2 56206906 1 Timer, 12 Hour
* 56206914 1 Knob, Timer
3 56206907 1 Capacitor, 2.0 MFD, 660 VAC
* 56206908 2 Bu hing, 6N3-4, In ulator For Cord et
5 56206910 1 Cord et, DC, 14/2, 108", Le ter Plug
6 56206912 2 Fu e, 15 AMP, AGC-15
* 56206913 2 Fu eholder, HKP-HH, With 1/4 qd Tab
* = Not Shown
TIMER
WHT
AC
INLET
PLUG
BLK
13
2
1
2
3
4
DIODE
DIODE
FUSE
FUSE
CAPACITOR
RED OR WHT
AMMETER
BLK
TO DC
PLUG
+
-
1
2
3
4
5
6
6
SECONDARY COIL 1
2
3
4
CAPACITOR COIL
SECONDARY
TEST POINTS
CAPACITOR
TEST POINTS
TIMER
WHT
AC
INLET
PLUG
BLK
13
2
TAN
BLK
BLK
TAN
revi ed 8/00
For new, refurbished and used cleaning equipment and supplies visit www.southeasternequipment.net

FORM NO. 56041170 / BATTERY CHARGER SERVICE MANUAL / PARTS LIST - 17
Te t Capacitor Capacitor
Po ition Di connected Connected
Secondary Approx. Approx.
Coil 36 to 44 VAC 54 to 66 VAC
Capacitor Approx.
Coil 370 VAC
A.C. Input - 120 VAC / 60HZ
PARTS LIST FOR APA BATTERY CHARGER
PART NUMBER 56206980 24 VOLT 10 AMP AUTOMATIC
120 VAC 60 HZ
TRANSFORMER TEST DIAGRAM
BATTERY CHARGER PARTS LIST
I em Par No. Q y Descrip ion
* 56206904 1 Heat ink A embly, With Diode
1 56206905 1 Ammeter
2 56206917 1 Electronic Timer A embly
3 56206907 1 Capacitor, 2.0 MFD, 660 VAC
* 56206908 2 Bu hing, 6N3-4, In ulator For Cord et
* 56206982 1 AC Cord Strain Relief
5 56206910 1 Cord et, DC, 14/2, 108", Yellow Le ter Plug
(u ed on 206980)
* 56324306 2 DC Charger Plug Contact
(u ed with SB 50 mall red plug)
6 56206912 2 Fu e, 15 AMP, AGC-15
* 56206913 2 Fu eholder
7 56206919 1 Relay, 24VDC, SP, 15 AMP
* 56206921 1 Te t Kit, E.T. Bypa
* = Not Shown
AC
INLET
PLUG RED
TO DC
PLUG
+
-
4
ELECT.
TIMER
BLK
WHT
RELAY
BRN
GRN
BLK
RED
TRANSFORMER
TAN
BLK
BLK
TAN
DIODE
DIODE
FUSE
FUSE
CAPACITOR
AMMETER
BLK
WHT
BLK
GRN
BRN
2
7
3
1
6
65
6
5
4
3
2
1
RELAY
JUMPER
AC
INLET
PLUG
PRIMARY COIL SECONDARY COIL 1
2
3
4
CAPACITOR COIL
SECONDARY
TEST POINTS
CAPACITOR
TEST POINTS
TAN
BLK
BLK
TAN
revi ed 8/00
For new, refurbished and used cleaning equipment and supplies visit www.southeasternequipment.net

18 - FORM NO. 56041170 / BATTERY CHARGER SERVICE MANUAL / PARTS LIST
Te t Capacitor Capacitor
Po ition Di connected Connected
Secondary Approx. Approx.
Coil 36 to 44 VAC 54 to 66 VAC
Capacitor Approx.
Coil 435 VAC
A.C. Input - 120 VAC / 60HZ
PARTS LIST FOR APA BATTERY CHARGER
PART NUMBER 56372945 24 VOLT 20 AMP MANUAL
120 VAC 60 HZ
TRANSFORMER TEST DIAGRAM
BATTERY CHARGER PARTS LIST
I em Par No. Q y Descrip ion
* 56373047 1 Heat ink A embly, With Diode
1 56373048 1 Ammeter
2 56206906 1 Timer, 12 Hour
* 56206914 1 Knob, Timer
3 56373049 1 Capacitor, 4.0 MFD, 660 VAC
* 56373050 2 Bu hing, 7W-2, In ulator For Cord et
4 56373051 1 Cord et, AC, 14/3, 78", Molded Plug
5 56373053 1 Cord et, DC, 12/2, 108", SB175 Red Plug
6 56373054 1 Fu e A embly
* 56372045 1 Ca e A embly
* 56373046 1 Tran former A embly
* = Not Shown
SECONDARY COIL 1
2
3
4
CAPACITOR COIL
SECONDARY
TEST POINTS
CAPACITOR
TEST POINTS
TIMER
WHT
AC
INLET
PLUG
BLK
13
2
TAN
BLK
BLK
TAN
TIMER
WHT
AC
INLET
PLUG
BLK
13
2
1
2
3
4
DIODE
DIODE
FUSE
ASSY
CAPACITOR
RED OR WHT
AMMETER
BLK
TO DC
PLUG
+
-
1
2
3
4
5
6
For new, refurbished and used cleaning equipment and supplies visit www.southeasternequipment.net

FORM NO. 56041170 / BATTERY CHARGER SERVICE MANUAL / PARTS LIST - 19
Te t Capacitor Capacitor
Po ition Di connected Connected
Secondary Approx. Approx.
Coil 36 to 44 VAC 54 to 66 VAC
Capacitor Approx.
Coil 430 VAC
A.C. Input - 120 VAC / 60HZ
PARTS LIST FOR APA BATTERY CHARGER
PART NUMBER 56372947 24 VOLT 20 AMP AUTOMATIC
120 VAC 60 HZ
TRANSFORMER TEST DIAGRAM
BATTERY CHARGER PARTS LIST
I em Par No. Q y Descrip ion
1 56373056 1 Tran former A embly
* 56373047 1 Heat ink A embly, With Diode
2 56373048 1 Ammeter
3 56373057 1 Electronic Timer A embly
4 56373049 1 Capacitor, 4.0 MFD, 660 VAC
* 56373050 2 Bu hing, 7W-2, In ulator For Cord et
5 56373058 1 Cord et, AC, 14/3, 78", Molded Plug
6 56373053 1 Cord et, DC, 12/2, 108", SB175 Red Plug
7 56373054 1 Fu e A embly
8 56206919 1 Relay, 24VDC, SP, 15 AMP
* 56373059 1 Control Cable A embly
* 56206921 1 Te t Kit, E.T. Bypa
* 56373055 1 Ca e A embly
* = Not Shown
RELAY
JUMPER
AC
INLET
PLUG
PRIMARY COIL SECONDARY COIL 1
2
3
4
CAPACITOR COIL
SECONDARY
TEST POINTS
CAPACITOR
TEST POINTS
TAN
BLK
BLK
TAN
AC
INLET
PLUG RED
TO DC
PLUG
+
-
5
ELECT.
TIMER
BLK
WHT
RELAY
BRN
GRN
BLK
RED
TRANSFORMER
TAN
BLK
BLK
TAN
DIODE
DIODE
CAPACITOR
AMMETER
BLK
WHT
BLK
GRN
BRN
3
8
4
2
76
FUSE
ASSY
1
6
5
4
3
2
1
For new, refurbished and used cleaning equipment and supplies visit www.southeasternequipment.net
This manual suits for next models
29
Table of contents
Other Nilfisk-Advance Batteries Charger manuals