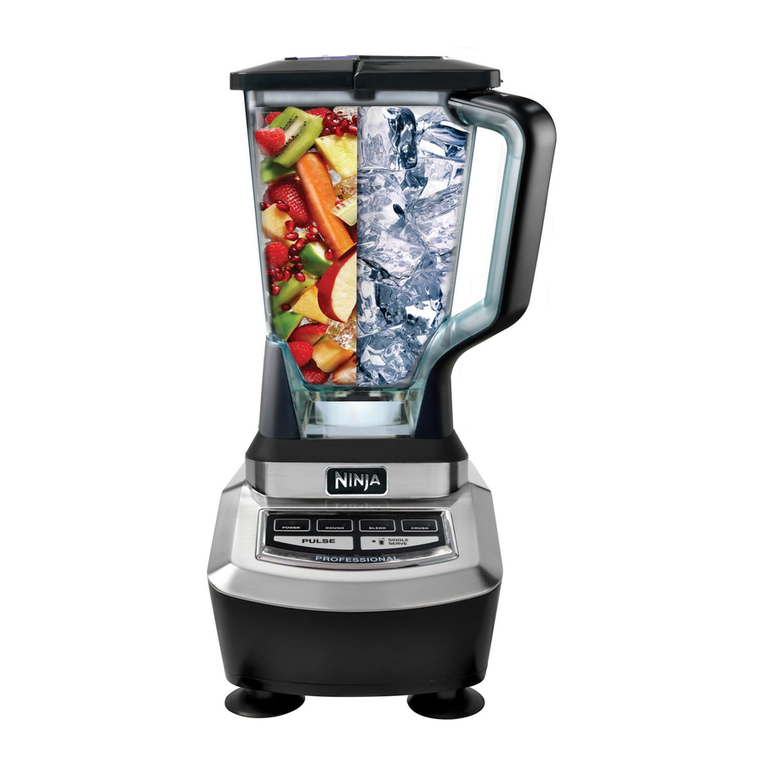
Ninja QB1000C User manual

®
ninjakitchen.com
1 877 646-5288
OWNER’S GUIDE
GUIDE D’UTILISATION
QB1000C

11-877-646-5288
WHEN USING ELECTRICAL APPLIANCES,
BASIC SAFETY PRECAUTIONS SHOULD
ALWAYS BE FOLLOWED, INCLUDING THE
FOLLOWING:
READ ALL INSTRUCTIONS BEFORE
USING YOUR NINJA
®
MASTER PREP
®
PROFESSIONAL.
POLARIZED PLUG
WARNING: To reduce the risk of
electric shock, this appliance has a
polarized plug (one blade is wider than
the other). This plug will fit into a
polarized outlet only one way. If the
plug does not fit fully into the outlet,
reverse the plug. If it still does not fit,
contact a qualified electrician to install
the proper outlet. DO NOT modify the
plug in any way.
WARNING: Extension cords are
not recommended for use with this
product.
WARNING:
TO REDUCE THE RISK OF FIRE, ELECTRIC
SHOCK OR INJURY:
1WARNING: Remove utensils prior to
processing. Failure to remove may
cause the jar to be damaged or to
shatter which may cause personal
injury.
2WARNING: The Blade Assemblies
are sharp, not locked in place and
removable, handle with care. When
handling the Blade Assemblies, always
hold them by the shaft. Failure to do so
will result in a risk of laceration.
3 WARNING: The Blade Assemblies
are sharp and not locked in place.
Remove the splashguard and carefully
remove the Blade Assemblies first,
holding them by the shaft before
pouring. Failure to do so will result in a
risk of laceration.
4 CAUTION: DO NOT blend hot liquids,
doing so may cause excessive pressure
build-up, resulting in risk of the user
being burned.
5To protect against electrical shock, DO NOT
submerge the appliance or allow the power
cord to come into contact with water or any
other liquid.
6DO NOT allow the appliance to be used by
children. Close attention is necessary when
used near children. This is not a toy.
7Never leave an appliance unattended when
inuse.
8Appliance accessories are not intended to
be used in the microwave as it may result in
damage to the accessories.
IMPORTANT SAFETY INSTRUCTIONS
For Household Use Only

English
2
www.ninjakitchen.com
9Remove the Master Pod from the appliance
and unplug the power cord from the
electrical outlet when not in use, before
assembling or disassembling parts and
before cleaning. To unplug, grasp the plug
and pull from the electrical outlet. Never pull
from the power cord.
10 DO NOT abuse the power cord. Never carry
the Master Pod by the power cord or yank it
to disconnect from electrical outlet; instead
grasp the plug and pull to disconnect.
11 DO NOT operate any appliance with a
damaged cord or plug, or after the appliance
malfunctions, has been dropped or
damaged in any manner. This appliance has
no serviceable parts. Return the appliance to
SharkNinja Operating LLC for examination,
repair or adjustment.
12 DO NOT let the power cord hang over
the edge of table or counter or touch hot
surfaces such as the stove.
13 Always use appliance on a dry, level surface.
14 Keep hands, hair, clothing, as well as
utensils out of container while processing to
reduce the risk of severe injury to persons
or damage to the appliance. A scraper may
be used but only when the appliance is not
running.
15 Avoid contact with moving parts.
16 DO NOT attempt to sharpen blades.
17 DO NOT use the appliance if blade
assemblies are bent or damaged.
18 DO NOT expose pitcher or the chopping
bowl to extreme temperature changes.
19 DO NOT use pitcher or chopping bowl if it is
cracked or chipped.
20 To reduce the risk of injury, NEVER operate
the appliance without the splashguard in
place.
21 DO NOT operate this appliance on or near
any hot surfaces (such as gas or electric
burner or in a heated oven).
22 The use of accessory attachments, including
canning jars not recommended by the
manufacturer may cause fire, electrical
shock or risk of personal injury.
23 DO NOT remove the Master Pod before the
Blade Assemblies have stopped turning.
24 DO NOT overfill.
25 DO NOT operate the appliance empty.
26 DO NOT try to defeat the interlock
mechanism. Make sure that the 4-Blade
Assemblies are properly inserted before
operating the appliance.
27 Immediately release the On/Off pulse button
on the Master Pod in the event that the
appliance malfunctions during use.
28 DO NOT operate the appliance for more than
15 seconds.
29 If the appliance overheats, a thermal
switch will become activated and shut off
the motor. To reset, unplug the appliance
and let it cool down for approximately 10
minutes before using again.
30 THIS PRODUCT IS INTENDED FOR
HOUSEHOLD USE ONLY. Do not use
this appliance for anything other than its
intended use. DO NOT use outdoors.
SAVE THESE
INSTRUCTIONS

31-877-646-5288
LORS DE L’UTILISATION D’APPAREILS
ÉLECTRIQUES, DES MESURES DE
SÉCURITÉ DE BASE DOIVENT TOUJOURS
ÊTRE SUIVIES, Y COMPRIS LES
SUIVANTES:
LIRE TOUTES LES DIRECTIVES AVANT
D’UTILISER VOTRE NINJA
MD
MASTER
PREP
MD
PROFESSIONNEL.
AVERTISSEMENT
CONCERNANT LA FICHE POLARISÉE:
afin de réduire le risque de décharges
électriques, cet appareil est muni
d’une fiche polarisée (une lame est
plus large que l’autre). Cette fiche
s’insère dans une prise polarisée dans
un seul sens. Si la fiche ne s’insère pas
entièrement dans la prise, inversez la
fiche. Si la fiche ne s’insère toujours
pas, communiquez avec un électricien
accrédité afin qu’il installe la prise
appropriée. Vous NE DEVEZ PAS
modifier la prise d’aucune façon.
AVERTISSEMENT:
l’utilisation d’une rallonge électrique
n’est pas recommandée pour ce
produit.
AVERTISSEMENT:
AFIN DE RÉDUIRE LES RISQUES D’INCENDIE,
D’ÉLECTROCUTION OU DE BLESSURE:
1AVERTISSEMENT: retirez tout
ustensile avant de transformer des
aliments. Sinon, cela pourrait
endommager le contenant ou le faire
éclater et ainsi causer des blessures.
2AVERTISSEMENT: les jeux de lames
sont aiguisés, amovibles et leur tige non
verrouillée en place; manipulez-les avec
soin. Lorsque vous manipulez les jeux
de lames, tenez-les toujours par la tige.
Ne pas procéder de la sorte augmente le
risque de lacération.
3 AVERTISSEMENT: les jeux de lames
sont tranchants et leurs tiges
respectives ne sont pas verrouillées en
place. Retirez le pare-éclaboussures et
enlevez d’abord soigneusement les jeux
de lames en les tenant par la tige avant
de verser. Ne pas procéder de la sorte
augmente le risque de lacération.
4 MISE EN GARDE: NE MÉLANGEZ PAS
de liquides chauds; cela pourrait
entraîner une accumulation de pression
excessive, ce qui présente un risque de
brûlure pour l’utilisateur.
5Pour éviter les décharges électriques, NE
SUBMERGEZ PAS l’appareil et ne laissez
pas le cordon d’alimentation entrer en contact
avec de l’eau ou tout autre liquide.
6NE LAISSEZ PAS les enfants se servir de
l’appareil. Portez une attention particulière
lorsque l’appareil est utilisé à proximité
d’enfants. Cet appareil n’est pas un jouet.
7Ne laissez jamais un appareil en marche sans
surveillance.
CONSIGNES DE SÉCURITÉ IMPORTANTES
Pour usage domestique seulement

4
www.ninjakitchen.com
Français
8L’utilisation des accessoires de l’appareil est
contre-indiquée dans le micro-ondes, car ils
pourraient subir des dommages.
9
Retirez le socle d’alimentation de l’appareil et
débranchez le cordon d’alimentation lorsque
l’appareil n’est pas utilisé, avant d’assembler ou
de désassembler des pièces ainsi qu’avant de
nettoyer l’appareil. Pour débrancher l’appareil,
tenez la fiche du cordon et tirez vers vous. Ne
tirez jamais en tenant le cordon d’alimentation.
10 PRENEZ SOIN du cordon d’alimentation.
Ne portez jamais le socle d’alimentation par
le cordon d’alimentation et ne tirez pas sur
celui-ci pour débrancher le socle; tirez plutôt
sur la fiche.
11 N’UTILISEZ PAS un appareil dont le cordon
ou la fiche est endommagé ni si l’appareil
ne fonctionne pas bien ni s’il a été échappé
ou endommagé de quelque façon que ce
soit. Cet appareil ne contient aucune pièce
pouvant être réparée. Retournez l’appareil
à SharkNinja Operating LLC aux fins de
vérification, de réparation ou de réglage.
12 NE LAISSEZ PAS le cordon d’alimentation
pendre d’une table ou du comptoir ni toucher
des surfaces chaudes, y compris la cuisinière.
13 Utilisez toujours l’appareil sur une surface
plane sèche.
14 Gardez les mains, les cheveux, les vêtements
et tout ustensile à l’extérieur du socle lors
de la transformation afin de réduire les
risques de blessure grave ou d’endommager
l’appareil. Un grattoir peut être utilisé, mais
uniquement lorsque l’appareil n’est pas en
marche.
15 Évitez d’entrer en contact avec des pièces
mobiles.
16 NE TENTEZ PAS d’aiguiser les lames.
17 N’UTILISEZ PAS l’appareil si les jeux de
lames sont pliés ou endommagés.
18 N’EXPOSEZ PAS le pichet ou le bol du
hachoir à des variations extrêmes de
température.
19 N’UTILISEZ PAS le pichet ou le bol du
hachoir s’ils sont craqués ou ébréchés.
20 Pour réduire les risques de blessure,
N’UTILISEZ JAMAIS l’appareil si le pare-
éclaboussures n’est pas en place.
21 N’UTILISEZ PAS l’appareil sur ou près d’une
surface chaude (comme un brûleur électrique
ou à gaz, ou le dessus d’un four chaud).
22 L’utilisation d’accessoires, y compris de pots
de mise en conserve, non recommandés par
le fabricant pourrait occasionner un incendie
ou une décharge électrique, ou poser un
risque de blessures.
23 NE RETIREZ PAS le socle d’alimentation
avant que les jeux de lames aient cessé de
tourner.
24 NE REMPLISSEZ PAS excessivement le
socle.
25 N’UTILISEZ PAS l’appareil si le socle est vide.
26 NE TENTEZ PAS de forcer le mécanisme
de verrouillage. Assurez-vous que les jeux
de quatre (4)lames sont insérés de manière
appropriée dans l’appareil avant de l’utiliser.
27 Relâchez immédiatement le bouton marche/
arrêt des impulsions du socle d’alimentation
dans l’éventualité d’un défaut de
fonctionnement de l’appareil.
28 N’UTILISEZ PAS l’appareil pendant plus de
15secondes.
29
En cas de surchauffe de l’appareil, un
thermocontacteur sera activé et arrêtera
le moteur. Pour le réinitialiser, débranchez
l’appareil et laissez-le refroidir pendant environ
10minutes avant de l’utiliser de nouveau.
30 CET APPAREIL EST CONÇU POUR UN
USAGE DOMESTIQUE SEULEMENT.
N’utilisez l’appareil qu’aux fins pour lesquelles
il est prévu. N’UTILISEZ PAS cet appareil à
l’extérieur.
CONSERVEZ CES
INSTRUCTIONS.
51-877-646-5288
CE GUIDE PORTE SUR LE NUMÉRO DE MODÈLE:
QB1000C
CARACTÉRISTIQUES TECHNIQUES
Tension électrique: 120V, 60Hz
Puissance: 450W
Capacité du pichet: 48oz (6tasses, 1,5l)
Capacité du bol: 16oz (2tasses, 500ml)
THIS BOOK COVERS MODEL NUMBER:
QB1000C
TECHNICAL SPECIFICATIONS
Voltage: 120V., 60Hz.
Power: 450 Watts
Pitcher Capacity: 48 oz. (6 cups, 1.5 L)
Bowl Capacity: 16 oz. (2 cups, 500 ml)

English
6
www.ninjakitchen.com
Contents
Thank you for
purchasing
the Ninja®
Master Prep®
Professional.
Getting Started ..................................................................................................... 7
Before First Use .................................................................................................... 9
Assembly and Use of the Pitcher............................................................................ 9
Assembly and Use of the Master Prep Bowl.......................................................... 11
Cleaning and Maintenance .................................................................................. 13
Troubleshooting Guide......................................................................................... 14
Replacement Parts.............................................................................................. 14
Warranty & Registration....................................................................................... 25
Table des matières
Merci d’avoir
acheté le NinjaMD
Master PrepMD
professionnel.
Pour commencer ................................................................................................ 15
Avant la première utilisation................................................................................. 17
Assemblage et utilisation du pichet ...................................................................... 17
Assemblage et utilisation du bol Master Prep........................................................ 19
Soins et entretien................................................................................................ 21
Guide de dépannage........................................................................................... 22
Pièces de rechange............................................................................................. 22
Garantie et enregistrement .................................................................................. 26
Français

71-877-646-5288
Getting Started
aMaster Pod
bMaster Prep®Professional Pitcher
with Non-Slip Base
cPitcher Splashguard
dNinja®6-Blade Assembly
ePitcher Storage Lid
a
b
c
d
e
j
i
h
g
f
f Master Prep®Professional Bowl
with Non-Slip Base
gBowl Splashguard
h Upper Chopping Blade Assembly (bowl)
iLower Chopping Blade Assembly (bowl)
j Bowl Storage Lid
kPower Cord (not shown)

English
8
www.ninjakitchen.com
The Ninja®Master Prep®Professional is an indispensable kitchen tool that is perfect for blending, chopping, mixing or
pureeing when preparing your favorite recipes. For best results, be sure to carefully read all the instructions contained in
the manual before using this appliance.
450 Watt Master Pod
The 450 watt power head operates on 120V., 60Hz. electrical power. NEVER allow the Master Pod to become wet when
plugged into an electrical outlet.
WARNING: The Master Pod should never be immersed in water or any other liquid.
CAUTION: Make sure that the Master Pod is unplugged from the electrical outlet and that the Blade
Assemblies have stopped turning before removing from the bowl or the pitcher.
CAUTION: Blade Assemblies are sharp! Use extreme caution when handling the Blade Assemblies. Always
hold them by the shaft. DO NOT attempt to sharpen blades.
IMPORTANT: Never run the appliance empty.

91-877-646-5288
Assembly and Use of the Pitcher
Shaft
1 Review warning and caution statements at the top of
page 10 before proceeding to number 2.
2Place the pitcher on a clean, dry, level surface.
3Holding the Ninja 6-Blade Assembly by the shaft,
place it onto the spindle pin inside the Master Prep®
Professional pitcher. (fig. 1)
WARNING: DO NOT try to place
the Ninja 6-Blade Assembly
onto the Master Pod and
then into the Master Prep®
Professional pitcher. Always
assemble the Ninja 6-Blade
Assembly inside the pitcher.
PLEASE KEEP THESE IMPORTANT SAFEGUARDS
IN MIND WHEN USING THE APPLIANCE:
IMPORTANT: Make sure that the Master Pod is
plugged in for use.
IMPORTANT: Never add ingredients into the
container before placing the Blade Assemblies in
first.
IMPORTANT: Attachments are not
interchangeable.
IMPORTANT: DO NOT attempt to operate the
appliance without the splashguard on.
IMPORTANT: Never run the appliance empty.
IMPORTANT: Appliance accessories are not
intended to be used in the microwave as it may
result in damage to the accessories.
Before First Use
WARNING: If pouring
with the lid or splashguard
removed, ALWAYS remove
the Ninja 6-Blade Assembly
first, holding them by their
shaft. Failure to do so will
result in a risk of laceration.
WARNING: Ninja®6-Blade
Assembly is sharp and not locked
in place. If using the pour spout,
ensure that the splashguard
is fully on the pitcher. Failure
to do so will result in a risk of
laceration.
WARNING: DO NOT immerse the Master Pod into
water or any other liquid.
1Remove all packaging material and labels from the
appliance. Separate/remove all parts from each other.
2Wash the lids, splashguards, bowl, pitcher, and blade
assemblies in warm, soapy water. When washing the
blade assemblies use a dish-washing utensil with a
handle to avoid direct hand contact with blades.
WARNING: Handle the blade assemblies with care
when washing, as the blades are sharp.
3Handle the blade assemblies with care to avoid contact
with sharp edges. Rinse and air dry thoroughly.
4The pitcher, bowl, lids, splashguards, and Blade
Assemblies are all dishwasher safe. It is recommended
that the lids, spashguards and blade assemblies
be placed on the top rack. Ensure that the blade
assemblies are removed from the pitcher and the bowl
before placing in the dishwasher.
5Wipe the motor base clean with a damp cloth.
Fig. 1

English
10
www.ninjakitchen.com
4Add the ingredients to be processed into the Master
Prep®Professional pitcher.
IMPORTANT: Never add ingredients into the Master
Prep Professional pitcher before placing the blade
assembly in first.
5Place the pitcher splashguard onto the top of the
Master Prep Professional pitcher. (fig. 2)
6Place the Master Pod on top of the pitcher splashguard
making sure that it is securely in place. (fig. 3) DO
NOT attempt to operate the appliance without the
safety splashguard in place.
7To start the appliance, plug the power cord into the
electrical outlet, securely hold power head while
operating and press on the on/off pulse button located
on the top of the power head. (fig. 4)
8Hold the Master Prep Professional pitcher firmly while
depressing the on/off pulse button to ensure the unit
stays in place.
NOTE: DO NOT operate the appliance continuously for
more than 15 seconds at a time.
WARNING: Handle the Ninja®6-Blade Assembly with care, as the blades are sharp.
WARNING: Remove utensils prior to processing. Failure to remove may cause the pitcher to be damaged or
to shatter, which may cause personal injury.
WARNING: DO NOT try to place the Ninja 6-Blade Assembly onto the Master Pod and then into the pitcher.
WARNING: DO NOT attempt to operate the appliance without the safety splashguard in place.
WARNING: Never leave the appliance unattended while in use.
CAUTION: DO NOT blend hot liquids, doing so may cause excessive pressure buildup, resulting in risk of
the user being burned.
IMPORTANT: Make sure that the Master Pod is plugged in for use.
Fig. 2
9 To stop the appliance, remove your fingers from the On/
Off pulse button.
10 In order to obtain a better quality of chopping, operate
the appliance by using the “pulse” method.
11 Make sure that the Ninja 6-Blade Assembly has
stopped completely before removing the Master Pod.
12 If the ingredients stick to the side of the Master Prep®
Professional pitcher, stop the appliance, remove the
Master Pod and the splashguard. Use a spatula to
dislodge the pieces and then replace the splashguard
and the Master Pod. Continue processing.
13 Depending on the consistency of the contents, use the
pouring spout to empty liquid contents.
14 For thicker consistencies, first remove the pitcher
splashguard. Then, carefully remove the Ninja 6-Blade
Assembly by the top of the shaft. Place blade assembly
away from the work area to avoid accidental contact.
Finally, empty contents from the pitcher.
HINTS & TIPS FOR USING YOUR NINJA®MASTER
PREP®PROFESSIONAL
•To crush ice into snow, start by using short pulses to
break up large chunks. Continue until snow is achieved.
Fig. 3 Fig. 4

11 1-877-646-5288
Assembly and Use of the Master Prep®Bowl
WARNING: Handle the Upper and Lower Chopping Bowl Blade Assemblies with care, as the blades are
sharp.
WARNING: Remove utensils prior to processing. Failure to remove may cause the bowl to be damaged or to
shatter, which may cause personal injury.
WARNING: DO NOT try to place the Blade Assemblies onto the Master Pod and then into the bowl.
WARNING: DO NOT attempt to operate the appliance without the safety splashguard in place.
WARNING: DO NOT crush ice in Master Prep Bowl or damage may occur to the unit.
WARNING: Never leave the appliance unattended while in use.
WARNING: Upper and Lower Chopping Bowl Blade Assemblies are loose and not locked in place. Make
sure to remove the Chopping Blade Assembly before emptying contents of processor bowl.
IMPORTANT: Make sure that the Master Pod is plugged in for use.
WARNING: DO NOT try to place the Chopping
Blade Assembly onto the Master Pod and then
into the Master Prep bowl.
1 Review warning and caution statements at the top of
page before proceeding to number 2.
2 Place the Master Prep bowl on a clean, dry, level
surface.
3 Holding the Lower Chopping Blade Assembly by the
shaft, place it over the spindle pin inside the Master
Prep bowl. (fig. 1)
4 Carefully insert the Upper Chopping Blade Assembly
over the Lower Chopping Blade Assembly rotating it
until it locks onto the Lower Chopping Blade Assembly.
(fig. 2)
IMPORTANT: Always assemble the Chopping
Blade Assembly inside the container.
Shaft
Fig. 1 Fig. 2

English
12
www.ninjakitchen.com
11 In order to obtain a better quality of chopping, operate
the appliance by using the “pulse” method.
12 Make sure that the Chopping Blade Assembly has
stopped completely before removing the Master Pod.
13 If the ingredients stick to the side of the Master Prep
bowl, stop the appliance, remove the Master Pod and
the splashguard. Use a spatula to dislodge the pieces
and then replace the splashguard and the Master Pod.
Continue processing.
14 Upper and Lower Chopping Bowl Blade Assemblies are
loose and not locked in place. Remove the Chopping
Bowl Blade Assembly by its shaft before you empty the
contents of the Master Prep bowl.
HINTS & TIPS FOR USING YOUR NINJA®
MASTER PREP
• The Chopping Bowl Blade Assembly can be used for
chopping meat, fish, vegetables, cheese etc.
• For mincing, chopping and pureeing, increase the
length of pulses.
• For coarse chopping, use short, quick pulses and
monitor food texture.
• Pre-cut larger pieces to make them fit into the Master
Prep. When chopping hard foods (e.g. meat, cheese)
cut into 1-inch cubes.
5 Place the food that you want to process into the Master
Prep bowl.
IMPORTANT: Never add ingredients into the
Master Prep bowl before placing the Upper and
Lower Chopping Bowl Blade Assemblies in first.
NOTE: DO NOT add more than 2 cups dry or 1 cup
liquid ingredients as this will strain the motor and may
cause overflow.
6Place the splashguard on the bowl. (fig. 3)
7Place the Master Pod on top of the splashguard making
sure that it is securely in place. (fig. 4) DO NOT
attempt to operate the appliance without the safety
splashguard in place.
8To start the appliance, plug the power cord into the
electrical outlet, securely hold Master Pod while
operating and press on the On/Off pulse button located
on the top of the Master Pod. (fig. 5)
9Hold the Master Prep®bowl firmly while depressing the
On/Off pulse button to ensure the unit stays in place.
NOTE: DO NOT operate the appliance continuously for
more than 15 seconds at a time. Be careful not to over
process. For coarsely chopped foods, use repeated short
pulsing action until the desired consistency is reached.
10 To stop the appliance, remove your fingers from the
On/Off pulse button.
Fig. 3 Fig. 4 Fig. 5

13 1-877-646-5288
Care & Maintenance
HOW TO STORE
1Store the Master Prep®with the Upper and Lower
Chopping Blade Assembly inside the Bowl and the
6-Blade Assembly inside the Pitcher. Place the
splashguards on the containers. Store the rest of the
attachments in a safe place where they will not be
damaged and will not cause a hazard. Loosely wrap the
power cord around the Master Pod.
RESETTING THE MOTOR THERMOSTAT
The Ninja®Master Prep Professional features a unique
safety system which prevents damage to the unit’s motor
and drive system should you inadvertently overload your
appliance. If the appliance is being overloaded, the motor
will stop. To reset the appliance, follow the resetting
procedure below:
1Unplug the appliance from the electrical outlet.
2Remove the Master Pod and splashguard and empty
the container and ensure that no food is jamming the
blade assembly.
3Allow the appliance to cool for approximately 10
minutes.
4Replace the splashguard and Master Pod onto the
container and re-plug the appliance into the electrical
outlet.
5Proceed to use the appliance as before making sure not
to exceed the recommended maximum capacities.
HOW TO CLEAN
WARNING: DO NOT immerse the Master Pod into
water or any other liquid.
CAUTION: Make sure that the Master Pod is
unplugged from the power source before inserting
or removing any attachment and before cleaning.
1Separate/remove all parts from each other.
2Hand Washing: Wash the lids, splashguards, pitcher,
bowl and Blade Assemblies in warm, soapy water. When
washing the Blade Assemblies, use a dish-washing
utensil with a handle to avoid direct hand contact with
blades. Handle the Blade Assemblies with care to avoid
contact with sharp edges. Rinse and air dry thoroughly.
Dishwasher: The pitcher, bowl, lids, splashguards,
and Blade Assemblies are all dishwasher safe. It is
recommended that the lids and blade assemblies be
placed on the top rack. Ensure the blade assemblies are
removed from the pitcher and the bowl before placing in
the dishwasher.
WARNING: Handle the Blade Assemblies with care
when washing, as the blades are sharp. Contact
with the blades’ edges can result in laceration.
3Wipe the motor base clean with a damp cloth.
Please call customer service if any servicing needs to
be performed on the appliance at 1-877-646-5288.

English
14
www.ninjakitchen.com
PROBLEMS POSSIBLE REASONS & SOLUTIONS
Motor Doesn’t Start or Blade
Assembly Doesn’t Rotate.
Check that the bottom of motor head is clean and there is no food blocking
connection when placing on containers.
There is too much food in the container.
The unit has overheated or overloaded. Unplug and wait approximately 10
minutes before using again.
Make sure the splashguard is securely on container.
Make sure the Master Pod is securely placed on splashguard.
Check that the plug is securely inserted into the electrical outlet.
Check fuse or breaker. Replace fuse/reset breaker.
Food is Unevenly Chopped.
Either you are chopping too much food at one time, or the pieces are not small
enough. Try cutting the food into smaller pieces of even size and processing
smaller amounts per batch.
Food is Chopped Too Fine or is
Too Watery.
The food has been over processed. Use brief pulses or process for shorter time.
Let blade assembly stop completely between pulses.
Food Collects On Splashguard or
On the Sides of the Master Prep
Pitcher or Master Prep Bowl.
You may be processing too much food. Turn the machine off. When the blade
assembly stops rotating, remove the Master Pod and the splashguard. Remove
some of the food being processed.
You Cannot Achieve Snow From
Solid Ice.
Do not use ice that has been sitting out or has started to melt. Be sure to use
short pulses in the beginning to break up large pieces.
Replacement Parts
ORDERING REPLACEMENT PARTS
To order additional parts and attachments, please visit our website: www.ninjakitchen.com
or feel free to contact customer service: 1-877-646-5288.
Troubleshooting Guide

15 1-877-646-5288
Pour commencer
aSocle d’alimentation
bPichet Master PrepMD professionnel avec base
antidérapante
cPichet pare-éclaboussures
dJeu de sixlames NinjaMD
eCouvercle de rangement du pichet
a
b
c
d
e
j
i
h
g
f
f Bol Master PrepMD professionnel avec
base antidérapante
gBol pare-éclaboussures
h Jeu de lames de hachage supérieur (bol)
iJeu de lames de hachage inférieur (bol)
j Couvercle de rangement du bol
kCordon d’alimentation (non illustré)

16
www.ninjakitchen.com
Français
Le NinjaMD Master PrepMD professionnel est un outil de cuisine indispensable idéal pour mélanger, hacher ou réduire
en purée les aliments lorsque vous préparez vos recettes préférées. Pour obtenir de meilleurs résultats, assurez-vous
de lire attentivement toutes les directives du présent guide avant d’utiliser l’appareil.
Socle d’alimentation de 450W
L’ensemble-moteur de 450W nécessite une énergie électrique de 120V, 60Hz. Veillez à ce que le socle d’alimentation
NE SOIT JAMAIS mouillé lorsque branché à une prise électrique.
AVERTISSEMENT: le socle d’alimentation ne doit jamais être immergé dans l’eau ou tout autre liquide.
AVERTISSEMENT: assurez-vous que le socle d’alimentation est débranché et que les jeux de lames ont
cessé de tourner avant de le retirer du bol ou du pichet.
AVERTISSEMENT: les jeux de lames sont aiguisés! Faites preuve d’une extrême prudence lorsque vous
manipulez les jeux de lames. Tenez-les toujours par la tige. NE TENTEZ PAS d’aiguiser les lames.
IMPORTANT: ne mettez jamais l’appareil en marche s’il est vide.

17 1-877-646-5288
Assemblage et utilisation
dupichet
Tige
1 Passez en revue les avertissements et les mises
en garde au haut de la page18 avant de passer au
numéro2.
2Placez le pichet sur une surface plane, propre et sèche.
3Placez, en tenant le jeu de sixlames Ninja par la
tige, sur l’axe de rotation du pichet Master PrepMD
professionnel. (fig.1)
AVERTISSEMENT: NE TENTEZ
PAS de placer le jeu de
sixlames de Ninja sur le
socle d’alimentation , puis
dans le pichet Master PrepMD
professionnel. Assemblez
toujours le jeu de sixlames de
Ninja à l’intérieur du pichet.
VEUILLEZ TOUJOURS GARDER CES CONSIGNES
IMPORTANTES À L’ESPRIT LORSQUE VOUS
UTILISEZ L’APPAREIL:
IMPORTANT: assurez-vous que le socle
d’alimentation est branché avant d’utiliser l’appareil.
IMPORTANT: ne mettez jamais d’ingrédients dansle
contenant avant d’avoir assemblé les jeuxde lames.
IMPORTANT: les accessoires ne sont pas
interchangeables.
IMPORTANT: NE TENTEZ PAS d’utiliser l’appareil
sans le pare-éclaboussures.
IMPORTANT: ne mettez jamais l’appareil en marche
s’il est vide.
IMPORTANT: l’utilisation des accessoires de
l’appareil est contre-indiquée dans le micro-ondes,
car ils pourraient subir des dommages.
Avant la première utilisation
AVERTISSEMENT: si vous
versez le contenu sans le
couvercle ou le pare-
éclaboussures, retirez
TOUJOURS le jeu de
sixlames de Ninja d’abord,
en le tenant par la tige. Ne pas procéder de la sorte
augmente le risque de lacération.
AVERTISSEMENT: le jeu de sixlames de
Ninja
MD
est coupant et la tige n’est pas
verrouillée en place. Si vous utilisez
le bec verseur, assurez-vous que
le pare-éclaboussures recouvre
entièrement le pichet. Ne pas
procéder de la sorte augmente
lerisque de lacération.
AVERTISSEMENT: N’IMMERGEZ PAS le socle
d’alimentation dans l’eau ou tout autre liquide.
1Retirez tous les matériaux d’emballage et les étiquettes
de l’appareil. Séparez et retirez toutes les pièces.
2Lavez les couvercles, les pare-éclaboussures, le bol, le
pichet et les jeux de lames à l’eau chaude savonneuse.
Lavez les jeux de lames avec une brosse à vaisselle
munie d’une poignée pour éviter tout contact direct
avec les lames.
AVERTISSEMENT: les jeux de lames sont
coupants; manipulez-les avec soin lorsque vous
les lavez.
3Manipulez les jeux de lames avec précaution pour éviter
de toucher les bords coupants. Rincez et faites bien
sécher à l’air.
4Le pichet, le bol, les couvercles, les pare-éclaboussures
et les jeux de lames peuvent être mis au lave-vaisselle.
Nous vous recommandons de placer les couvercles, les
pare-éclaboussures et les jeux de lames dans le panier
supérieur. Veillez à retirer les jeux de lames du pichet
etdu bol avant de les placer dans le lave-vaisselle.
5Essuyez le socle moteur avec un chiffon humide.
Fig.1

18
www.ninjakitchen.com
Français
4Mettre les ingrédients à transformer dans le pichet
Master PrepMD professionnel.
IMPORTANT: ne mettez jamais d’ingrédients dans
le pichet Master Prep professionnel avant d’y avoir
assemblé le jeu de lames.
5Placez le pare-éclaboussures du pichet sur le dessus
du pichet Master Prep professionnel. (fig.2)
6Placez le socle d’alimentation sur le dessus du pare-
éclaboussures du pichet en vous assurant qu’il est bien
maintenu en place. (fig.3) NE TENTEZ PAS d’utiliser
l’appareil sans le pare-éclaboussures.
7Pour mettre l’appareil en marche, branchez le
cordon d’alimentation dans la prise électrique, tenez
fermement l’ensemble-moteur lorsque vous l’utilisez
et appuyez sur le bouton marche/arrêt des impulsions
situé sur le dessus de l’ensemble-moteur. (fig.4)
8Tenez le pichet Master Prep professionnel fermement
tout en appuyant sur le bouton marche/arrêt des
impulsions pour vous assurer que l’appareil ne
bougepas.
REMARQUE: N’UTILISEZ PAS l’appareil pendant plus
de 15secondes à la fois.
9 Pour arrêter d’utiliser l’appareil, retirez votre doigt du
bouton marche/arrêt des impulsions.
AVERTISSEMENT: le jeu de sixlames NinjaMD est coupant; manipulez-le avec soin.
AVERTISSEMENT: retirez tout ustensile avant de transformer des aliments. Sinon, cela pourrait
endommager le pichet ou le faire éclater et ainsi causer des blessures.
AVERTISSEMENT: NE TENTEZ PAS de placer le jeu de sixlames Ninja sur le socle d’alimentation , puis
dans le pichet.
AVERTISSEMENT: NE TENTEZ PAS d’utiliser l’appareil sans le pare-éclaboussures.
AVERTISSEMENT: ne laissez jamais l’appareil en marche sans surveillance.
AVERTISSEMENT: NE MÉLANGEZ PAS de liquides chauds; cela pourrait provoquer une accumulation de
pression excessive, ce qui présente un risque de brûlure pour l’utilisateur.
IMPORTANT: assurez-vous que le socle d’alimentation est branché avant d’utiliser l’appareil.
Fig.2
10 Afin améliorer le hachage des aliments, utilisez
l’appareil en mode «impulsions».
11 Assurez-vous que le jeu de sixlames Ninja a
complètement cessé de tourner avant de retirer le socle
d’alimentation .
12 Si les ingrédients collent aux parois du pichet Master
PrepMD professionnel, arrêtez l’appareil et retirez le
socle d’alimentation et le pare-éclaboussures. Utilisez
une spatule pour déloger les aliments collés aux parois;
remettez ensuite en place le pare-éclaboussures et le
socle d’alimentation . Poursuivez la transformation des
aliments.
13 En fonction de la consistance des aliments transformés,
utilisez le bec verseur pour vider le contenu liquide du
pichet.
14 Pour les aliments transformés à consistance plus
épaisse, retirez d’abord le pare-éclaboussures. Puis,
enlevez délicatement le jeu de sixlames Ninja par le
haut de la tige. Placez le jeu de lames loin de la zone de
travail afin d’éviter tout contact accidentel. Enfin, videz
le contenu du pichet.
TRUCS ET CONSEILS POUR UTILISER VOTRE
NINJAMD MASTER PREPMD PROFESSIONNEL
•Pour broyer de la glace, commencez par de courtes
impulsions pour obtenir de gros morceaux. Poursuivez
jusqu’à obtention d’une consistance poudreuse.
Fig.3 Fig.4

19 1-877-646-5288
Assemblage et utilisation du bol Master PrepMD
AVERTISSEMENT: manipulez les jeux de lames supérieur et inférieur du bol du hachoir avec soin, puisque
les lames sont tranchantes.
AVERTISSEMENT: retirez tout ustensile avant de transformer des aliments. Sinon, cela pourrait
endommager le bol ou le faire éclater et ainsi causer des blessures.
AVERTISSEMENT: NE TENTEZ PAS de placer les jeux de lames sur le socle d’alimentation , puis dans le
pichet.
AVERTISSEMENT: NE TENTEZ PAS d’utiliser l’appareil sans le pare-éclaboussures.
AVERTISSEMENT: NE BROYEZ PAS de la glace dans le bol Master Prep ou vous pourriez endommager
l’appareil.
AVERTISSEMENT: ne laissez jamais l’appareil en marche sans surveillance.
AVERTISSEMENT: les jeux de lames supérieur et inférieur du bol du hachoir ne sont ni serrés ni verrouillés
en place. Assurez-vous de retirer les jeux de lames du bol du hachoir avant de vider le contenu du bol à
transformation.
IMPORTANT: assurez-vous que le socle d’alimentation est branché avant d’utiliser l’appareil.
AVERTISSEMENT: NE TENTEZ PAS de placer les
jeux de lames sur le socle d’alimentation , puis
dans le bol Master Prep.
1 Passez en revue les avertissements et les mises en
garde au haut de la page avant de passer au numéro2.
2 Placez le bol Master Prep sur une surface plane, propre
et sèche.
3 Placez, en tenant le jeu de lames inférieur du bol du
hachoir par la tige, sur l’axe de rotation à l’intérieur du
bol Master Prep. (fig.1)
4 Insérez soigneusement le jeu de lames supérieur du
bol du hachoir par-dessus le jeu de lames inférieur en
le faisant tourner jusqu’à ce qu’il se verrouille dessus.
(fig.2)
IMPORTANT: assemblez toujours les jeux
de lames du bol du hachoir à l’intérieur du
contenant.
Tige
Fig.1 Fig.2
Table of contents
Languages:
Other Ninja Blender manuals

Ninja
Ninja BL300 User manual

Ninja
Ninja BL710WM User manual

Ninja
Ninja BL490ANZ User manual

Ninja
Ninja BN300 Series User manual

Ninja
Ninja BN750ME User manual

Ninja
Ninja Ninja Pulse BL205 User manual

Ninja
Ninja FOODI SS300 Series User manual

Ninja
Ninja BL740 User manual

Ninja
Ninja BL770 series User manual

Ninja
Ninja BL642UK User manual

Ninja
Ninja Nutri BL480UK User manual

Ninja
Ninja Nutri BL480 Series User manual

Ninja
Ninja BL770NZ User manual

Ninja
Ninja BN750UK User manual

Ninja
Ninja BL492ANZ User manual

Ninja
Ninja FOODI SS401 User manual

Ninja
Ninja BL800 User manual

Ninja
Ninja NJ601AMZ User manual

Ninja
Ninja BL682Q Series User manual

Ninja
Ninja BL680A User manual