Ninka Qanto User manual
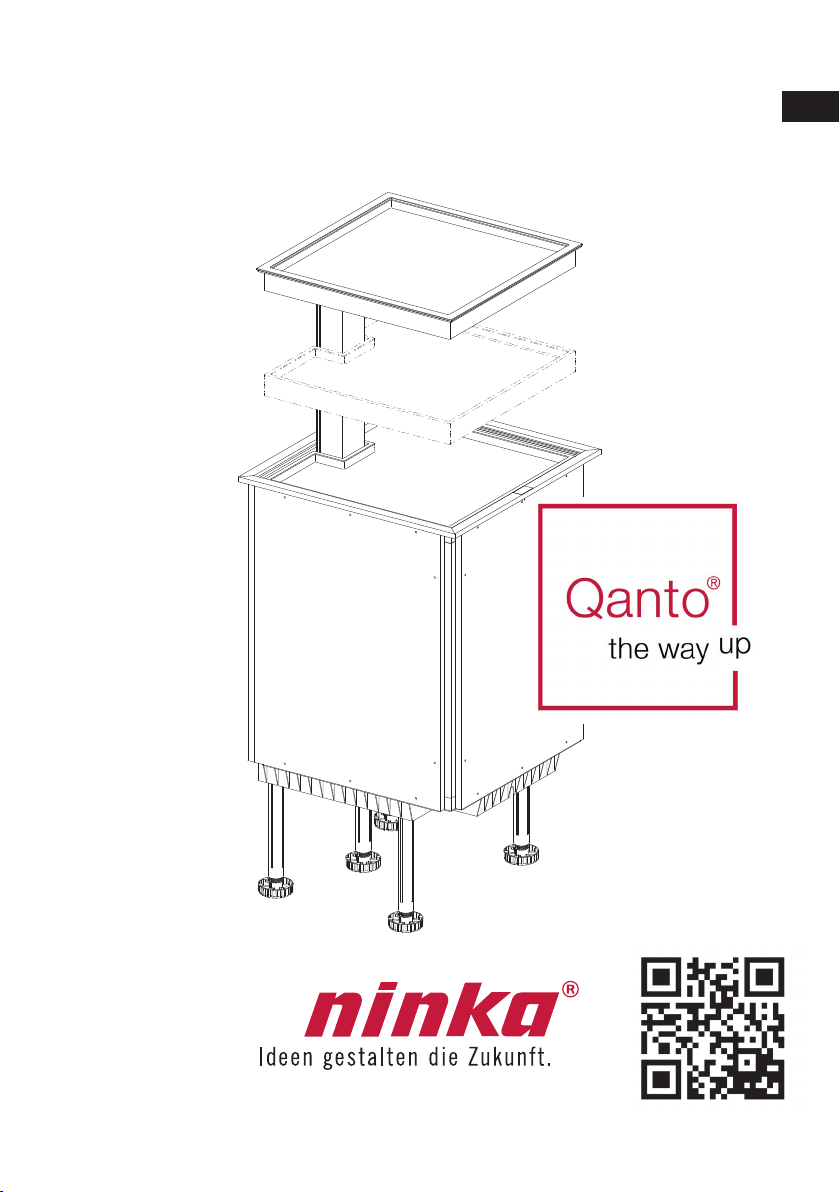
Instructions for use
Instrucciones de uso
Mode d’emploi
US
Qanto_Id_A5_ 0000.50.65062 - US
Reproduction, even in excerpts, is permitted only with the written permission of Ninkaplast GmbH.
Ninguna parte de este manual puede ser reproducida sin el consentimiento escrito de Ninkaplast GmbH.
Toute reproduction, même par extrait, n’est autorisée qu’avec le consentement écrit de Ninkaplast GmbH.
English 2
Espanõl 34
Français 66

2
US
Qanto_Id_A5_ 0000.50.65062-US
Contents:
1. Explanation of symbols......................................................4
2. Safety instructions .............................................................5
3. General information ...........................................................8
3.1 Designation of the device..........................................8
3.2 Intended use..............................................................8
3.3 Versions (installation on left/right) .............................8
4. Technical data....................................................................9
5. Assembly of Qanto.............................................................10
5.1 General assembly instructions ..................................10
5.2 Delivery......................................................................11
6. Operation of Qanto ............................................................12
6.1 Electrical system........................................................12
6.2 Control element .........................................................12
6.3 Safety cut-off .............................................................14
6.4 Lighting ......................................................................15
6.5 Height adjustment of the middle tray.........................16
6.6 Height adjustment of trays.........................................19
6.7 Gap adjustment of trays ............................................21
6.8 Initialisation................................................................23

3
US
Qanto_Id_A5_ 0000.50.65062-US
7. Maintenance and care .......................................................24
8. Warranty and guarantee ....................................................24
8.1 Guarantee..................................................................24
8.2 Spare parts................................................................25
8.3 Repair ........................................................................26
9. Disassembly/assembly ......................................................26
9.1 Exchange of the LED lighting....................................27
10. Recycling/disposal..............................................................29
11. Troubleshooting..................................................................33
4
US
Qanto_Id_A5_ 0000.50.65062-US
1. Explanation of symbols
DANGER indicates a hazardous situation which, if not avoided,
will result in death or serious injury.
WARNING indicates a hazardous situation which, if not avoided,
could result in death or serious injury.
CAUTION indicates a hazardous situation which, if not avoided,
could result in minor or moderate injury.
NOTICE is used to address practices not related to physical injury.
safety-related instructions or procedures.
DANGER
!
WARNING
!
CAUTION
!
NOTICE
SAFETY
INSTRUCTIONS
5
US
Qanto_Id_A5_ 0000.50.65062-US
2. Safety instructions
•The Qanto kitchen cabinet has been built according to state-
of-the-art technology and recognised safety-related regulations.
People can still be injured if the safety instructions in these in-
structions for use are not observed. Carefully store these in-
structions for use for later reference. If Qanto is passed on to
a third party, these instructions for use must be handed over as
well.
•
damage. Read all safety instructions before using the Qanto.
•Connect Qanto only to a properly grounded socket.
•
•Keep children away from the lifting system.
•Keep the cord away from heated surfaces.
•Do not use the drive to lift people. During operation, do not put
your weight on or lean against the system.
•Careful monitoring is required if Qanto is used by or in the
vicinity of children or disabled persons.
WARNING
!
Never operate this furnishing if it has a damaged cord or plug,
if it is not working properly, if it has been dropped or damaged, or
dropped into water. Return the furnishing to a service center for
examination and repair.
6
US
Qanto_Id_A5_ 0000.50.65062-US
•Qanto may be used by children 8 years of age and older,
people with limited physical, sensory or mental aptitude or lack
of experience and/or knowledge only if they are supervised or
have been instructed in the safe use of Qanto and understand
the resulting risks.
•Unplug from outlet before putting on or taking off parts.
•Careful monitoring is required if cleaning and user mainte-
nance is performed by children.
•
clearance for the movement of the lifting system. When extend-
ing the lifting system, observe a clearance of at least 7.87” (200
mm) to other cabinets or shelves at the top and both sides of
Qanto.
•Do not place or operate appliances that can cause high tem-
peratures (e.g., toasters), high amounts of moisture (e.g., elec-
tric kettles) or high dynamic movement loads (e.g., food proces-
sors) on the trays.
•Use Qanto only for the purpose described in these instruc-
tions. Do not use accessory devices that have not been recom-
mended by the manufacturer.
•
CAUTION
!
7
US
Qanto_Id_A5_ 0000.50.65062-US
•Do not overload the drive; make sure that the maximum
weight load per tray does not exceed the total load on any ac-
count.
•Do not use Qanto outdoors.
•Never drop or insert any object into any opening.
•Operate the lifting system only with the trays in place.
•Downward movement is possible only if the upper trays are in
place. The trays can be moved only when the button is pressed.
If the upper trays shift/cant during the downward movement,
the system stops the downward movement immediately. In this
situation, the system permits upward movement only.
NOTICE

8
US
Qanto_Id_A5_ 0000.50.65062-US
3.1 Designation of the device
The kitchen cabinet is called Qanto.
3.2 Intended use
Qanto is an enclosed cabinet in which trays can be lifted
and lowered using a lifting system.
3.3 Versions
Qanto is suitable for “left” and/or “right” installation.
Qanto is equipped with 2 or, alternatively, 3 trays.
3. General information
9
US
Qanto_Id_A5_ 0000.50.65062-US
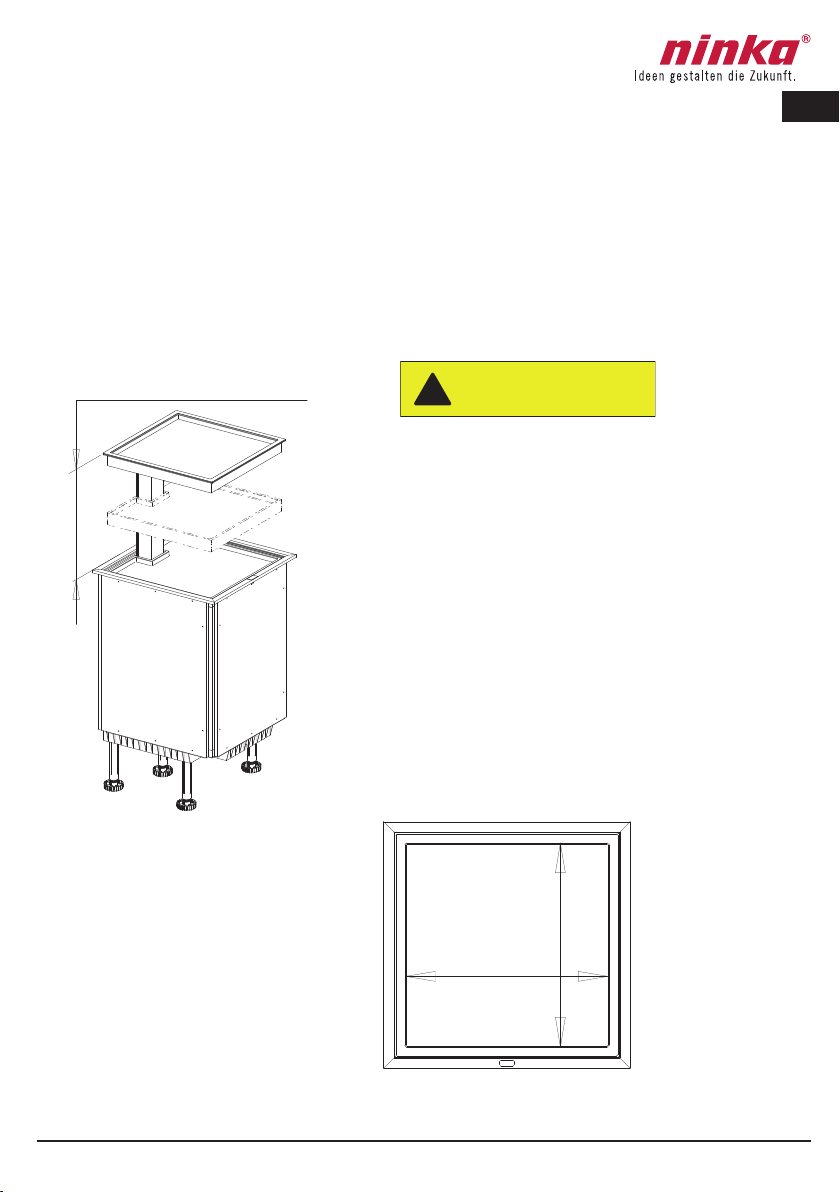
4.Technical data
Lifting 19,69“ (500 mm)
18,66“
(474 mm)
Top tray: max. load of 22 lbs. (10 kg)
Middle tray: max. load of 22 lbs. (10 kg)
Bottom tray: max. load of 33 lbs. (15 kg)
Inner dimensions of tray
Mains connection 120 V / 60 Hz / 15A
CAUTION
!

10
US
Qanto_Id_A5_ 0000.50.65062-US
5. Assembly of Qanto
5.1 General assembly instructions
Anyone who performs connection or assembly work on Qanto or
uses Qanto must have access to these instructions for use. Fol-
low these instructions. Non-observance of the above mentioned
instructions can lead to accidents resulting in severe personal
injury.
If the product is visibly damaged, it must not be installed.
clearance for the movement of the lifting system. When Qanto is
extended upward and to both sides, a clearance of about 7,88”
(200 mm) to other cabinets or shelving must be observed.
A clearance of 11,82” (300 mm) must be observed between Qan-
to and a gas stove.
The electrical system of Qanto must be accessible (e.g., a dou-
ble socket under the cabinet near the base).
Make sure the cables are undamaged.
Before connecting Qanto to the power mains, you must check
whether the voltage on the control unit is correct.
If the control unit causes unusual noises or odours during opera-
tion, interrupt the power supply.
WARNING
!
11
US
Qanto_Id_A5_ 0000.50.65062-US
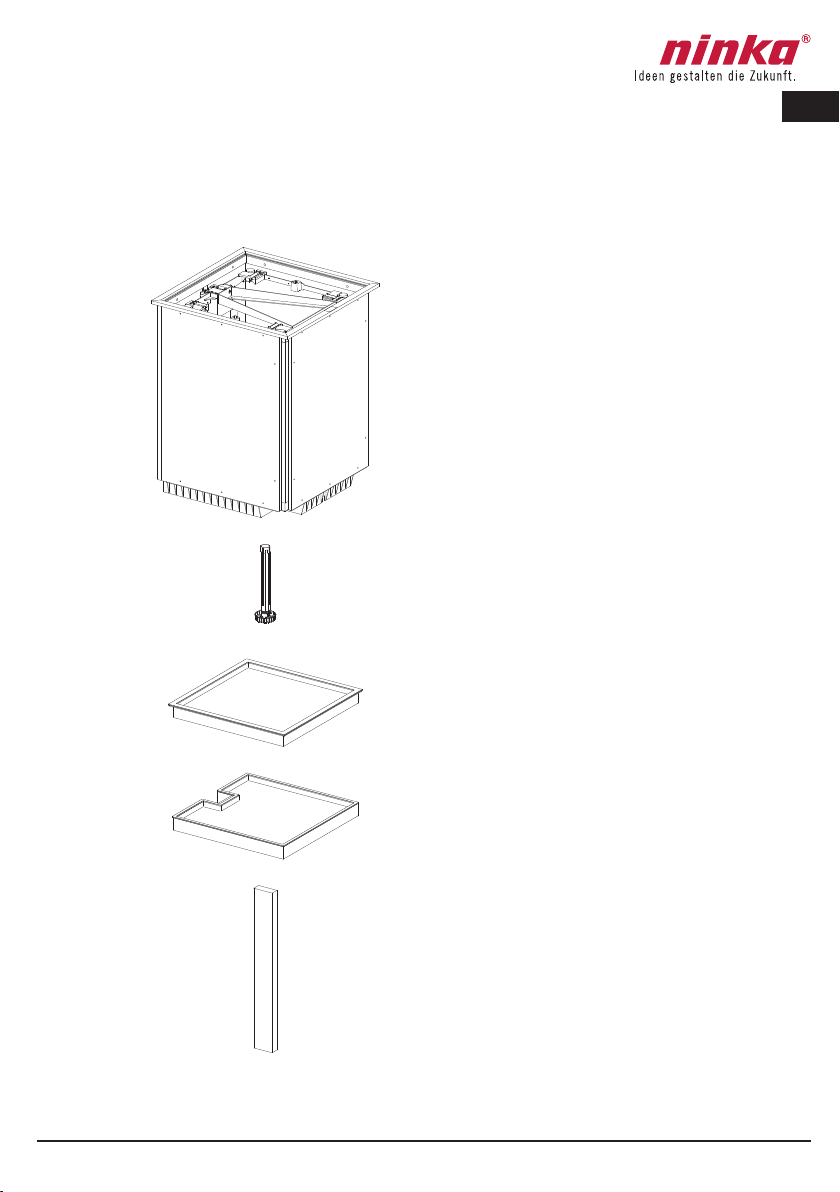
1x
1x
5x
4x
1x (2x)
5.2 Scope of supply
Cabinet with lifting system
Adjustable feet
Top tray
Bottom tray (middle tray:
optional)
Spacer bars: optional
12
US
Qanto_Id_A5_ 0000.50.65062-US
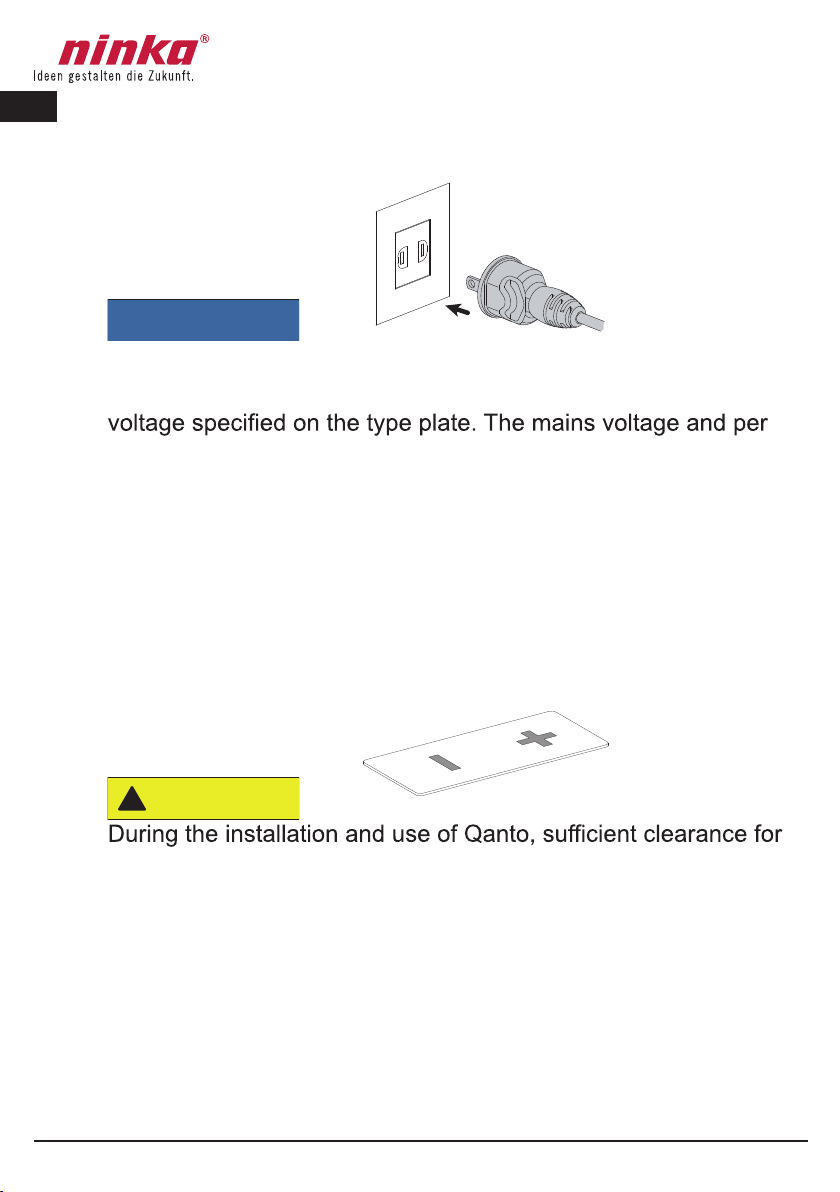
6.1 Electrical system
Before connecting the electrical drives to the in-house power
mains, compare the voltage of the power mains with the input
-
missible input voltage must be identical. If not, Qanto must not
be connected. Please contact your specialist dealer.
6.2 Control element
the movement of the lifting system must be observed so that no
risks arise for users and other people in the vicinity.
The on-period must not exceed 6 minutes an hour or a maxi-
mum of 2 minutes in continuous operation. This can lead to
an overheating of the motor, brake and spindle nut. When the
on-period is exceeded, the service life of the lifting column can
be considerably reduced.
6. Operation of Qanto
NOTICE
CAUTION
!
13
US
+
-
Qanto_Id_A5_ 0000.50.65062-US
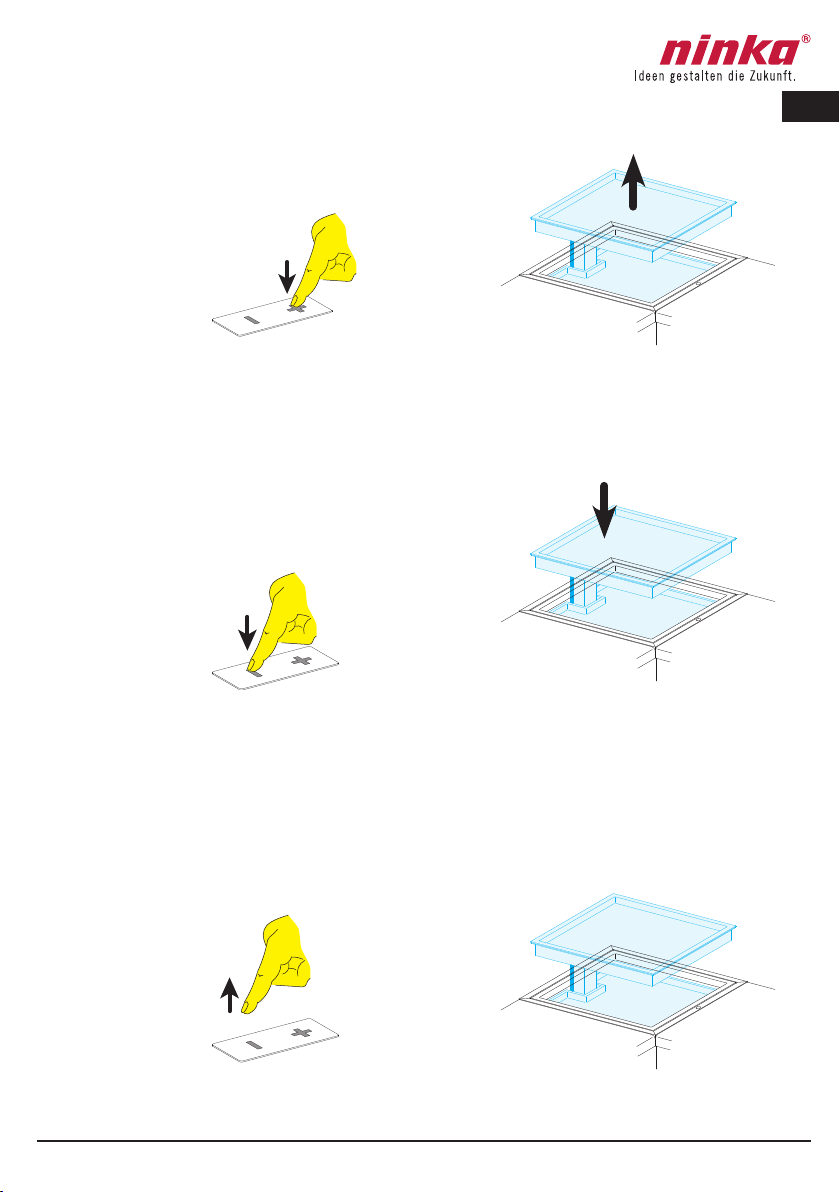
PRESSING and HOLDING the button
moves the drive up.
RELEASING the button switches the
drive to STOP. STOP
PRESSING and HOLDING the button
moves the drive down.
14
US
+
-
Qanto_Id_A5_ 0000.50.65062-US
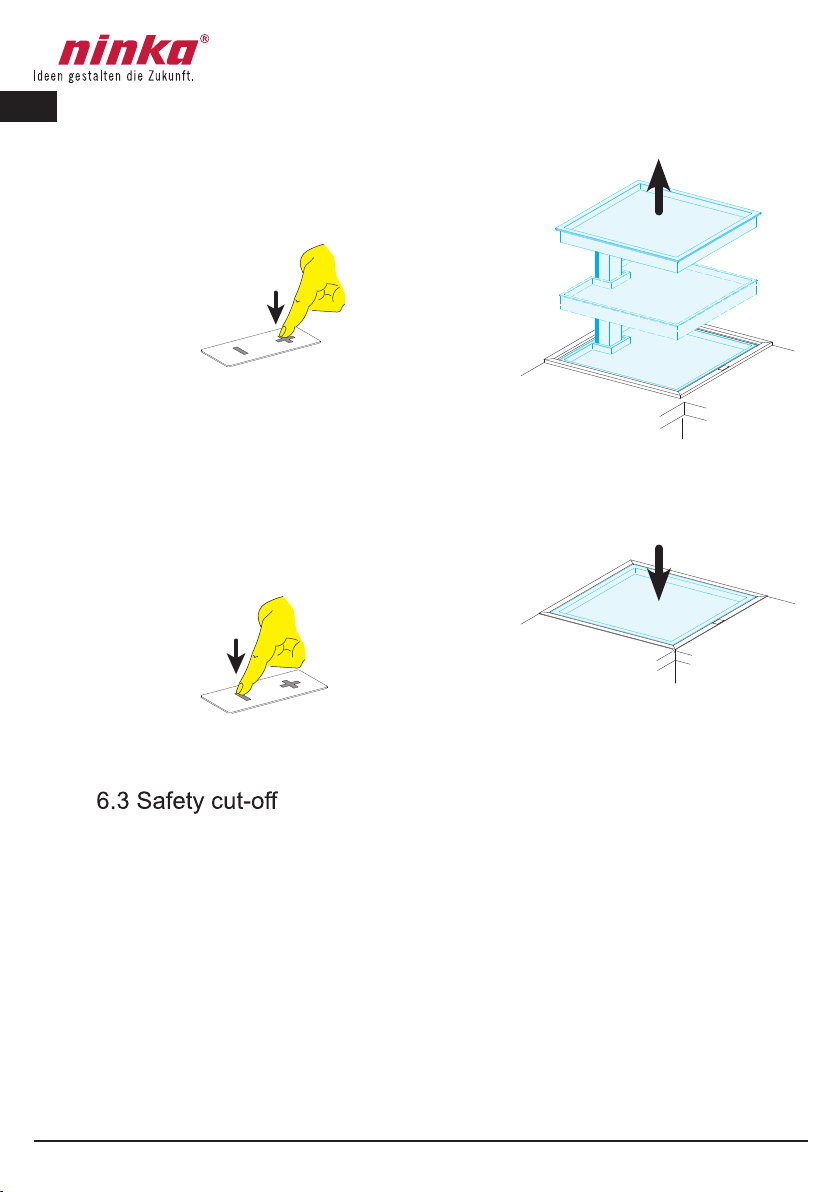
PRESSING and HOLDING the button
moves the drive up and switches to
STOP in the end position.
STOP
Downward movement is possible only if the upper trays are in
place.
The trays can be moved only when the button is pressed.
If the upper trays shift/cant or raise during the downward move-
ment, the system stops the downward movement immediately.
In this situation, the system permits upward movement only.
PRESSING and HOLDING the button
moves the drive down and switches
to STOP in the end position.
STOP
15
US
Qanto_Id_A5_ 0000.50.65062-US
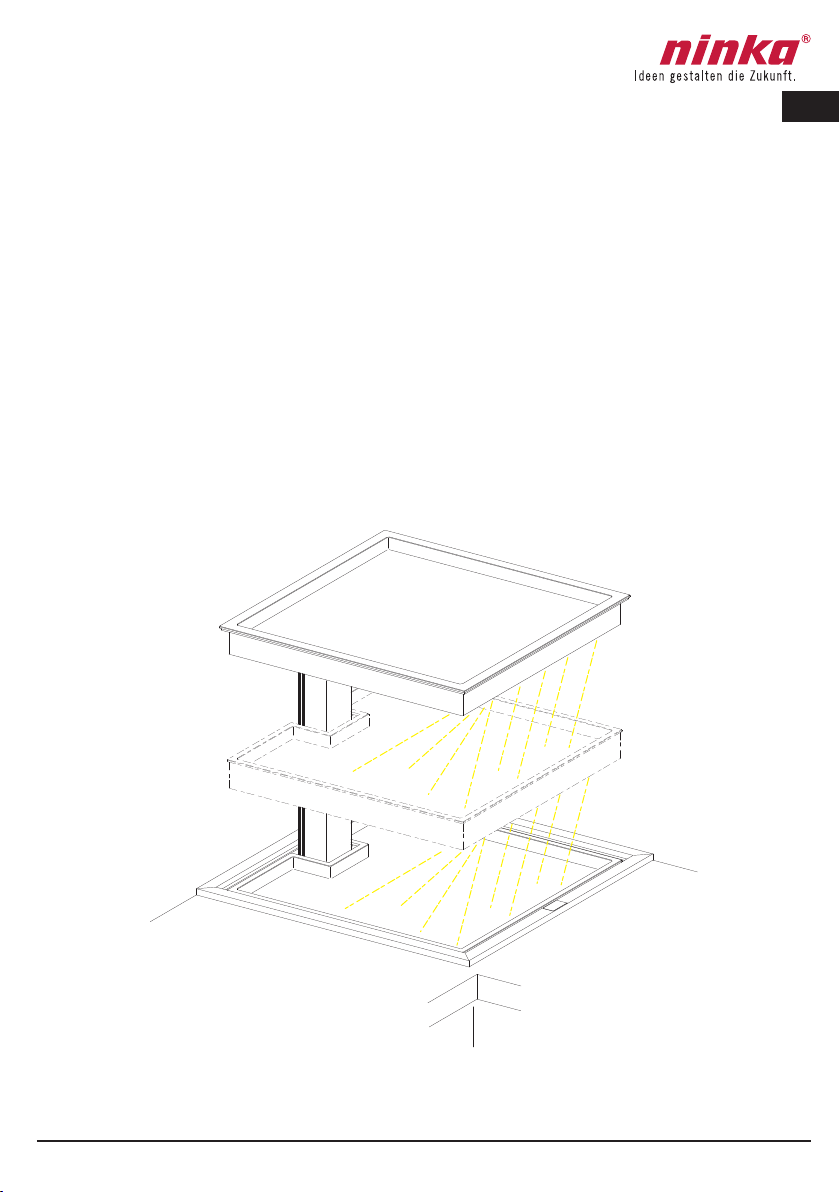
6.4 LED lighting optional NOT FOR US-VERSION
The cabinet can be delivered with maintenance-free LED lighting.
When the trays are raised, the LED lighting switches “ON” auto-
matically.
When the trays are lowered, the LED lighting switches “OFF”
automatically
If a fault occurs, please contact your specialist dealer or
customer service.
1.
2.
16
US
Qanto_Id_A5_ 0000.50.65062-US
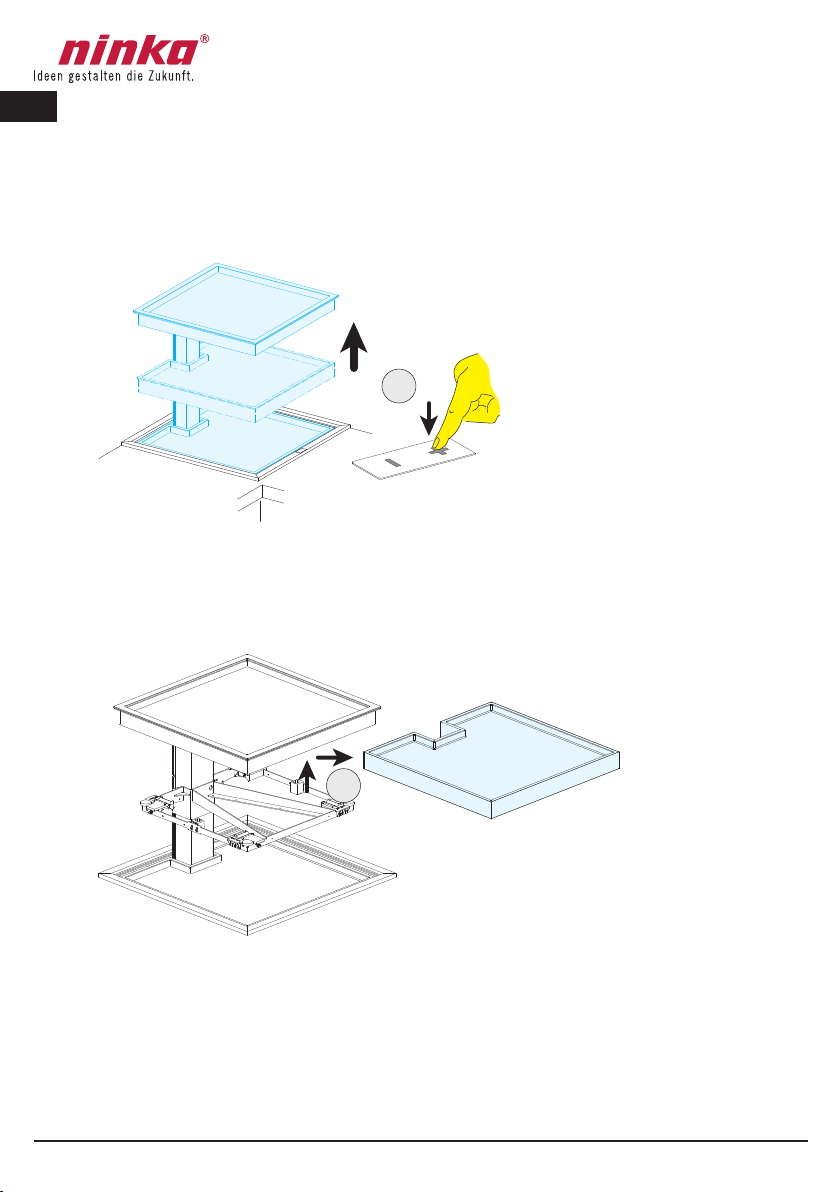
6.5 Height adjustment of the middle tray
Step 1:
Move the trays completely to the top by
pressing the “+” button on the control
element.
Step 2:
Leverage under the middle tray and
remove it from the tray carrier.
Tray
3. 1x 360°
5.
4.
17
US
Qanto_Id_A5_ 0000.50.65062-US
Step 4:
You can now move in the middle tray by
about ± 1.96” (± 50 mm).
Step 5:
Retighten the 4 screws with a socket
head screwdriver 7/64” (3 mm).
Step 3:
Loosen the 4 screws with a socket head
screwdriver 7/64” (3 mm) by a 360°
turn.
Tray carrier

6.
7.
18
US
Qanto_Id_A5_ 0000.50.65062-US
Step 6:
Place the tray on the middle tray
carrier.
Step 7:
Move the trays completely to the
bottom by pressing the “–” button on
the control element.
Tray
Tray carrier
H = H 1.
2.
3.
19
US
Qanto_Id_A5_ 0000.50.65062-US
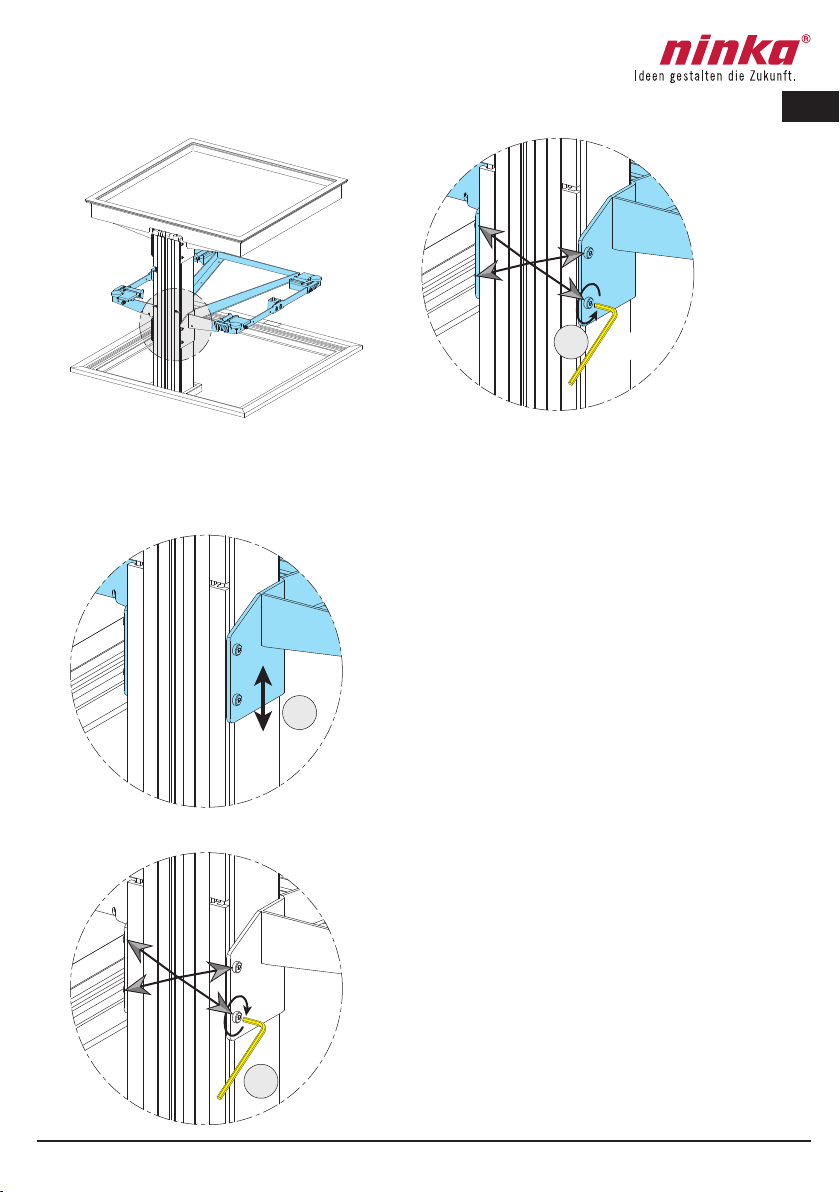
6.6 Height adjustment of trays
Step 1:
Check the height of the tray in relation
to the height of the masking frame.
Step 2:
Leverage the tray from the tray carrier.
Step 3:
Raise or lower the tray supports by
turning them.
Tray
Tray
Masking frame
Tray support

H = H 4.
6.
5.
6.
TX20
6.
20
US
Qanto_Id_A5_ 0000.50.65062-US
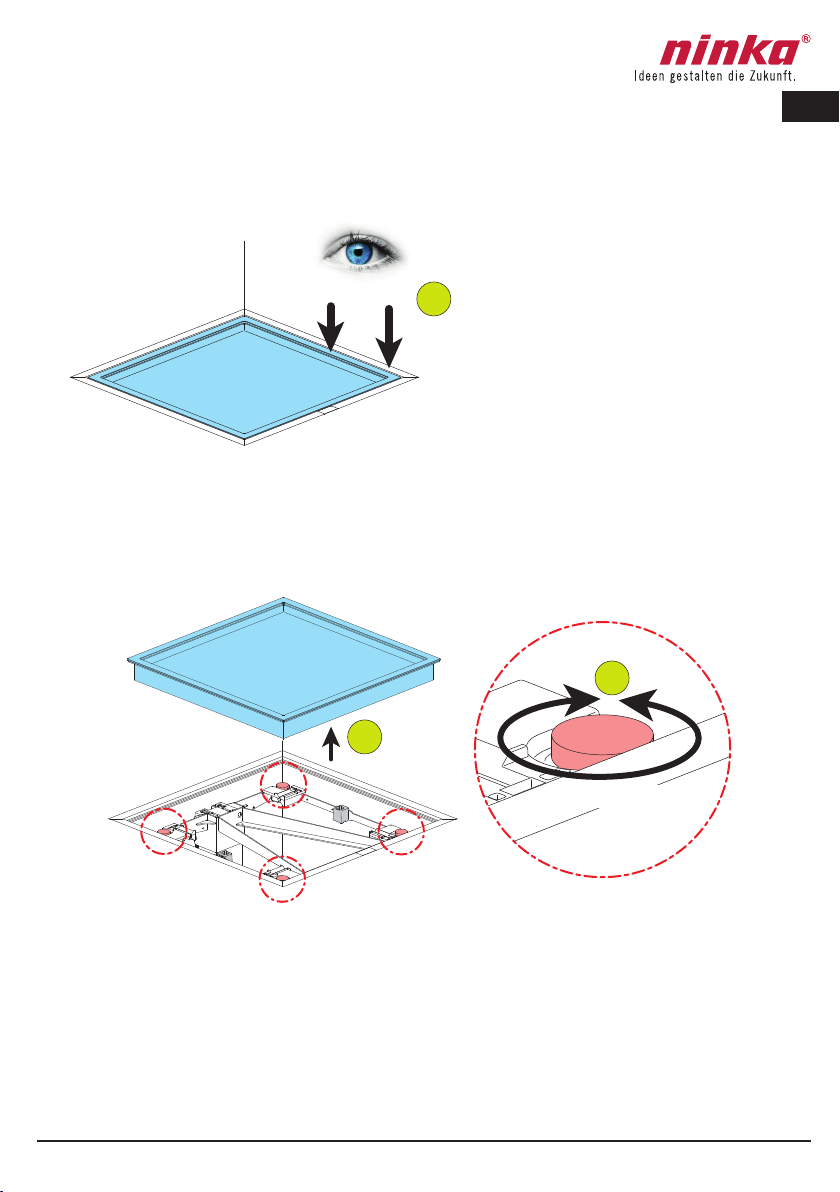
Step 4:
Lay the tray on the tray carrier
and check the height of the tray in
relation to the height of the mask-
ing frame once again. If the height
still is not correct, repeat Steps 2
and 3.
Step 5:
Lay a water level or straightedge on the tray supports.
Step 6:
Loosen the screws of the safety switch and move the safety switch
screws.
Water level / straightedge
Safety switch
Other manuals for Qanto
2
Table of contents
Other Ninka Kitchen Appliance manuals


