Warning: To use any features in this
device, other than the alarm clock, the
device must be switched on. Do not switch
the device on when wireless device use
may cause interference or danger.
Remember to make back-up copies or
keep a written record of all important
information stored in your device.
When connecting to any other device,
read its user guide for detailed safety
instructions. Do not connect incompatible
products.
Important: Use only services that you
trust and that offer adequate security and
protection against harmful software.
Network services
To use the phone you must have service
from a wireless service provider. Many of
the features require special network
features. These features are not available
on all networks; other networks may
require that you make specific
arrangements with your service provider
before you can use the network services.
Your service provider can give you
instructions and explain what charges will
apply. Some networks may have
limitations that affect how you can use
network services. For instance, some
networks may not support all language-
dependent characters and services.
Your service provider may have requested
that certain features be disabled or not
activated in your device. If so, these
features will not appear on your device
menu. Your device may also have a special
configuration such as changes in menu
names, menu order, and icons. Contact
your service provider for more
information.
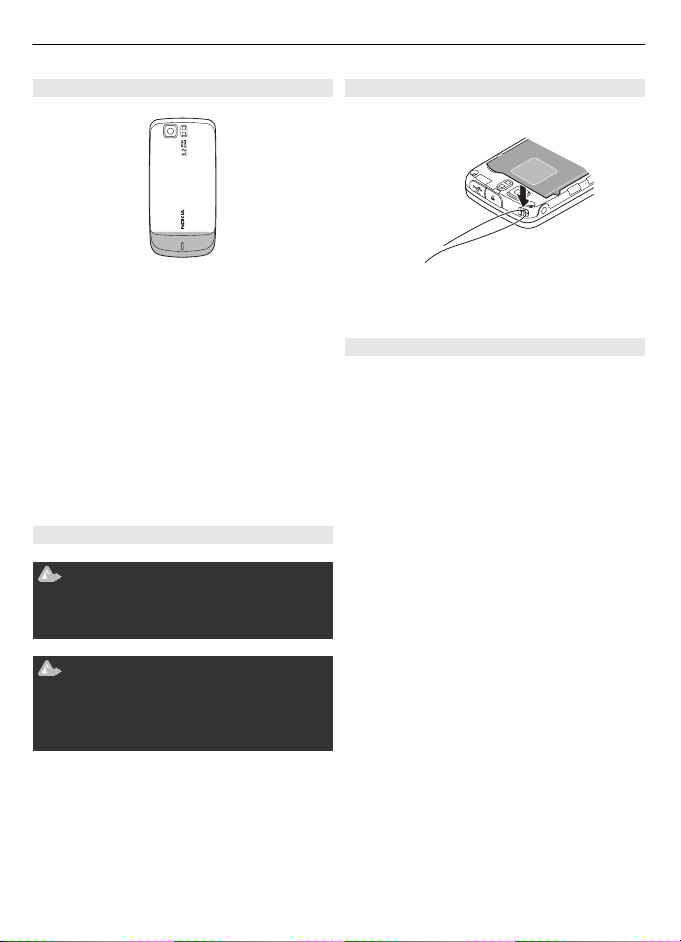
Functions without a SIM card
Some functions of your phone may be
used without inserting a SIM card, such as
Organiser functions and games. Some
functions appear dimmed in the menus
and cannot be used.
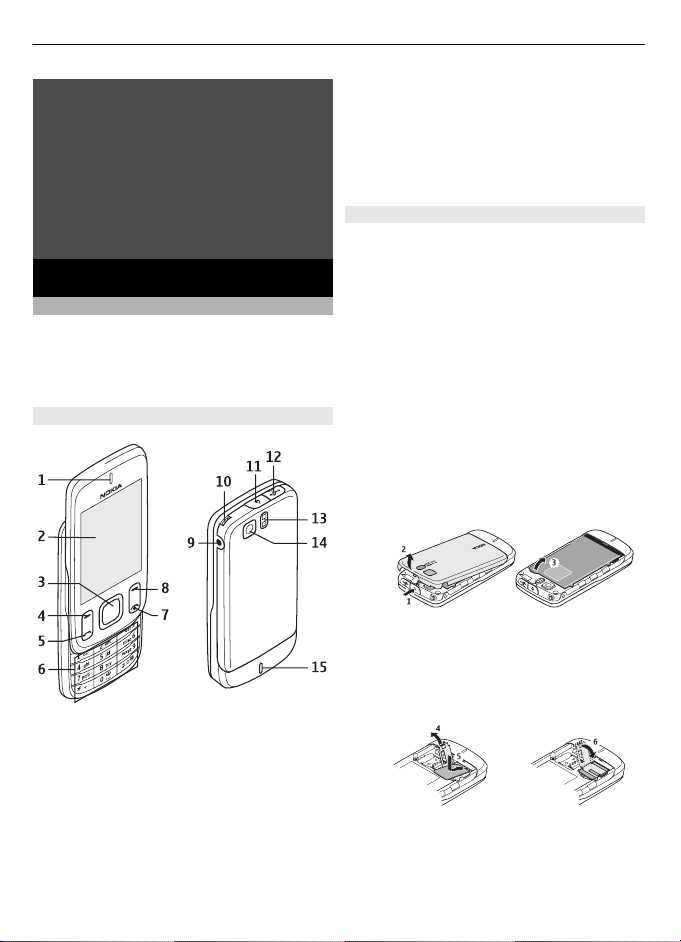
Keypad lock
•To lock the keypad to prevent
accidental keypresses, select Menu,
and press *within 3 seconds.
•To unlock the keypad, select Unlock,
and press *within 1.5 seconds. If
requested, enter the lock code.
•To answer a call when the keypad is
locked, press the call key. When you
end or reject the call, the keypad locks
automatically.
Further features are Automatic
keyguard and Security keyguard. See
"Phone settings", p. 10.
When the device or keypad is locked, calls
may be possible to the official emergency
number programmed into your device.
Access codes
To set how your phone uses the access
codes and security settings, select
Menu > Settings > Security > Access
codes.
•The PIN (UPIN) code, supplied with the
SIM (USIM) card, helps to protect the
card against unauthorised use.
•The PIN2 (UPIN2) code, supplied with
some SIM (USIM) cards, is required to
access certain services.
•PUK (UPUK) and PUK2 (UPUK2) codes
may be supplied with the SIM (USIM)
card. If you enter the PIN code
incorrectly three times in succession,
you are asked for the PUK code. If the
Make it your phone 7
Cyan
Magenta
Yellow
Black