manuals.online logo
Brands
  1. Home
  2. •
  3. Brands
  4. •
  5. Nokia
  6. •
  7. Cell Phone
  8. •
  9. Nokia Communicator 9290 Quick start guide

Nokia Communicator 9290 Quick start guide

Nokia 9290 Communicator
CD-ROM Software Guide
www.Communicatorworld.net
Welcome to the Nokia 9290
Communicator CD-ROM Software Guide
This guide contains information a out software that you
can install from the CD-ROM found in the sales package.
These applications are located in the “Software for the
Communicator” and “Software for PC” sections. Please note
that some add-on programs have their own user’s guides.
They are located next to the programs on the CD-ROM.
For more information on installing software, see the User’s Guide.
3
Content
To install software
from the CD-ROM 5
Remote synchronization 6
Unit converter 10
File viewer 12
Notes 17
Multimedia converter 21
Games 24
Others 36
4
FOR YOUR SAFETY Read these simple guidelines. Breaking the rules may e dangerous or illegal. Further detailed
information is provided in the Nokia 9290 Communicator User’s Guide.
ROAD SAFETY COMES FIRST Do not use the Nokia 9290 Communicator while driving; park the vehicle first.
INTERFERENCE All wireless phones may get interference which could affect performance.
SWITCH OFF IN HOSPITALS O serve restrictions, rules and regulations. Switch off the phone near medical equipment.
SWITCH OFF IN AIRCRAFT Wireless phones can cause interference. Using them on an aircraft is illegal.
SWITCH OFF WHEN REFUELING Do not use the phone at a fueling point. Do not use near fuel or chemicals.
SWITCH OFF NEAR BLASTING Do not use the phone where lasting is in progress. O serve restrictions, and follow
any rules or regulations.
USE SENSIBLY Use only in the normal position (to ear). Do not touch the antenna unnecessarily.
USE QUALIFIED SERVICE Only qualified service personnel are authorized to install or repair equipment.
ACCESSORIES AND BATTERIES Use only Nokia approved accessories and atteries. Do not connect incompati le
products.
MAKING CALLS VIA THE PHONE Close the cover and ensure the phone is switched on and in service. Enter the
phone num er, including the area code, then press . To end a call press . To answer a call press .
EMERGENCY CALLS Close the device cover. Ensure the phone is switched on and in service. Hold for several sec-
onds to clear the display. Enter the emergency num er, then press . Give your location. Do not end the call until told
to do so.
MAKE BACKUP COPIES Remem er to ack-up all important data on the device.
CONNECTING TO OTHER DEVICES When connecting to any other device, read its user’s guide for detailed safety
instructions. Do not connect incompati le products.
INFRARED PRECAUTIONS Do not point the IR eam at anyone’s eye or allow it to interfere with other IR devices.
5
To install software from the CD-ROM
The applications and files on the Nokia 9290 Communicator’s CD-ROM are ready to e installed or moved to
the Nokia 9290 Communicator. Proceed with installation as follows:
1 Ensure that PC Suite has een installed on your computer. You can find this program on the CD-ROM in
the sales package.
2 Insert the CD-ROM into the CD-ROM drive of your computer.
3 Either connect your Nokia 9290 Communicator to your computer using the adapter ca le supplied in the
sales package, or prepare the Nokia 9290 Communicator and the computer for an infrared connection.
See the User’s Guide for more information.
4The CD-ROM launches automatically. If not, open the CD-ROM y dou le-clicking the file ”Start.exe“ in the
CD-ROM file structure.
5Locate and select the program you want to install from the CD-ROM menu options and click “Install.”
Note:
Remember to install the add-on applications in the same language as your Nokia 9290 Communicator.
Tip: Use the memory card in the Nokia 9290 Communicator to gain more space for the different applications and files on the CD-ROM.
6
The Remote synchronization application for the Nokia 9290 Communicator ena les you to synchronize your
calendar and contacts over a GSM data call with various compati le Internet calendar and address ook
applications as well as multiple corporate office solutions such as Lotus Notes. The synchronization application
uses SyncML technology.
Remote server settings are called synchronization profiles. You can create several profiles if you need to
synchronize with multiple servers or applications.
NNoottee:: For information on yncML compatibility, please contact your Internet service provider or company
service administrator.
NNoottee:: This product includes software developed by The yncML Initiative.
Figure 1
To create a new ynchronization profile
When you start Remote synchronization, the current synchronization profile is displayed in the main view, under
the title Remote Synchronization. If no profile has een created, the text (No profiles defined) is displayed.
Remote synchronization
7
To create a new profile, proceed as follows:
1If no profiles have een defined, press New. A dialog opens. Continue with step 4.
2If at least one profile has een defined, press Profile Setting in the main view to view availa le profiles.
3 To create a new profile ased on the settings of an old one, select the one to e used as a ase and click
New. A dialog opens.
4Define the following sync profile settings – General and Data.
General page
Default: At least one of the availa le synchronization profiles must e defined as the default profile. To define
the current profile as the default, choose Yes. The default profile is shown in the main view for quick access.
Profile name: Type a descriptive name for the profile. Example:
“
My Office Calendar.
”
Each profile must
have a unique profile name.
Use Internet access/Host address/Port/HTTP Authentication: Refer to your Internet service provider or sys-
tem administrator for the correct values.
User name: Your user ID for the synchronization server. Refer to your Internet service provider or system
administrator for your correct ID.
Password: Type your password here. For security reasons, the password is shown with asterisks (*****).
Refer to your Internet service provider or system administrator for your correct password.
NNoottee::The ettings button is active only in the HTTP Authentication field.
Tip: When adding a new profile ased on an old one, select the profile whose values are closest to the values of the new profile.
Tip: For ease-of-use, set the most used profile as the default profile.
8
Data page
Figure 2
On this page, you can select which application to synchronize with a server.
1Select the application with the Arrow key and click Change to choose Yes or No.
2To define the Calendar or Contacts settings, press Setting . A dialog opens.
Define the following:
Calendar file/Contacts file: Press Brow e to select the correct data ase in your Nokia 9290 Communicator.
Remote calendar/Remote contacts: Refer to your Internet service provider or system administrator.
NNoottee:: Before you can synchronize calendar data, a calendar file must exist in your Nokia 9290 Communicator.
Use the Calendar application to create a calendar file.
To ynchronize data
1In the main view, check that you have selected the correct profile. Press Sync. The status of the synchro-
nization is displayed at the ottom of the screen.
2 To cancel the synchronization efore it is finished, press Cancel.
3You are notified when the synchronization has een completed. Press View Log to open a log file or Clo e
to return to the main view.
9
To edit exi ting erver profile
1In the main view, press Profile Setting . A list of server profiles is displayed.
2Select a profile to edit with the Arrow key and press Edit.
3Edit the profile as necessary.
4Click Clo e to accept changes and close the dialog.
To delete exi ting erver profile
1In the main view, press Profile Setting . A list of server profiles is displayed.
2Select a profile to delete with the Arrow key and press Delete.
To ynchronize with another erver
1In the main view, press Profile Sync. A list of server profiles is displayed.
2Select a profile and press Sync.
To view ynchronization log
You can view the most recent synchronization log for each profile.
1In the main view, press Profile Sync. A list of server profiles is displayed.
2Select a profile and press View Log. The log shows you the num er of updated, added or deleted items.
10
You can use the Unit converter for the Nokia 9290 Communicator to convert units of measurements.
The conversion tool has two frames for each conversion category. See Figure 3.
Only one frame may e active at a time. The frames always have corresponding values; if the value in either
of the two frames is changed, the other frame is automatically updated.
Figure 3
To open the conversion tool, select the conversion
category in the main view and press Open.
The conversion categories and units are listed in
the chart at right.
NNoottee::The calculator has limited accuracy and
rounding errors may occur.
Unit converter
Tip: To move etween the frames, use the Ta key.
CCOONNVVEERRSSIIOONN CCAATTEEGGOORRYYUUNNIITT AAUUNNIITT BB
CURRENCY USD EUR
AREA ft2m2
ENERGY kcal kJ
LENGTH mi km
MASS l s kg
POWER hp kW
PRESSURE Pa
TEMPERATURE FC
TIME dh
VELOCITY mph km/h
VOLUME gal (US) litre
11
To change unit
You may want to change the units used in a particular conversion category. For example, instead of converting
from USD in the currency category, you may want to convert from FRF.
1Press Change unit in the conversion tool view for the particular conversion category. A dialog opens.
2Choose from the list or search the list y typing a string in the search field.
3Press Select to accept the change or Cancel to dismiss it.
To add and edit currency unit
NNoottee:: Only currency units can be edited, deleted and added.
1Select and open the currency category.
2To edit a currency, select it and press Open.
To add a currency, press the Menu key and select File> New currency....
A dialog opens.
3Define the following:
Name: The name of the currency unit.
ymbol: An a reviation of the currency unit.
4Press Calculate ratio to define the following:
Ratio: The rate of conversion defined y the ase unit.
A dialog opens.
5Define the values of the new and ase currency units and press Cancel.
6Press Clo e to accept the changes.
Tip: To delete a currency, select it and press the Menu key; select File> Delete currency.... Press Delete.
12
File viewer ena les you to view several text editor formats, graphic formats and other file formats.
Furthermore, you can open and extract archived files.
Figure 4
Supported format
The CD-ROM contains five installation files that support different file formats. See the adjacent page for the
list of availa le installation files and the corresponding supported file formats.
NNoottee:: Compatible file formats are subject to change without notice.
File viewer
13
IINNSSTTAALLLLAATTIIOONN FFIILLEESSUUPPPPOORRTTEEDD FFIILLEE FFOORRMMAATTSSSSUUPPPPOORRTTEEDD FFIILLEE EEXXTTEENNSSIIOONNSS
ALL INSTALLATION FILES Plain text TXT
Windows itmap BMP, RLE, ICO, CUR
Porta le Network Graphics PNG
Windows Metafile WMF, EMF
MS_POWERPOINT.SIS Microsoft PowerPoint 3/4/7/9798/2000/ PPT, POT, PPS
MS_EXCEL.SIS Microsoft Excel 2/3/4/5/7/97/98/2000 XLS, XLC
MS_OFFICE.SIS Microsoft PowerPoint 3/4/7/97/98/2000 PPT, POT, PPS
Microsoft Excel 2/3/4/5/7/97/98/2000 XLS, XLC
Microsoft Word 1/2/4/5/6/7/97/98/2000 DOC, WRI
LOTUS_WP_AMI.SIS Lotus 1-2-3 v. 1/2/3/4/5/97/Millennium WQ1, WKU, WK1, WK3,
WK4, WK5, WK6, 123
Lotus Ami Pro SAM
WordPerfect 4/5/6/7/8 WPD
WordPerfect Graphic WPG
Lotus Ami Draw SDW
OTHER.SIS: IMAGE FORMATS Computer Graphics Metafile CGM
Compuserve GIF GIF
Paint rush PCX, DCX
Tagged Image File Format TIF, JPG, JIF
OTHER.SIS: TEXT FORMATS Internet Hypertext Markup Language HTML
Plain text TXT
vCard VCF
Rich text format RTF
OTHER.SIS: ARCHIVED FILES Winzip, PKZIP ZIP, EXE
Unix Gzip TGZ
Unix Compress TAR, TAZ
OTHER.SIS: OTHER FORMATS Microsoft project MPP
Visio VSD
14
To view file
NNoottee:: The menu options and commands available depend on the type of file that is viewed.
1Select File viewer in the Extras application main view and press Enter.
2The Open dialog appears.
3Press Brow e to locate a supported file type and press OK. The file opens. Depending on the file type, you
have the following options:
All file
•• Press Zoom in and Zoom out to change the view.
•• Press the Menu key and select View> Full screen mode to display only the document or file contents on
the screen.
•• To send the file, press Send. The Send dialog opens. The options are As a mail/Via infrared. Press Send to
confirm sending.
•• To close File viewer, press Clo e.
Text document and image
•• Press the Menu key and select Picture/Document> Fit to width to zoom the file so that it fits the screen width.
•• Select Picture/Document> Fit to window to zoom the file so that it fits to the screen.
Text document and pread heet
The Document or preadsheet menu contains several viewing options:
15
•• Draft view: To select draft view, press the Menu key and select Document> Draft view or preadsheet>
Draft view. In draft view, the text of the document or spreadsheet file is displayed in a single font.
Character formatting, paragraph alignment, spacing and ta s are also displayed. Em edded o jects are
not displayed in draft view.
•• Normal view: To select normal view, press the Menu key and select Document> Normal view or
preadsheet> Normal view. In normal view, all fonts and em edded o jects are displayed as in the
original document.
•• Page view: To select page view, press the Menu key and select Document> Page view or preadsheet>
Page view. In page view the text of the document or spreadsheet file is displayed as in the original
document, including line wrapping, columns, page margins, headers, footers and annotations.
Image
•• Press the Menu key and select Picture> Fit to width to zoom the image so that it fits the screen width.
•• Select Picture> Fit to window to zoom the image so that it fits to the screen.
•• Select Picture> Rotate to rotate the image 90 degrees clockwise.
•• Select Picture> Reset to original to view the picture as it was viewed when opened.
Archived file
•• To extract selected files, press Extract. A target folder dialog opens.
•• To extract all files in an archive, press Extract all.
•• To view a file in an archive, press View.
You can also sort the items in an archive.
•• Select Edit> ort by to define the sorting criteria. The options are Name/Date/ ize.
•• Select Edit> ort Order to define the sorting order. The options are Ascending/Descending.
Tip: When viewing a text document, you can select text, copy it to the clip oard and paste it in other applications.
PowerPoint pre entation
To view slides, press the Menu key and select lide> Next slide/Previous slide. The other menu commands
in the Slide menu work exactly as in the Picture menu.
To configure File viewer option
Press the Menu key and select View> Options. A dialog with two pages opens.
Define the following:
View page
Default font: To select the default font, press Change. The font dialog opens.
View unknown as: Defines how the viewer handles unknown file types. The options are
Text/Hexadecimal/Do not view.
Unsupported files as: Defines how the viewer handles unsupported file types. The options are
Ask user/Open in registered app/View as unknown.
Other page
how gridlines: Select the default setting for spreadsheet gridlines. The options are Yes/No.
ort archives by: Select the default sorting criterion for archive files. The options are Name/Date/Type/ ize.
Archives sort order: Select the default sorting order. The options are Ascending/Descending.
To close the dialog, press Clo e.
16 Tip: The key oard shortcuts for Next slide/Previous slide are Shift-Ctrl-N and Shift-Ctrl-P.
Notes is a simple text editor for typing quick notes and creating note lists. You can make several notes to
create a note list. You can sort a list in multiple ways and save a list as a note ook. Notes includes many of
the standard commands found in word processors.
Notes is availa le in English only.
Figure 5
To add and delete note and notebook
To add a new note, press New note.
To delete a note, press the Menu key and select File> Delete note.
To add a new note ook, press the Menu key and select File> New file. You can have separate note ooks for
different topics.
17
Notes
View
You can view the contents of a note or oth a note and a note list. To choose a view, press the Menu key
and select View> plit view/Note view.
To move etween the views in split view, press Change focu .
To display the current view in full-screen mode, press the Menu key and select View> Full screen. To return
to normal view, select Full screen again.
To format the note text
1Select the text you want to modify.
2Press the Menu key and select the options you want in the Format menu:
Select Font... to change the font used in the text. To select old, italics, underlining or ulleted text,
select the corresponding options.
To count the word in a note
Press the Menu key and select Tools> Word count.
To pell check a note
If you have installed the spell checker application, you can check the spelling of a note as follows:
1Press the Menu key and select Tools> pell check.
2For more suggestions on an unknown word, highlight uggestions and select Change.
18 Tip: Note view is good for editing large amounts of text. Split View is good for rowsing a note ook.
Tip: The word count feature is useful when you want to send a note as a short message. Short messages must e no longer than160 alphanumeric characters.

Other manuals for Communicator 9290

10

Other Nokia Cell Phone manuals

Nokia 6126 - Cell Phone 10 MB User manual

Nokia

Nokia 6126 - Cell Phone 10 MB User manual

Nokia 6015 Guide

Nokia

Nokia 6015 Guide

Nokia 8810 Quick start guide

Nokia

Nokia 8810 Quick start guide

Nokia 6060 - Cell Phone 3.2 MB User manual

Nokia

Nokia 6060 - Cell Phone 3.2 MB User manual

Nokia 6133 - Cell Phone 11 MB User manual

Nokia

Nokia 6133 - Cell Phone 11 MB User manual

Nokia 6 Specification sheet

Nokia

Nokia 6 Specification sheet

Nokia 6310 User manual

Nokia

Nokia 6310 User manual

Nokia N Series User manual

Nokia

Nokia N Series User manual

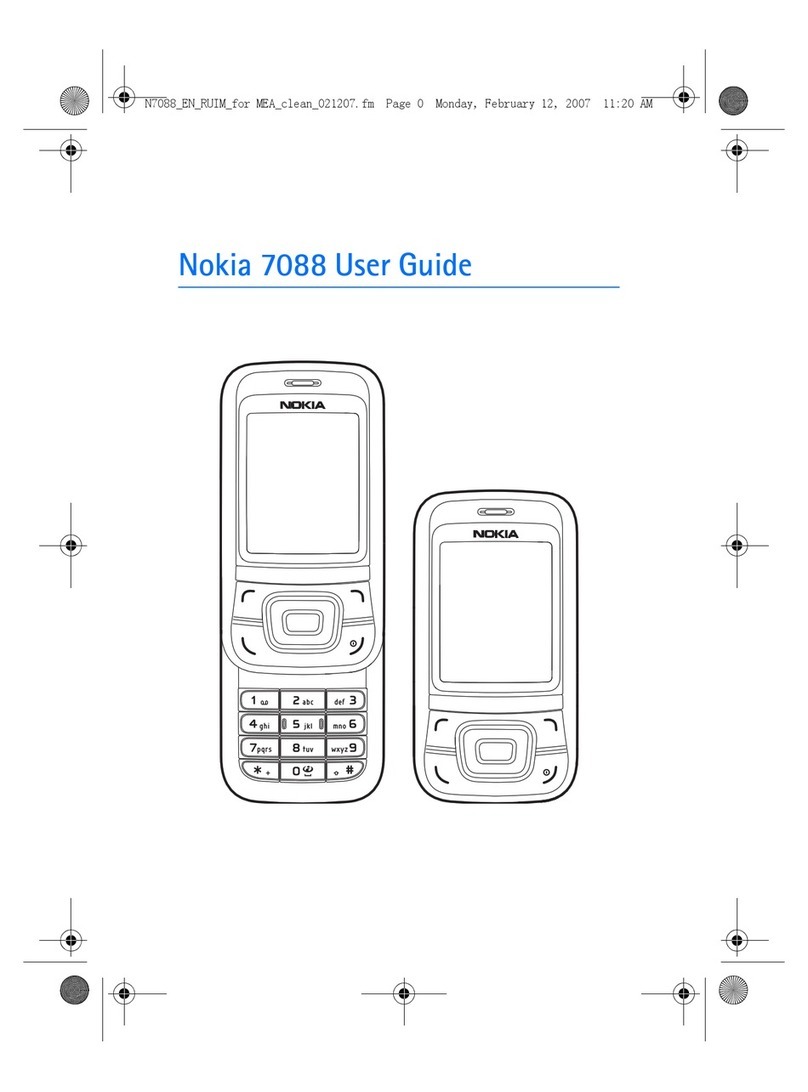
Nokia 7088 User manual

Nokia

Nokia 7088 User manual

Nokia N95 User manual

Nokia

Nokia N95 User manual

Nokia N70 Music Edition User manual

Nokia

Nokia N70 Music Edition User manual

Nokia NPM-5 Installation instructions

Nokia

Nokia NPM-5 Installation instructions

Nokia NHL-2NA Series Quick start guide

Nokia

Nokia NHL-2NA Series Quick start guide

Nokia 2600 classic User manual

Nokia

Nokia 2600 classic User manual

Nokia N 80 User manual

Nokia

Nokia N 80 User manual

Nokia N81 User manual

Nokia

Nokia N81 User manual

Nokia 1220 User manual

Nokia

Nokia 1220 User manual

Nokia N610 Quick start guide

Nokia

Nokia N610 Quick start guide

Nokia C6-01 User manual

Nokia

Nokia C6-01 User manual

Nokia RH-117 User manual

Nokia

Nokia RH-117 User manual

Nokia 9300i User manual

Nokia

Nokia 9300i User manual

Nokia 5800 - XpressMusic Smartphone - WCDMA User manual

Nokia

Nokia 5800 - XpressMusic Smartphone - WCDMA User manual

Nokia C6-01 User guide

Nokia

Nokia C6-01 User guide

Nokia RM-464 User manual

Nokia

Nokia RM-464 User manual

Popular Cell Phone manuals by other brands

Samsung SM-A720F quick start guide

Samsung

Samsung SM-A720F quick start guide

LG KG189 user guide

LG

LG KG189 user guide

Optimus L-06D instruction manual

Optimus

Optimus L-06D instruction manual

HTC HTC One X user guide

HTC

HTC HTC One X user guide

Samsung GT-C3595V user manual

Samsung

Samsung GT-C3595V user manual

Samsung repp quick start guide

Samsung

Samsung repp quick start guide

Sharp WX-T91 user guide

Sharp

Sharp WX-T91 user guide

LG LG-H811 manual

LG

LG LG-H811 manual

LG GB195 Service manual

LG

LG GB195 Service manual

Motorola E375 user guide

Motorola

Motorola E375 user guide

Viera 941P manual

Viera

Viera 941P manual

Samsung X9850 User instructions

Samsung

Samsung X9850 User instructions

Azumi V5 user manual

Azumi

Azumi V5 user manual

LG LG-P895 user guide

LG

LG LG-P895 user guide

Samsung GT-S7262 quick start guide

Samsung

Samsung GT-S7262 quick start guide

Samsung SM-N7505 user manual

Samsung

Samsung SM-N7505 user manual

TCL FLIP Pro user manual

TCL

TCL FLIP Pro user manual

Motorola i296 user guide

Motorola

Motorola i296 user guide

manuals.online logo
manuals.online logoBrands
  • About & Mission
  • Contact us
  • Privacy Policy
  • Terms and Conditions

Copyright 2025 Manuals.Online. All Rights Reserved.