Contents
Safety 5
Get started 6
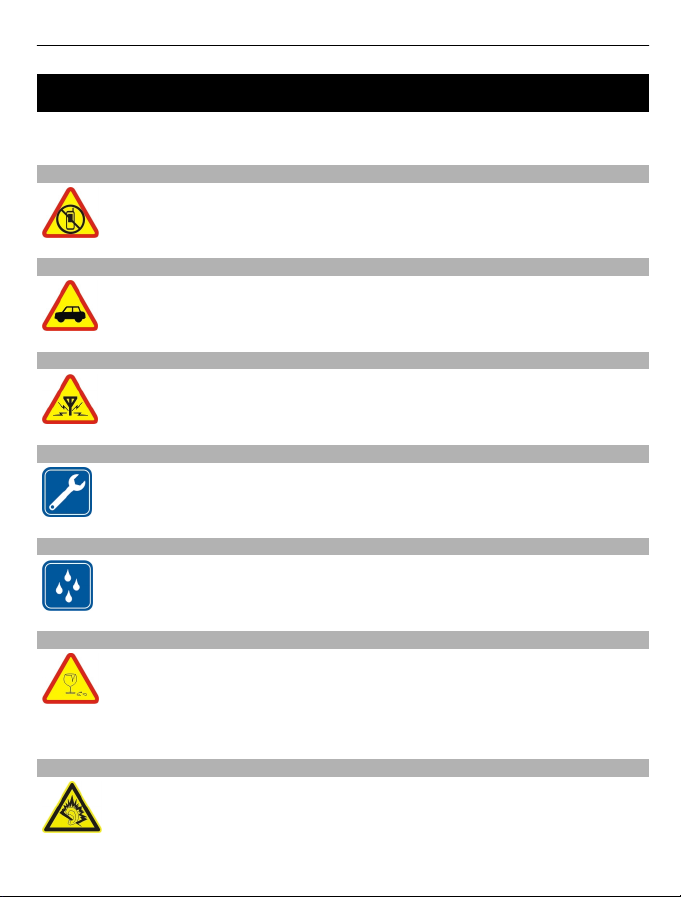
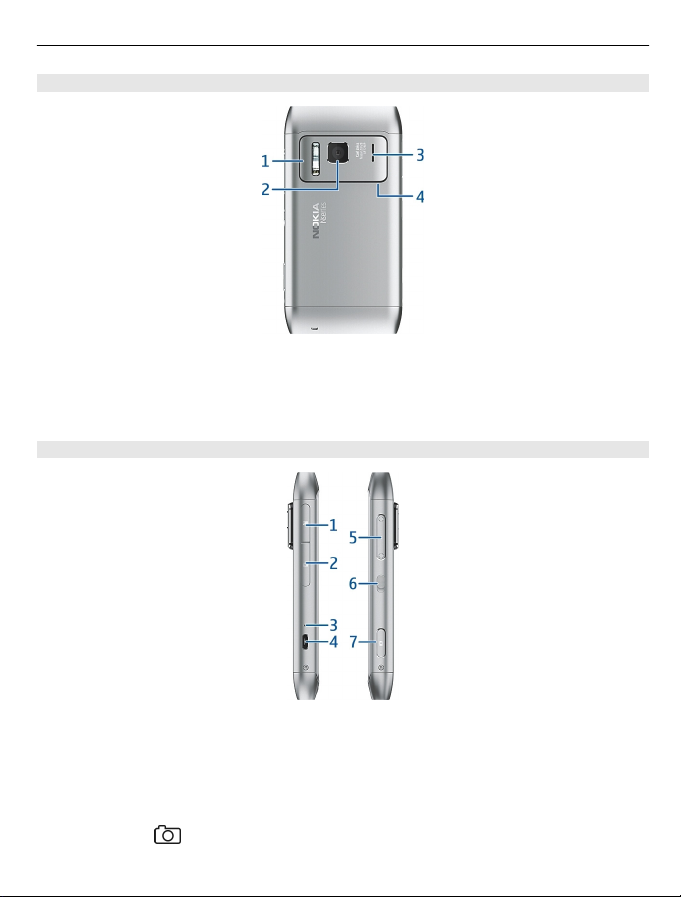
Keys and parts 6
Change the volume of a call, song, or
video 8
Lock or unlock the keys and screen 8
Insert or remove the SIM card 9
Insert or remove the memory card 10
Charging 12
Antenna locations 14
Attach the wrist strap 15
Headset 15
Switch the device on or off 15
Use your device for the first time 16
Copy contacts or pictures from your old
device 16
Device set-up 17
Use the in-device user guide 17
Install Nokia Ovi Suite on your PC 18
Basic use 19
Touch screen actions 19
Interactive home screen elements 22
Switch between open applications 23
Write text 23
Display indicators 26
Set the notification light to blink for
missed calls or messages 28
Search in your device and on the
internet 28
Use your device offline 28
Prolong battery life 29
Personalisation 30
Profiles 30
Change your theme 32
Home screen 32
Organise your applications 35
Download a game, application, or
other item 35
Telephone 36
Call a phone number 36
Search for a contact 36
Call a contact 37
Make a video call 37
Make a conference call 38
Use speed dial 39
Use your voice to call a contact 39
Make calls over the internet 40
Call the last dialled number 41
Record a phone conversation 41
Turn to silence 41
View your missed calls 42
Call your voice mailbox 42
Divert calls to your voice mailbox or
another phone number 42
Prevent making or receiving calls 43
Allow calls only to certain numbers 44
Video sharing 44
Contacts 46
About Contacts 46
Save phone numbers and mail
addresses 46
Save a number from a received call or
message 47
Contact your most important people
quickly 47
Set a ringing tone for a specific
contact 47
Send your contact information using
My Card 48
Create a contact group 48
Send a message to a group of people 48
Copy contacts from the SIM card to your
device 49
Back up your contacts to Ovi by Nokia 49
2Contents