5Enter key. To move the cursor to the
next row or text input field, press the
enter key. Additional functions are
based on the current context. For
example, in the web address field of
the web browser, the enter key acts as
the Go icon.
6Ctrl key
Insert a variation of a letter
You can insert, for example, letters with
accents. To insert á, press and hold the
sym key, and then press Arepeatedly,
until the desired letter is displayed. The
order and availability of letters depends
on the selected writing language.
Quick access with one-touch keys
With the one-touch keys, you can access
applications and tasks quickly. Each key
has been assigned an application and a
task.
Modify one-touch keys
Select Menu > Settings and Phone >
One-touch keys. Your service provider
may have assigned applications to the
keys, in which case you cannot modify
them.
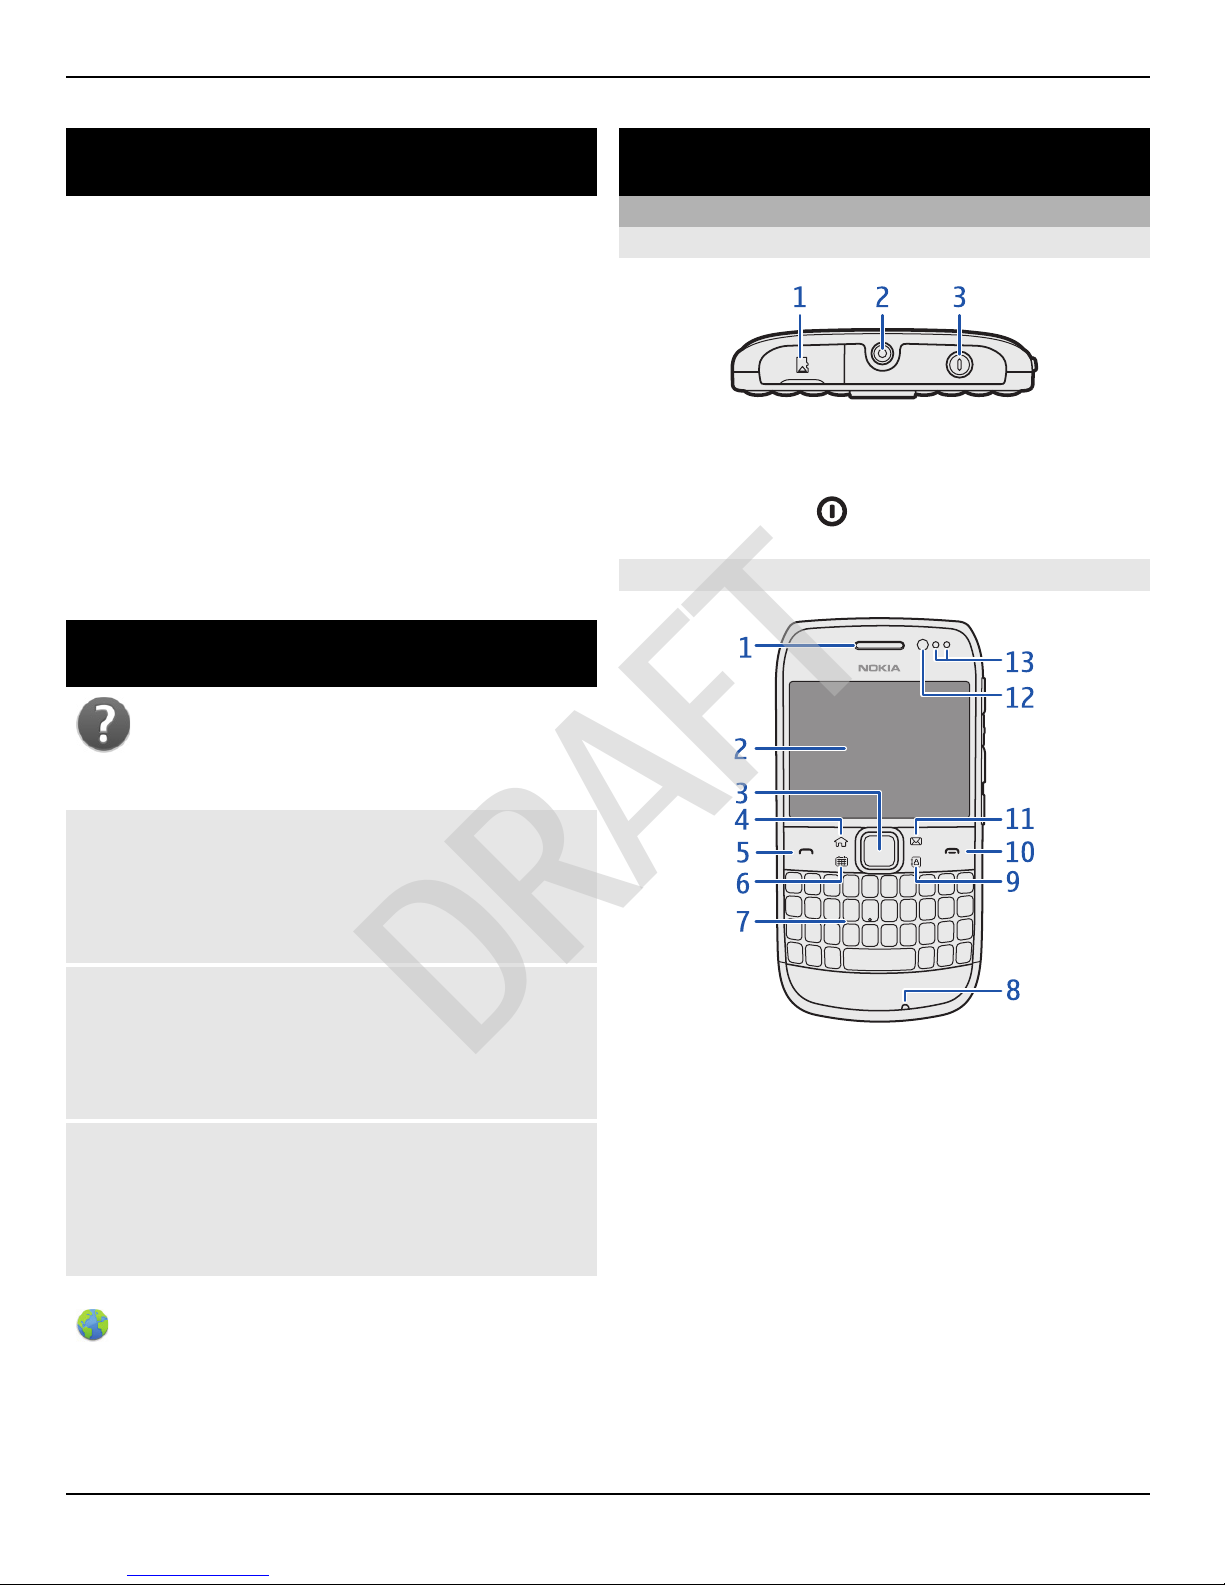
1Home key. To open the main menu,
press the home key. To return to the
home screen, press the home key
again. To switch between the open
applications, press and hold the home
key.
2Mail key. To open your default
mailbox, press the mail key. To start
writing a mail, press and hold the mail
key.
3Calendar key. To view your device
calendar, press the calendar key. To
create a new meeting entry, press and
hold the calendar key.
4Contacts key. To open the contacts list,
press the contacts key. To create a
new contact, press and hold the
contacts key.
Touch screen
To control your device, lightly touch the
screen with your fingertips. The screen
does not respond when you use your
fingernails.
If your fingertips are cold, the screen may
not respond to your touch.
Important: Avoid scratching the
touch screen. Never use an actual pen or
pencil or other sharp objects to write on
the touch screen.
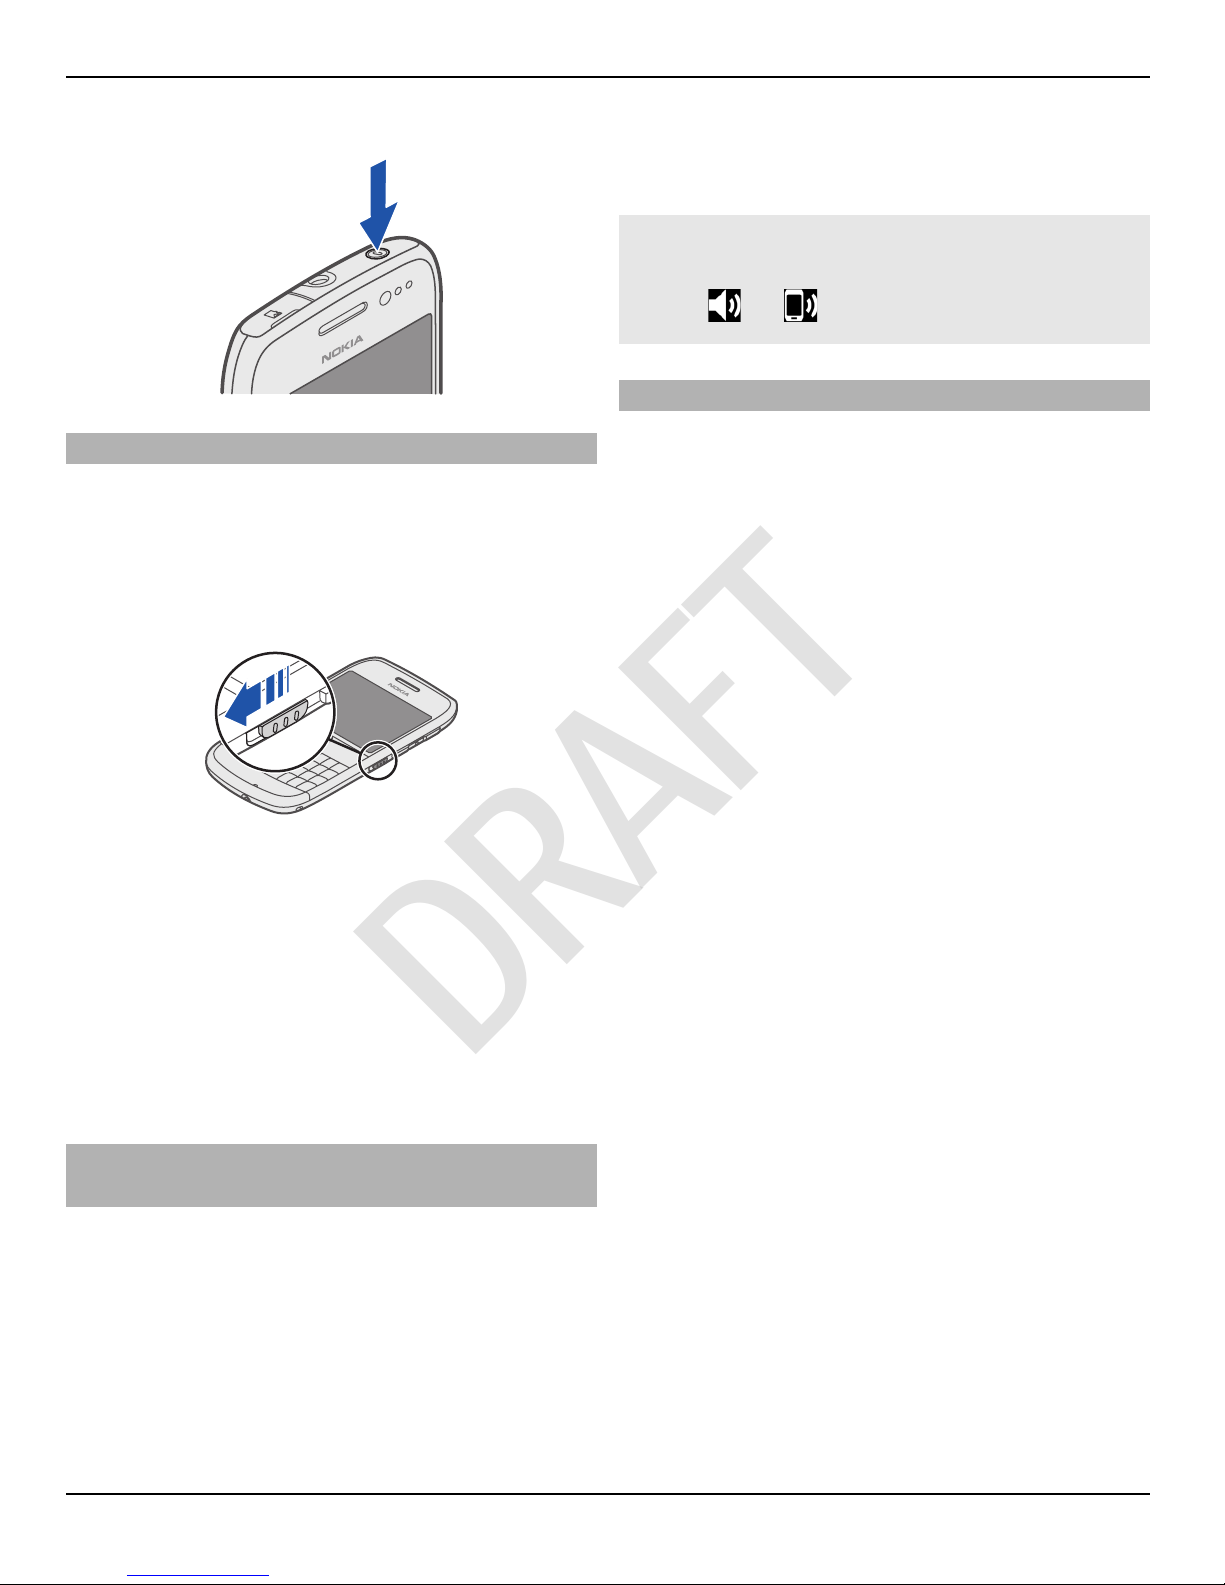
Flashlight
The camera flash can be used as a
flashlight. To switch the flashlight on or
off, slide and hold the key lock switch for
two seconds.
The flashlight can only be used when you
are on the home screen. You can switch
the flashlight on also when you are on the
home screen and the keys and screen or
the device is locked.
6Getstarted
6 www.nokia.com/support
Cyan
Magenta
Yellow
Black