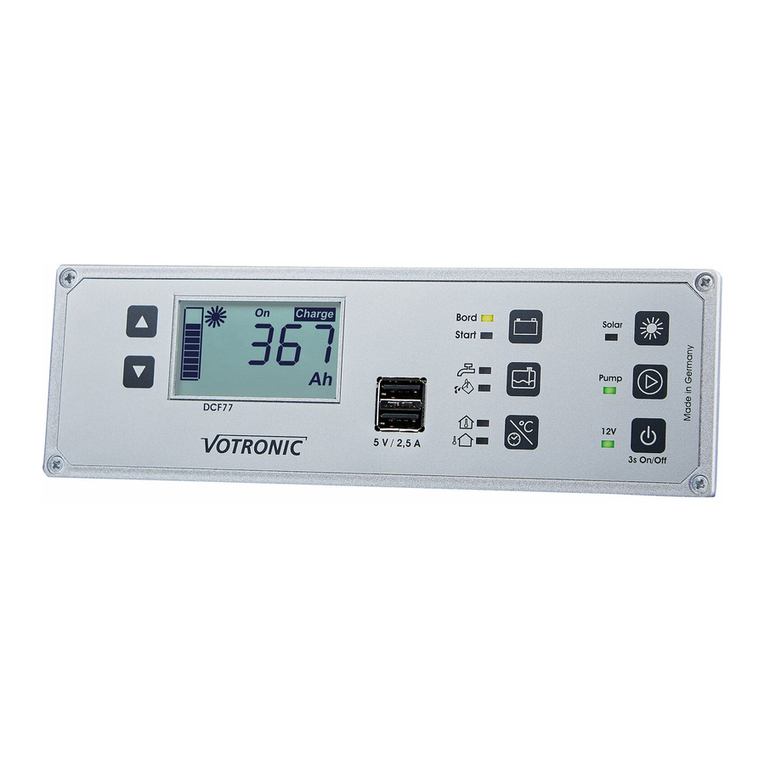
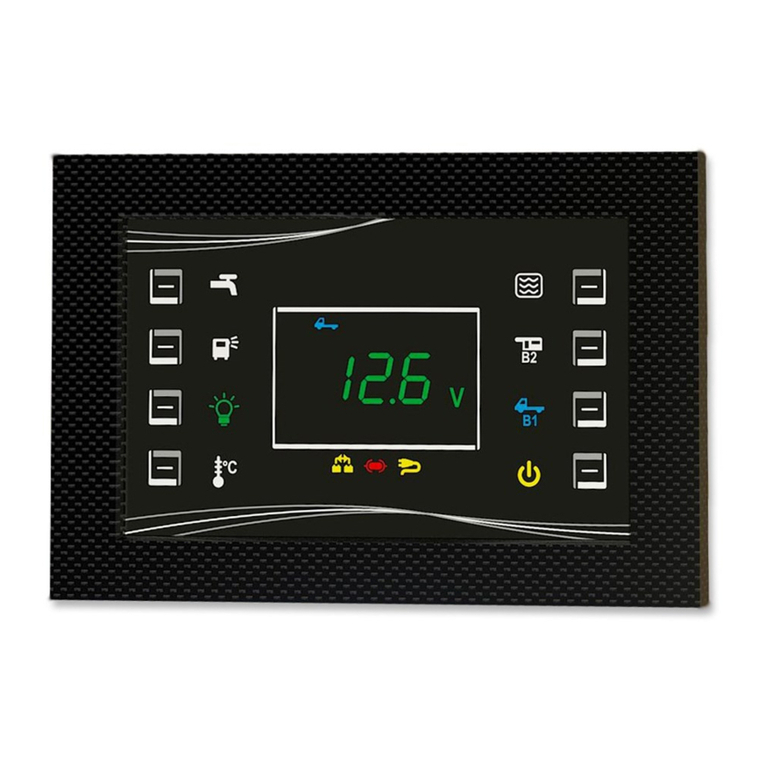
Nordelettronica NE274 User manual

95.0001.233 Rev. 0
NE274
I
GB
F
D
E
PANNELLO COMANDI
CONTROL PANEL
PANNEAU DE CONTROLE
BIEDENPANEL
PANEL DE MANDOS
ISTRUZIONI D’USO
INSTRUCTIONS MANUAL
INSTRUCTIONS D’EMPLOI
BEDIENUNGSANLEITUNG
INSTRUCCIONES PARA EL USO

2
25.10
128.7
195.2
Ø3.5
fix 184.5
fix 98.0
min 174.0
unit: mm
min 111.0
mod. NE274
JP3
JP5
JP4
internal
temperature
sensor

PANNELLO COMANDI NE274
COMANDI:
Pulsante con spia per accensione Pulsante con spia per accensione
o spegnimento LUCI INTERNE o spegnimento POMPA
Pulsante con spia per accensione Pulsante:
o spegnimento LUCE ESTERNA - per spegnere il pannello
- per attivare la modalità notturna
VISUALIZZAZIONI:
Questo simbolo si accende quando e’ presente la rete 230V
Questo simbolo si accende quando un fusibile del derivatore NE185/NE196 è bruciato
Questo simbolo si accende quando il mezzo e’ in moto e le due batterie sono accoppiate oppure in presenza
della rete 230V quando vengono accoppiate le due batterie verificando prima la tensione della batteria servizi.
Premendo questo pulsante si visualizza sul display la temperatura interna ( ), premendo una seconda volta si
visualizza la temperatura esterna ( ) solo se è presente il sensore temperatura esterna.
Se il sensore di temperatura e’ guasto appare la scritta “ ”.
La visualizzazione rimane attiva per circa 30sec
Premendo piu’ volte questo pulsante si visualizza sul display il livello in % (0, 33, 66,100) del relativo serbatoio
identificato con i simboli S1, R1, R2* (* R2 è opzionale)
Se S1 e’ vuoto o R1,R2 sono pieni la visualizzazione sul display lampeggia. Se il collegamento al serbatoio e’ errato sul
display appare la scritta “ ”. La visualizzazione rimane attiva per circa 30 sec.
Premendo una volta questo pulsante si visualizza la tensione della batteria servizi B2, premendo una seconda volta si
visualizza in % l’automonia residua della batteria.
Solo nella visualizzazione in %, se è presente o il valore visualizzato viene sostituito con dei segmenti in
movimento per indicare la carica della batteria. La visualizzazione rimane attiva per circa 30 sec.
Premendo una volta questo pulsante si visualizza la tensione della batteria avviamento B1, premendo una seconda volta
si visualizza in % l’automonia residua della batteria.
Solo nella visualizzazione in %, Se è presente il valore visualizzato viene sostituito con dei segmenti in movimento
per indicare la carica della batteria. La visualizzazione rimane attiva per circa 30 sec.
ALLARMI:
Batterie: Batteria avviamento (B1) minore di 11,8V o Batteria servizi (B2) minore di 10,5V.
In questo caso si verifica un allarme sonoro (se abilitato) e il lampeggio del pulsante della batterie che ha generato l’allarme
(per i primi 30 secondi viene visualizzato anche il valore).
Serbatoi: Serbatoio S1 vuoto o Serbatoi recupero R1,R2 pieni.
In questo caso si verifica un allarme sonoro (se abilitato) e il lampeggio del simbolo del corrispondente serbatoio che ha
generato l’allarme (per i primi 30 secondi viene visualizzato anche il valore).
: Questa scritta sul display indica un errore di comunicazione con il derivatore NE185/NE196
IMPOSTAZIONI:
Tenendo premuto per più di 3 secondi il pulsante si può disabilitare ( “ “ sul display) o abilitare ( sul display) ( ) “ “
l’allarme batteria avviamento scarica.
Tenendo premuto per più di 3 secondi il pulsante si può disabilitare ( “ “ sul display) o abilitare ( sul display)( ) “ “
l’allarme batteria servizi scarica.
Tenendo premuto per più di 3 secondi il pulsante si può disabilitare ( “ “ sul display) o abilitare ( sul display)( ) “ “
l’allarme di tutti i serbatoi.
Tenendo premuto per più di 3 secondi il pulsante si può disabilitare ( “ “ sul display) o abilitare ( sul display) ( ) “ “
il beep di conferma tasto premuto e allarmi sonori.
Tenendo premuto per più di 8 secondi il pulsante si visualizzerà per 1 secondo la versione firmware del pannello comandi ( )
e per un altro secondo la versione firmware del derivatore collegato.
SPEGNIMENTO / MODALITA’ NOTTURNA
Premendo per 1 secondo questo tasto il pannello si spegne visualizzando la scritta . “ “
Se rimane premuto per altri 3 secondi il pannello visualizza la scritta e si abilita la funzione notturna. “ “
Nella modalità notturna si spengono tutti i simboli accesi, rimane acceso solo il simbolo , non vengono segnalati gli allarmi ma
viene gestito il controllo dello spegnimento automatico. Pigiando un tasto qualsiasi si riaccendono i simboli spenti.
GESTIONE CONSUMI
Per accendere il pannello comandi si deve toccare per 1 sec. la parte destra o sinistra del pannello dove ci sono i pulsanti.
In modalità stand-by (senza comandi attivi) il pannello comandi con il derivatore NE185/NE196 ha un consumo totale di circa 40mA.
Spegnendo il pannello comandi con il tasto si riduce a soli 3mA il consumo totale.
SPEGNIMENTO AUTOMATICO:
Se la tensione della batteria servizi scende sotto i 10,5V per più di 3 minuto si verifica un auto-spegnimento del sistema. In questo
caso è consigliabile staccare tutti i carichi con il maniglione stacca batteria e ricaricare la batteria servizi entro 2 giorni.
ATTENZIONE: In caso di inutilizzo del mezzo e di assenza collegamento 230V scollegare la batteria servizi con il maniglione
stacca batteria.
CONNESSIONI:
Sul retro del pannello e’ presente il connettore per il collegamento seriale (JP3) , il connettore per il sensore della temperatura esterna
opzionale (JP5) e il connettore per il sensore della temperatura interna remota (JP4).
Se viene collega il sensore di temperatura interna remoto si deve tagliare e togliere il sensore di temperatura della scheda posizionato
tra il supporto e la cornice.
3
II
B1
B2
B2
B1

CONTROL PANEL NE274
CONTROLS:
Push button with warning light for turning Push button with warning light for turning
INTERNAL LIGHTS on or off PUMP on or off
Push button with warning light for turning Push button with warning light for:
EXTERNAL LIGHTS on or off - to turn off the control panel
- to activate the night function
SCREENS:
The warning light goes on when the 230V mains is connected
The warning light goes on when a fuse on the NE185/NE196 shunt burns out
The warning light goes on when the vehicle engine is running and the parallel batteries is active or in the presence of the
230V mains when the two batteries are in parallel verifing before the battery service voltage
Press the push button to see internal temperature on the display ( ), press the push button twice to view external
temperature ( ) only if the external temperature sensor is present.
If the temperature probe is faulty the wording “ “ will appear. The screen remains active for approx. 30 seconds.
Repeatedly pressing this Key for viewing the level percentage (0, 33, 66, 100) of the its reservoir identified with the symbols
S1, R1, R2* ( * R2 is optional)
If S1 is empty, or R1, R2 are full with the display flashes. If the tank is wrongly connected, the display will show “ “.
The screen remains active for approx. 30 seconds.
Press the push button once to see the voltage on the service battery (B2), Press the push button again to see displays the %
the remaining battery
Only in the view as %, if there is or the displayed value is replaced with the moving segments to indicate the battery
charge. The screen remains active for approx. 30 seconds.
Press the push button once to see the voltage on the starter battery (B1), Press the push button again to see displays the %
the remaining battery
Only in the view as %, if there is the displayed value is replaced with the moving segments to indicate the battery
charge. The screen remains active for approx. 30 seconds.
ALARMS:
Batteries: Car battery (B1) less than 11,8V or Service battery (B2) less than 10,5V.
In this case there is a beep (if enabled) and the flashing battery button that have generated the alarm
(for the first 30 seconds you see the value)
Tanks: Tank S1 empty or Recovery tanks R1,R2 full.
In this case there is a bleep (if enabled) and the flashing symbol the corresponding tank that raised the alarm
(for the first 30 seconds you see the value)
: This symbol appears when there is an error communicating with NE185/NE196 shunt.
SETTING:
Hold for more than 3 seconds ( ) button can be disabled (show “ “) or enabled (show “ “) the low car battery alarm
Hold for more than 3 seconds ( ) button can be disabled (show “ “) or enabled (show “ “) the low service battery alarm
Hold for more than 3 seconds ( ) button can be disabled (show “ “) or enabled (show “ “) the alarm of all tanks
Hold for more than 3 seconds ( ) button can be disabled (show “ “) or enabled (show “ “) the the confirmation beep
button pressed, and alarm buzzers.
Hold for more than 8 seconds ( ) button, the display will show the panel firmware version for one second and then the firmware
version for the shunt in use for a further second.
SHUTDOWN / NIGHT FUNCTION
Hold down the push button for 1 seconds the panel turns off by displaying the writing “ “:
If the button remains pressed for another 3 seconds, the display shows the writing “ “ and the night function is enabled.
In the night function all the symbols are switched off, only the symbol remains litm, the alarms are not signaled but the automatic
shutdown control is managed. Press any button to light the symbols that have been turned off.
CONSUMPTION:
To turn on the control panel you must touch for 1 sec. the right or left side panel where there are the keys.
On stand by (no active controls or back lighting) the control panel with shunt NE185/NE196 consumes a total of approx 40mA. When
the key is pressed the control panel turns off and total consumption is reduced to just 3mA.
AUTO-SHUTDOWN:
If the service battery voltage drops below 10,5V, after 3 minute the control panel turns itself off, together with all live parts. In this case
is advisable to disconnect all loads with the battery main switch and recharge the battery services within 2 days.
WARNING: If the vehicle not in use and the connection 230V is not present, disconnect the battery service with the battery
main switch.
CONNECTIONS:
The back of the panel has a connector for serial connection (JP3), a connector for the optional external temperature probe (JP5) and
a connector for the remote internal temperature probe (JP4).
If connecting the remote internal temperature probe must be cut and remove the temperature sensor of the pc-board positioned
between the support and the frame.
4
GBGB
B2
B1
B1
B2

PANNEAU DE CONTROLE NE274
COMMANDES:
Bouton avec témoin lumineux pour mise Bouton avec témoin lumineux pour mise
en marche/arrêt ECLAIRAGES INTERIEURS en marche/arrêt POMPE
Bouton avec témoin lumineux pour mise Bouron avec témoin lumineux pour
en marche/arrêt ECLAIRAGE EXTERIEUR - éteindre le panneau de commande.
- activer la fonction nuit
AFFICHAGES:
Ce voyant s'allume quand on se trouve en présence d'un réseau 230V
Ce voyant s'allume quand un fusible du dérivateur NE185/NE196 est brûlé.
Ce voyant s'allume quand moteur du camping-car est en marche et que les batteries sont couplées ou en présence du réseau
230V, quand ils sont couplés les deux batterie après vérification des batterie services de tension.
Appuyer une fois sur ce bouton pour afficher la température interne ( ) et deux fois pour afficher la température externe
( ) uniquement si le capteur de température externe est présent.
Si le senseur de température est défaillant,vous verrez l'affichage : “ ”. Les écrans sont actifs pendant 30 secondes environ.
Appuyant plusieurs fois sur ce bouton de visualiser le niveau en % (0, 33, 66, 100) le réservoir correspondant identifié par le
symbole S1, R1, R2*. ( * R2 est optionnel)
Si S1 est vide ou R1,R2 sont pleins, la visualisation l'affichage clignote. Si les deux conditions si dessus ne sont pas
respectées, alors l’affichage sera “ “. Les écrans sont actifs pendant 30 secondes environ.
En appuyant une fois sur cette touche on visualise la tension batterie services (B2), appuyant une seconde fois, vous pouvez
recevoir la puissance restante de la batterie en %.
Seulement avec l'affichage en%, Si il est ou , la valeur affichée est remplacé par segments mouvement pour
indiquer la charge de la batterie. Les écrans sont actifs pendant 30 secondes environ.
En appuyant une fois sur cette touche on visualise la tension batterie auto (B1), appuyant une seconde fois, vous pouvez
recevoir la puissance restante de la batterie en %.
Seulement avec l'affichage en%, Si il est , la valeur affichée est remplacé par segments mouvement pour indiquer la
charge de la batterie. Les écrans sont actifs pendant 30 secondes environ.
ALARMES:
Batterie : Batterie auto (B1) moins que 11.8V ou batterie services (B2) moins de 10,5V.
Dans ces cas se déclenchent une alarme sonore (si activée) et le clignotant bouton de la batterie qui a déclenché
l'alarme de batterie (pour les 30 premières secondes, vous voyez la valeur)
Réservoirs : Réservoir S1 vide ou Réservoir de recouvrement R1 ou R2 pleins.
Dans ces cas se déclenchent une alarme sonore (si activée) et le clignotant symbol de le réservoir correspondant qui a
déclenché l'alarme de batterie (pour les 30 premières secondes, vous voyez la valeur)
: Ce symbole apparaît lorsque il ya un manque de communication avec le dérivateur NE185/NE196
RÉGLAGE:
Si l'on maintient l'appui sur la touche ous pouvez désactiver affichage ou ( ) pour plus de 3 secondes v (“ “ )
(” “ affichage) l’alarme les batterie auto dèchargèes.activer
Si l'on maintient l'appui sur la touche ( ) pour plus de secondes ous pouvez désactiver affichage ou 3 v (” “ )
(” “ ) l’alarme les batterie services dèchargèes.activer affichage
Si l'on maintient l'appui sur la touche pour plus de secondes ous pouvez désactiver affichage ou ( ) 3 v (” “ )
activer (” “ ) l’alarme tous les . affichage réservoirs
Si l'on maintient l'appui sur la touche ( ) pour plus de secondes ous pouvez désactiver affichage ou 3 v (” “ )
(” “ ) s.activer affichage le bip de confirmation « touche enfoncée » et des alarmes sonore
Si 8 , l'écran affiche la version du micrologiciel du panneau pendant l'on maintient l'appui sur la touche ( ) pour plus de secondes
une seconde, puis la version du micrologiciel pour de dérivateur utilisé pendant une seconde de plus.
FONCTION ARRÊT / NUIT
Si l'on maintient l'appui sur la touche pour 1 seconde, le panneau s’éteint en affichant ” “
Si le bouton reste appuyé pendant 3 secondes, l'écran affiche l'écriture ” “ et la fonction de nuit est activée.
Dans la fonction de nuit, tous les symboles sont désactivés, seul le symbole reste illuminé, les alarmes ne sont pas signalées
mais la commande d'arrêt automatique est gérée. Appuyez sur n'importe quel bouton pour allumer les symboles désactivés.
GESTION DE LA CONSOMMATION
Pour allumer le panneau de commande doit toucher sur le panneau latéral droit où il y es touches,ement à où à gauche là a l
En mode stand-by (aucune commande activée), le panneau de commande et le dérivateur ont une consommation NE185/NE196
totale d'environ mA. la touche pour éteindre le tableau des commandes et abattre ainsi à mA seulement la 40 Appuyer sur 3
consommation totale.
ARRÊT AUTOMATIQUE
Si la tension de la batterie de descend sous les 10 V, minute plus tard le tableau de command ainsi que toutes les charges service ,5 trois e
actives s'éteindront. Dans ce cas est conseillé de débrancher toutes les charges avec l'interrupteur principal de la batterie, et recharger la
batterie des services dans les 2 jours.
ATTENTION: En cas de non utilisation du véhicule et sans connexion à 230V débranchez la batterie service avec l'interrupteur principal
de batterie.
CONNEXIONS:
Derrière le tableau des commandes, il y a un connecteur pour la connexion sérielle (JP3), un connecteur pour le senseur de la
température externe facultatif (JP5) et un connecteur pour le senseur de la température interne à distance(JP4).
Si vous connectez le capteur de température à distance à l'intérieur, vous devez d'abord couper et enlever le capteur de température
monté sur le circuit positionné entre le support et le cadre.
5
FF
B2
B1
B1
B2

BEDIENPANEL NE274
6
DD
BEFEHLE:
Leuchtdrucktaste INNENBELEUCHTUNG EIN/AUS Leuchtdrucktaste PUMPE EIN/AUS
Leuchtdrucktaste AUSSENBELEUCHTUNG EIN/AUS Leuchtdrucktaste:
- um das Bedienfeld auszuschalten
- um die Nacht Funktion zu aktivieren
ANZEIGEN:
Diese Kontrolllampe schaltet ein, wenn 230V Netzstrom vorhanden ist.
Diese Kontrolllampe schaltet ein, wenn das eines des Verteiler NE185/NE196 Sicherung ist durchgebrannt.
Diese Kontrolllampe schaltet ein, wenn 230V das Camping-Reisebus davon geht e die Batterien zusammengefügt oder in
Netzstrom vorhanden wenn die beiden Batterien gekoppelt sind Überprüfen der Spannung der Servicebatterie
Beim Drücken dieser Taste wird auf dem Display die Innentemperatur angezeigt ( ),beim doppelten Drücken dieser Taste
wird die Außentemperatur angezeigt ( ) nur wenn der externe Temperatursensor vorhanden ist. Ist der Temperaturfühler
defekt, erscheint die Schrift “ ”. Die Anzeige bleibt zirka 30 Sekunden aktiv.
Durch wiederholtes Drücken der Taste, erscheint auf dem Display, das Niveau in% der Tank, mit den Symbolen
gekennzeichnet S1, R1, R2*. ( * R2 ist optional)
Wenn S1 ist leer oder R1,R2 sind voll, blinkt die Anzeige auf dem Display
Wenn Ist der Anschluss an den Tank falsch, erscheint die Anzeige “ ”. Die Anzeige bleibt zirka 30 Sekunden aktiv.
Drücken Sie diese Taste einmal, sehen Sie die Spannung , der Servicebatterie (B2) Drücken der Taste ein zweites Mal, zeigt es
die verbleibende Batteriekapazität%.
Nur in der Anzeige in%, wenn es oder , wird der angezeigte Wert mit beweglichen Segmente ersetzt, um den
Ladezustand des Akkus anzuzeigen. Die Anzeige bleibt zirka 30 Sekunden aktiv.
Drücken Sie diese Taste einmal, sehen Sie die Spannung , der Startbatterie (B1) Drücken der Taste ein zweites Mal, zeigt es
die verbleibende Batteriekapazität%.
Nur in der Anzeige in%, wenn es , wird der angezeigte Wert mit beweglichen Segmente ersetzt, um den Ladezustand
des Akkus anzuzeigen. Die Anzeige bleibt zirka 30 Sekunden aktiv.
ALARME:
Batterie: Starterbatterie(B1) niedriger als 11 V oder Servicebatterie(B2) niedriger als 10,5V. ,8
In diesem Fall ertönt ein Signalton (wenn aktiviert) und das blinkende Batteriesymbol, dass der Alarm ausgelöst (Für den
ersten 3 Sekunden sehen Sie den Wert)
Tanks: Tank S1 leer oder Tanks R1,R2 voll.
In diesem Fall ertönt ein Signalton (wenn aktiviert) und das Blinken des Symbols des entsprechenden Behälters, dass der
Alarm ausgelöst
: Dieses Symbol erscheint wenn das gibt es einen Kommunikationsfehler mit dem Verteiler NE185/NE196.
EINSTELLUNGEN:
Halten Sie die Taste länger als 3 Sekunden können Sie disabilirare ( Anzeige) oder enable ( Anzeige) die ( ) “ “ ” “
Starterbatterie erschöpft Alarm.
Halten Sie die Taste länger als 3 Sekunden können Sie disabilirare ( Anzeige) oder enable ( Anzeige) die( ) “ “ ” “
Servicebatterie erschöpft Alarm.
Halten Sie die Taste länger als 3 Sekunden können Sie disabilirare ( Anzeige) oder enable ( Anzeige) die ( ) “ “ ” “
Alarm für alle Tanks.
Halten Sie die Taste länger als 3 Sekunden können Sie disabilirare ( Anzeige) oder enable ( Anzeige)( ) “ “ ” “
dem Signalton, der das Drücken der Taste bestätigt und akustische Alarme.
Halten Sie die Taste länger als 8 Sekunden um auf dem Display anzuzeigen wird für eine Sekunde die Firmware-Version des( )
Panels und für eine weitere Sekunde die Firmware-Version des Verteiler angezeigt.
ABSCHALTUNG / NACHT FUNKTION:
Halten Sie den Druckknopf für 1 Sekunde gedrückt, bis sich das Panel ausschaltet, indem Sie die Schrift " " anzeigen.
Wenn die Taste für weitere 3 Sekunden gedrückt bleibt, zeigt das Display den Schriftzug " " an und die Nachtfunktion ist
aktiviert. In der Nachtfunktion sind alle Symbole ausgeschaltet, nur das Symbol leuchtet, die Alarme werden nicht signalisiert,
aber die automatische Abschaltsteuerung wird verwaltet. Drücken Sie eine beliebige Taste, um die ausgeschalteten Symbole zu
beleuchten.
VERBRAUCH:
So wechseln Sie auf dem Bedienfeld. Berühren Sie die rechte oder links Seitenwand, wo befinden sich die Tasten für 1 Sekunde.
In der Modalität Stand-by (ohne aktivierte Befehle) verbraucht das Schaltfeld mit der NE185/NE196 zirka 40mA.Verteiler Wird die
Taste gedrückt , schaltet das Paneel aus und verbraucht nur mehr 3mA.
AUTOMATISCHES ABSCHALTEN
Sinkt die Spannung der Servicebatterie unter 10,5V, nach zirka 3 Minute schaltet das Bedienungspaneel mit allen aktiven Ladungen
automatisch aus. In diesem Fall ist es ratsam alle Lasten mit dem Batterie-Hauptschalter unterbrechen und Aufladen der Batterie Service
innerhalb von 2 Tagen.
WARNUNG: Wenn das Fahrzeug nicht in Gebrauch ist und die Verbindung 230V nicht vorhanden ist, trennen Sie das Service-Batterie mit
dem Batterie-Hauptschalter.
ANSCHLÜSSE:
Auf der Rückseite der Steuerschalttafel befindet sich die Steckbuchse für den seriellen Anschluss (JP3), die Steckbuchse für den Fühler
der fakultativ Außentemperatur (JP5) und die Steckbuchse für den Fühler der Innenentemperatur Fernbedienung (JP4).Wenn Anschluss
des Temperatursensor in der Fernbedienung, müssen Sie zuerst schneiden und entfernen Sie den Temperatursensor auf der Platine
montiert, zwischen der Mechanik der Panel platziert und den Rahmen.
B2
B1
B1
B2

COMANDOS:
Botón con luz de aviso para encender o Botón con luz de aviso para encender o
apagar LUCES INTERIORES apagar BOMBA
Botón con luz de aviso para encender o Botón con luz:
apagar LUZ EXTERIOR - para apagar el panel
- para activar el modo nocturno
INDICACIONES:
Este indicador luminoso se enciende cuando está presente la red 230V.
Este indicador luminoso se enciende cuando se quema un fusible de la derivación NE185/NE196.
Este indicador luminoso se enciende cuando está activo el paralelo de las baterías con la autocaravana arrancada o en
presencia de red de 230V cuando las dos baterìas están acopladas, primero mediante la comprobación de voltaje de los
servicios bateria.
Al pulsar este botón, se muestra el indicador de temperatura interior ( ), al pulsar una segunda vez, muestra la
temperatura exterior ( ) solo si el sensor de temperatura externo está presente.
Si el sensor de temperatura está averiado, aparece la inscripción “ ”. La visualización queda activa durante unos 30 segs.
Pulsando repetidamente el botón se muestra en el nivel en% (0, 33, 66.100) de su Depósito identificado con el símbolo S1,
R1, R2*. ( * R2 es opcional)
Si S1 está vacío o R1 y R2 están llenos de la pantalla parpadea. Si la conexión al depósito está errada en el display
aparece la inscripción “ ”.La visualización queda activa durante unos 30 segs.
Al pulsar este botón una vez que muestra el voltaje de la batería de servicios B2, al pulsar un segundo vez que se muestra
en la batería automonia% restante.
Sólo en la pantalla en%, si hay o el valor mostrado se sustituye con segmentos móviles para indicar la carga de la
batería. La visualización queda activa durante unos 30 segs.
Al pulsar este botón una vez que muestra el voltaje de la batería de auto B1, al pulsar un segundo vez que se muestra en la
batería automonia% restante.
Sólo en la pantalla en%, si hay el valor mostrado se sustituye con segmentos móviles para indicar la carga de la batería.
La visualización queda activa durante unos 30 segs.
ALARMS:
Baterìas: Batería auto (B1) menor de 11,8V o Batería servicios (B2) menor de 10,5V.
En este caso hay una alarma audible (si está activado) y bateria de botón parpadeante que generó la alarma (durante los
primeros 30 segundos se muestra en el valor).
Depósitos: Depósito S1 vacío o Depósitos recuperación R1 R2 llenos.
En este caso hay una alarma audible (si está activado) y el parpadeo del símbolo en el mismo tanque que ha generado la
alarma (durante los primeros 30 segundos se muestra en el valor).
: Este símbolo aparece cuando hay un error de comunicación con la derivación NE185/NE196.
CONFIGURACIÓN:
Si mantiene pulsado más de 3 segundos el botón de ( ), se puede desactivar (se visualiza “ “) o permitir (se visualiza “ “)
la alarma de descarga de la batería de arranque.
Si mantiene pulsado más de 3 segundos el botón de ( ), se puede desactivar (se visualiza “ “) o permitir (se visualiza “ “)
la alarma de descarga de la batería de servicios.
Si mantiene pulsado más de 3 segundos el botón de ( ), se puede desactivar (se visualiza “ “) o permitir (se visualiza “ “)
la alarma de todos los tanques.
Si mantiene pulsado más de 3 segundos el botón de ( ), se puede desactivar (se visualiza “ “) o permitir (se visualiza “ “)
el botón presionado tono de confirmación, y las alarmas sonoras.
Si mantiene pulsado más de 8 segundos el botón de ( ), lla pantalla mostrará la versión de firmware del panel por un segundo y
luego la versión de firmware para el derivación en uso por un segundo más.
MODO APAGADO / NOCHE:
Al presionar esta tecla durante 1 segundo, el panel se apaga al mostrar la palabra .“ “
Si permanece presionado por otros 3 segundos, el panel muestra la escritura “ “ y la función nocturna está habilitada.
En el modo nocturno, todos los símbolos están apagados, solo el símbolo permanece encendido, las alarmas no se señalizan,
pero se controla el apagado automático. Al presionar cualquier botón, los símbolos se vuelven a encender.
GESTIÓN CONSUMOS:
Para activar el panel de control, toque el lado derecho o izquierda del panel donde están los botones presentes durante 1 segundo.
En modalidad stand-by (sin cargas activas) el tablero de mandos con el derivador NE185/NE196 tiene un consumo total de 40mA
aproximadamente. Pulsando el botón se apaga el tablero de mandos reduciendo a tan sólo 3mA el consumo total.
PARADA AUTOMÁTICA:
Si la tensión de la batería de los servicios desciende por debajo de los 10,5V y transcurrido 3 minute se verifica un auto-apagado del
tablero de mandos con correspondiente apagado de todas las cargas activas. En este caso es aconsejable desconectar todas las cargas
con el interruptor principal de la batería y recargar la batería de servicio dentro de 2 días.
ATENCIÓN: Si el vehículo no está en uso y el enlace 230 no está presente, desconecte la batería en servicio con el interruptor principal
de la batería servicios.
CONEXIONES:
En la parte trasera del tablero se encuentran el conector para la conexión serial (JP3), el conector para el sensor de la temperatura
exterior opcional (JP5) y el conector para el sensor de la temperatura interior remoto (JP4) .
Si se conecta el sensor de la temperatura interior remoto primero debe cortar y retirar el sensor de temperatura de la tarjeta posicionado
entre el la mecánica del panel y el marco.
7
PANEL DE MANDOS NE274 EE
B2
B1
B1
B2

NE274T 95.0001.233 Rev. 0
Viale delle Industrie 6A - ITALY
31018 Z.I. ALBINA DI GAIARINE (TV)
Tel.+39 0434 759420
www.nordelettronica.it
GARANZIA: NORDELETTRONICA riconosce un periodo di
garanzia di 2 (due) anni su tutti i suoi prodotti elettronici in rispetto alla
Direttiva Comunitaria 1999/44/CE recepita con Decreto Legislativo
24/2002. Sono esclusi dalla garanzia guasti o danni causati da:
Uso inadeguato e inappropriato del prodotto o impiego per uno scopo
diverso da quello previsto normalmente e sotto inosservanza delle relative
istruzioni per l’uso, negligenza, imprudenza o imperizia nell’installazione e
nell’uso
(NORDELETTRONICA declina ogni responsabilità per danni a cose o
persone), manutenzioni e/o riparazioni effettuate da personale esterno o
non direttamente autorizzato da NORDELETTRONICA.
I prodotti senza diritto o fuori garanzia verranno esclusivamente
riparati a carico del cliente (spese di trasporto e riparazione).
GUARANTEE: NORDELETTRONICA grants a guarantee period
of 2 (two) years on all its electronic products (in application of EU
Directive 1999/44/CE. The guarantee excludes faults or damage to
products originating from: unsuitable or inappropriate use of the product
or its employment for a purpose different from its usual one
(NORDELETTRONICA declines all responsability for damage to people
or things), or failure to observe the instructions for use provided by
NORDELETTRONICA, negligence, carelessness or unskilled practice in
installation and use, maintenance and/or repairs carried out by external
personnel or not authorized directly by NORDELETTRONICA.
Inapplicable products or those not covered by the terms of the
guarantee shall be repaired exclusively at the customer's expense
(transport and repairs).
GARANTIE : Tous nos produits électroniques
NORDELETTRONICA sont garantis deux ans conformément à la Norme
Communautaire 1999/44/CE. Les pannes ou les dommages imputables
aux cas de figure ci-dessous sont hors garantie :
usage impropre et inadéquat du produit ou utilisation autre que celle pour
laquelle le produit a été fabriqué, non respect du mode d'emploi,
négligence, imprudence ou impéritie lors de l'installation et à l'usage.
NORDELETTRONICA décline toute responsabilité dans le cas de
dommages à des personnes ou à des choses dans le cas de
maintenance effectuée par des tiers non expressément autorisés par elle.
Les réparations de produits non couverts ou hors garantie seront à
charge du client (frais de transport et réparation).
GARANTIE-BEDINGUNGEN: NORDELETTRONICA gewährt eine
Garantie für den Zeitraum von 2 (zwei) Jahren auf alle seine
elektronischen Produkte gemäß der Direktive der Europäischen
Gemeinschaft 1999/44/CE.
Von der Garantie ausgenommen sind Störungen und Schäden welche
durch folgendes entstanden sind:
Unsachgemässiger und ungeeigneter Einsatz des Produktes oder
Gebrauch für andere Zwecke als normalerweise vorgesehen und/oder
Nichtbeachtung der Gebrauchsanweisungen, Leichtfertigkeit,
Unvorsichtigkeiten im Einbau und in der Benutzung.
NORDELETTRONICA weist jegliche Verantwortung zurück für
entstandene Schäden an Sachen oder Personen welche durch Reparatur-
und Unterhaltsarbeiten entstanden sind, die von Personal verursacht
wurden, welches nicht explizit und direkt von NORDELETTRONICA dazu
beauftragt wurde.
Produkte ohne Garantieanspruch oder ausserhalb des Garatie-
Zeitrahmens liegend werden ausschliesslich zu Lasten des Kunden
repariert (Reparatur und Transportkosten).
GARANTÍA: NORDELETTRONICA reconoce un periodo de
garantía de 2 (dos) años en todos sus productos electrónicos según la
Directiva Comunitaria 1999/44/CE. Se excluyen de la garantía averías o
daños causados por:Uso inadecuado e inapropiado del producto o uso
para un fin distinto de lo que está previsto normalmente, no observancia
de las correspondientes instrucciones de uso, negligencia, imprudencia o
impericia durante la instalación o el uso
(NORDELETTRONICA declina toda responsabilidad por daños a cosas
o personas), mantenimientos y/o reparaciones efectuados por personal
exterior o no directamente autorizado por NORDELETTRONICA.
Los gastos de reparación de productos sin derecho o fuera de
garantía estarán exclusivamente a cargo del cliente (gastos de
transporte y reparación).
E
D
F
GB
I
Table of contents
Languages:
Other Nordelettronica Control Panel manuals
Nordelettronica
Nordelettronica NE274 User manual

Nordelettronica
Nordelettronica NE334 User manual
Nordelettronica
Nordelettronica NE356T User manual

Nordelettronica
Nordelettronica KIT-NE185-12S User manual
Nordelettronica
Nordelettronica NE269 User manual
Nordelettronica
Nordelettronica NE273-D User manual
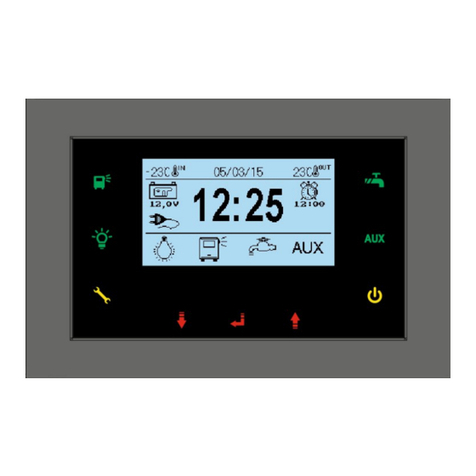
Nordelettronica
Nordelettronica NE276M User manual

Nordelettronica
Nordelettronica NE274-TVDL User manual
Nordelettronica
Nordelettronica NE319 User manual
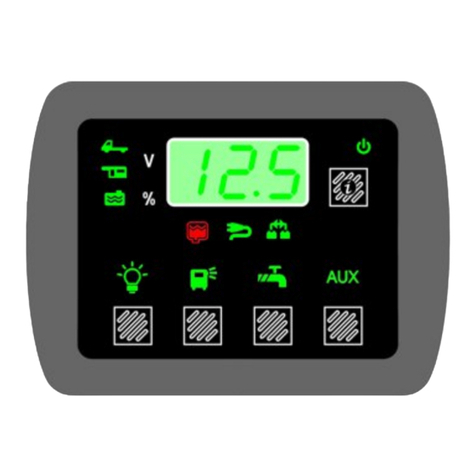
Nordelettronica
Nordelettronica NE293 User manual
