SETTINGS:
Time and Date - Toggle between Date and Time in the lower right-hand section of screen
Language - Choose from multiple languages
Display - Choose between Normal and Inverted displays
Lock Settings - Locks all settings on the recorder
Contrast - Adjusts LCD screen contrast
General Settings
Resolution - Choose between High and Normal resolution
Mark Diaries - Choose whether to denote diary entries on ECG with a 6-cycle square wave
Record Type - Choose between 3-channel and Oximetry. 12-Lead and SAECG are optional.
12-Lead Settings
Interval - How often an interval is saved. Number denotes seconds between saves
Length - Length of 12-Lead strip that is saved
Sample Rate - Choose between 720 and 1440 samples per second
TO START RECORDING:
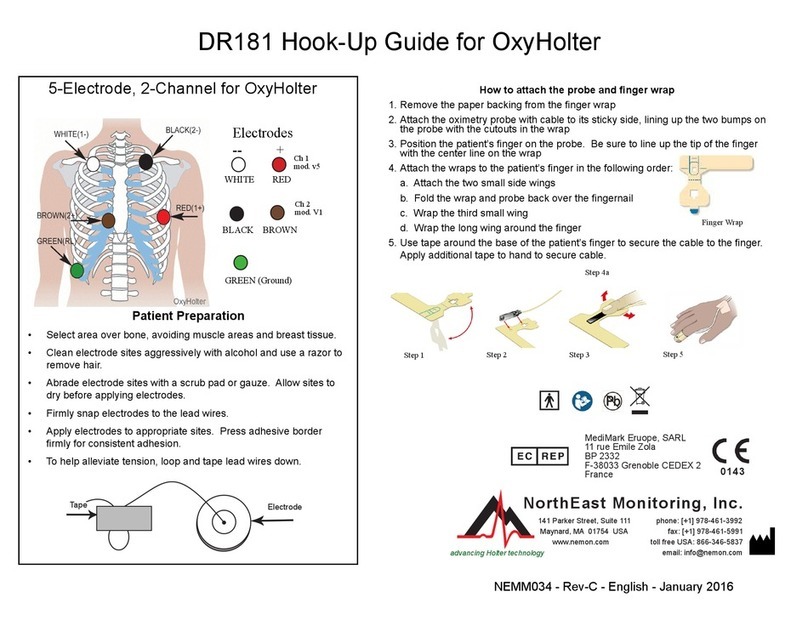
1. Attach cable to recorder and then hook-up the patient as shown on reverse.
2. Insert a formatted SD card and 2 AA batteries into the recorder. Erase SD Card memory if prompted
to do so. The screen will display date, time, battery strength, “DR181”, software version and
“NorthEast Monitoring”. Press Next to continue to main menu.
3. If desired, adjust settings by pressing the button on the keypad. In Settings, press More to see
additional setting options.
4. When settings are correct, go back to the main menu by pressing the Prev (Previous) button.
5. Press New Patient screen to verify or enter Patient ID. At least one character must be entered for
Patient ID. Press Next when nished entering Patient ID.
6. You will now see lead quality for 3 channels. Lead quality, or impedance, should be 4 or 5 for best
results. Adjust leads if required.
7. Press Record to start recording. (For 12-Lead, press Next to see all four screens of lead quality.)
AFTER RECORDING:
To remove card after recording, gently push inward to release. Never pull card out of slot, as it may
damage the recorder.
NOTE: If you want to record a new patient and less than an hour has gone by since you nished your
last, the recorder may try to continue recording. You can interrupt the 5 second countdown by
pressing the 5-left hand buttons starting at the top. Erase the SD Card and you can now record a
new patient.
MESSAGES:
Battery LOW or FAILURE - Replace both batteries
before starting recorder.
Erase SD Card? YES/NO - If the SD card has been
used for a previous patient, you will need to erase now.
If the card should not be erased as it has ECG data that
you do not want to lose, you will need to remove it and
put in another formatted SD card.
SD card is full - Recording has stopped because
memory is full.
SD Card errors - SD Cards must be formatted using
your HE/LX Analysis software. Also, the SD Card must
have a ash.dat le on it to record. Refer to your HE/
LX Analysis Operator’s Manual for details on SD Card
errors and how to format the card.
DR181 Quick-Start Guide for Holter
Copyright 2011 - 2016 Northeast Monitoring, Inc. NEMM033 - Rev-C - English - January 2016
MediMark Eruope, SARL
11 rue Emile Zola
BP 2332
F-38033 Grenoble CEDEX 2
France 0143


