Titan – Reassembly
STEPS DESCRIPTION IMAGE
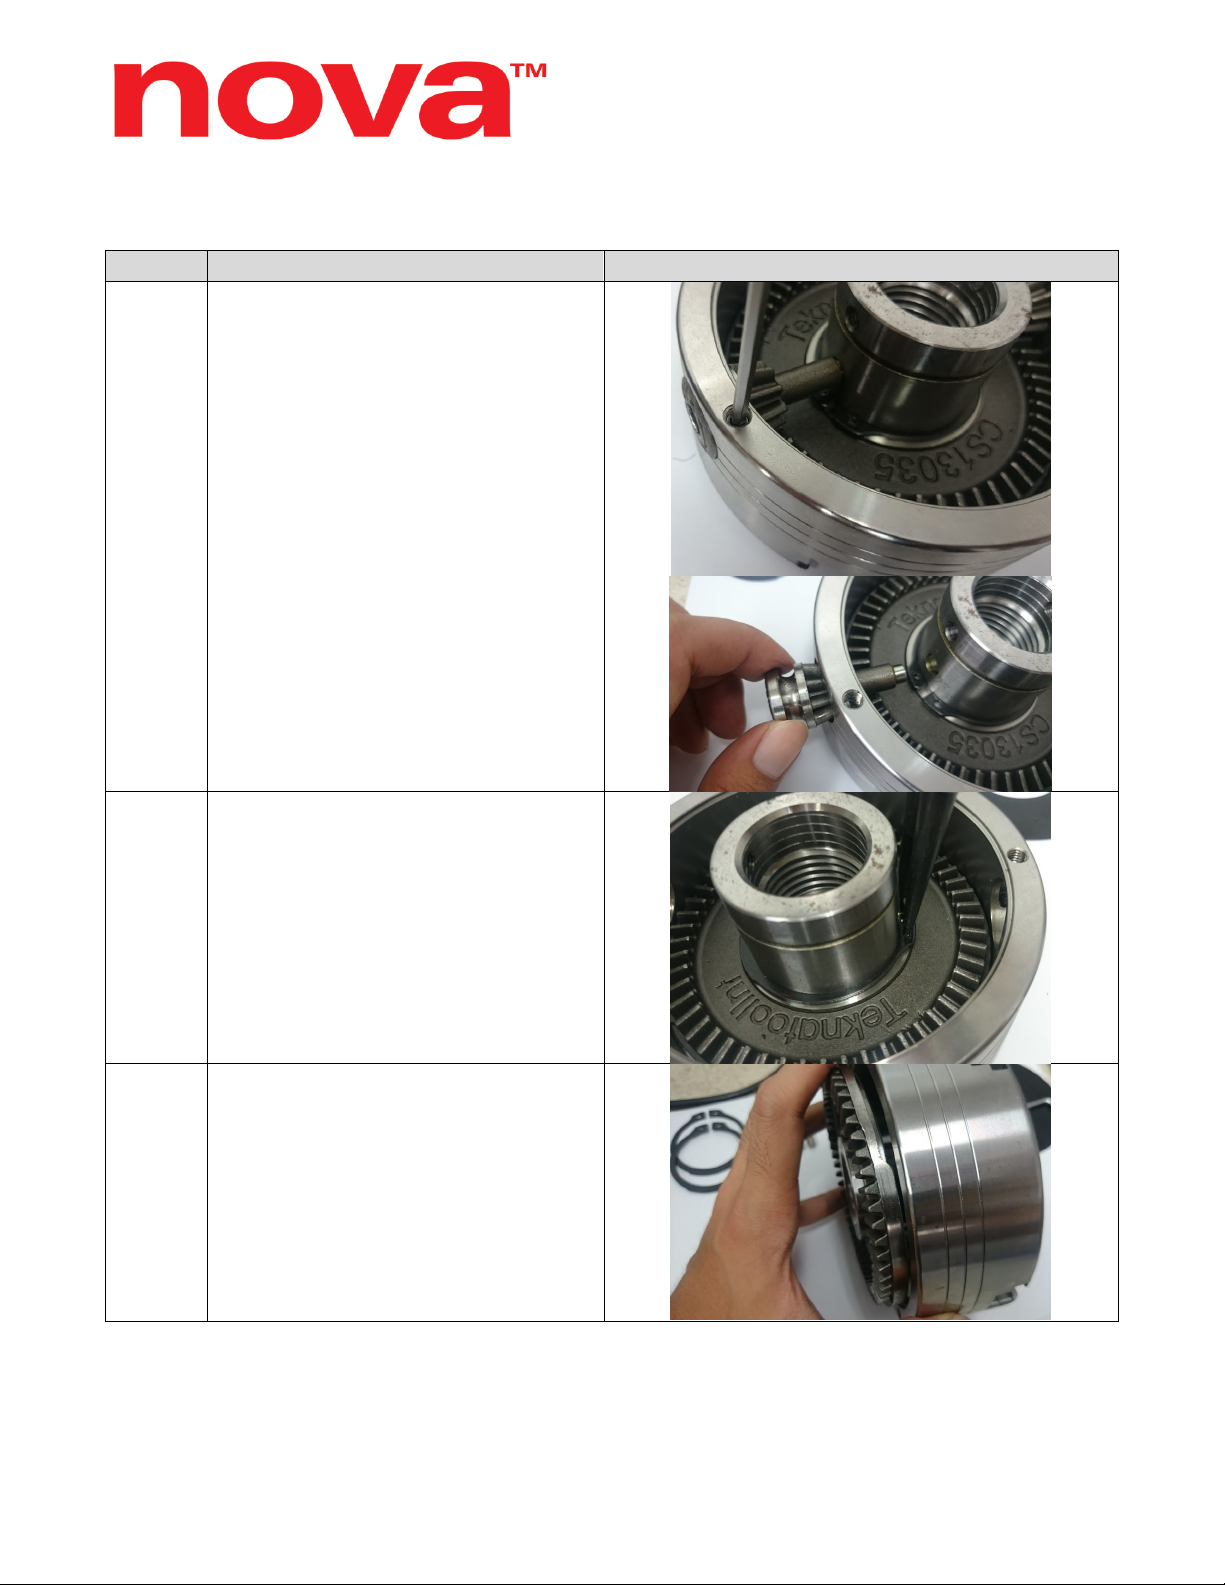
1.
Before reassembly, apply a generous
amount of lubricant where parts come
into contact.
We recommend applying the lubricant
to the inner surface of the chuck body
as well as the jaw slide slots before
assembly. Also, apply lubricant on the
spiral teeth side of the scroll ring.
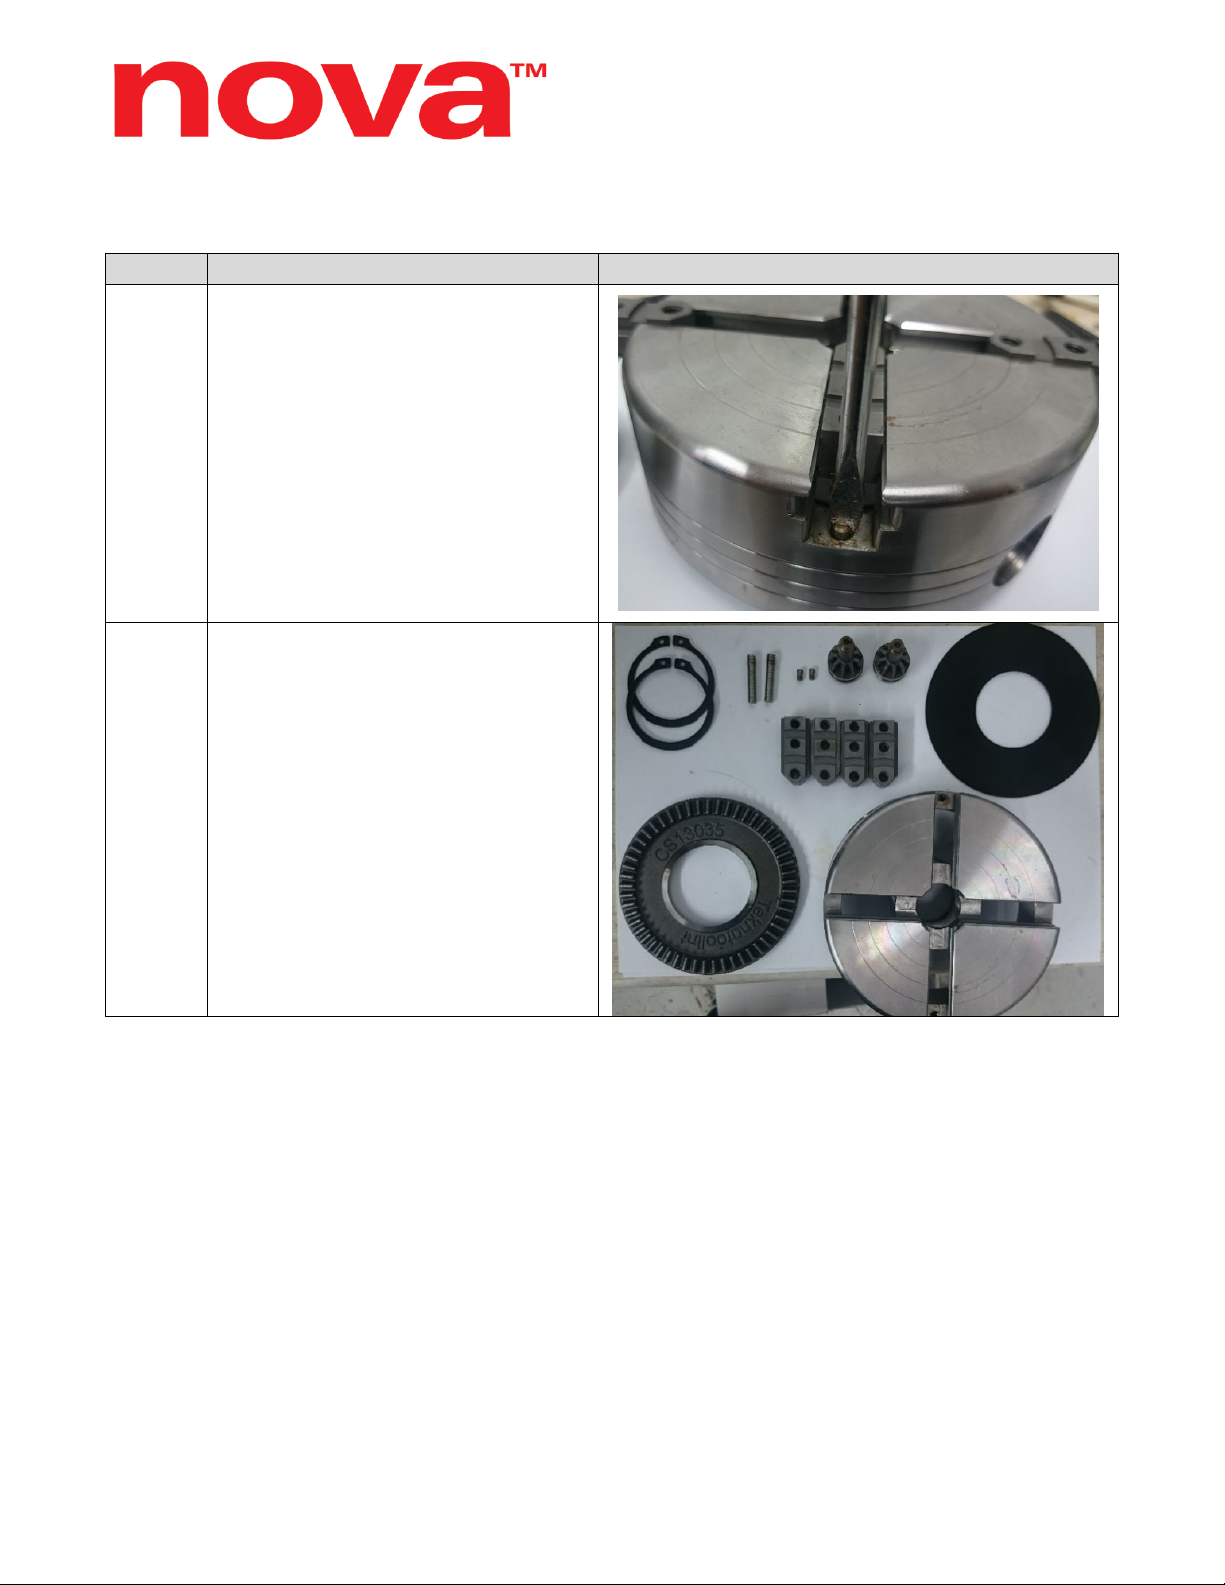
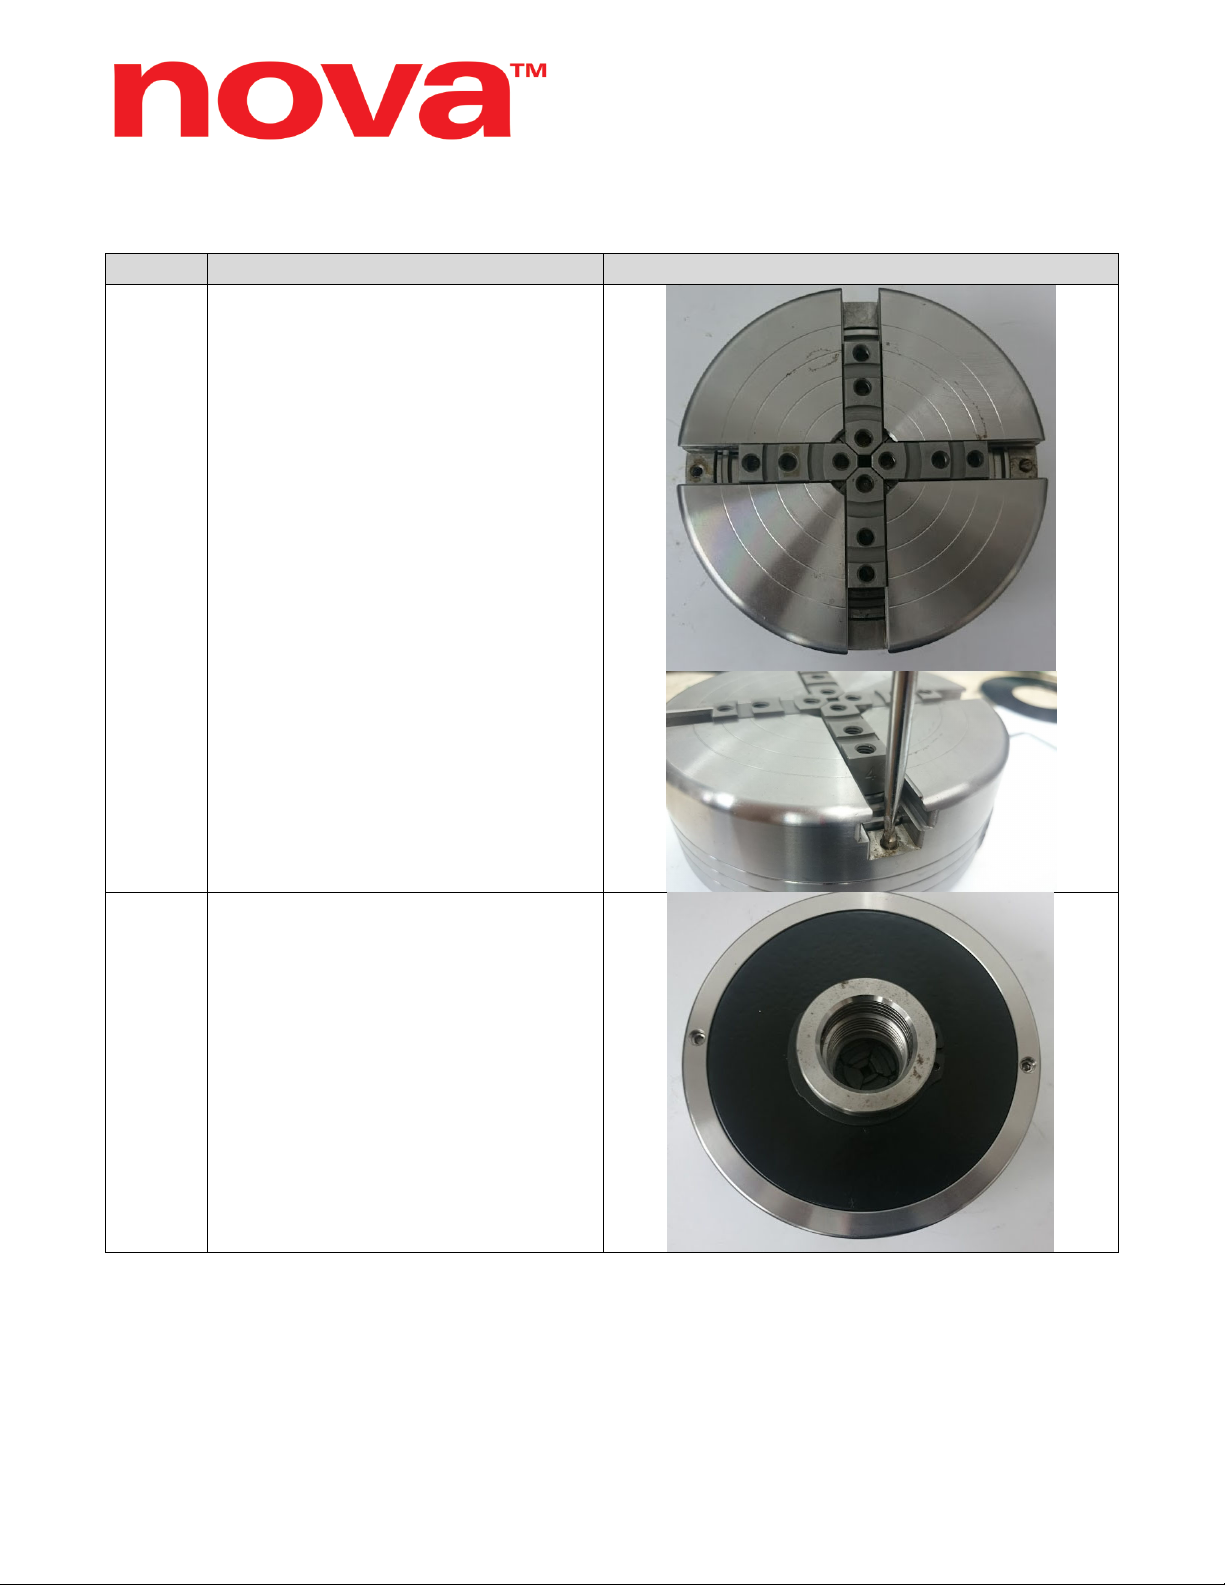
2.
Reinsert the jaw slides back into their
original slots.
Looking from the front, the jaw slide
number should be counting up from 1-
4 in the clockwise direction.
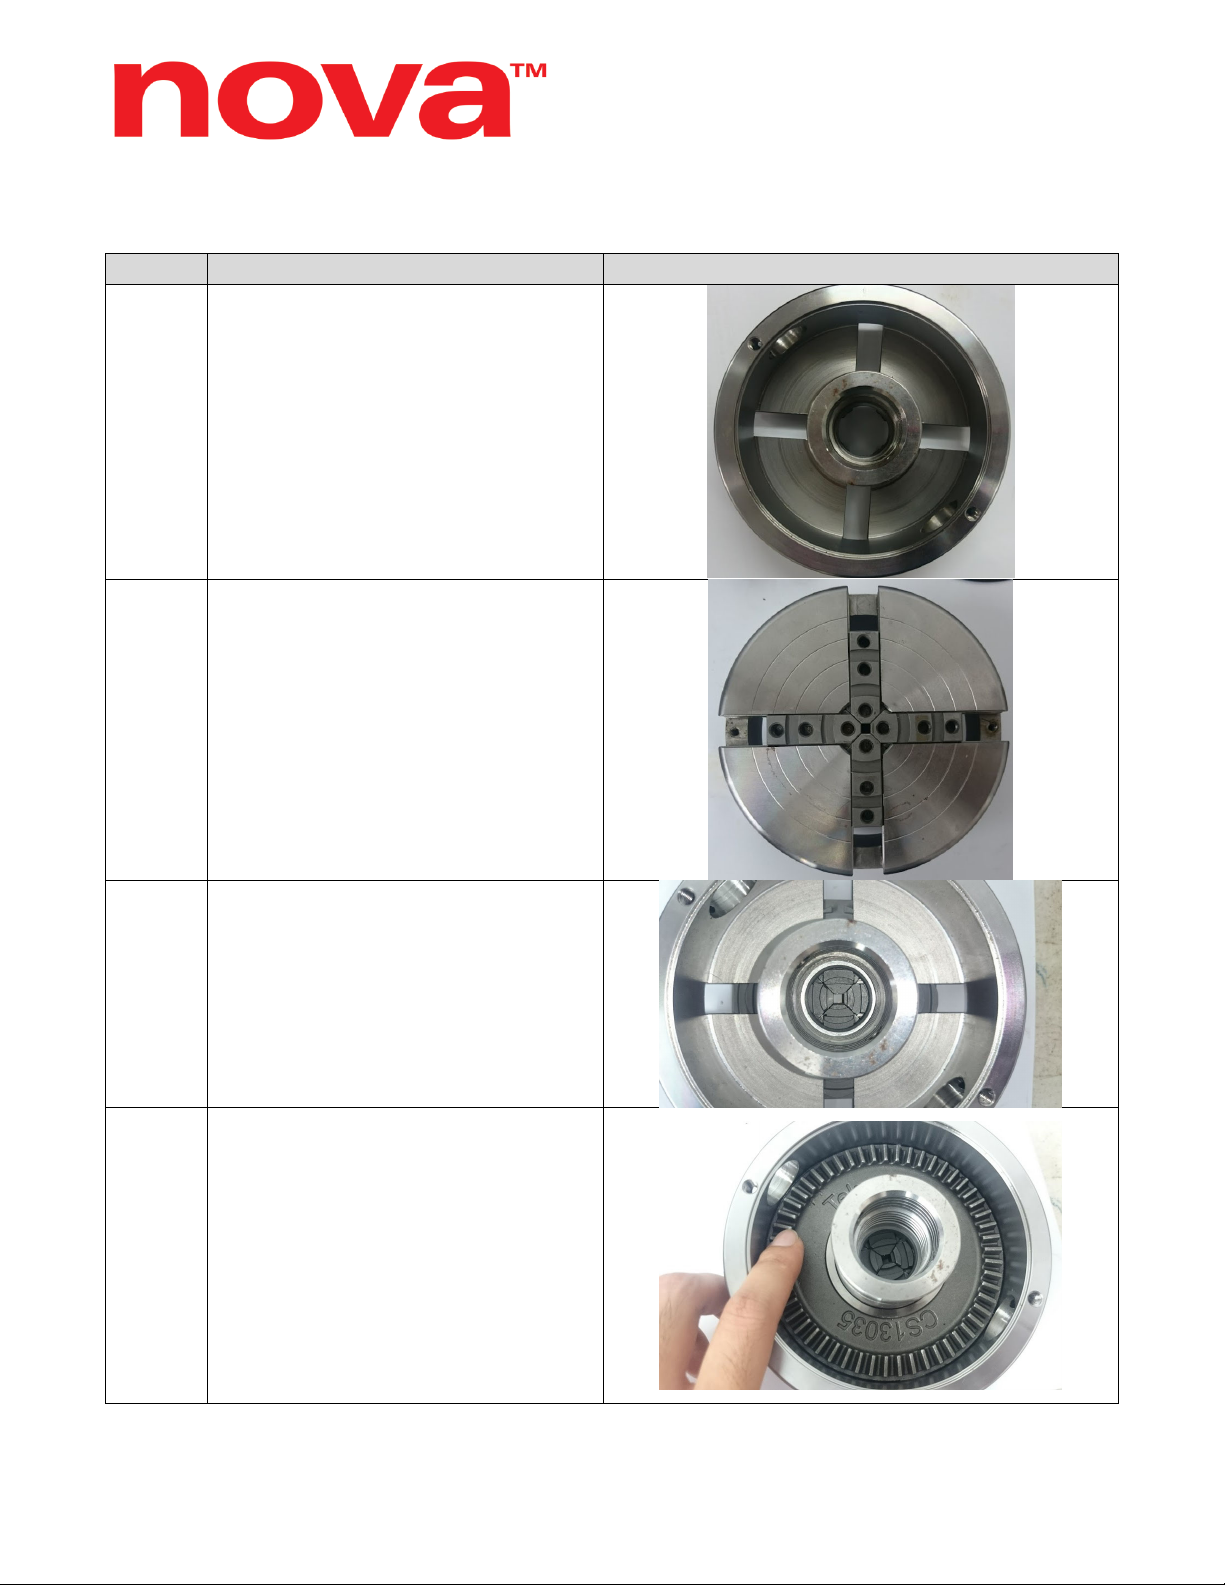
3.
Flip the chuck on its face and position
the jaw slides to form a square in the
centre as shown.
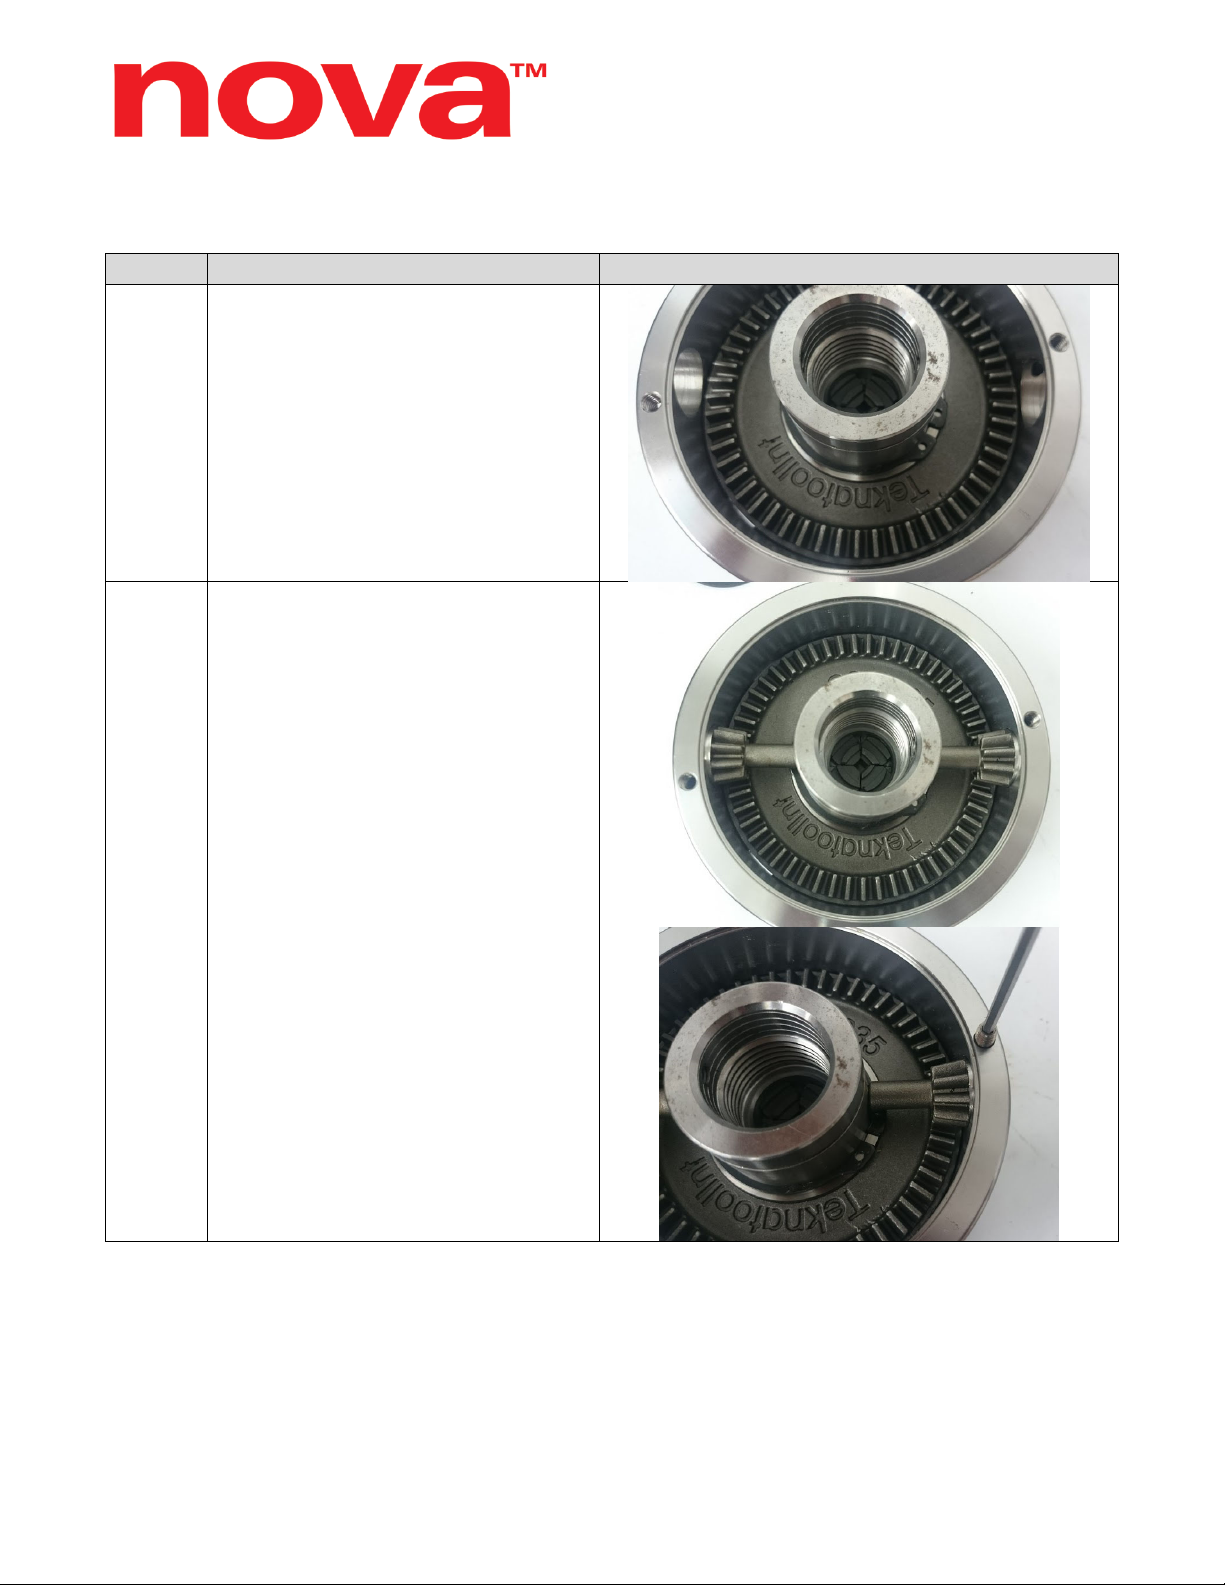
4.
Slide the scroll ring back into the
chuck body. Once it is in place, rotate
the scroll ring until it engages with the
jaw slides.
You should be able to feel the scroll
rings engage as it will drop into place,
exposing the slot where the snap ring
will fit.
Alternatively, you will see the jaw
slides move as you turn the scroll ring.
Continues to next page…
p.23