Novar lingo User manual

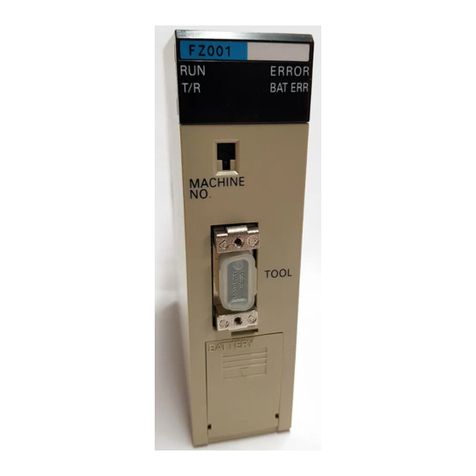
Lingo®Electronic Assembly
Installation Instructions
DOC. #569066000—B 7/30/04 PRINTED IN U.S.A.

Regulatory Compliance
Safety
This device has been tested and found to be in compliance with the requirements set forth in UL 916,
Energy Management Equipment, and is listed by Underwriters Laboratories, Inc., for installations in
the United States.
This device has been tested and found to be in compliance with the requirements set forth in C22.2,
No. 205-M1983, Signal Equipment, and is Certified by Underwriters Laboratories, Inc., for installations
in Canada.
Electromagnetic Compatibility
(EMC)
Federal Communications Commission (FCC)
This device complies with Part 15 of the FCC Rules. Operation is subject to the following two
conditions: (1) This device may not cause harmful interference, and (2) This device must accept any
interference received, including interference that may cause undesired operation.
NOTE! This device has been tested and found to comply with the limits established for
Class A digital devices. It is intended to be used in a commercial environment.
Operation of this equipment in residential environments may cause harmful
interference, in which case the user may be required to correct the interference
at his own expense.
CAUTION! Any changes or modifications not expressly approved by Novar Controls
Corporation could void your authority to operate this equipment.
Industry Canada
This digital apparatus does not exceed the Class A limits for radio noise emissions from digital
apparatus set out in the interference-causing equipment standard entitled Digital Apparatus,
ICES-003, of Industry Canada.
Cet appareil numérique respecte les limites de bruits radioélectriques applicables aux appareils
numériques de Classe A préscrites dans la norme sur le matériel brouiller: Appareils Numériques,
NMB-003, édictée par l’Industrie Canada.
Disclaimer
Logic One®and Hawki®are registered trademarks of Novar Controls Corporation.
The material in this manual is for information purposes only. The contents and the product it
describes are subject to change without notice. Novar Controls Corporation makes no
representations or warranties with respect to this manual.
In no event shall Novar Controls Corporation be liable for technical or editorial omissions or mistakes
in this manual, nor shall it be liable for any damages, direct or incidental, arising out of or related to
the use of this manual.
Copyright © 2004 by Novar Controls Corporation. All rights reserved.
No part of this manual may be reproduced in any form or by any means
without prior written permission from Novar Controls Corporation.
Novar Controls Corporation
6060 Rockside Woods Blvd., Cleveland, OH 44131
Tel: 800.348.1235 www.novarcontrols.com

Description
The Lingo®Energy Infosystem is the next generation control processor that
functions as a system network manager and control monitor in Novar Controls
Corporation’s Advanced Building Control System.
Lingo monitors and logs the operations of the local control modules, manages
network communications, and provides expandable and integrated control of the
building’s equipment. Lingo’s processing power, compatibility, and multiple
network capabilities provide optimum control to cut energy costs, increase
comfort, and reduce equipment maintenance.
This document provides the installation procedures for mounting the Lingo
electronic assembly, connecting it to the telephone network, and checking the
installation.
Lingo Specifications
Agency Approvals
Listed device: CUL/UL E90949
Standards used: UL 916, Energy Management Equipment
CSA C22.2, No. 205-M1983, Signal Equipment
Power Requirements
Voltage: 24 VAC, Class 2
Consumption: 40 VA
Input/Output Ratings
Analog Inputs: 4 to 20 mA
Digital Inputs: Contact closure only
Output (Fault): 24 VAC or VDC, 2 amp (pilot duty), Class 2
Operating Environment
Temperature: 32°to 140°F(0°to 60°C)
Humidity: 0 to 95% Relative, noncondensing
Physical Dimensions (Electronics only)
Height: 19 inches
Width: 13.25 inches
Depth: 2.5 inches
Weight: 5.85 lb (All aluminum enclosure)
Doc. #569066000—B 7/30/04 1
Lingo Electronic Assembly Installation Instructions

Precautions
Take the following precautions during installation:
§Observe national and local electrical codes.
§Connect 24-VAC power wiring to the terminals marked as 24 VAC only.
Connection to other terminals will damage them.
§Do not use the Lingo as a final safety device.
§Make sure that the 24-VAC power wiring is connected to a dedicated
transformer. No other devices should be powered by the transformer
connected to the Lingo.
§Do not ground the transformer for this module on the secondary side.
§Make sure that the Lingo power cannot be switched off accidentally. The
Lingo requires continuous power for proper operation.
Setting the Module
Address
Every Lingo module must have a unique address for it to be properly identified
on the local area network (LAN). Addresses are assigned in the software during
system programming.
NOTE! The Lingo address must be set for one less than the Unit
number assigned to the Lingo in the ESS32 Unit Directory.
For example, Unit 1 will have an address of 00, Unit 5 will
have an address of 04, etc. When there is only one executive
module on the system, it must have an address of 00.
The address switches are located on the bottom edge, on the left side of the
Lingo. Set the switches to match the module address shown in Figure 1.
2Doc. #569066000—B 7/30/04
Lingo Electronic Assembly Installation Instructions
00 01 02 03 04 05 06 07 08 09 10 11 12 13 14 15
16 17 18 19 20 21 22 23 24 25 26 27 28 29 30 31
Figure 1. Lingo address settings

Installing the Lingo
Electronic Assembly on
the Baseplate
Use the following procedure to install the Lingo electronic assembly on the
baseplate.
Step Procedure
1 Remove the baseplate’s cover.
§Use the hex wrench supplied in the hardware kit to loosen the
two screws at the bottom of the baseplate.
§Lift off the cover.
2 Slide the Lingo electronics assembly down from the top of the
baseplate assembly and over the mounting posts.
3 Guide the DB25 and DB37 connectors on the Lingo electronics
assembly over the corresponding connectors on the Lingo
transition circuit board.
4 Tighten the two retaining screws with the hex wrench to secure
the Lingo electronics assembly to the baseplate.
5 Connect the telephone cable (see “Connecting to the Telephone
Network” below for more detail), Ethernet®Cable, and/or
RS-232 direct-connect cable as required for the application.
6 Check all wiring connections and reattach the Lingo Baseplate
cover.
Connecting to the
Telephone Network
If the application requires connection to the telephone network, a telephone
interface jack must be located at the installation site.
NOTE! The telephone interface jack is normally supplied by the
telephone company and should be type RJ-11C. The jack
should be located no more than 6 feet from the Lingo.
Thread appropriate telephone cable from the telephone interface jack through the
knock-out on the side of the baseplate assembly and insert it into the phone line
connection located at the top left side of the Lingo’s transition circuit board.
Doc. #569066000—B 7/30/04 3
Lingo Electronic Assembly Installation Instructions

Checking Installation
NOTE! The system programming must be downloaded to the
Lingo panel before the installation can be checked.
Once the system programming has been downloaded, the installation can be
checked locally or remotely.
Locally
To check the installation locally, use the optional touchscreen (if the system is
equipped with one) or a laptop computer/PC running iScope®or ESS32 software.
The laptop/PC connects to Lingo via any one of the following three methods:
§The RS-232 direct-connect port at the bottom right side of the Lingo
electronics assembly using the RS-232 adapter cable (Novar Controls Part No.
600540000)
§The Ethernet port at the bottom right side of the Lingo electronics assembly
(using the proper Ethernet components and cables; contact the network
administrator for more information)
§The NovarNet®connection at the lower right side of the Lingo baseplate
assembly transition board, provided the PC is equipped with a NovarNet
Interface Module (NIM)
Remotely
Lingo can be accessed and checked remotely via either of the following two
methods:
§The dial-up telephone network connected to a phone line as previously
described under “Connecting to the Telephone Network”
§The Ethernet port at the bottom right side of the Lingo electronics assembly
(using the proper Ethernet components and cables)
4Doc. #569066000—B 7/30/04
Lingo Electronic Assembly Installation Instructions

Model and Part Numbers
Use the part numbers supplied in Table 1 to order the necessary Novar Controls
parts.
Table 1. Novar Controls Part Numbers
PRODUCT MODEL NO. PART NO.
Lingo Baseplate Lingo-BPL 750100000
Lingo Electronics Assembly (no options)
Options:
Lingo with Integral Touchscreen
Lingo with Integral Touchscreen and Modem
Lingo with Modem
Lingo 750000000
750007000
750004000
750005000
24-VAC, 40 VA, Class 2 Transformer Kit 24V-XFR 730090000
Analog Light Sensor ALS-300 708100000
Outdoor Temperature Sensor OTS/2 735070000
Two-conductor, shielded cable (Belden 8761
equivalent)
WIR-1010 709001000
Doc. #569066000—B 7/30/04 5
Lingo Electronic Assembly Installation Instructions

This page intentionally left blank.
6Doc. #569066000—B 7/30/04
Lingo Electronic Assembly Installation Instructions
Table of contents
Other Novar Controllers manuals
